With the release of NSX-T 3.2, the NSX-T load balancer has been replaced with NSX Advanced Load Balancer (previously known as Avi Networks). NSX ALB is the more polished product and is far more universal because it supports multiple platforms and doesn’t require an NSX-T infrastructure. It supports various orchestration clouds such as: vSphere (ESXI/vCenter), NSX-T, AWS, Azure etc.
The load balancer is feature rich, with an intuitive and responsive interface that does pretty much all we can ask for. Writing policies (such as whitelisting/blacklisting ACL’s) is fairly easy to do without needing to dive deep into regex strings. There’s also a Web Application Firewall (WAF) available with plenty of application rules to configure.
Prerequisites
- vCenter
- NSX-ALB appliance, trial available or limited functionality for up to two Service Engines
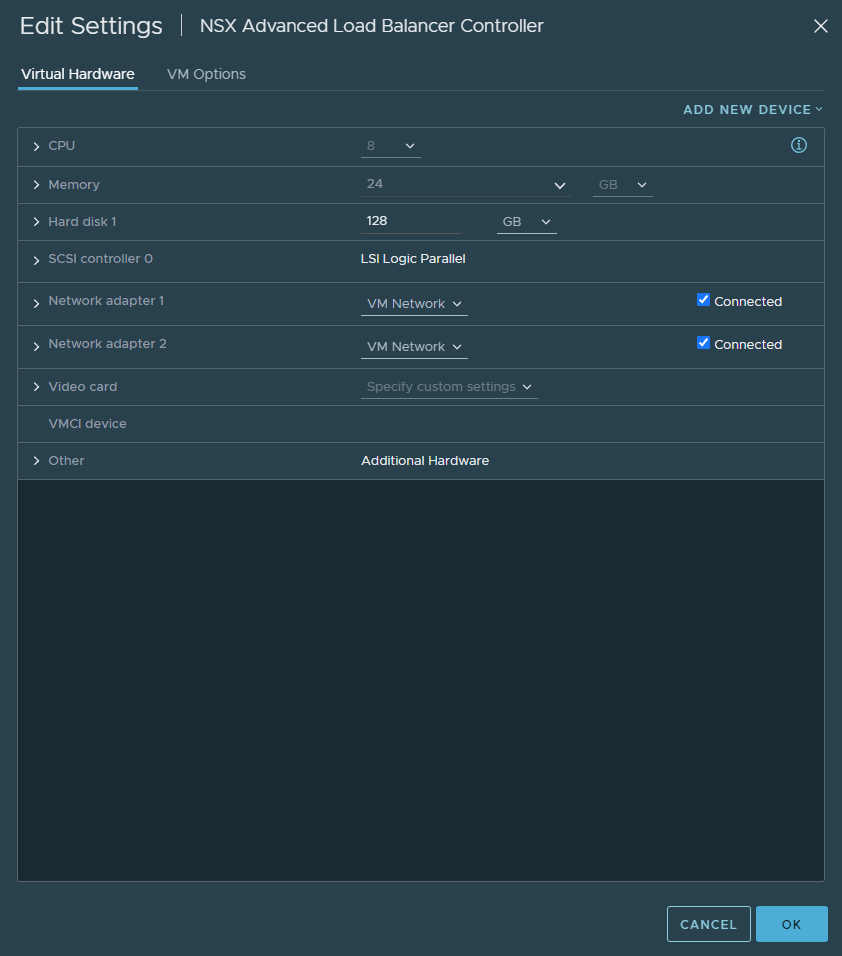
- 24 GB of RAM (in lab environment, check your actual VM guest usage not the provisioned amount)
- 8 vCPU’s
- Knowledge web-servers and have 3x web-servers listening on 80 or 443 or both
- Have a DHCP server available on the necessary port groups to make life easier
Topology
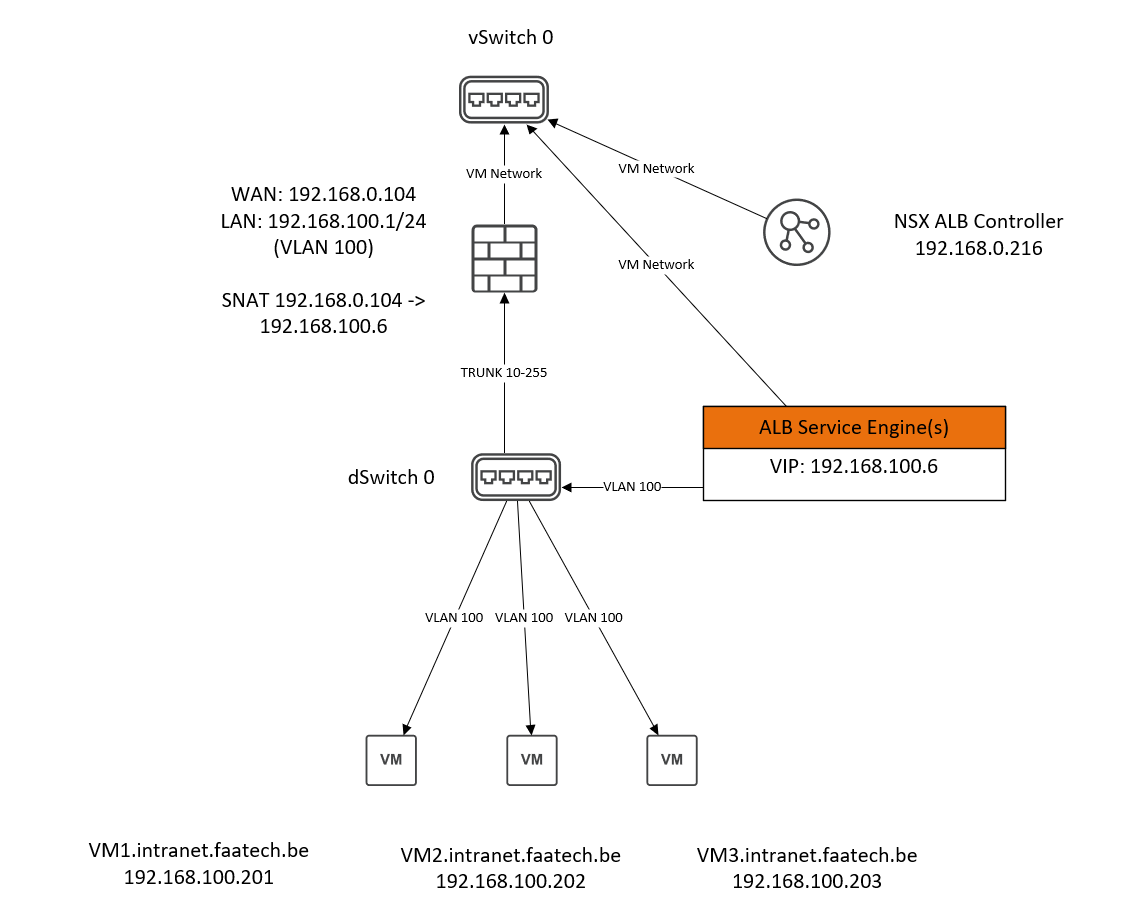
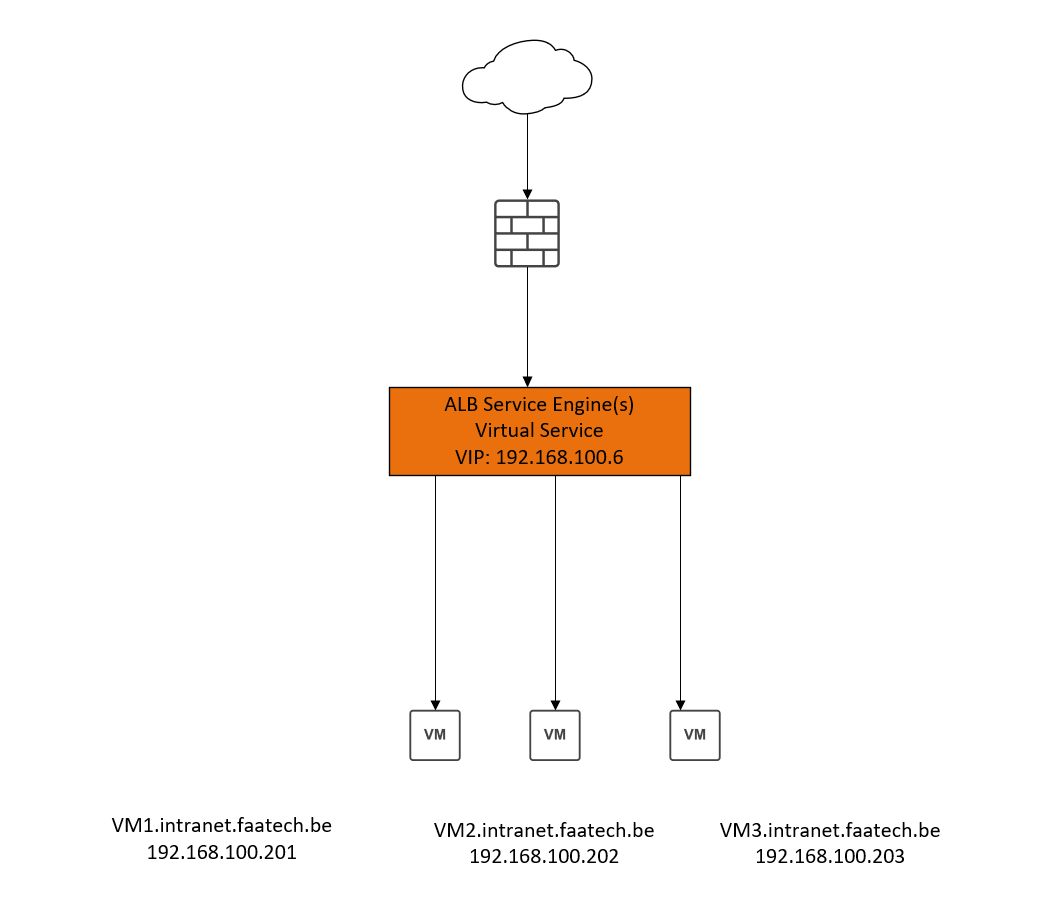
The NSX ALB appliance is connected to the default vSwitch 0, using the default VM Network port group. And that’s all there is to the appliance itself in terms of connectivity.
The WAN interface of the firewall is also connected to the default vSwitch 0, using the default VM Network port group. The LAN interface of the firewall is connected to the dSwitch 0 (distributed switch), with a trunk port group tagging for VLAN 10-255. There’s also a static NAT policy on the firewall that translates 192.168.100.6 (Virtual IP Address = VIP) to 192.168.0.104 (WAN interface).
The VM’s or the web-servers are connected to the dSwitch 0, using an access port group just simply untagged for VLAN 100.
The interfaces of the ALB Service Engine are automatically configured by the NSX ALB controller, and it’s advised to have a DHCP server available for each port group.
NSX ALB Components
NSX-ALB Controller
The NSX-ALB Controller is simply a virtual appliance, deployable using the .OVA file. It’s responsible for logging, monitoring, configuration and deploying/managing the Service Engines and the placement/load-balancing of Virtual Services across the SE’s. However the controller is not the dataplane, web-traffic does not traverse through the controller. In the absence of a controller, web-traffic is not interrupted. It’s fine to turn the controller off in a lab environment if you’re trying to save on resources. And spin it up when you need to make a configuration change. However you lose the ability to log during the time the Controller VM is turned off.
NSX-ALB Service Engines
Automatically deployed as a Virtual Machine and configured by the controller. It’s responsible for the dataplane and making security decisions and preventing threats. Also, it’s testing the health and performance of the back-end servers (your webservers, also known as ‘pool’ in NSX ALB). In the absence of a controller, there’s an option to allow the SE’s to elect a primary SE among themselves – which is configured on the controller. There’s never a need to do any configuration in the SE’s.
Deploying the NSX ALB Controller
The default login credentials can be found in the Avi Pulse Portal, where the appliance can be downloaded.
It’s rather straight forward, just like deploying any other virtual appliance that comes in the format of an .OVA file. It’ll be a wizard requiring a hostname, IP address, time configuration, the port group and that’s mostly it. The controller only requires a single management port group, in our case it’s VM Network.
Once it’s deployed, you may browse to https://IP-or-FQDN and follow the wizard.
Adding a cloud orchestration
Infrastructure > Clouds
Create a new orchestrator and select ‘VMware vCenter/vSphere ESXI. Basically orchestrators are also called cloud in NSX ALB. Clouds can be on-premise such as vCenter/NSX-T or in the actual cloud such as Azure/AWS.

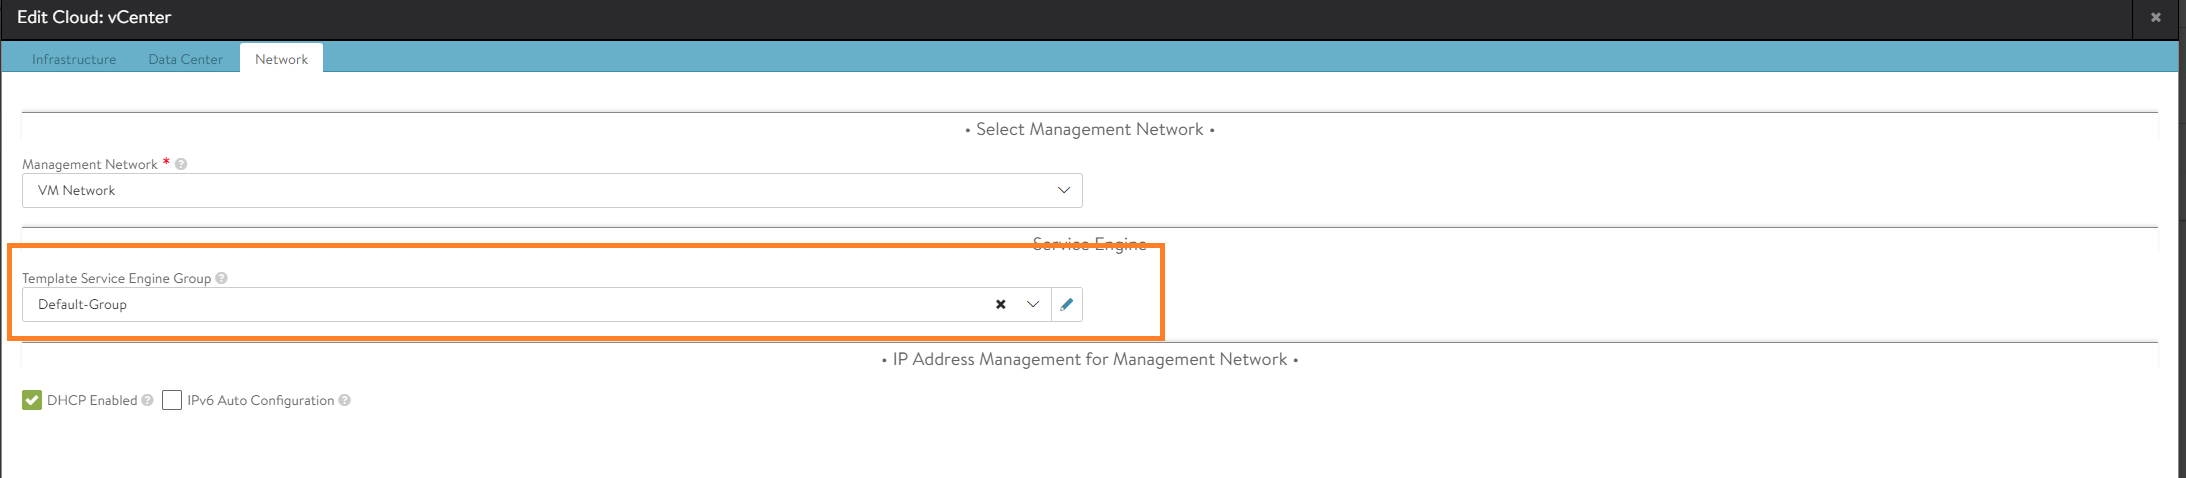
Edit the vCenter cloud.

And assign the ‘Default-Group’ template in the ‘Network’ tab. This is done, so that any SE’s deployed in the future will use the values of the ‘Default-Group’ template.
Virtual Services, VIP and Pools terminology in NSX-ALB
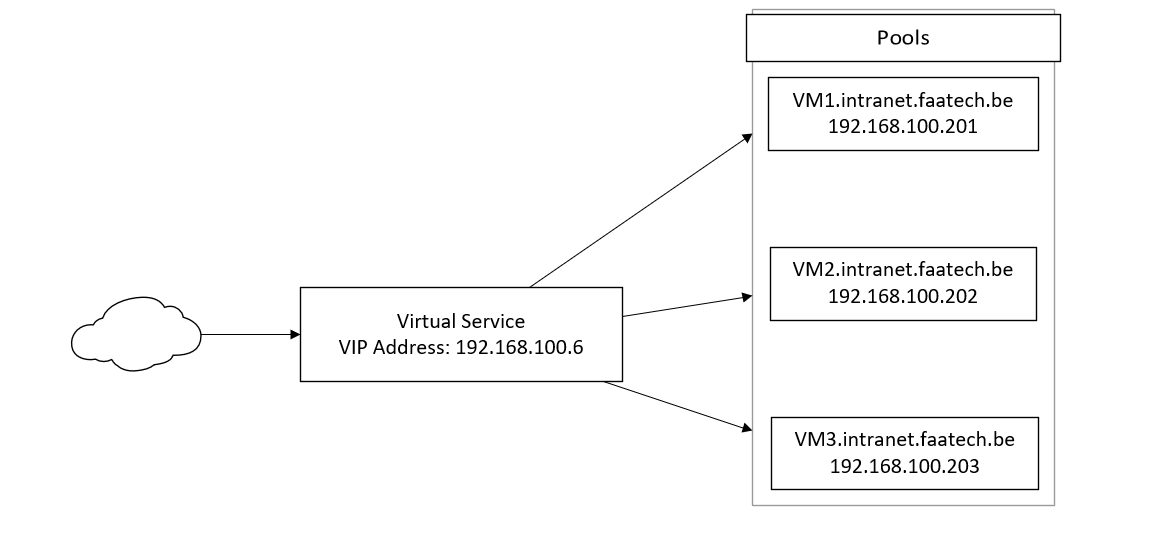
Basically users from the internet will hit the Virtual Service at the VIP address (192.168.100.6). The VS will either make routing decisions based on either L4 or L7 headers. L7 is used for web-servers when utilizing SNI and domain names. L4 routing decisions are strictly TCP/UDP at port 1-65535, which is ideal for VPN servers and such.
In our case, we’re only doing L7 – so the Virtual Service will check the host headers in L7 and make decisions from there on.
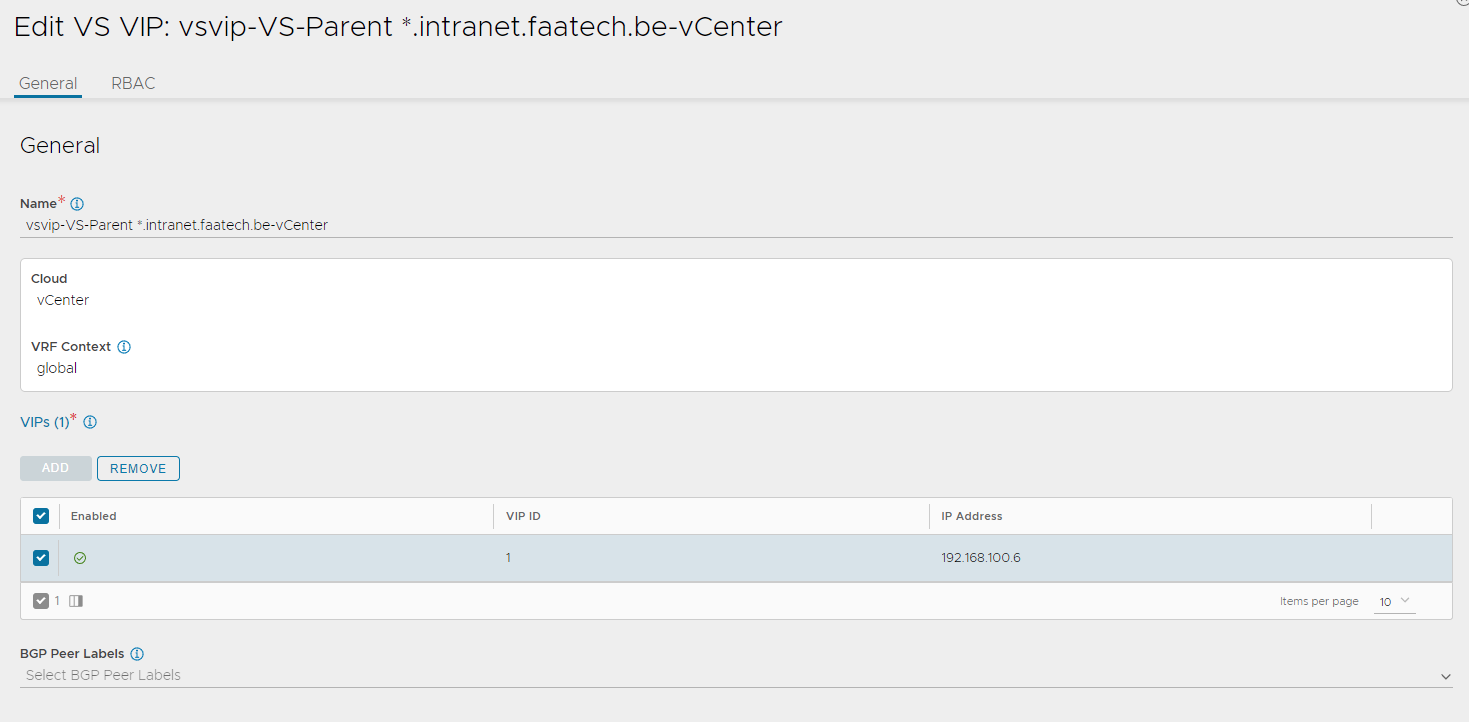
VIP’s are Virtual IP Addresses, belonging to a Virtual Service and there’s nothing more to it.
That’s how the topology looks like without the networking. The Virtual Service with the VIP that’s placed in the SE and VM (web-servers) are the pools.
Creating the pools
Pools are basically back-end servers such as your web-servers. The Virtual Service (has an VIP 192.168.100.6) is basically where all inbound traffic lands on. And the Virtual Service forwards this to the pools.
Applications > Pools
Create a new pool. Select vCenter as the cloud. Click next.

For this demonstration, we’ll be going with SSL. Make sure to set the port to 443 and enable SSL. Load an SSL profile as well. It’s fine to stick with port 80 because you’re doing SSL on the Virtual Service level anyways.
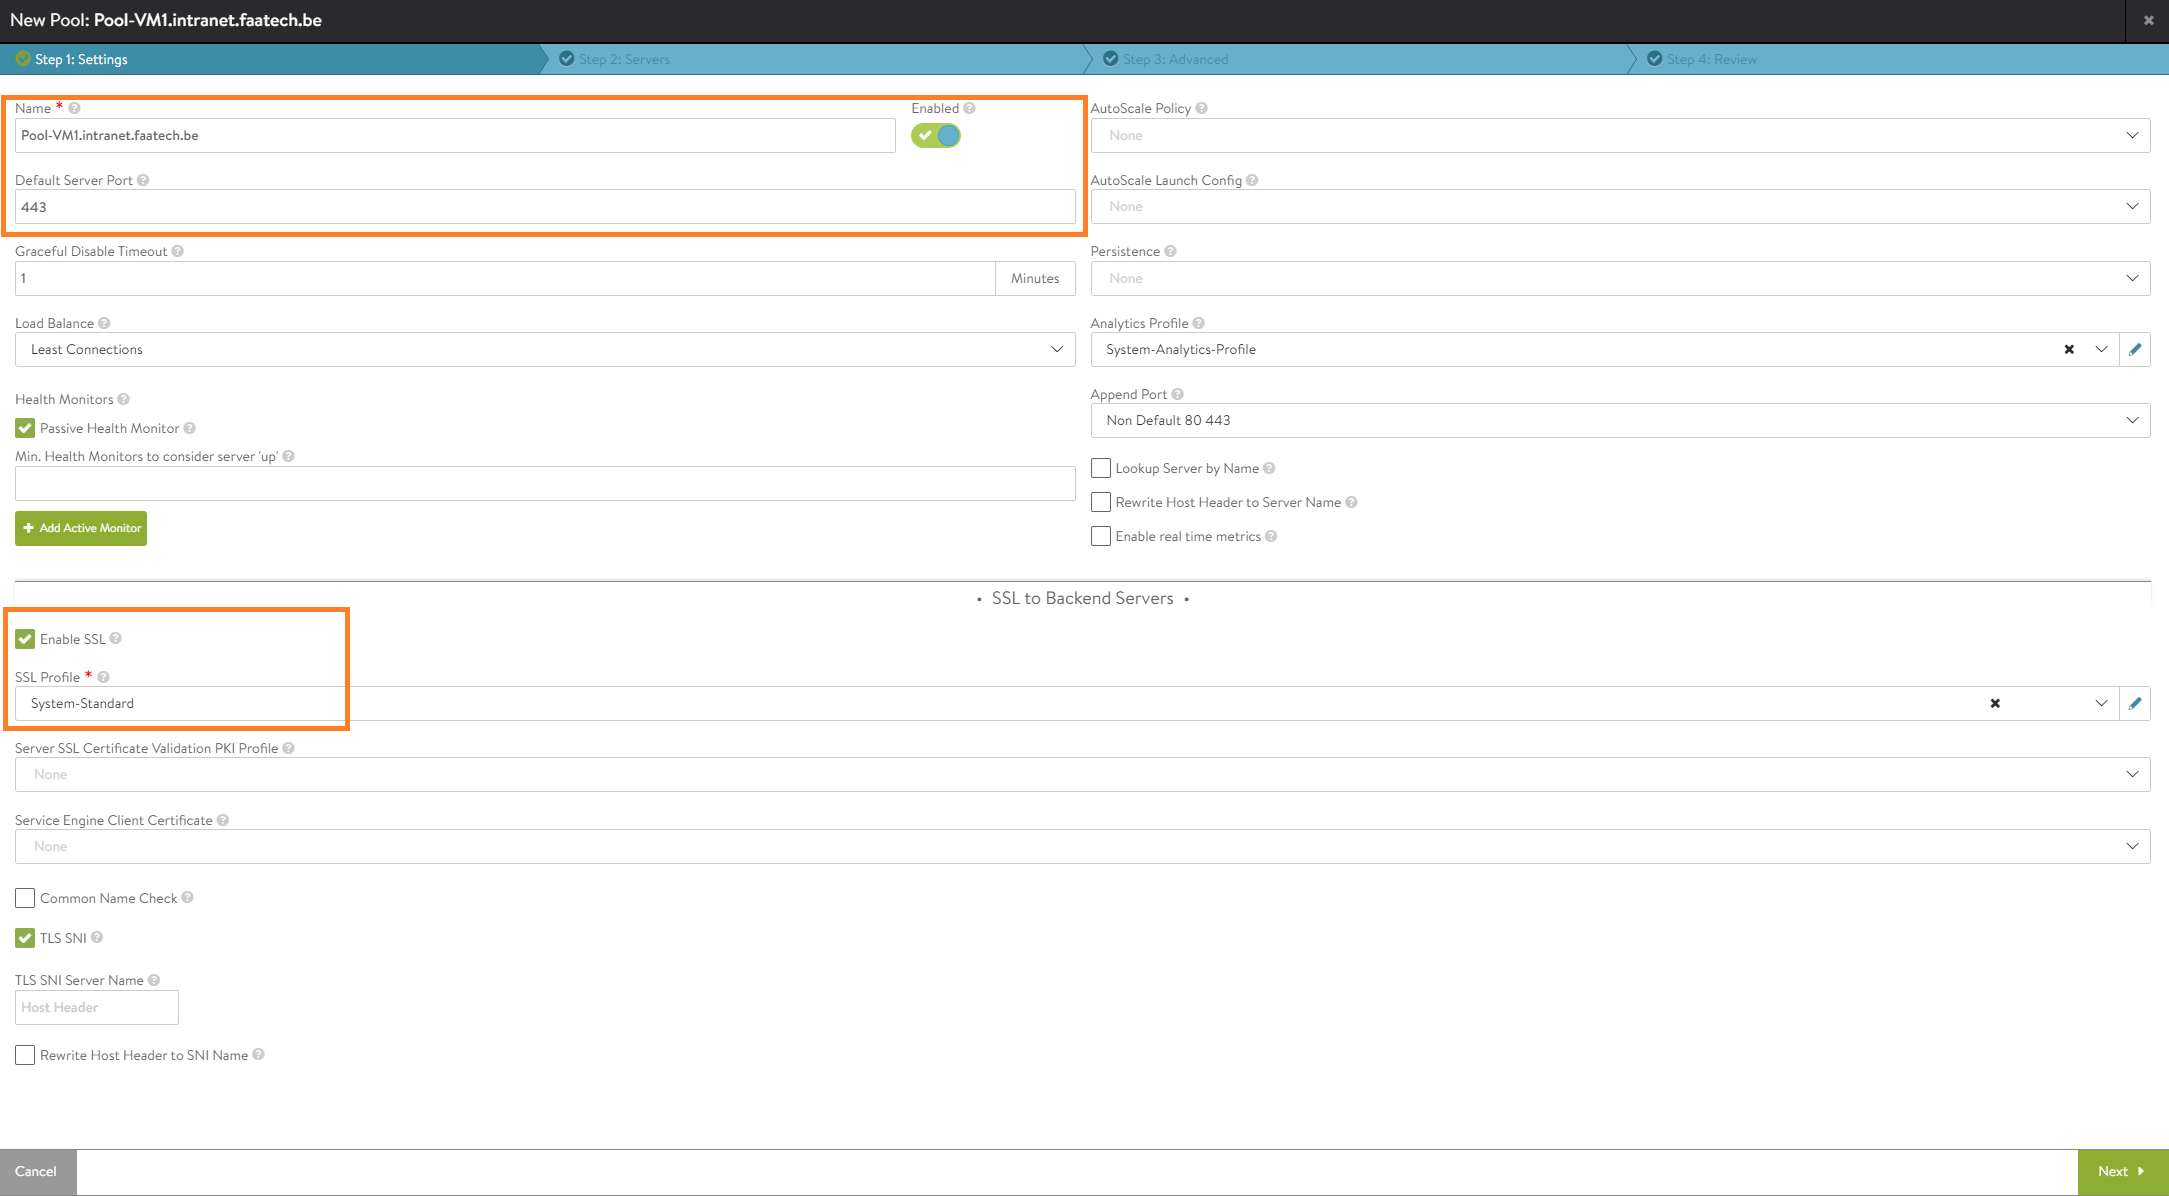
In the Servers tab, either manually add the server by entering the IP or just use the dropdown menu to add a server. Either way is correct. Make sure to enable the server.

In the next tab, add the ‘placement network’. Which is in this case our VLAN 100 port group.

Review your configuration and that’s it. You may repeat this step for the remaining web-servers VM2 and VM3.
After you’ve finished configuring a Virtual Service, SE’s should be automatically deployed by the ALB controller.
Creating parent Virtual Service (SNI)
Applications > VS VIPs
Create a new one and name it. Then click save.
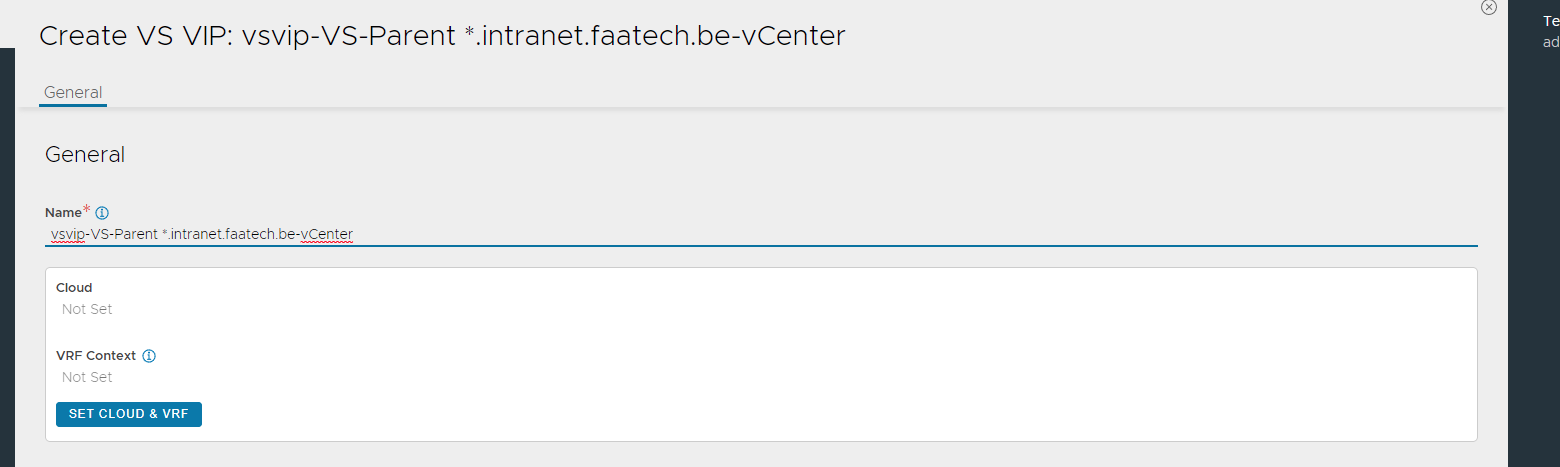
Then edit the same VS VIP you just created and add an IP address (192.168.100.6).
Applications > Virtual Services
Create a new Virtual Service (Advanced Setup)

Select vCenter as the cloud.

The way SNI works in NSX ALB is that we have a single Virtual Service, where we assign the VIP (Virtual IP Address 192.168.100.6) and we do NOT configure any domain names on the parent VS. However later on we will be configuring domain names (e.g. vm1.intranet.faatech.be) when creating our child virtual services.
- Name the parent VS (VS-Parent *.intranet.faatech.be)
- Enable Virtual Hosting VS, select parent.
- Enable SNI
- Select the VS VIP
- Load the System-Secure-HTTP profile, which will automatically do https redirecting and add security headers such as HSTS
- Add port 80 (no SSL)

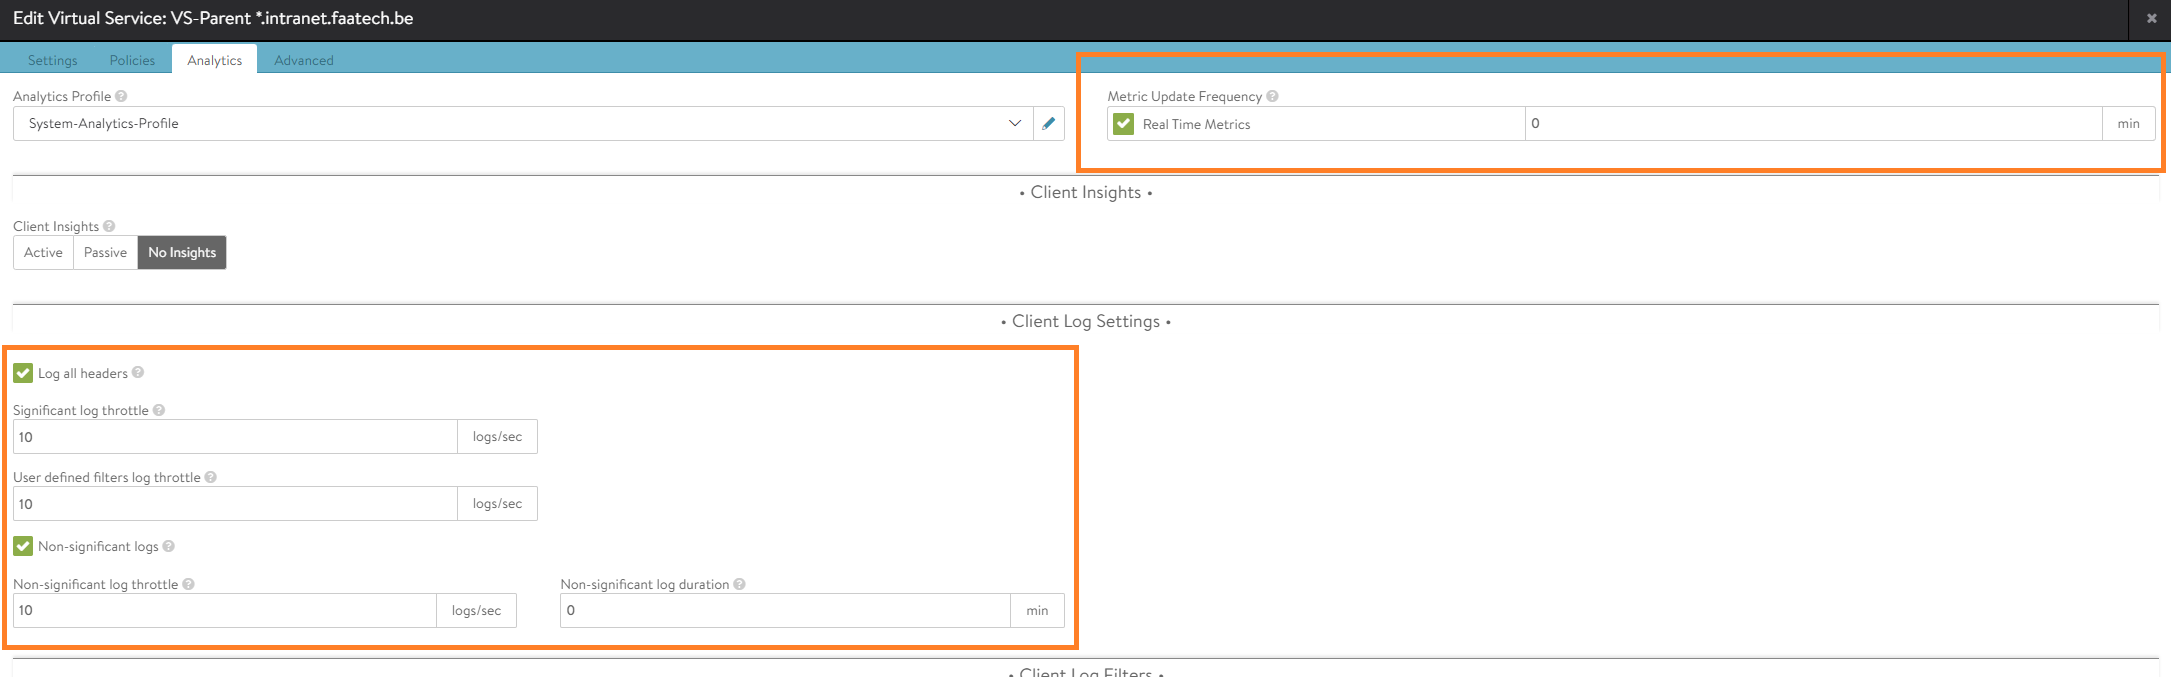
We can skip the policies tab and go straight for analytics. You may enable logging.
Nothing has to be configured in the advanced tab and we’re done with the parent VS, we’ll proceed with the child VS in the next section.
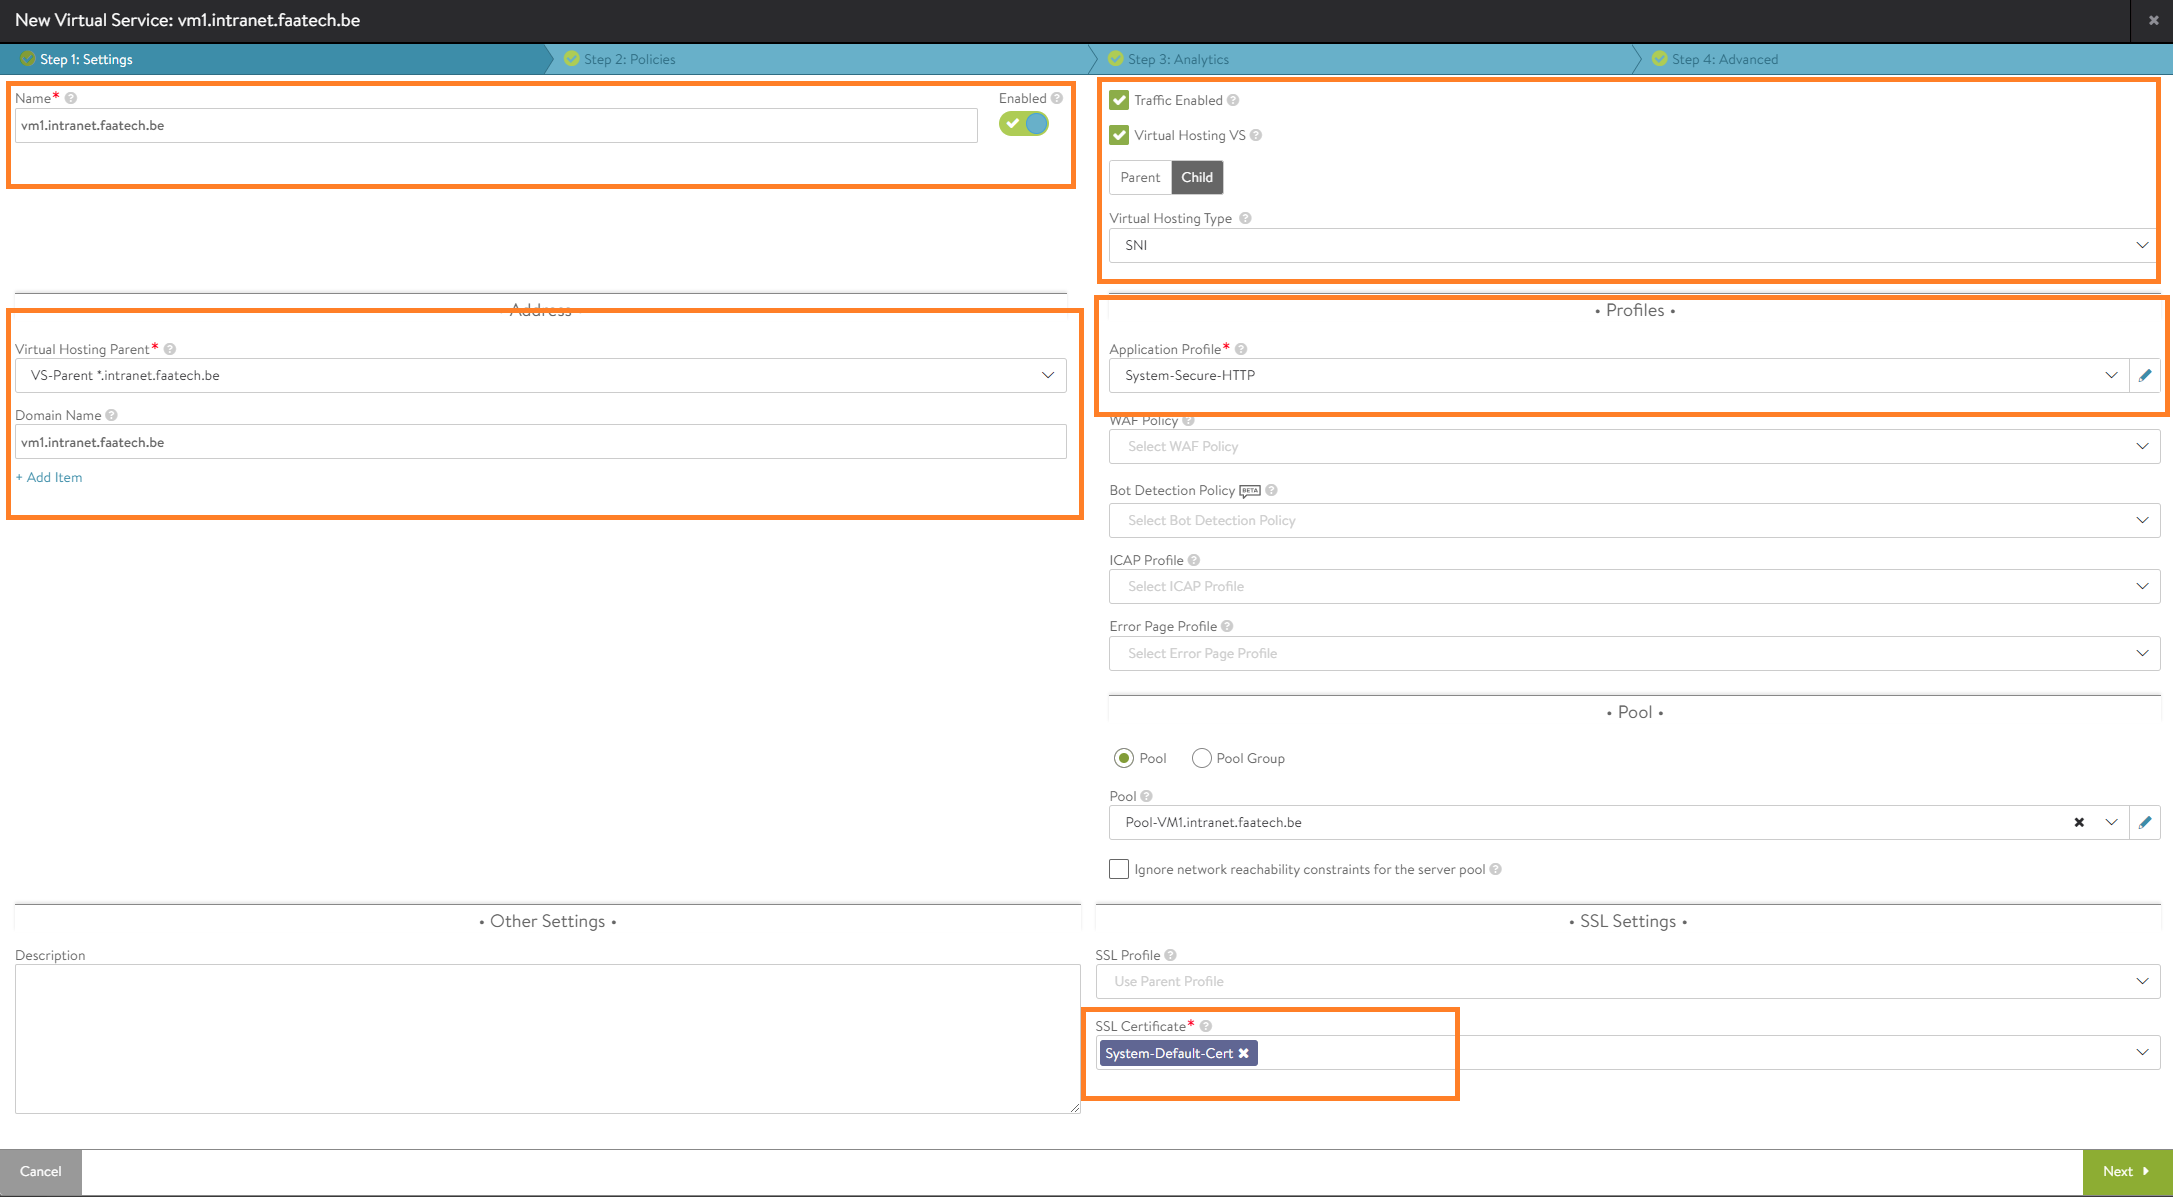
Creating child Virtual Service (SNI)
Applications > Virtual Services
Create a new Virtual Service (Advanced Setup).
Select vCenter as the cloud.
Configure the following:
- Name the VS (VM1.intranet.faatech.be)
- Enable Virtual hosting VS, select Child.
- Enable SNI
- Select the parent Virtual Service
- Enter the domain name (vm1.intranet.faatech.be)
- Load the System-Secure-HTTP application profile
- Select the pool (pool-VM1.intranet.faatech.be) which is the web-server
- Lastly select the default SSL certificate
We won’t be configuring any policies, so skip to analytics. You may enable logging.

Nothing will be configured in the advanced tab, so save the configuration.
Lastly, just repeat the same step to create child Virtual Services for VM2 and VM3.
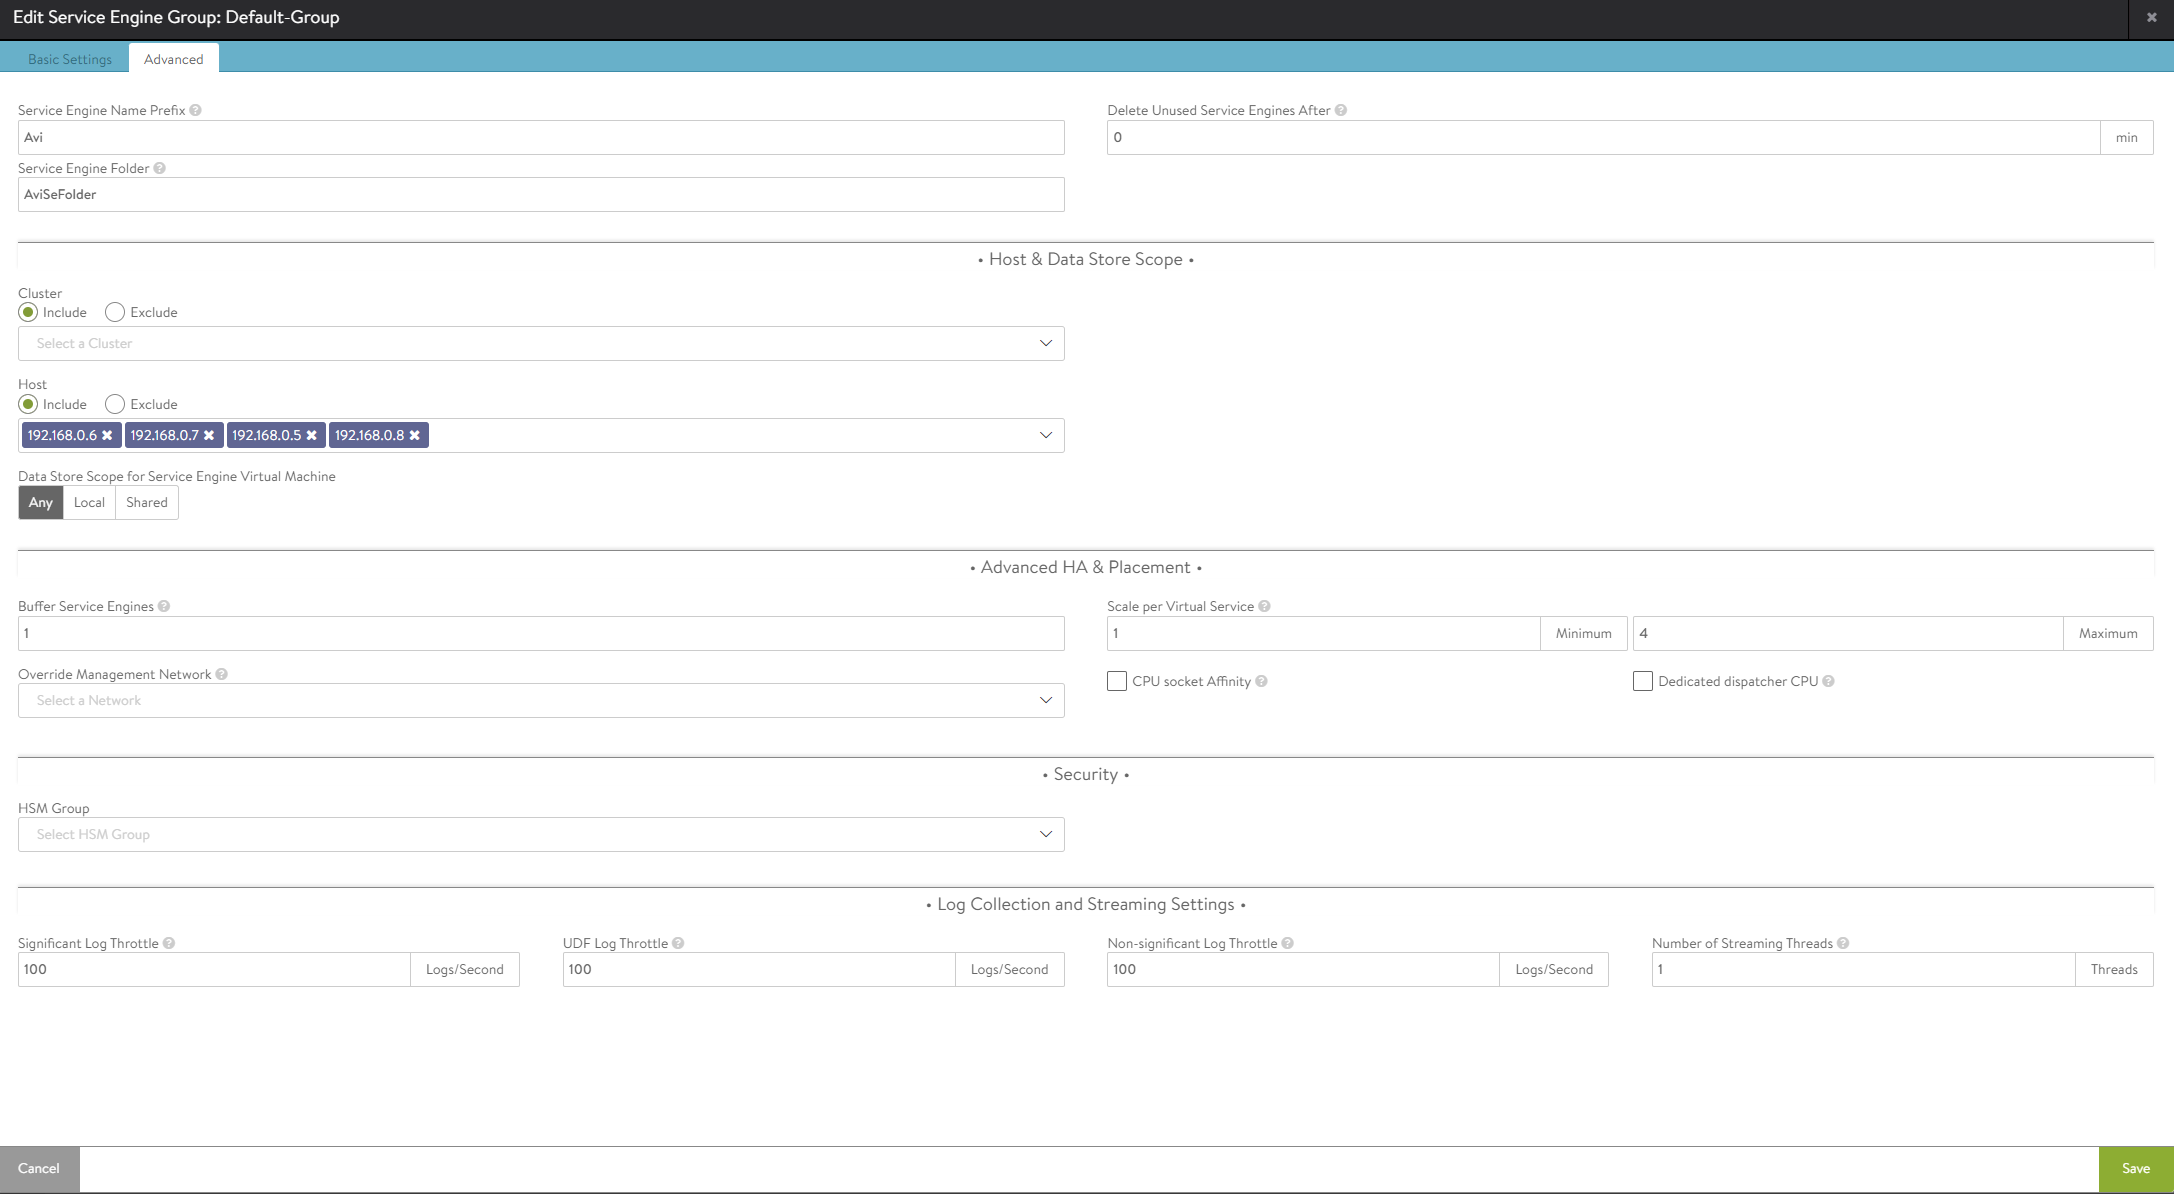
Managing Service Engine template configuration
Infrastructure > Cloud Resources > Cloud Engine Groups
Make sure to select the vCenter cloud. Then edit the ‘Default-Group’.

Here’s where we can change the amount of RAM, vCPU’s, HA settings etc. I’ve set the duration for logging to infinite (which is just 0 min). Also the option ‘Serivce Engine Self-Election’ has been enabled, should the controller go down.
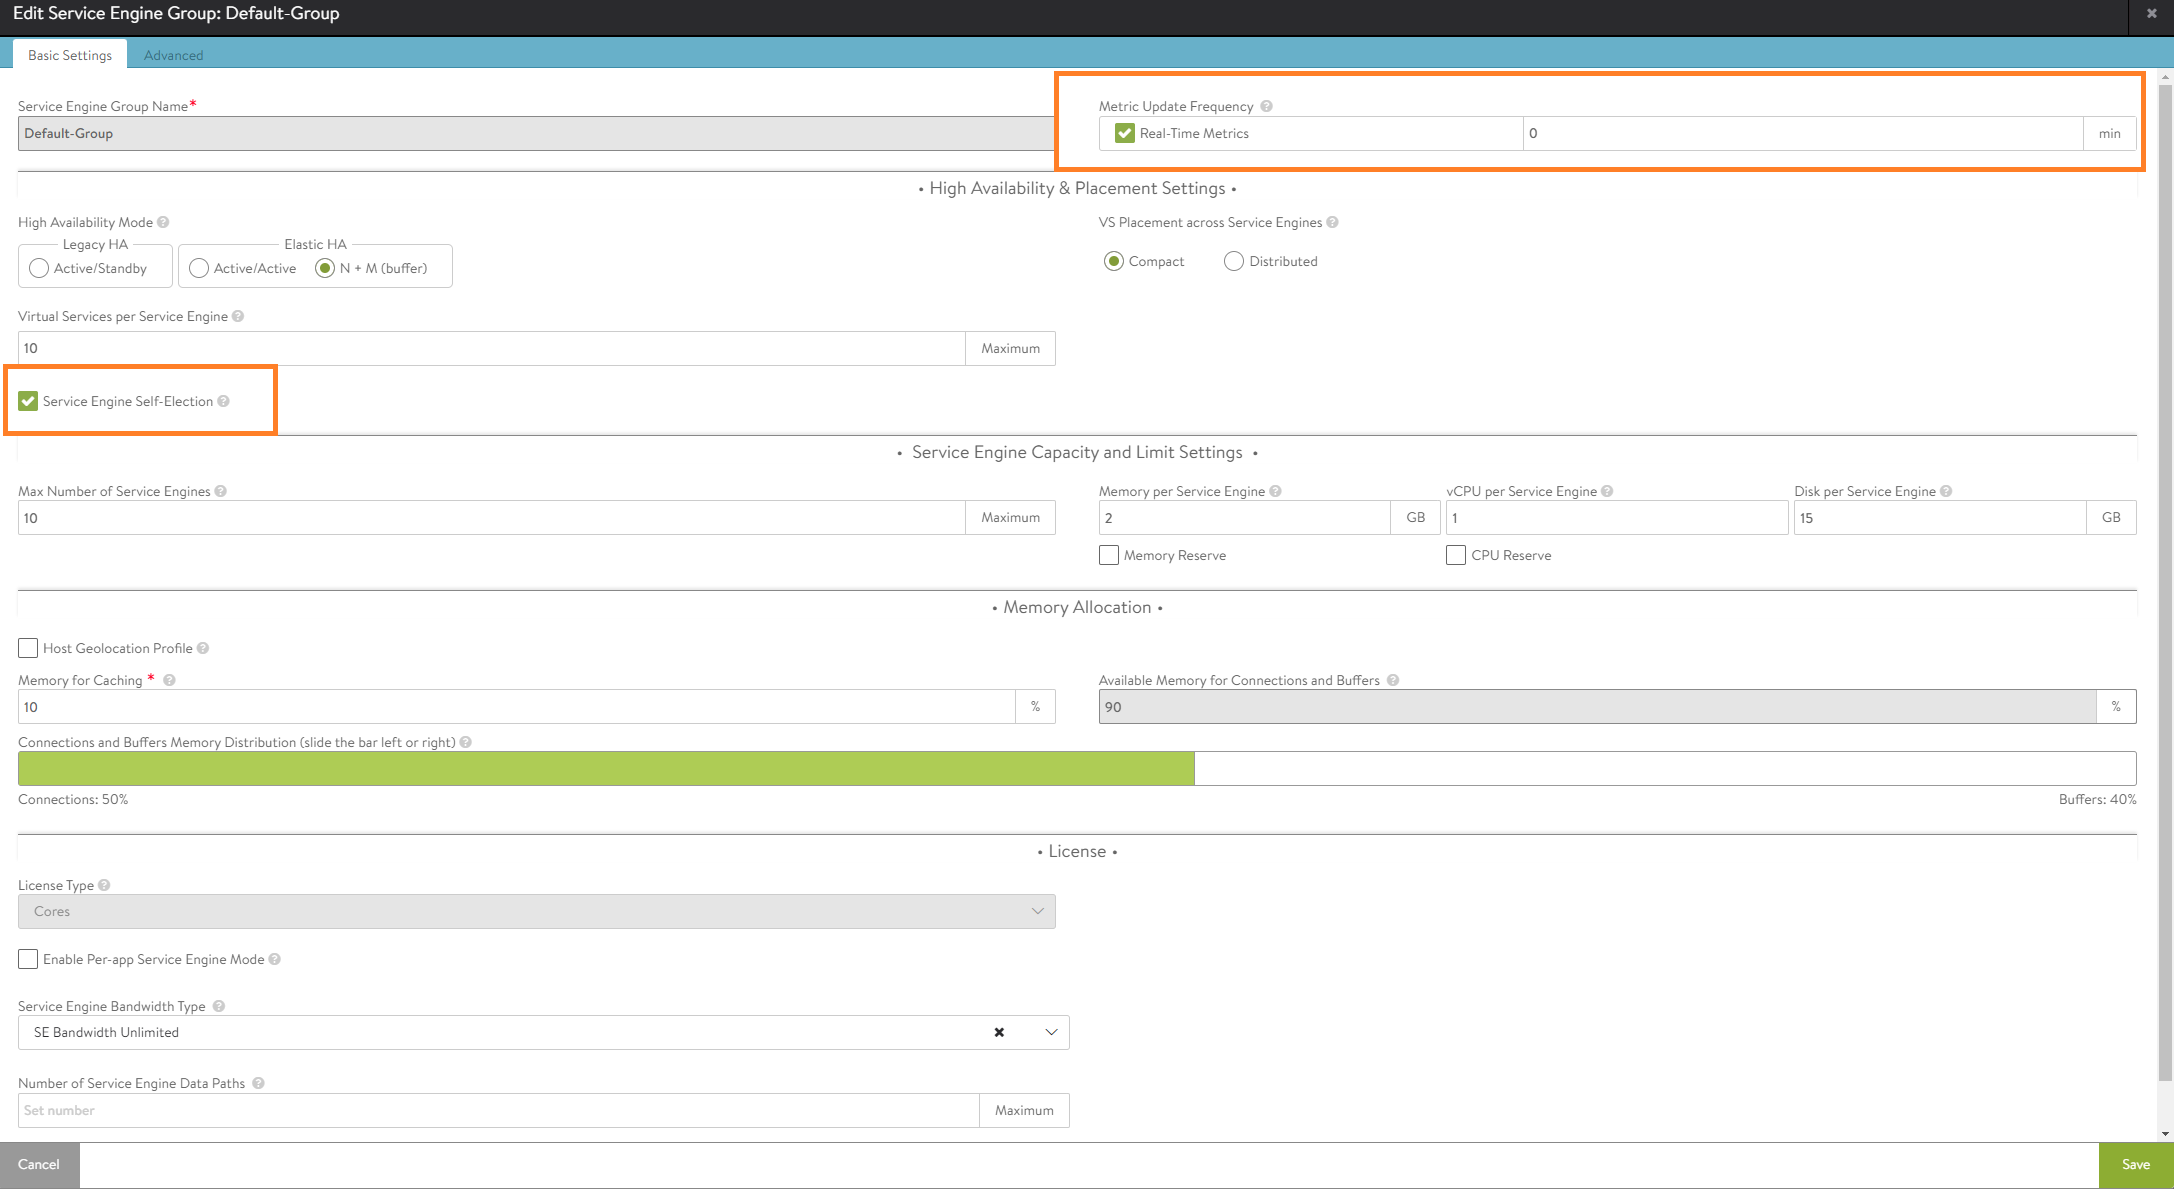
In the 2nd tab, we can select which hosts should participate and the datastores where we want to store our SE’s.
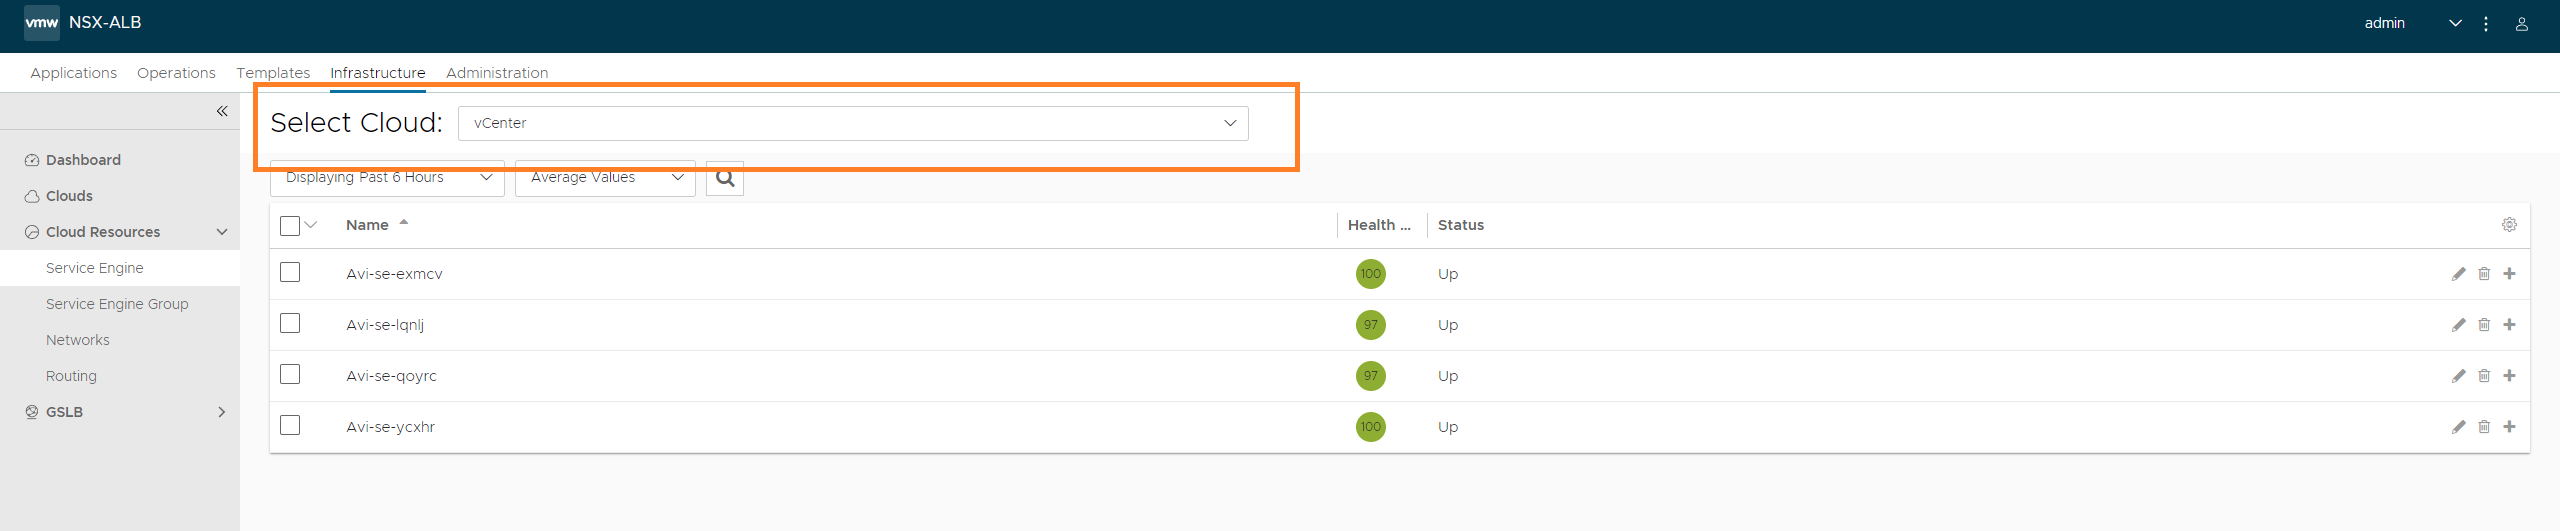
Infrastructure > Cloud Resources > Service Engine
Again make sure to select the vCenter cloud. We should see the SE’s at this point, if not check vCenter.
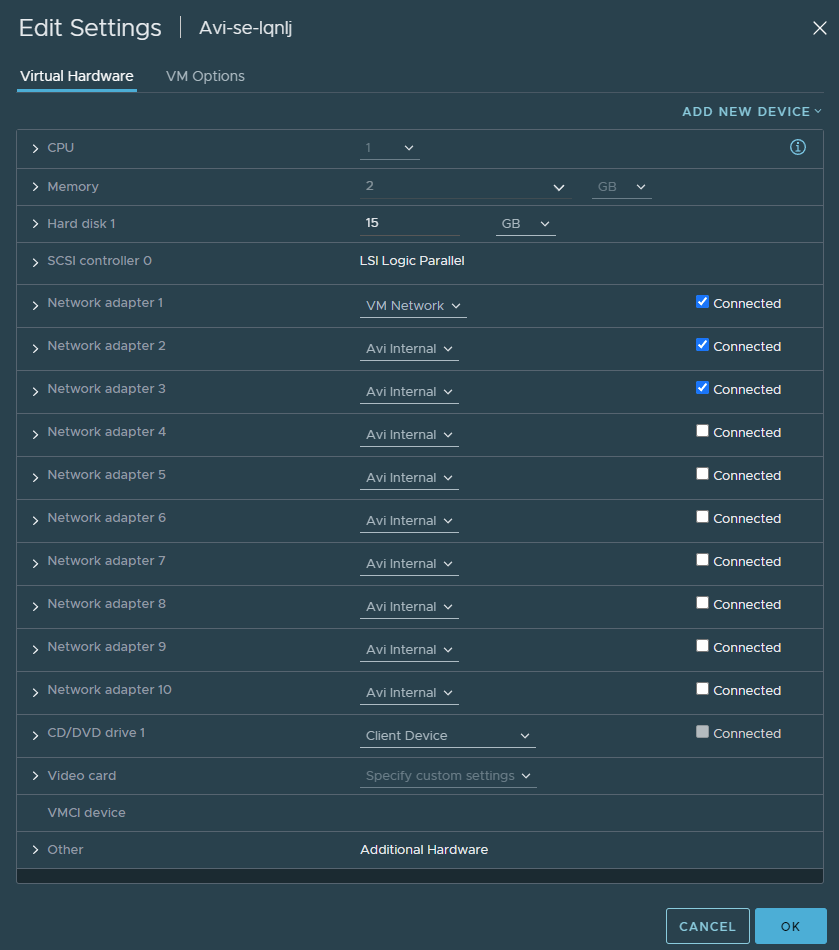
In vCenter, if we bring up the VM settings of the SE, we can see that the VM Network port group was automatically applied in order to establish a connection between the controller and the Service Engine. The ‘Avi internal’ NIC’s are just placeholders and are reserved for future use. The controller will automatically change this to a corresponding port group such as VLAN 100 in my case.
Conclusion
Now it just comes down to testing, however it requires a DNS server with the right DNS records. A quick remedy is editing the following file ‘C:\Windows\System32\drivers\etc\hosts’. The IP address should be the one of the WAN interface of your firewall.
192.168.0.104 vm1.intranet.faatech.be
192.168.0.104 vm2.intranet.faatech.be
192.168.0.104 vm3.intranet.faatech.be
The following docker-compose.yml file was used for the back-end servers:
version: "2.1"
services:
  nginx:
    image: ghcr.io/linuxserver/nginx
    container_name: vm1
    environment:
      - PUID=1000
      - PGID=1000
      - TZ=Europe/Brussels
    volumes:
      - ./config:/config
    ports:
      - 192.168.100.201:80:80
      - 192.168.100.201:443:443
    restart: unless-stopped
In part 2, we’ll be configuring NSX ALB for NSX-T Infrastructure.