To secure your webserver from any potential harms we can inspect/decrypt inbound traffic before being handed over to our webserver. It’s different than SSL Forward Proxy, which is mostly for outbound traffic e.g. a client visiting a website and NOT for inbound traffic destined for a host like a webserver. Both methods require the firewall to be put in-between in order for the firewall to step in and play a fundamental role to inspect traffic and gain visibility.
Prerequisites
- Running Apache2/nginx webserver (Apache2 on Ubuntu 18.04 in my case)
- For the purpose of this demo, a public domain name and a valid TLS certificate will be used.
- This will work in a lab environment with a self-signed certificate and private DNS records (e.g. an internal DNS server or just some localhost DNS records).
Enable firewall to forward decrypted SSL traffic to WildFire
Device > Setup > Content-ID > Content-ID Settings
In order for Palo Alto’s cloud-based WildFire engine to learn any new threats and to prevent them, it’s always a good idea to deliver them the necessary information.

Adding a passphrase to Private Key
There are multiple ways of adding a passphrase to a private key, but the best way of doing this is with the command ‘openssl’ in a linux environment. Web-based tools aren’t recommended because of the associated risks that go along with the process. A passphrase is required for when the certificate is imported on the firewall.
Familiarize yourself with the following the terminologies:
- cert.pem = server certificate (public key)
- privkey.pem = server private key certificate
- chain.pem = Intermediate CA (this is not the root CA)
- fullchain.pem = cert.pem + chain.pem or in other words server certificate + intermediate CA certificate
The server certificate and intermediate CA has to be in a single fullchain.pem file. Pay attention to the order because the server certificate has to be placed above the intermediate CA certificate.
-------BEGIN CERTIFICATE-------
Server certificate contents (cert.PEM)
Server certificate contents (Cert.PEM)
Server certificate contents (cert.PEM)
-------END CERTIFICATE---------

-------BEGIN CERTIFICATE-------
Intermediate CA certificate contents (chain.pem)
Intermediate CA certificate contents (chain.pem)
Intermediate CA certificate contents (chain.pem)
-------END CERTIFICATE----------
Because the firewall only allows encrypted private keys to be uploaded, we’ll have to add a passphrase to our private key. In a linux environment we can use the command ‘openssl’. First back-up the privkey.pem to privkey.pem.bak. And then you may proceed adding a passphrase with the 2nd command that follows up.
cp privkey.pem privkey.pem.bak
openssl rsa -aes192 -in privkey.pem -out privkeywithpassphrase.pem
It’ll prompt you for a passphrase. And it should be secure, right?
Import the certificate/private key to the Firewall
Device > Certificates > Import
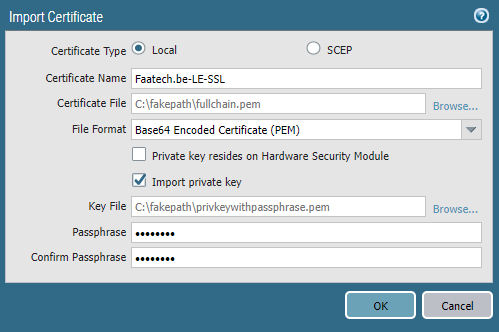
Select “fullchain.pem” as the certificate file. Select the option “Import private key” and load “privkeywithpassphrase.pem” as the key file and enter your passphrase.
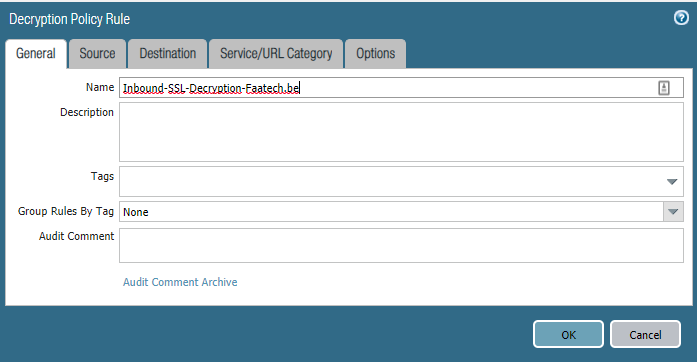
Adding Decryption Policy
Policies > Decryption > Add
Give the policy a clear name.
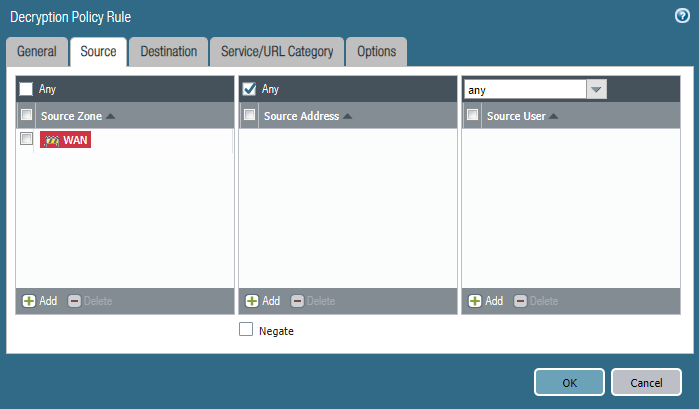
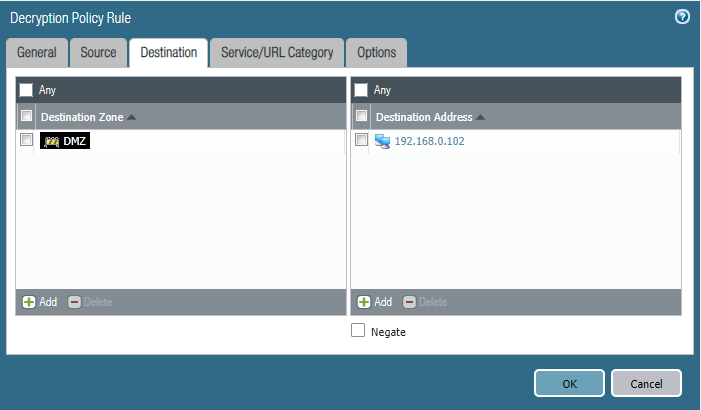
Choose the zone that’s your external side. Source address should be left to any.
Choose the zone where your webserver resides in. Enter the public IP (pre-NAT IP) of your webserver and NOT the internal IP address of the webserver.
Select service-https (443/tcp) as the service.

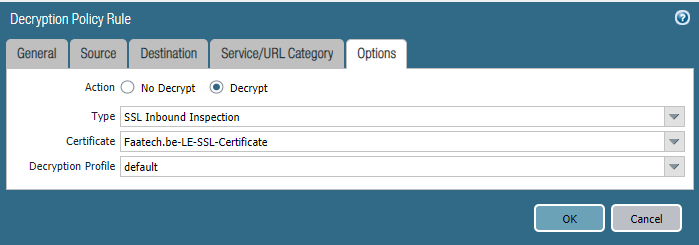
Select Decrypt as your action. Type should be “SSL Inbound Inspection”. Select the Certificate you just uploaded. I’ve used the default Decryption profile. You can make your own under Objects > Decryption > Decryption profile by cloning the default and make your changes as you please.
Enabling antivirus security profile in the security policy
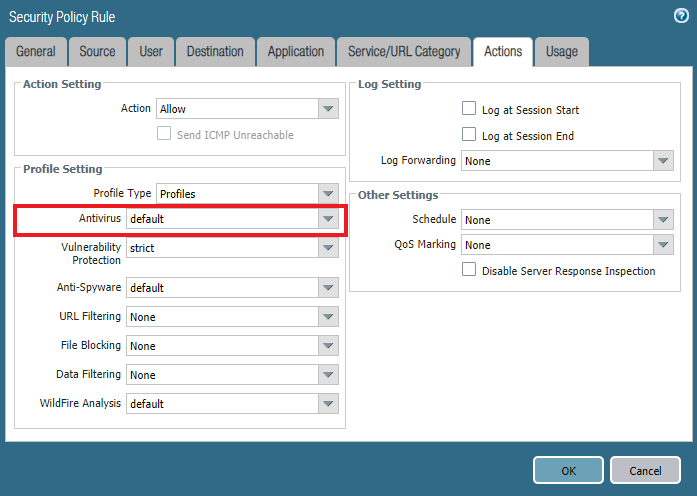
Policies > Security > edit your policy that allows traffic to flow through your webserver. Under Actions, select the default Anti-Virus profile or your own custom profile.
Using a self-signed certificate in a lab environment
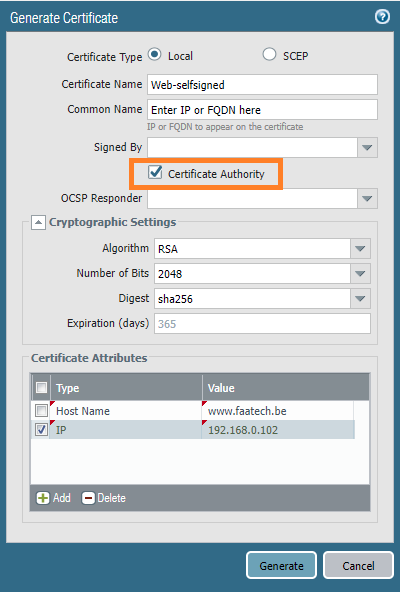
For those in a lab environment and don’t want to deal with a public CA or domain name, self-signed certificates can be used instead. Using an FQDN requires you to set up an internal DNS server or just modify your localhost DNS file which is a quick and dirty method. We can use the firewall to generate a certificate.
Enter an IP or FQDN for the common name. Check the box “Certificate Authority” so this’ll be the root certificate and also the server certificate that’ll be installed on the webserver. We’ll also add the IP address and FQDN as our SAN (Subject Alternate Names) attributes.
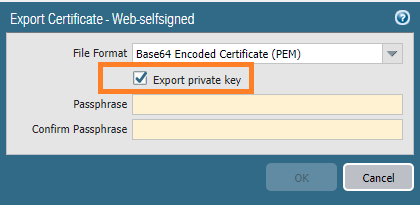
Next, export the private key. It’ll ask you to enter a passphrase.
Now it’s just a matter of uploading the certificates on your web-server. The issue is that it’s exported in a single file and web-servers such as Apache2 requires them to be split up. It looks like the following:
-------BEGIN CERTIFICATE-------
Server certificate contents
Server certificate contents
Server certificate contents
-------END Certificate---------

-------BEGIN RSA PRIVATE KEY------
Private key contents
Private key contents
Private key contents
-------END RSA PRIVATE KEY--------
Just split them up in two different files. Keep in mind that your web-server has to know the passphrase. Alternatively, you can remove the private key from the private key with the following command.
openssl rsa -in privkeywithpassphrase.pem -out privkey.pemConclusion
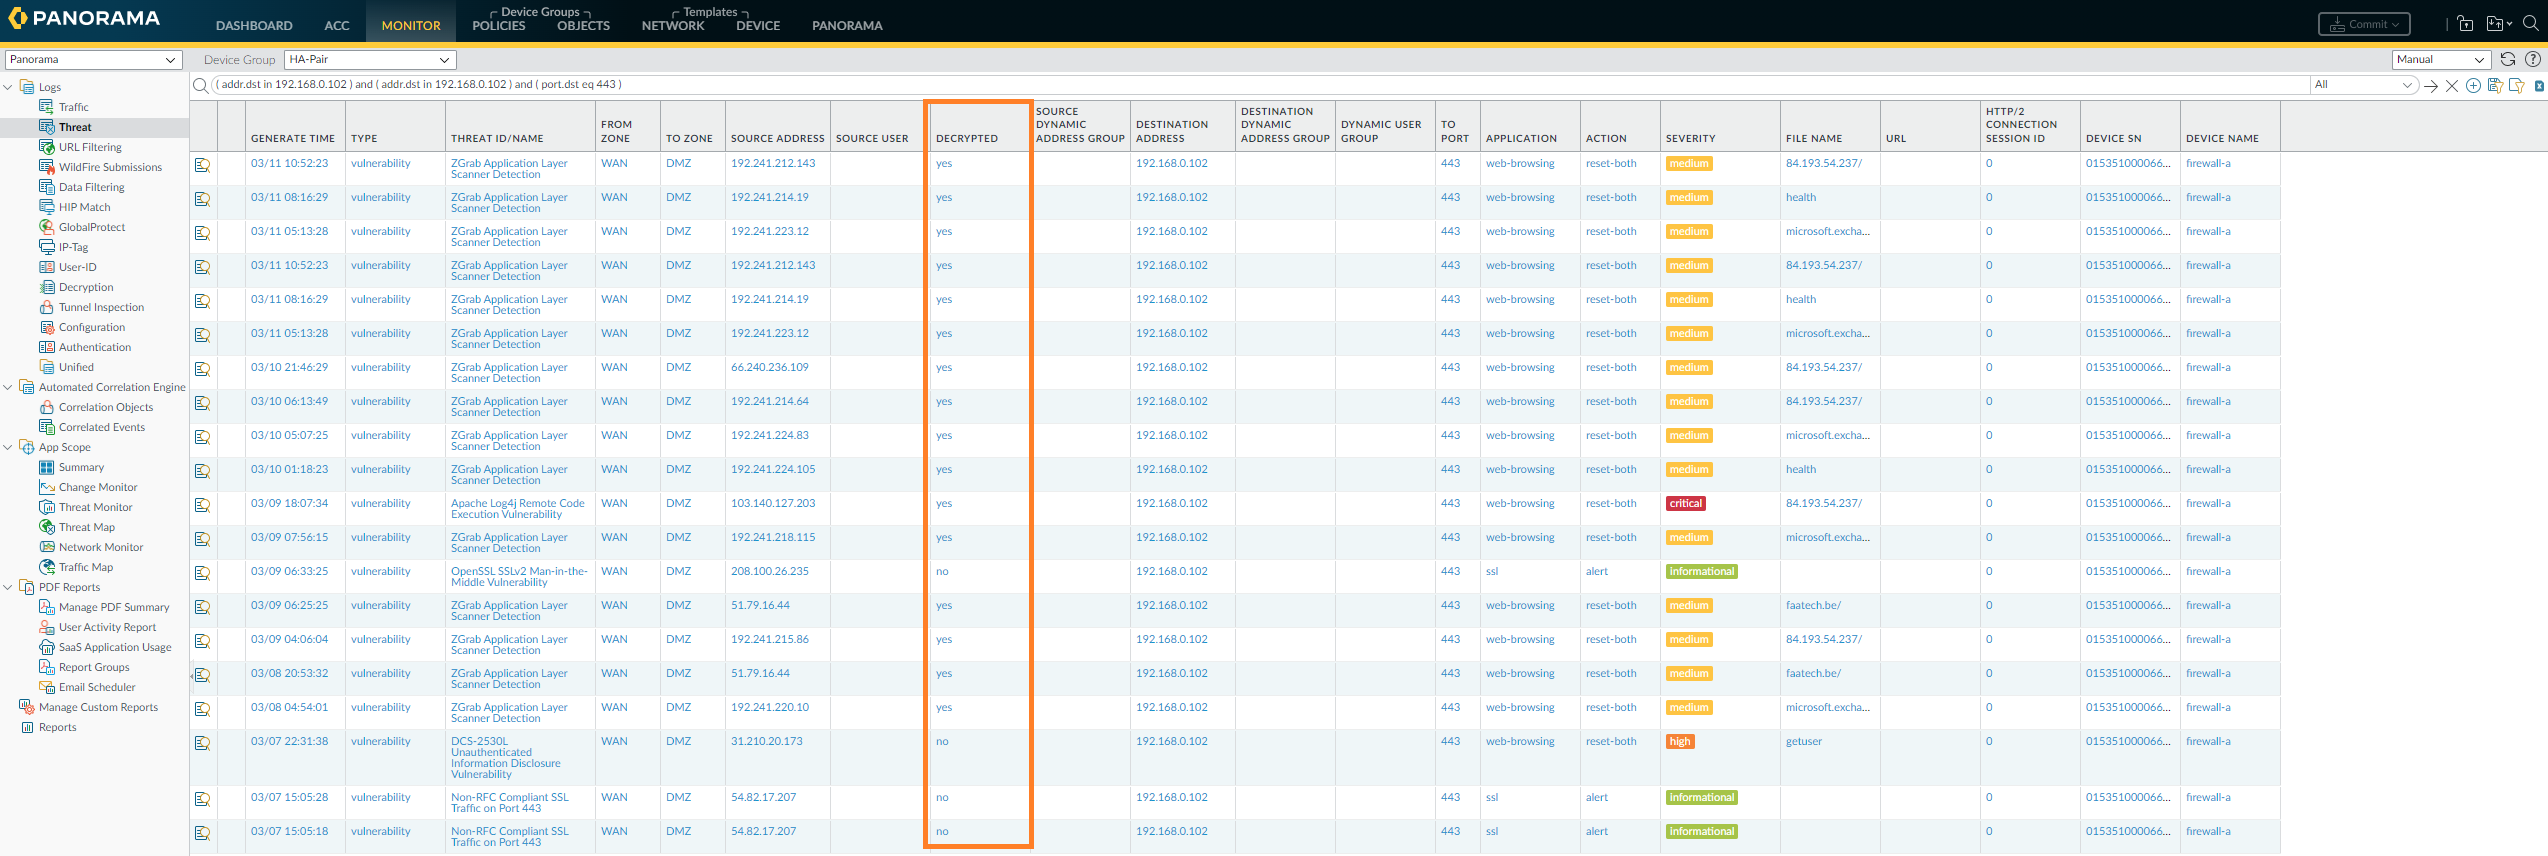
To verify the firewall is decrypting the traffic, under Policies > Decryption and check the Hit Counter to see how often the firewall decrypted.

Under Monitor > Threat – it’ll show any threats it has stopped (if there were any in the first place). The threat page will only show vulnerabilities, viruses and spyware logs. There’s a decryption filter available which will show whether it was decrypted or not.