Encryption offers data confidentiality but it doesn’t mean the encrypted data is harmless. It also means that it bypasses IPS/IDS systems because of the inability to inspect the data. To mitigate this we can leverage the firewall to decrypt traffic for deeper packet inspection.
In a previous post, we’ve configured SSL Inbound Inspection to protect a destination target like a webserver. To protect our end-users, we have to configure SSL Forward Proxy instead of the SSL Inbound Inspection method. Implementing SSL Forward Proxy (Outbound traffic only) on the firewall with MITM (man in the middle) behavior can prevent users from harming their device or even other devices within the network.

Under normal circumstances whenever the client browses to a website, then the client will use the certificate of that particular website. To be more specific, the server sends out her public key destined to the client who’s the only one able to decrypt the traffic and thus only the client can decrypt it because she’s the owner of the private key. The firewall can’t intercept this and decrypt it because it lacks the private key of the client.
SSL Forward Proxy works by replacing the public key of that server (eg google.com) with its own certificate and signs it with its own public key. Then the firewall will initiate a new SSL session by generating a new certificate before handing it over the client. As a result the traffic was inspected & decrypted by the firewall for any potential malware before it could harm any endpoint. It has to be a self-signed certificate generated on the firewall or a subordinate CA issued by the Active Directory PKI. These can’t be publicly trusted, but they should within the enterprise.
Generating trust certificate
Self-signed CA for Trust Forwarding
Device > Certificates
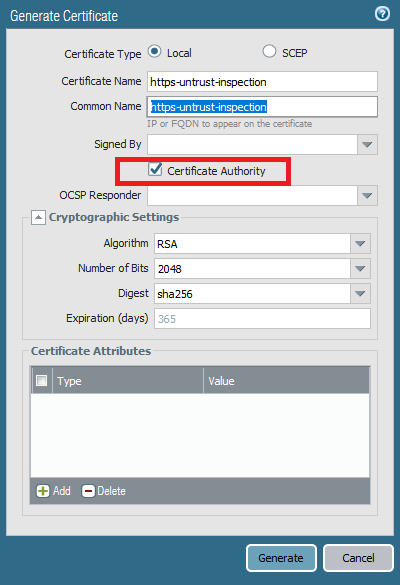
If Active Directory Domain Certificates isn’t an option, opt for a self-signed certificate instead. I’ve named the Certificate & Common Name the same for simplicity. Make sure to check the box “Certificate Authority”.

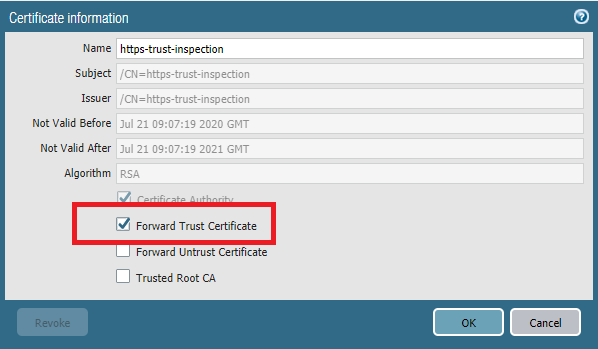
After the CA certificate has been generated, make sure to check the following boxes:
Optional: Enterprise CA with ADCS (Active Directory Certificate Services)
It totally makes sense to take advantage of this because every Active Directory Member already trusts the Domain’s Root CA. Manually installing the certificate or spreading it with a GPO is unnecessary. First off, install Active Directory Certificate Services.
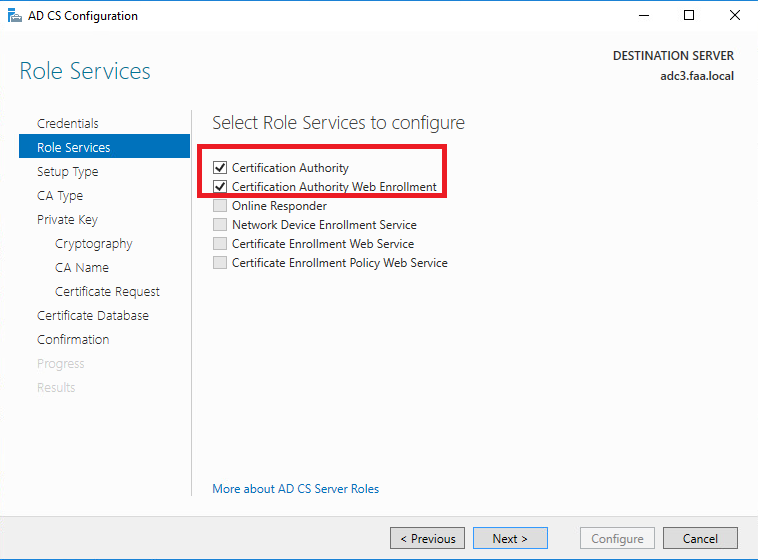
Server Manager > Manage > Add roles & Features > Active Directory Certificate Services > and make sure to select “Certificate Authority Web Enrollment” twice.

After the installation configure the Active Directory Certificate Services role. Select the highlighted down below. Leave everything else at default for the rest of the installation.
Device > Certificates
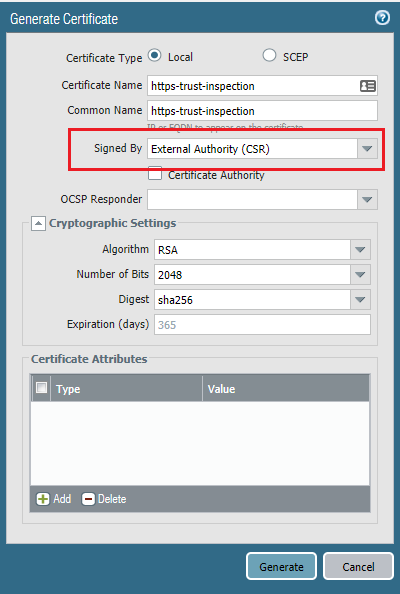
Request a CSR (certificate signing request).

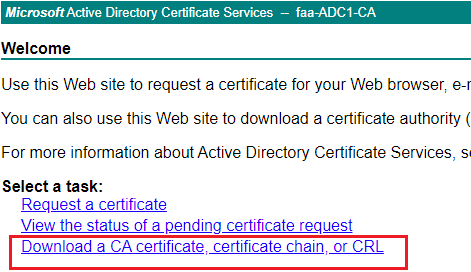
Export the certificate, open the certificate in notepad and browse to http://<ip-address>/certsrv

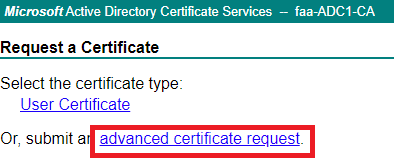
Click on “Advanced Certificate Request”
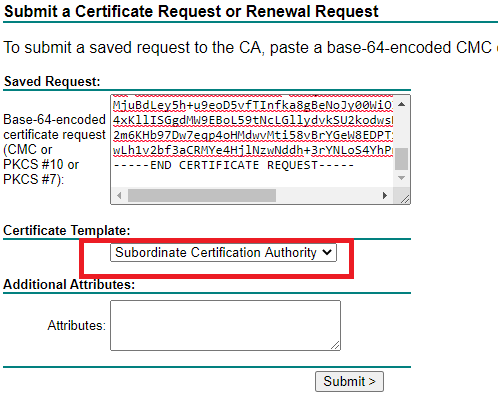
Copy & paste the CSR input in here and make sure to select “Subordinate Certification Authority” which simply just means Intermediate CA.
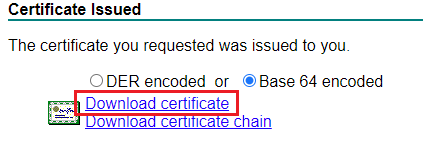
Click “Download Certificate” and rename the file to https-trust-inspection.cer
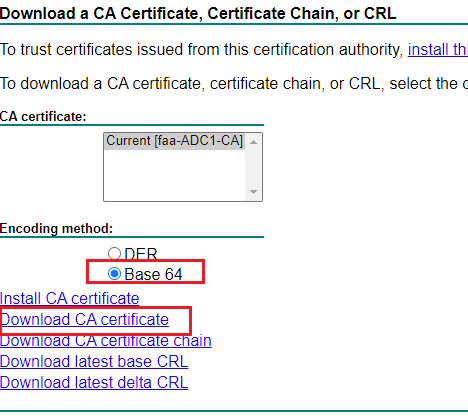
Next download the Root CA.
Select Base 64 and rename the file to root.crt
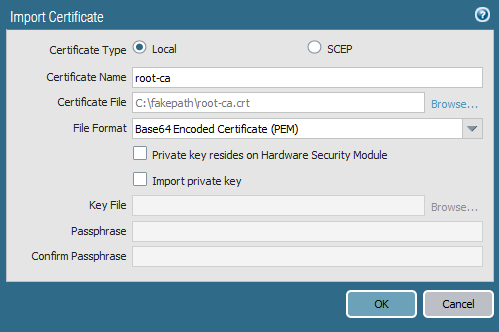
Import the root-ca.crt
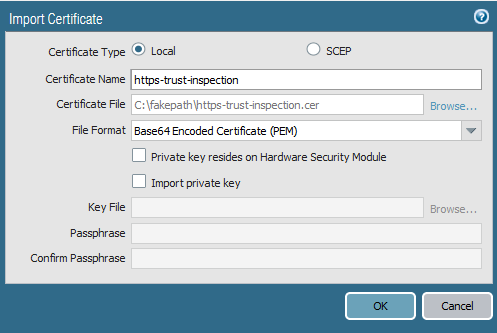
Import HTTPS-Trust-Inspection.cer file
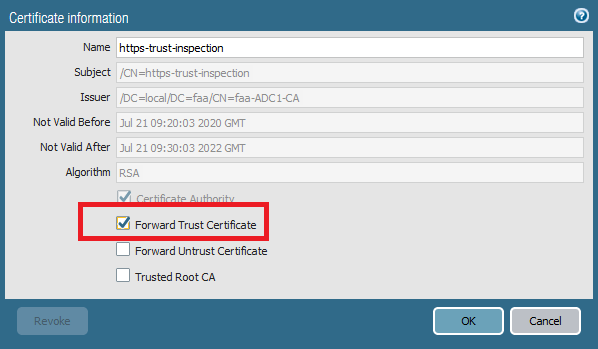
You’ll notice that the certificate is no longer highlighted in the color orange and that issued by the root CA of your Active Directory infrastructure.

Finally, open the https-trust-inspection and check “Forward Trust Certificate”.
Self-signed CA for Untrusted Forwarding
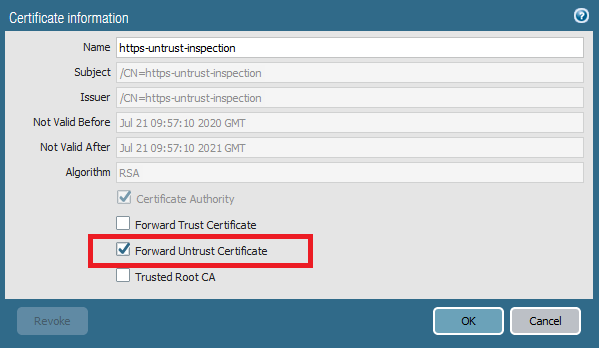
This will be the certificate that the firewall will present to our end-users when they visit a website with an expired or invalid certificate. Do not install this certificate on any endpoints under any circumstances. This is a certificate that should never be trusted. Installing this in the root store, defeats the purpose of this certificate. And it should be a self-signed certificate, not signed by a trusted root certificate such as ADCS.
Generate a self-signed CA.
Edit the certificate and select ‘Forward Untrust’.
Decryption Policy
Select the kind of content you want to decrypt. It’s best to NOT decrypt or use SSL Forward Proxy for financial services or anything that relies on it such as shopping or gambling because of legal requirements.

Enabling OCSP/CRL for certificate validation
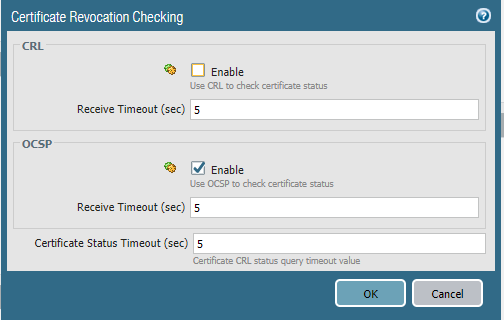
In order for the firewall to determine the validity of a certificate either the OCSP or CRL protocol is used with the former taking priority. This is an important step so that end-users get the error “not secure…” message when visiting a website with an expired certificate.
Under Device > Setup > Session > Certificate Revocation Checking
And enable OCSP. CRL can be enabled as well but OCSP takes priority unless the OCSP servers are down then CRL will be used.
Conclusion
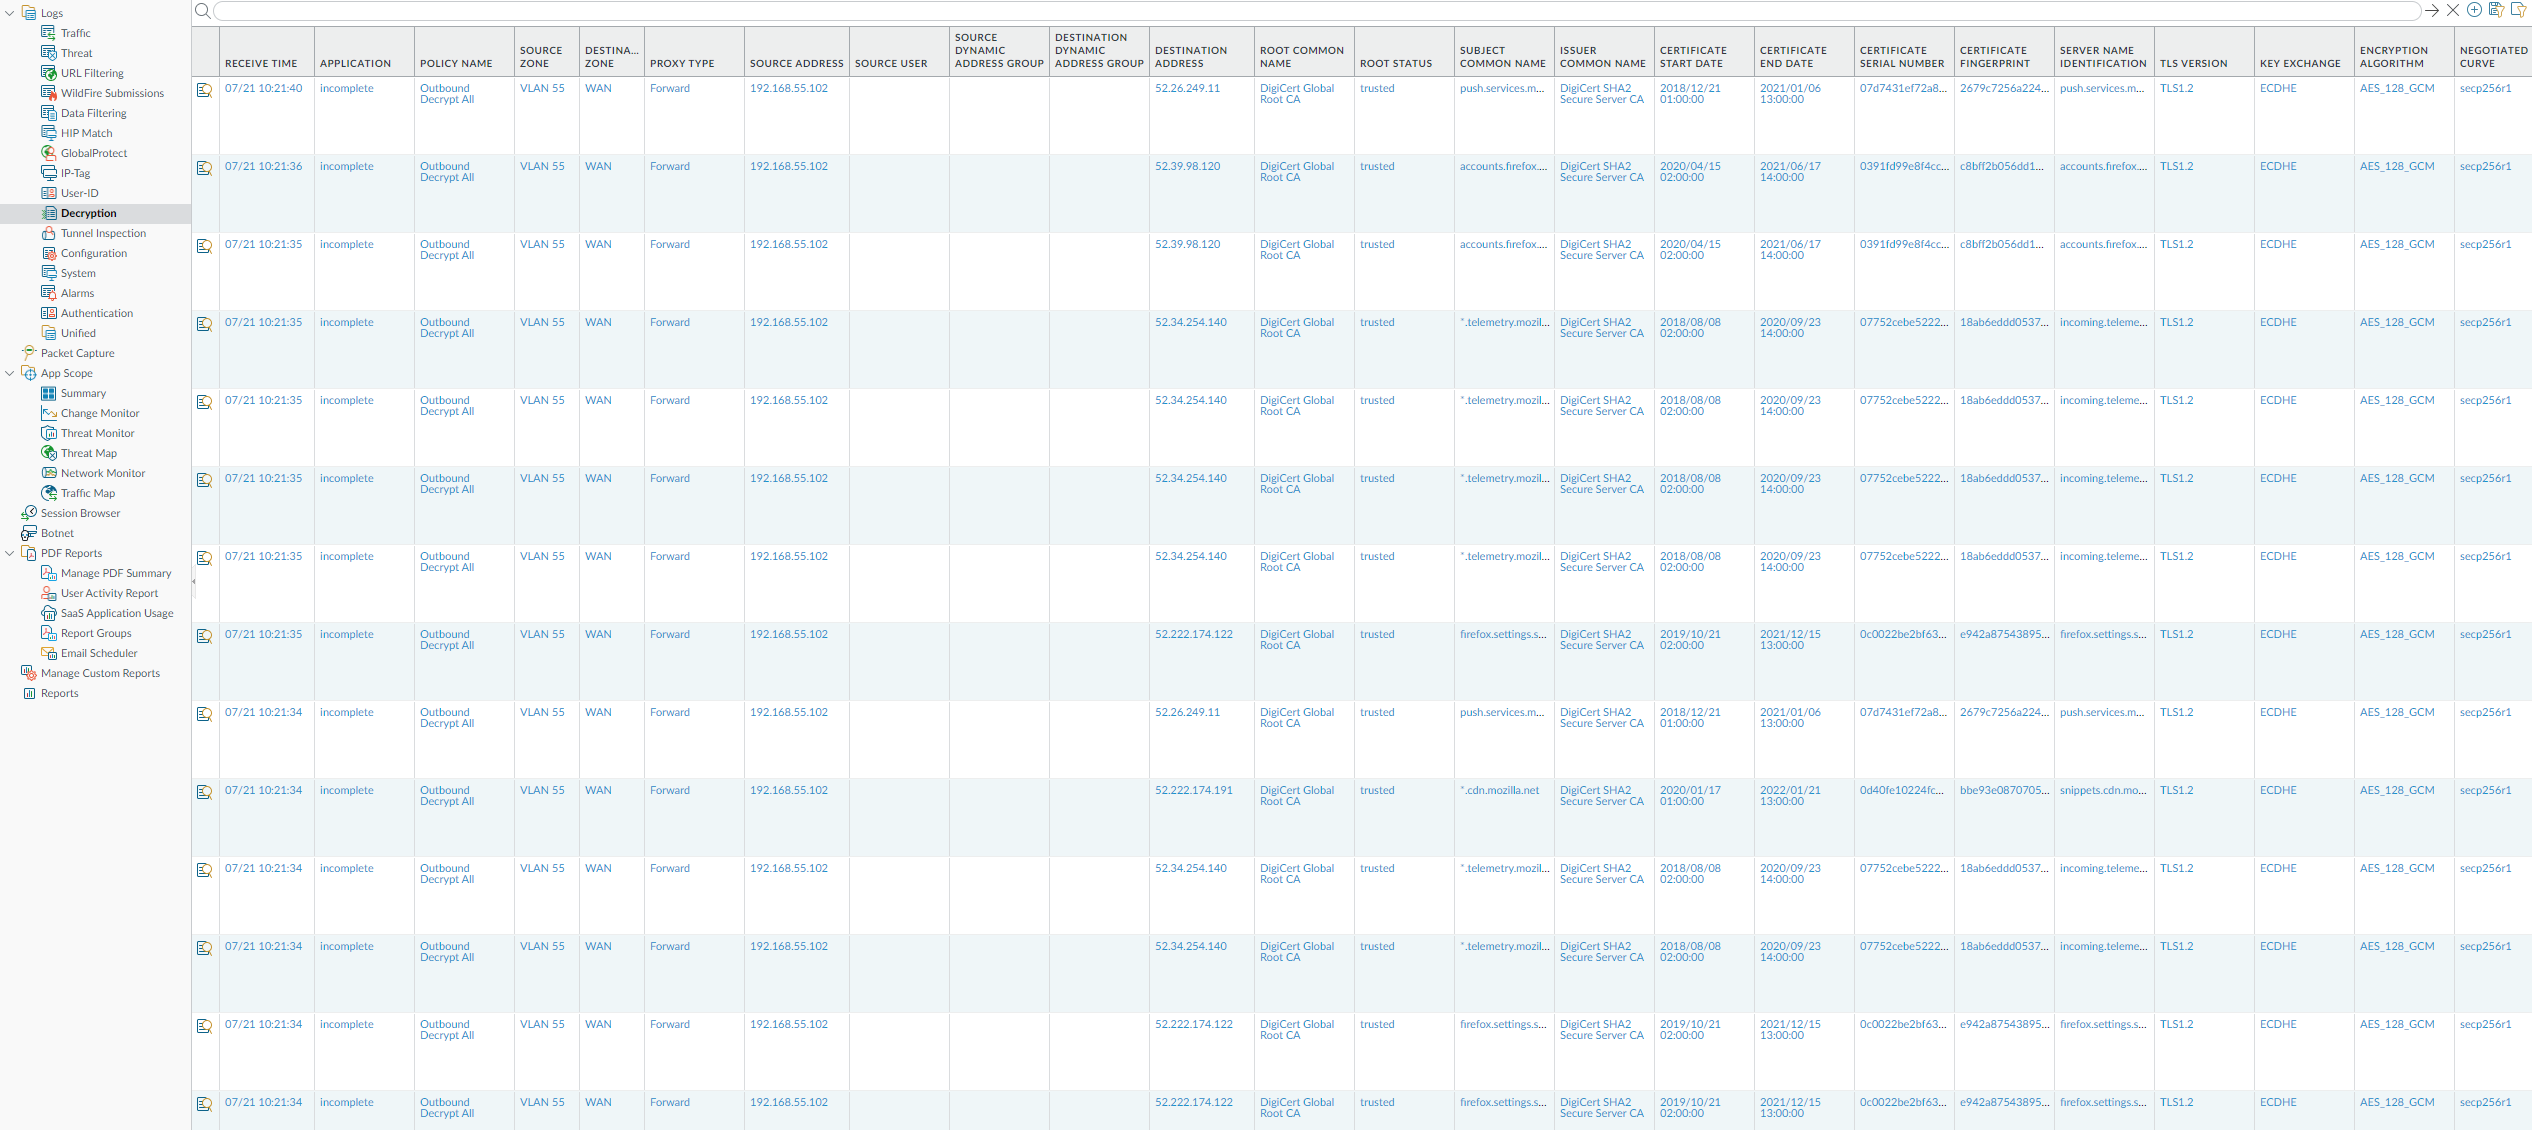
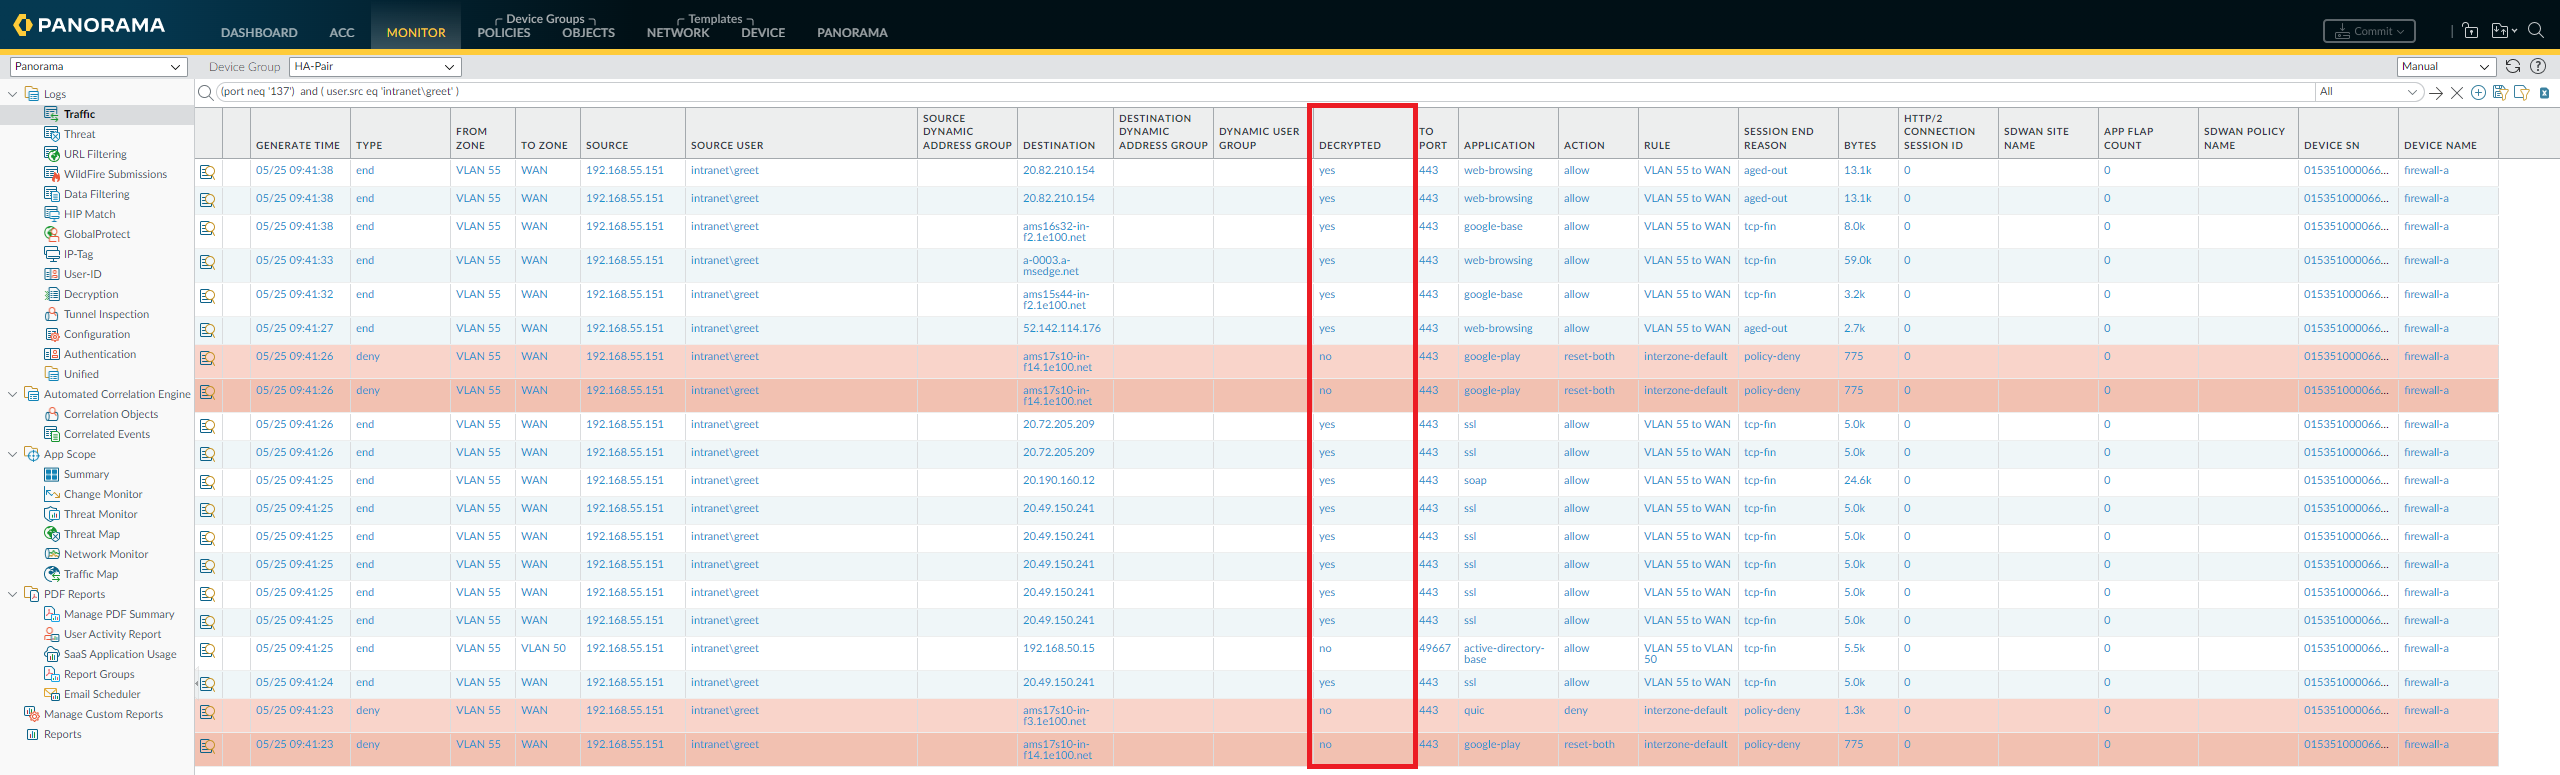
To verify that the firewall is successfully decrypting traffic, we can bring up the logs which provides the context we need.
In Monitor > Threat: You may want to add the column ‘Decrypted’, which will show whether it has been decrypted or not.
In Monitor > Decryption: dedicated logging section for decryption but it requires PANOS 10.x