In this article, we’ll be covering how to migrate from a FortiGate firewall to Palo Alto Networks firewalls using the Expedition tool. We can migrate security policies, interface addresses, NAT policies, address objects & groups, service objects & groups, etc. This tool does quite a lot for you, and makes the migration process a lot easier. But keep in mind that you should use this tool to a minimum.
Prerequisites
- FortiGate firewall
- Palo Alto Networks firewall with a serial number
- Ubuntu 20.04 machine
About the FortiGate firewall
- Port1 -> external interface with 192.168.0.x/24 and Untrust as security zone
- Port2 -> interface with 192.168.25.1 with Servers as security zone
- Port3 -> interface with 192.168.30.1 with Clients as security zone
- 3 security policies in total (integrated NAT, so no Central-NAT). No security profiles were used or address objects.
About the Palo Alto Networks firewall
- Besides that the management interface is configured, it’s literally empty configuration wise.
Installing Palo Alto Networks Expedition
We have to use the Expedtion tool from Palo Alto Networks. Which is just a web-based tool that we have to specifically install on Ubuntu 20.04. The installer might give an error if you’re on 22.04.
First, let’s download the installer, extract it and run it.
wget https://conversionupdates.paloaltonetworks.com/expedition1_Installer_latest.tgz

tar -xzvf expeditionInstaller.tgz

sudo useradd expedition

sudo bash initSetup.sh
Next, browse to the IP address of that Ubuntu 20.04 machine. E.g. https://192.168.10.50
Retrieving the config file of the FortiGate firewall
We have to get the config file from the FortiGate firewall so that we can load this up in Expedition later on. Find the config file in the top right corner where we see the logged in username.
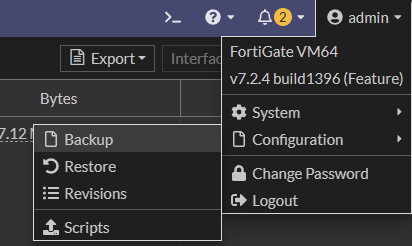
Then simply press “OK” and the config file will be downloaded.

Introduction to Expedition
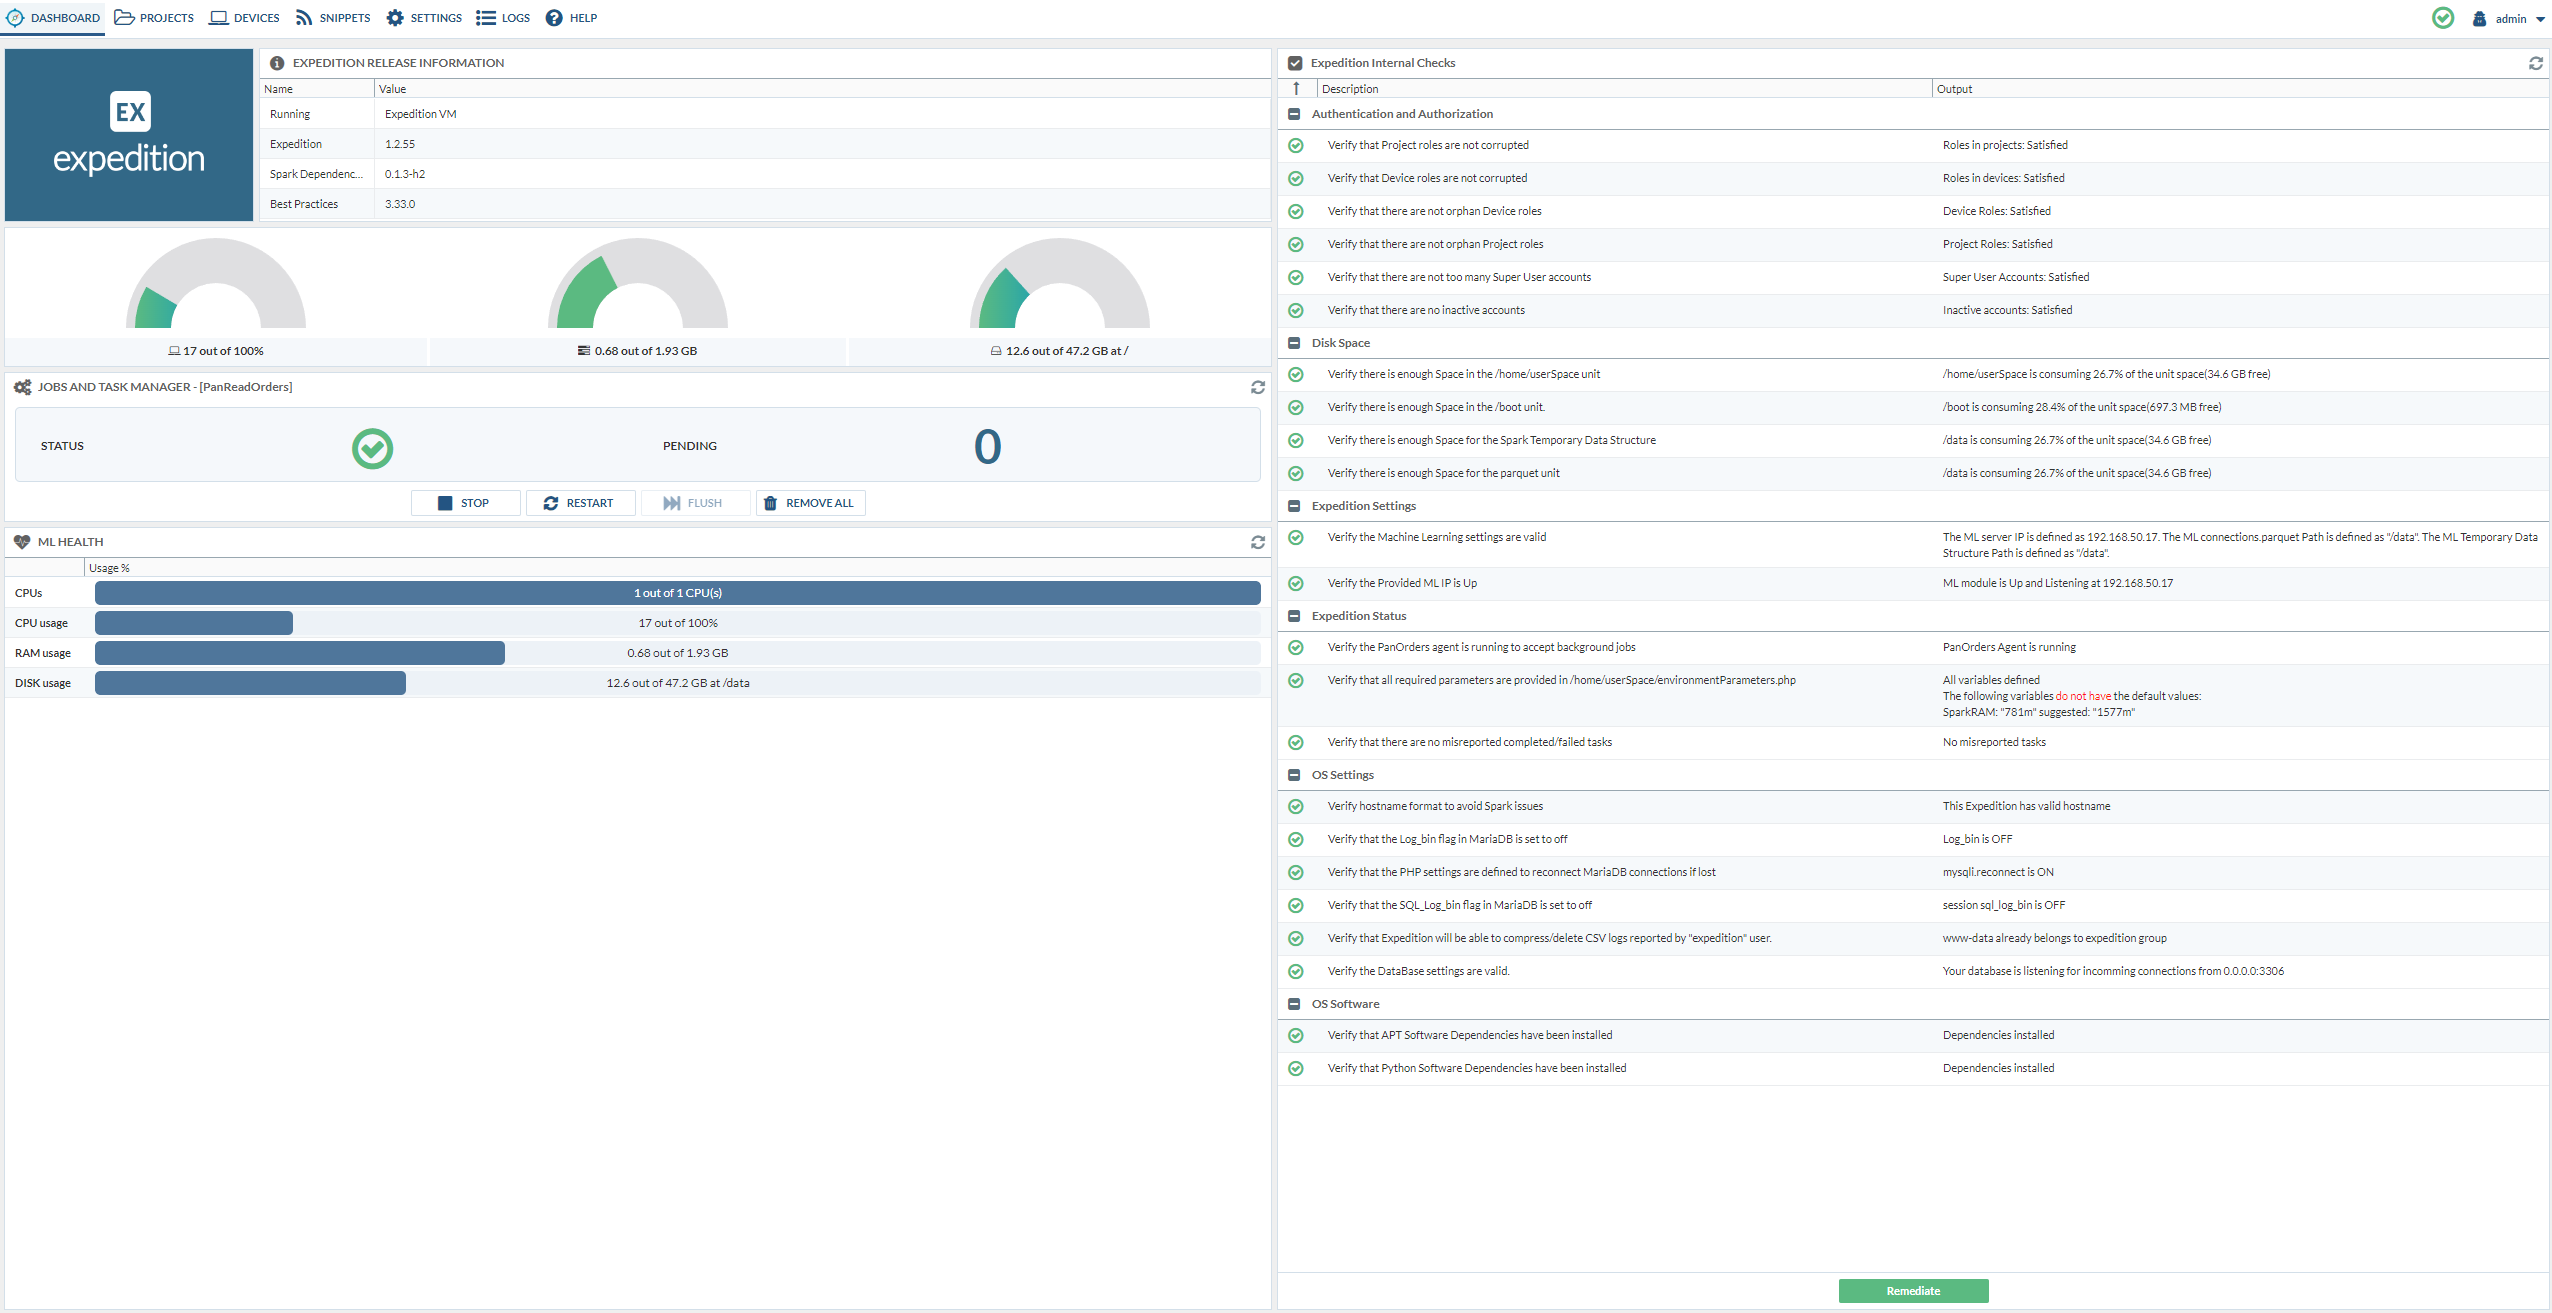
After you browse to the IP-address of your Ubuntu 20.04 machine, you’ll be greeted with the following:
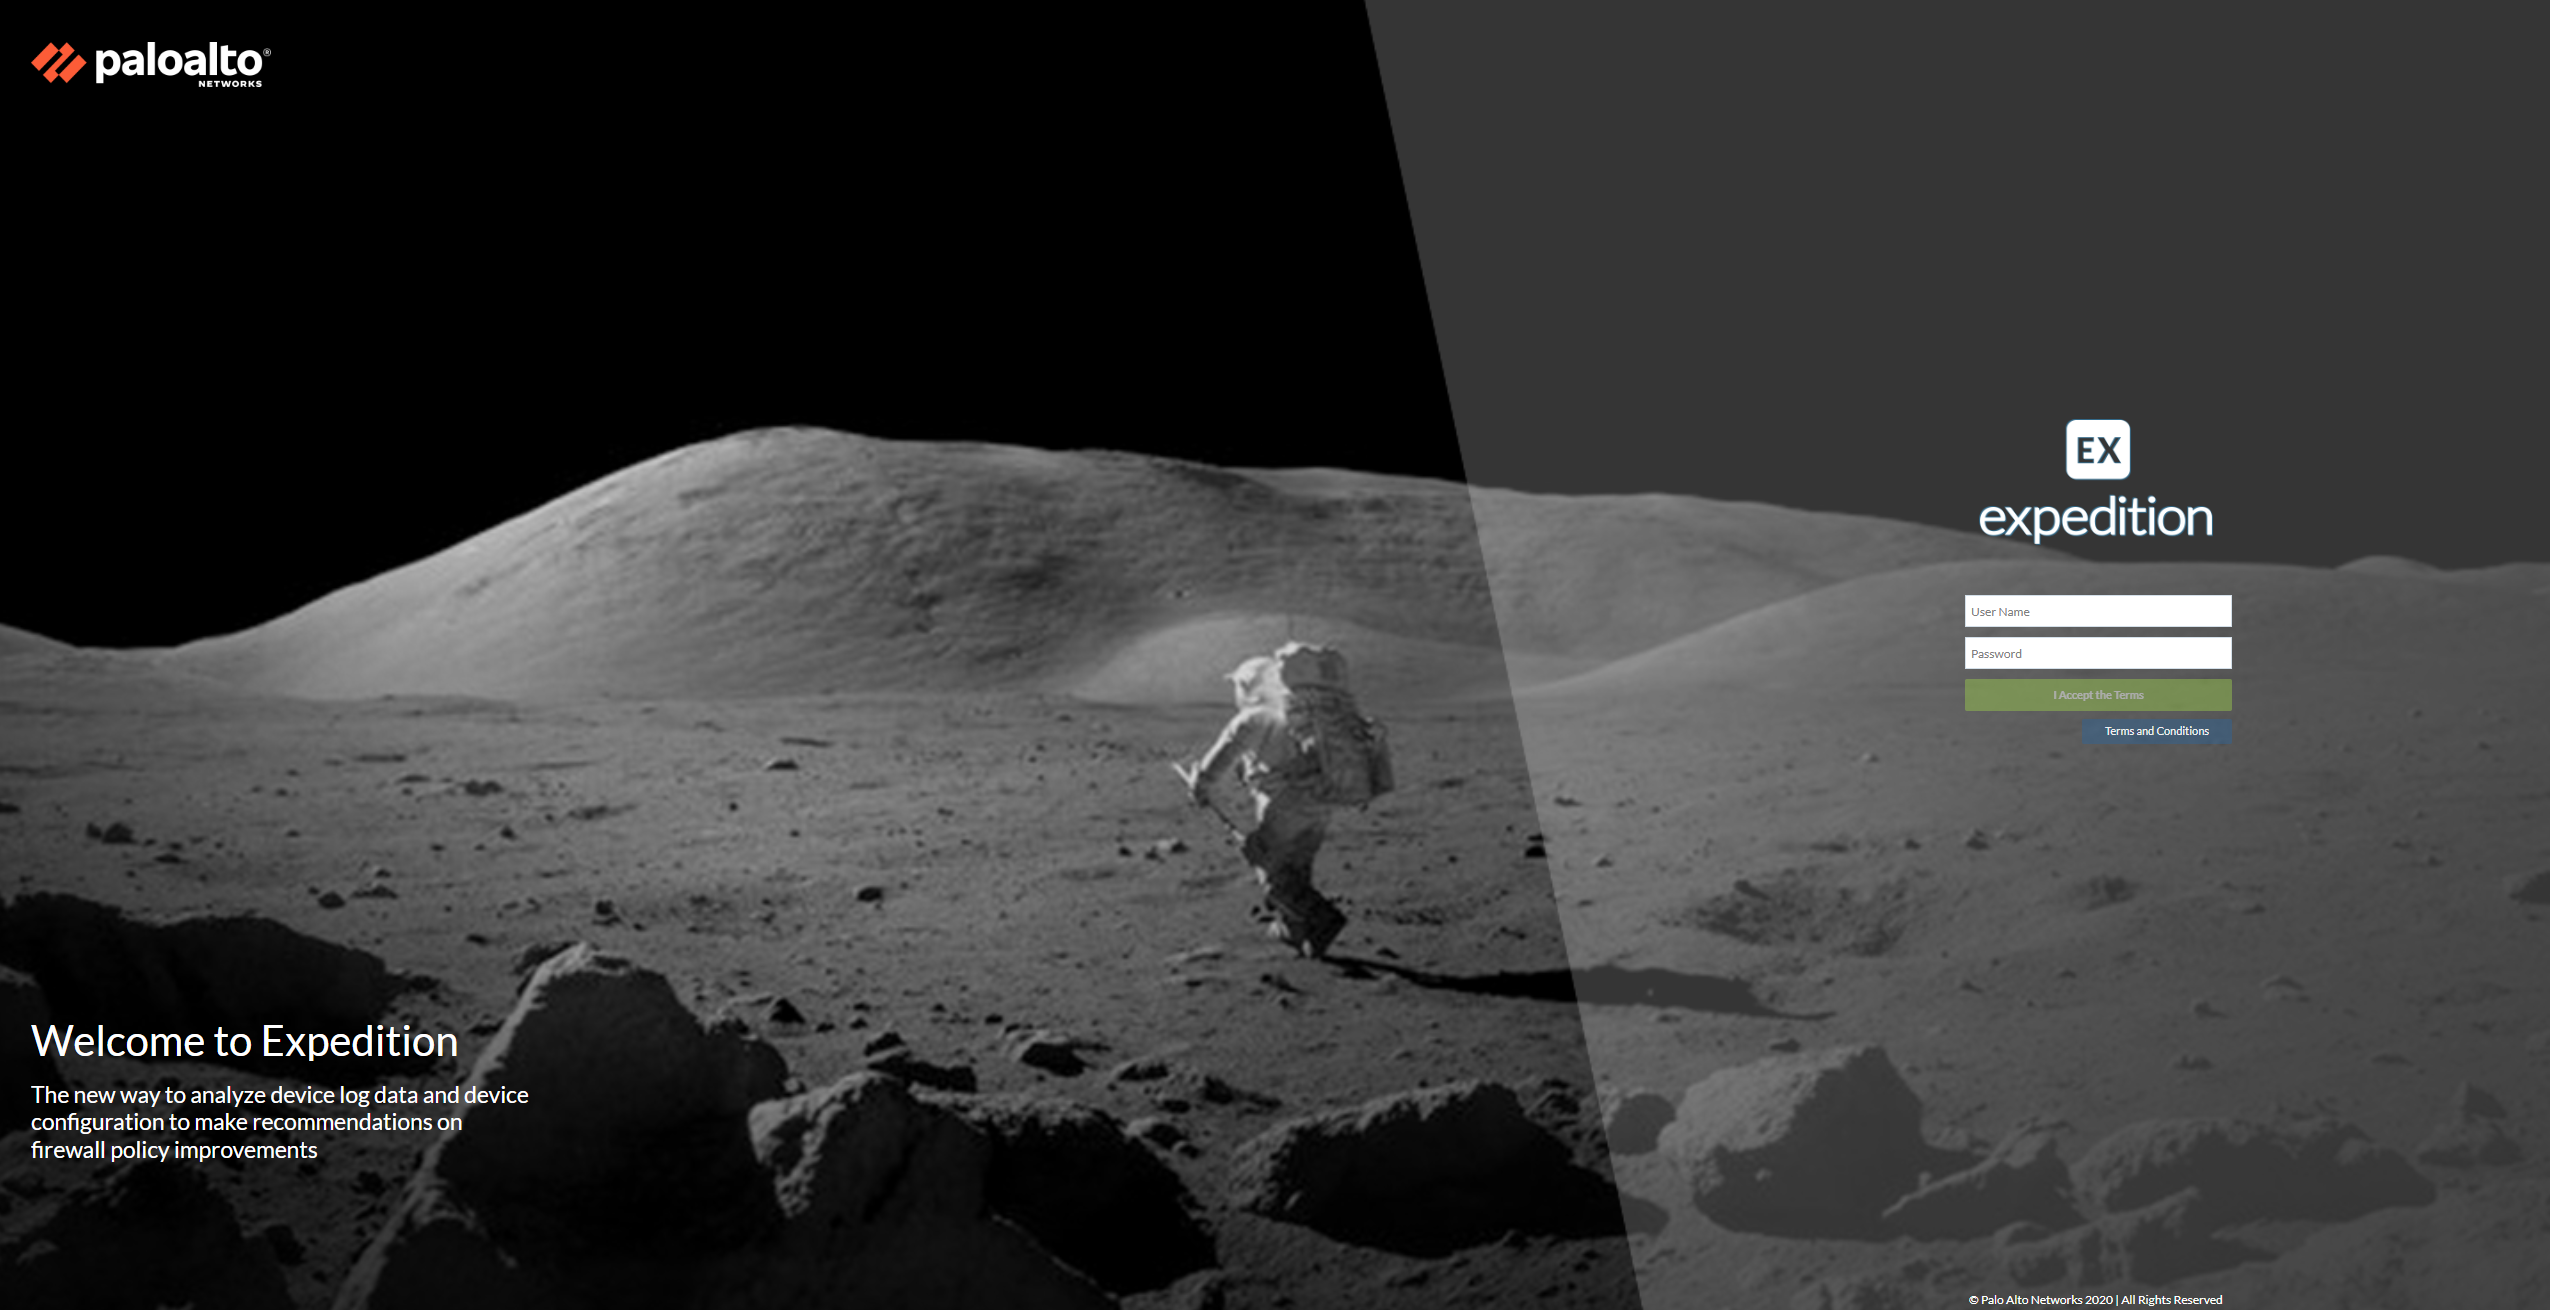
The default login and password is: admin & paloalto
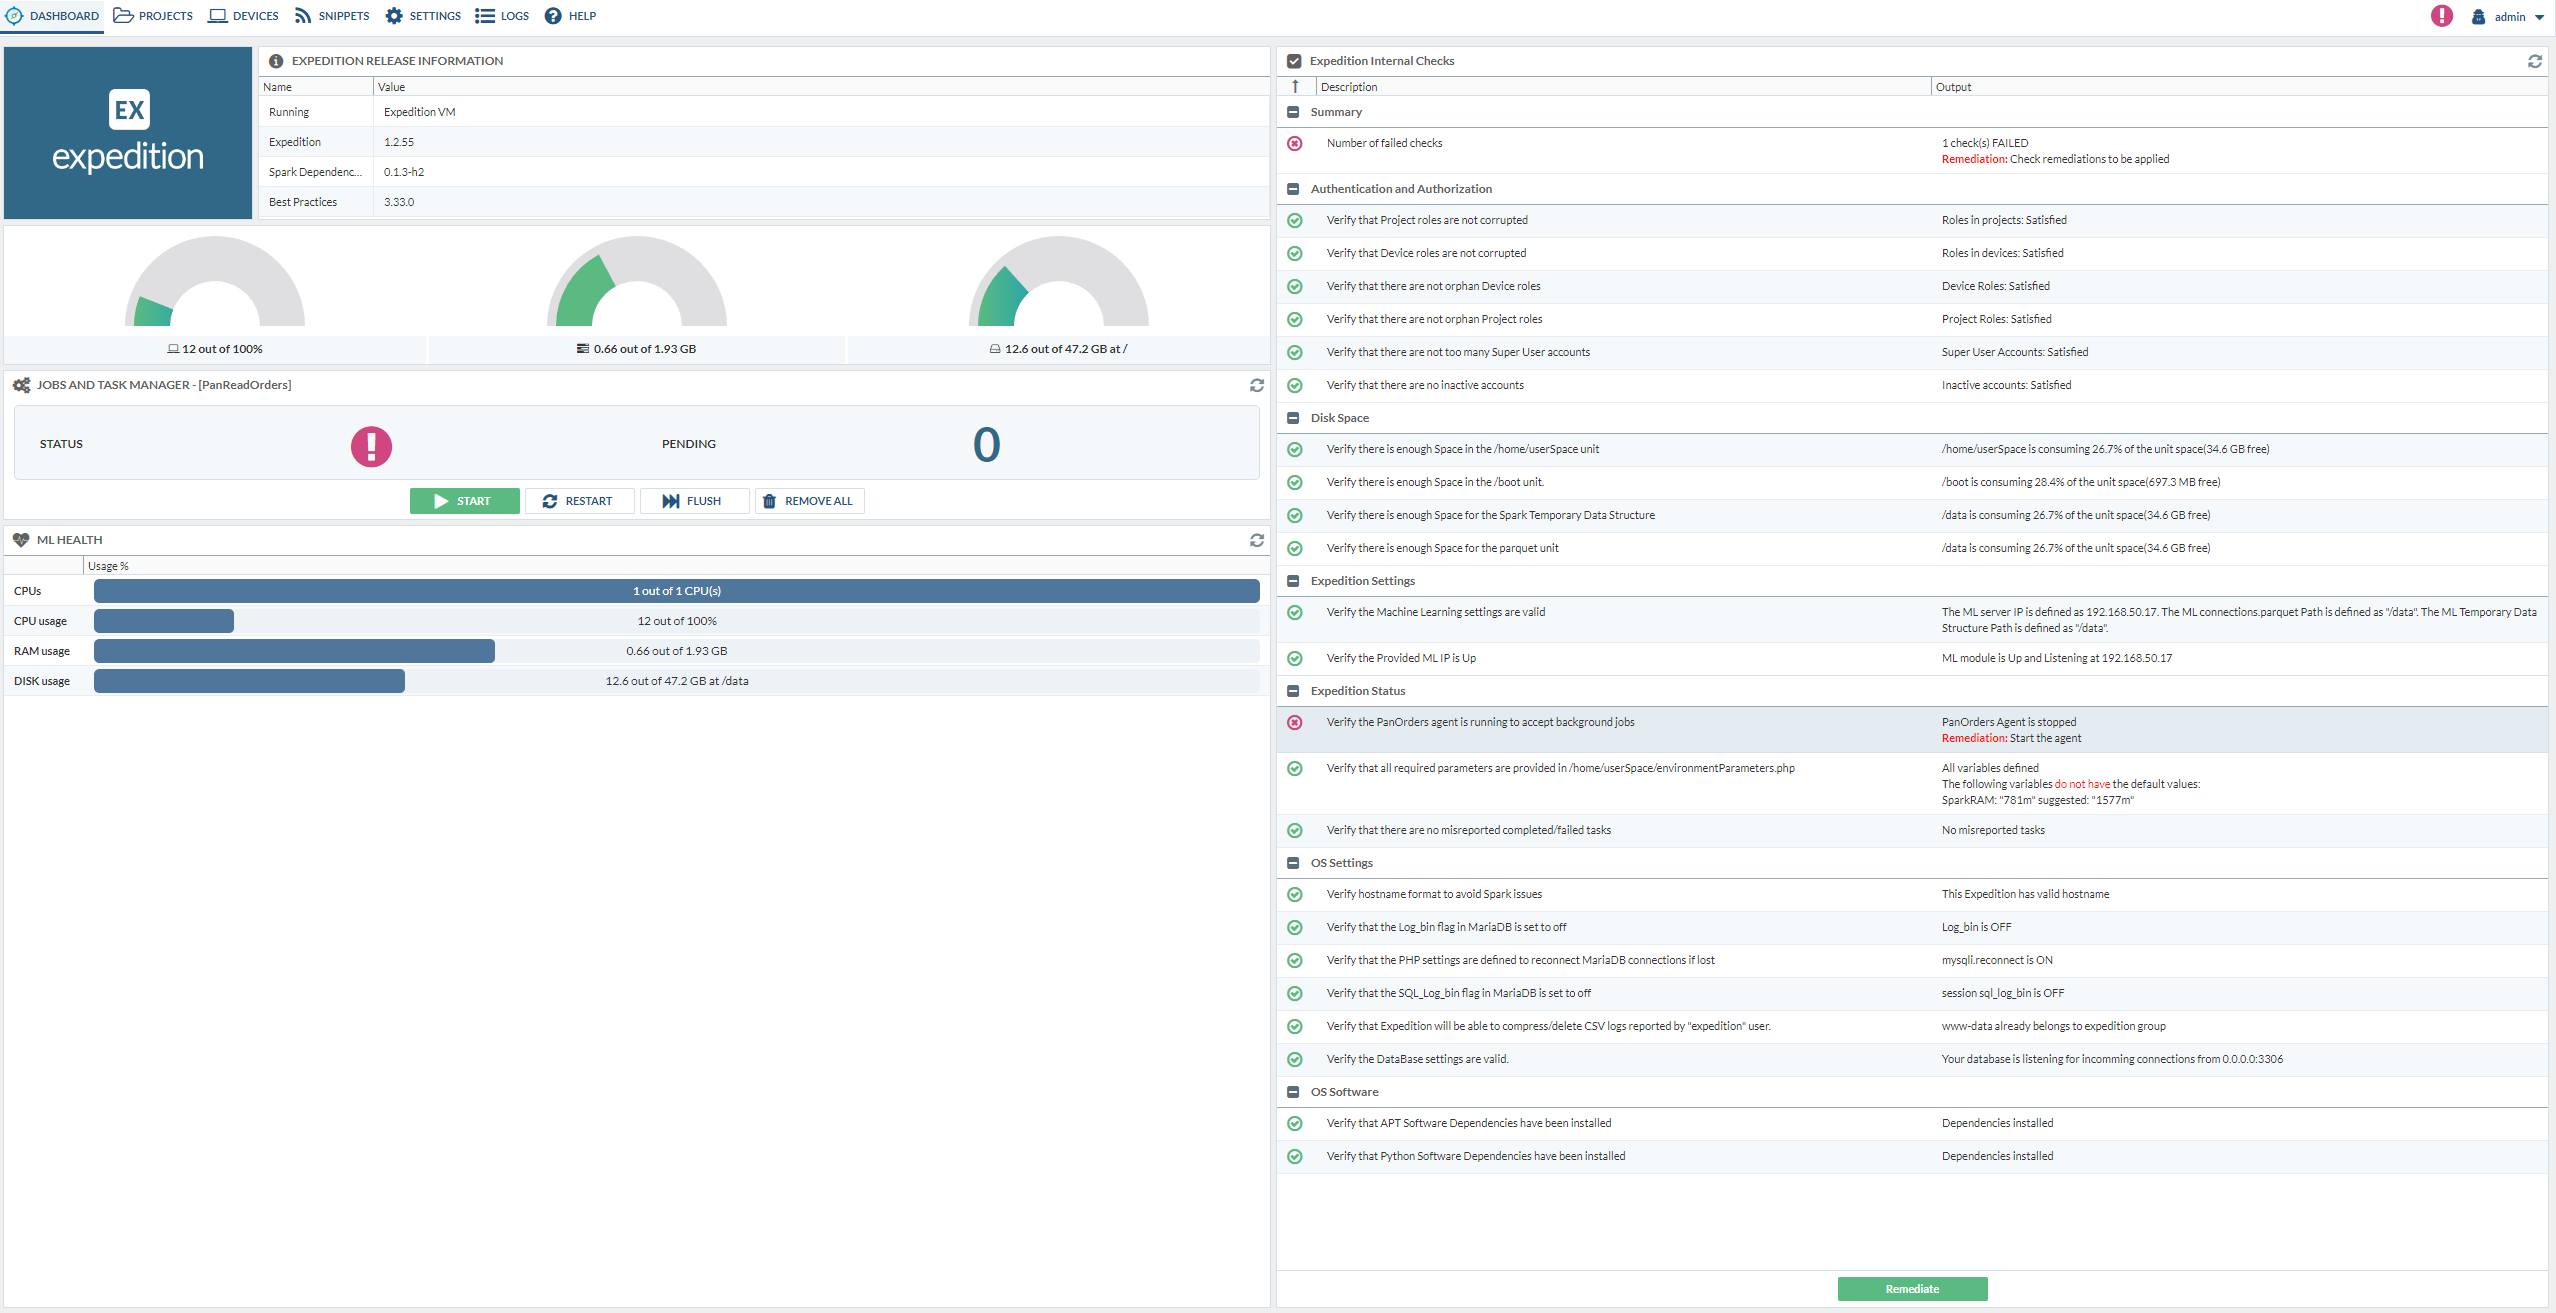
You might get remediation errors, just press the remediate button and see if that resolves the issue.
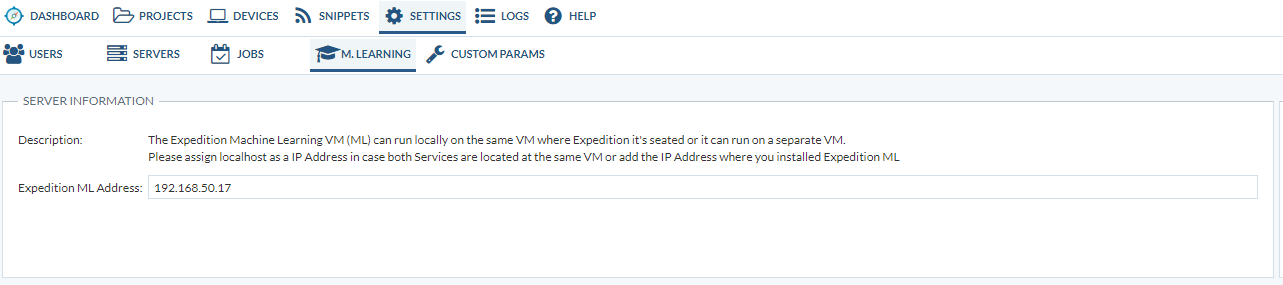
If there’s still an error with Machine Learning for example, try the following: Settings > M. Learning > Expedition ML Address: set this to 127.0.0.1 or the IP-address of the machine itself.
Once that’s done, it should look like below:
Adding the PAN firewall to expedition
Go to Devices > Add. We have to enter the serial number of the PAN device. Select the model.

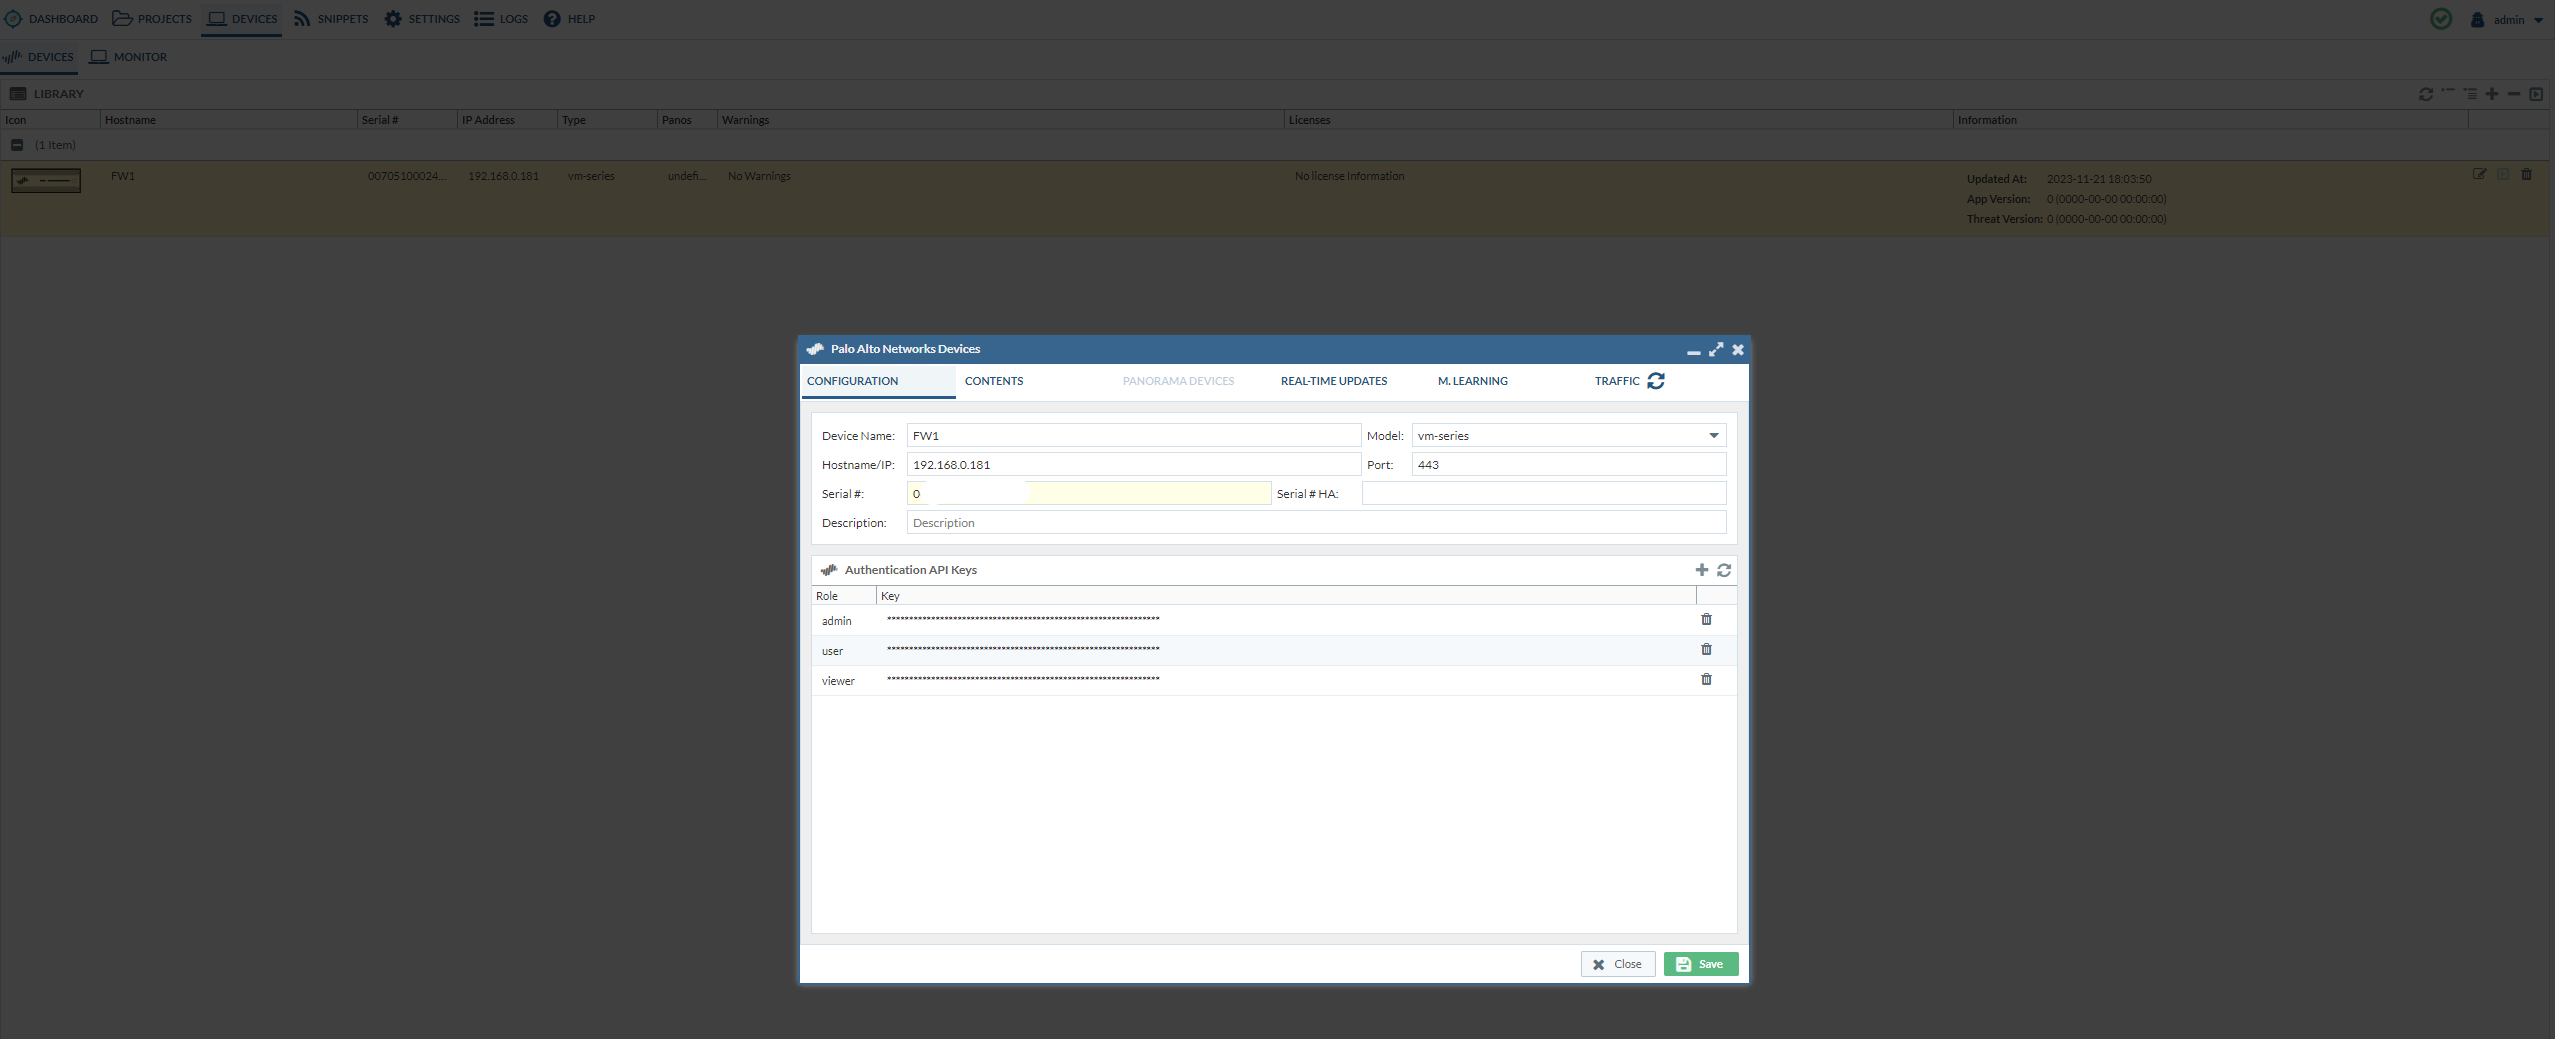
After that’s done, click on the added firewall to enter the credentials. Do not forget to click “add”.
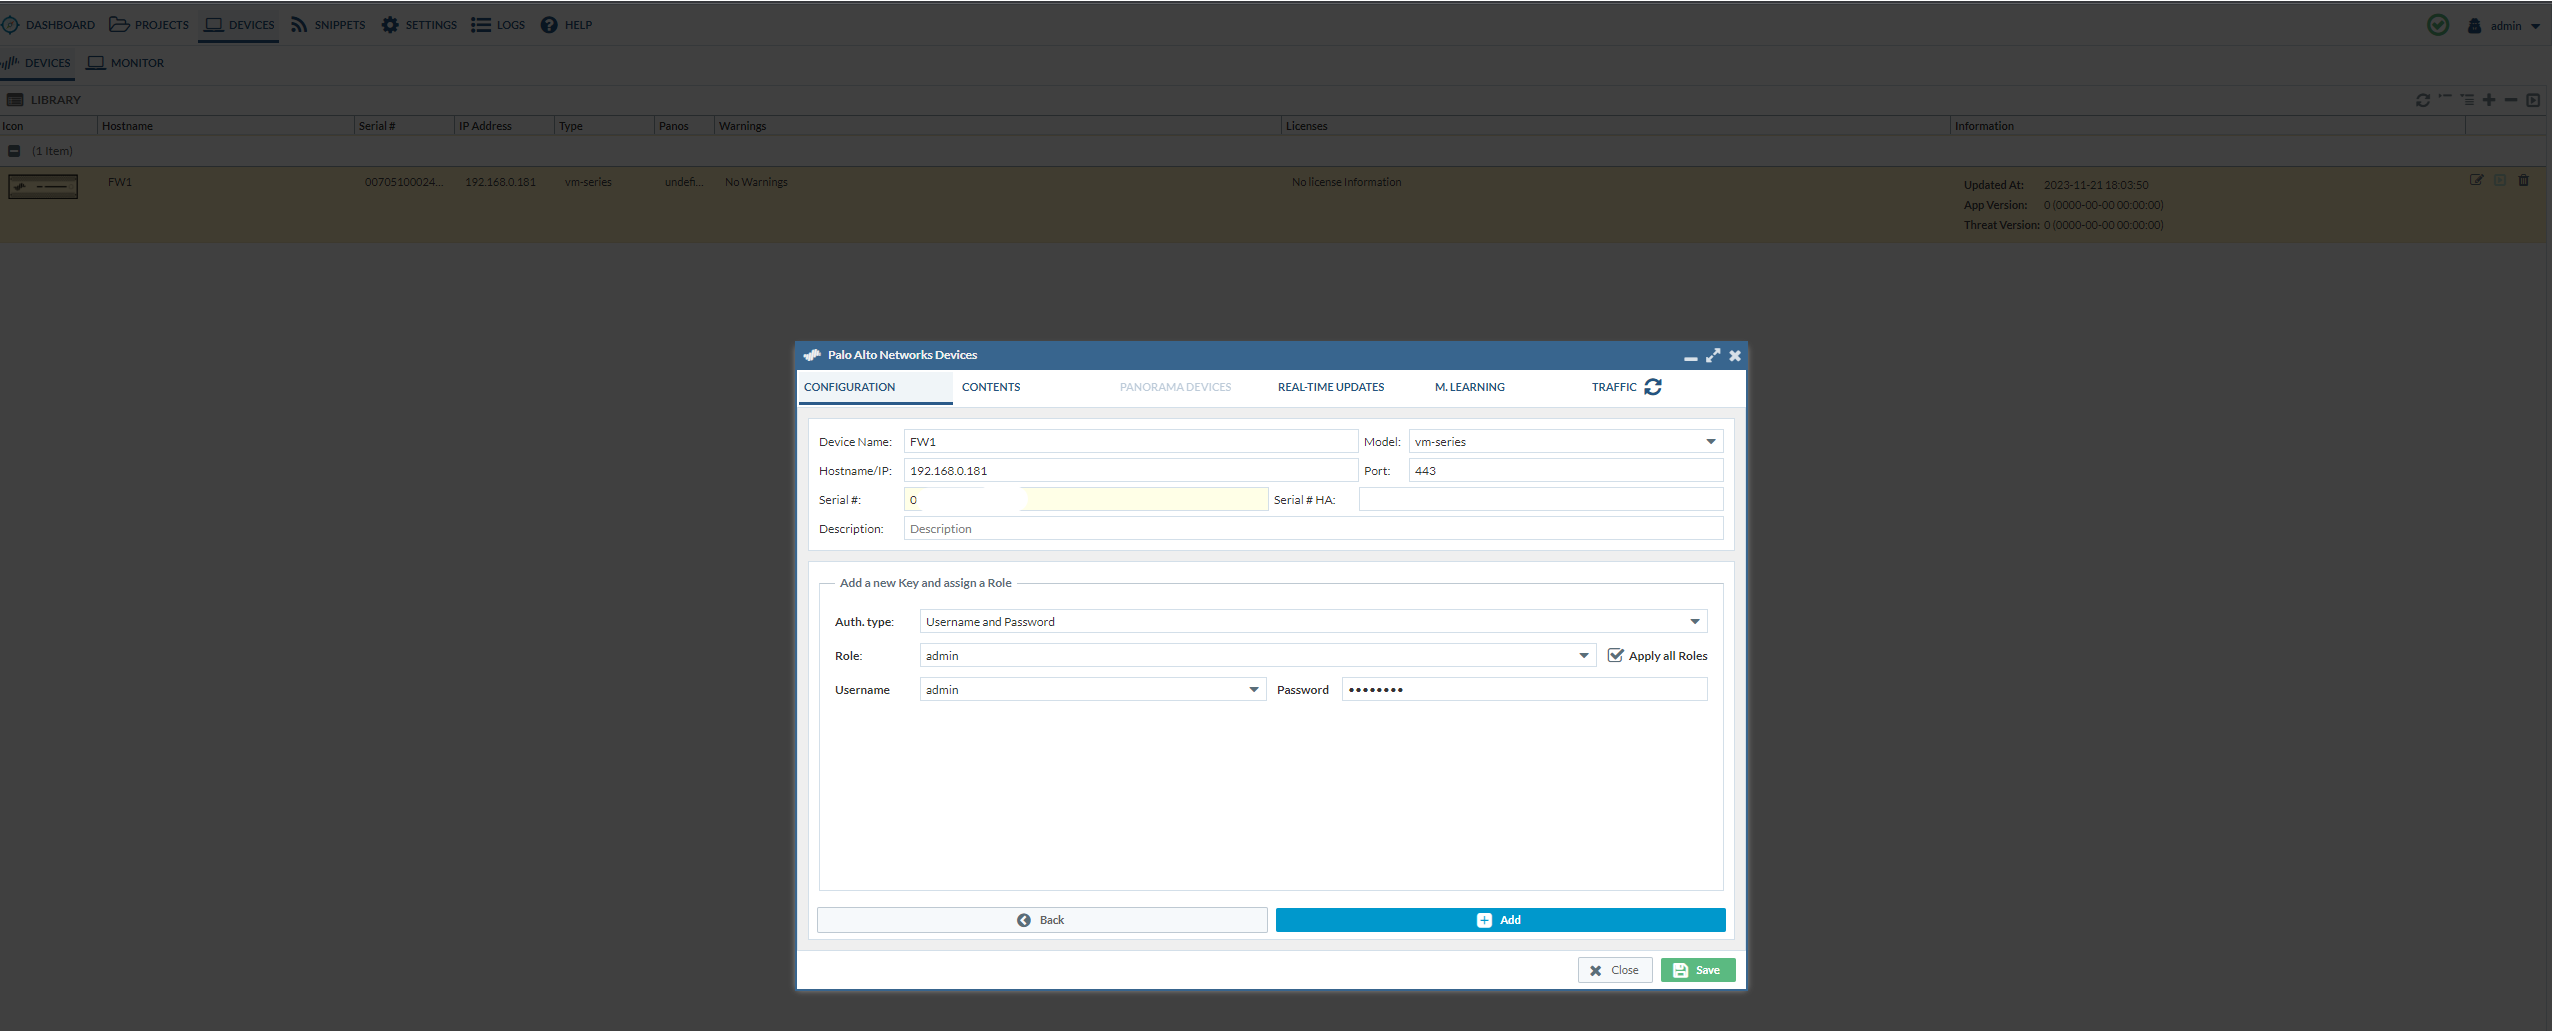
It should look like this:
After you’ve added the credentials, it’s time to retrieve the running configuration of the firewall.
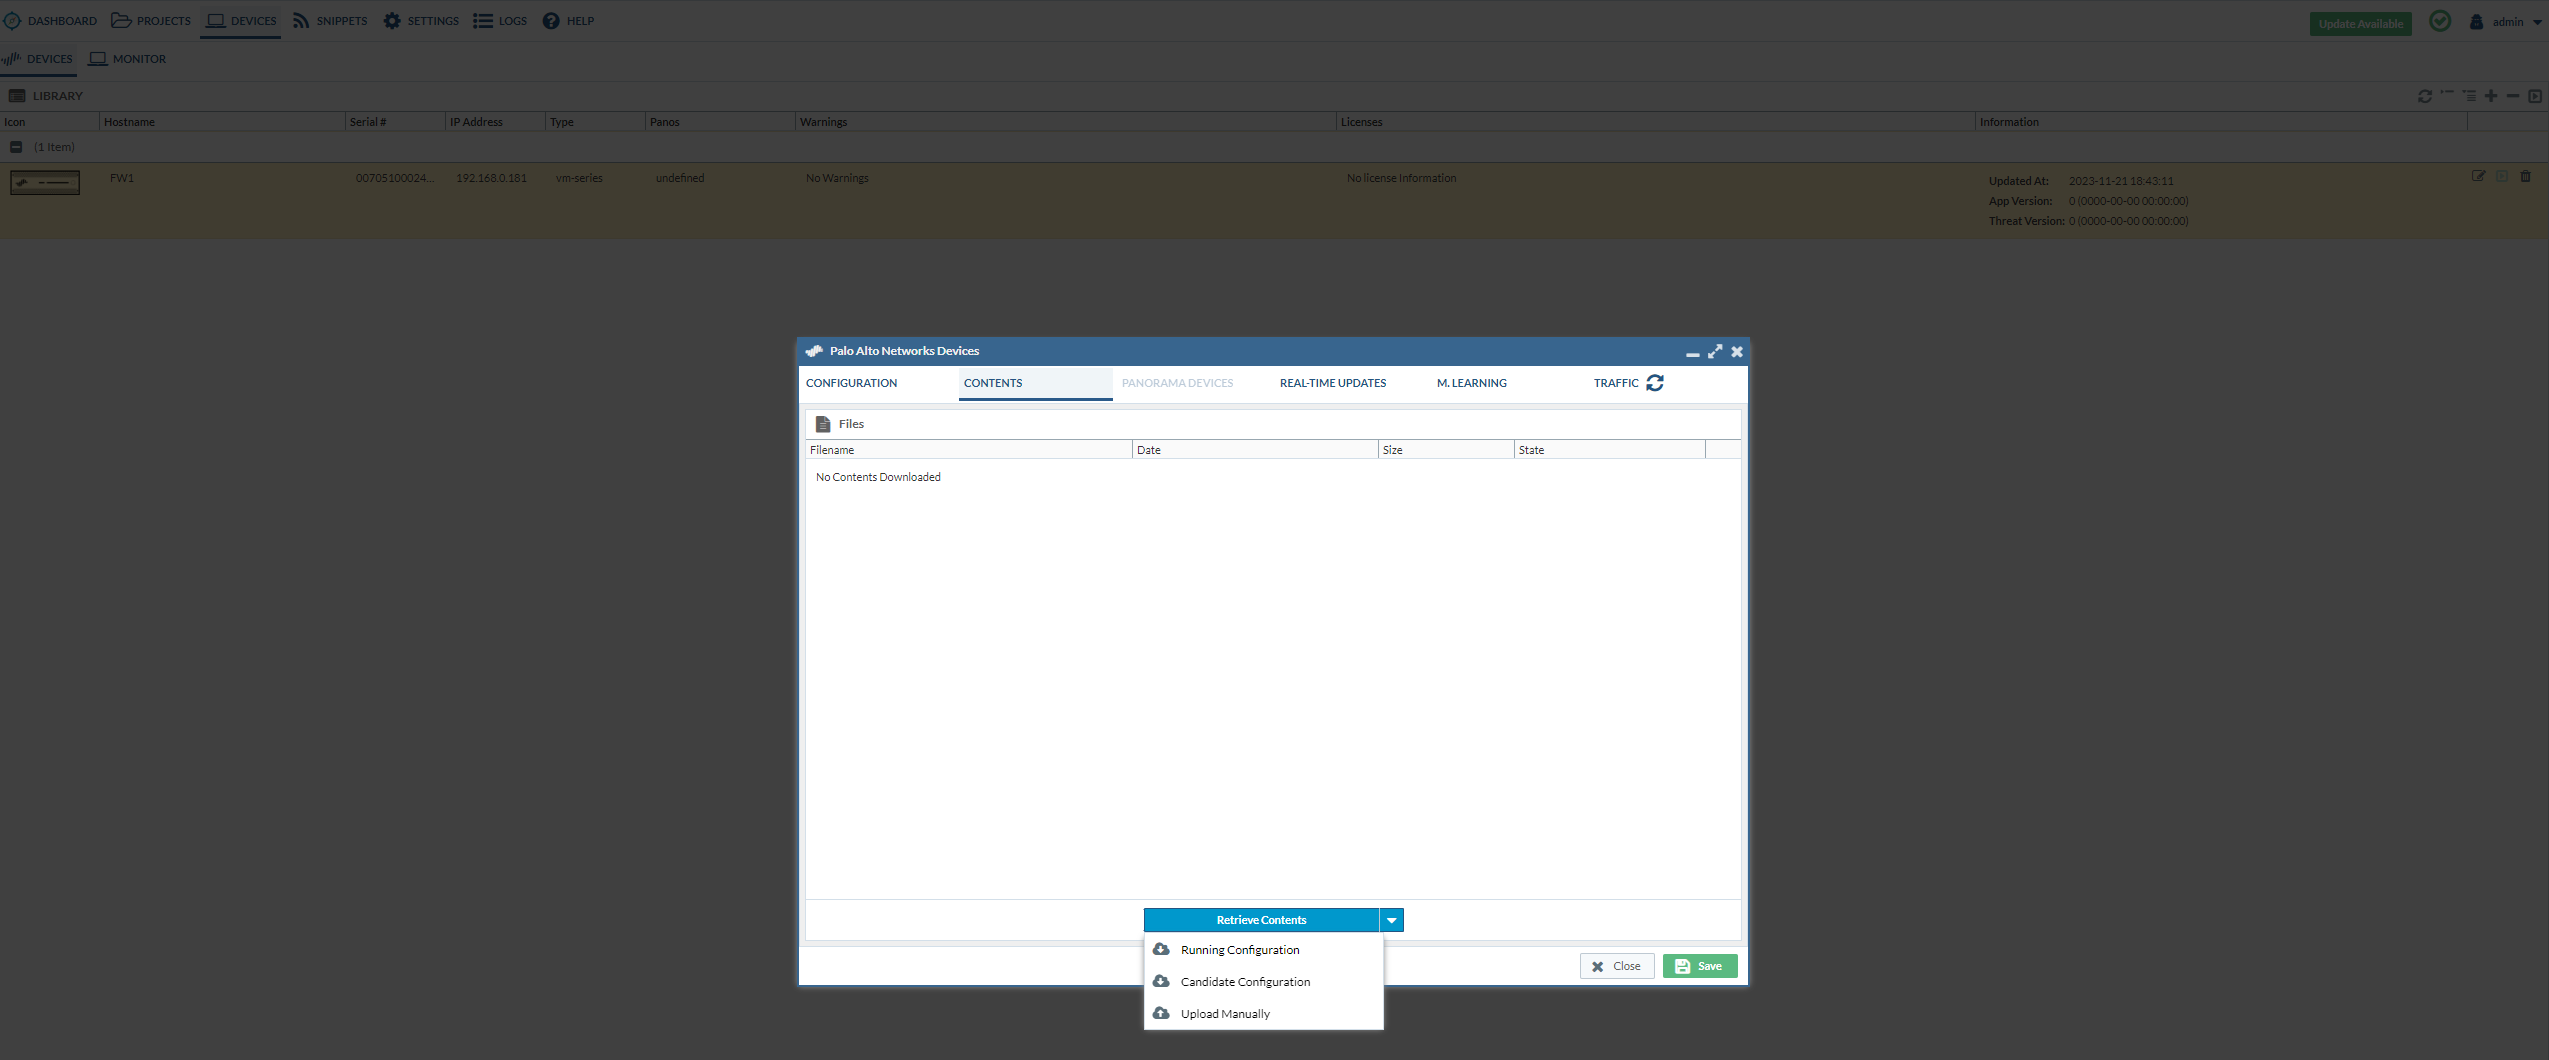
Then, we’ll get to see more details about the firewall itself such as the App-version, the licenses, PANOS version etc.

Adding a new project and importing the FG & PAN FW configuration files
Select the device and give the project a name.
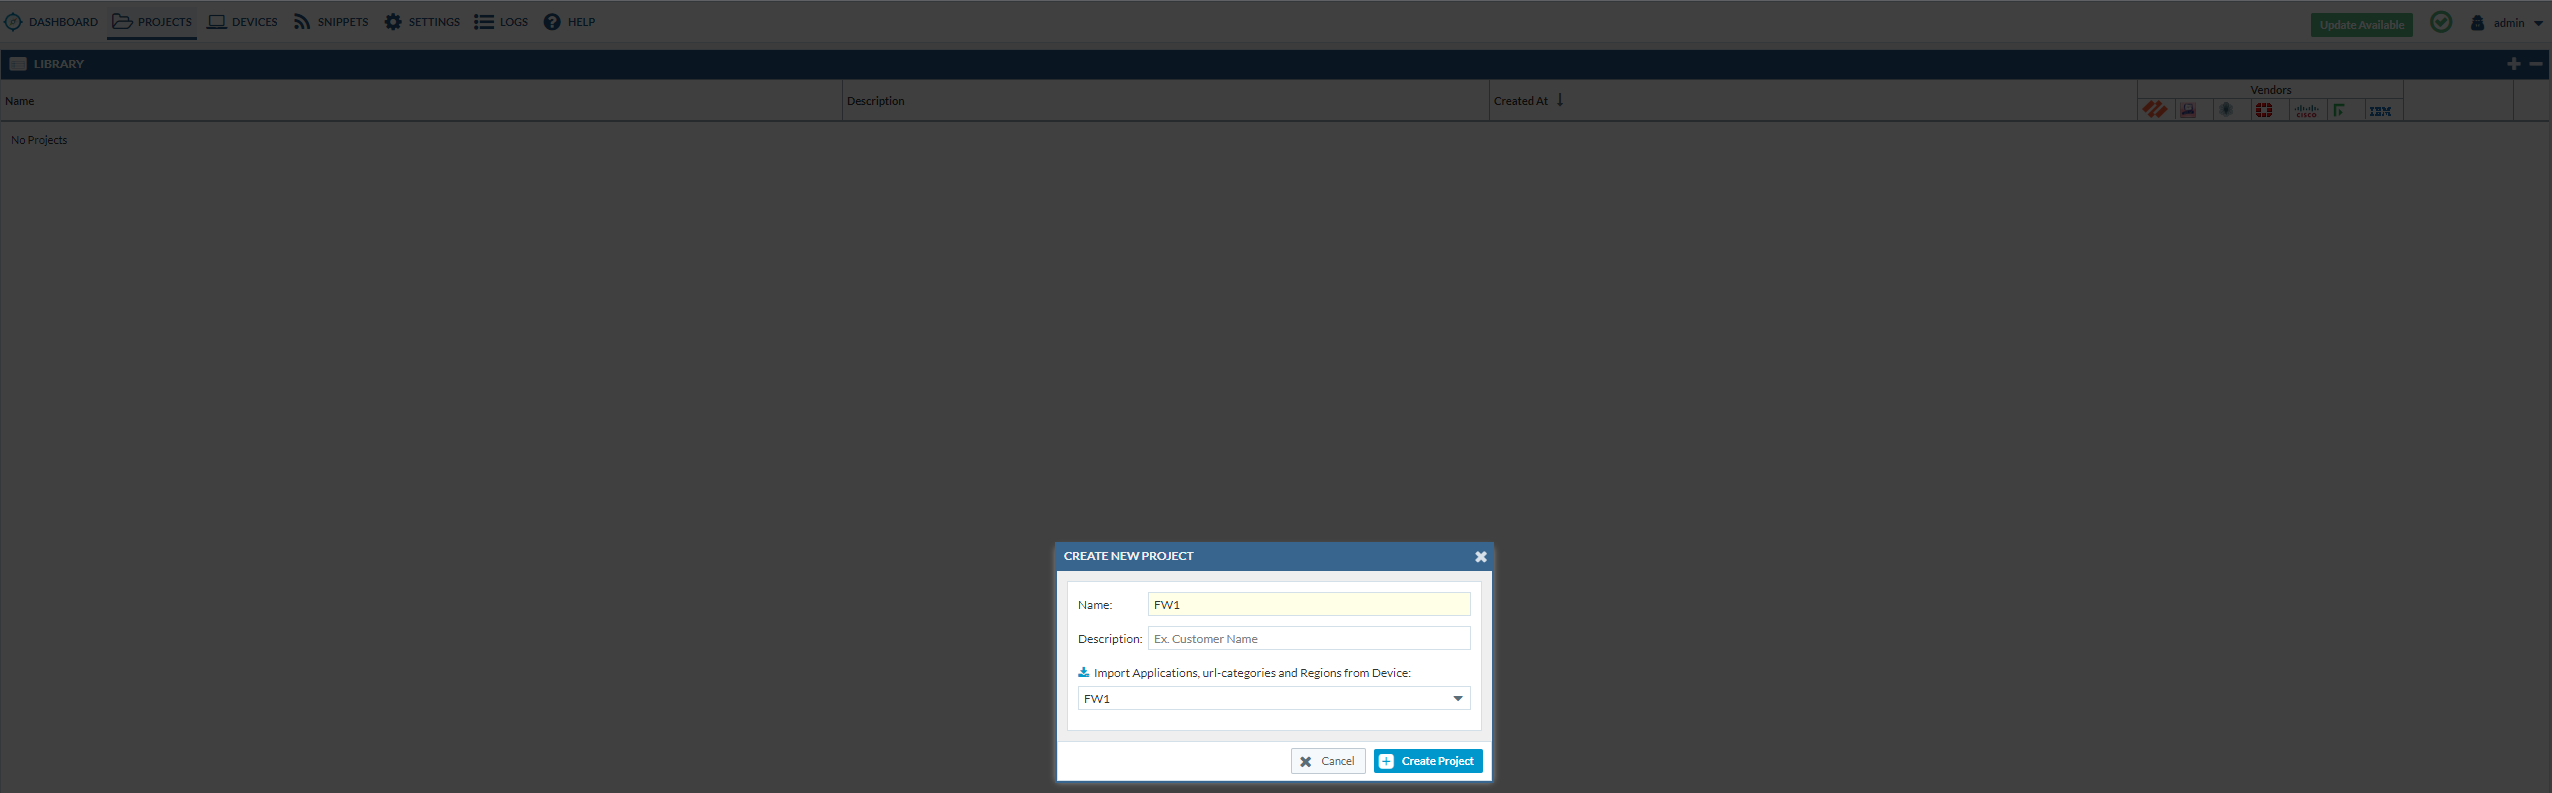
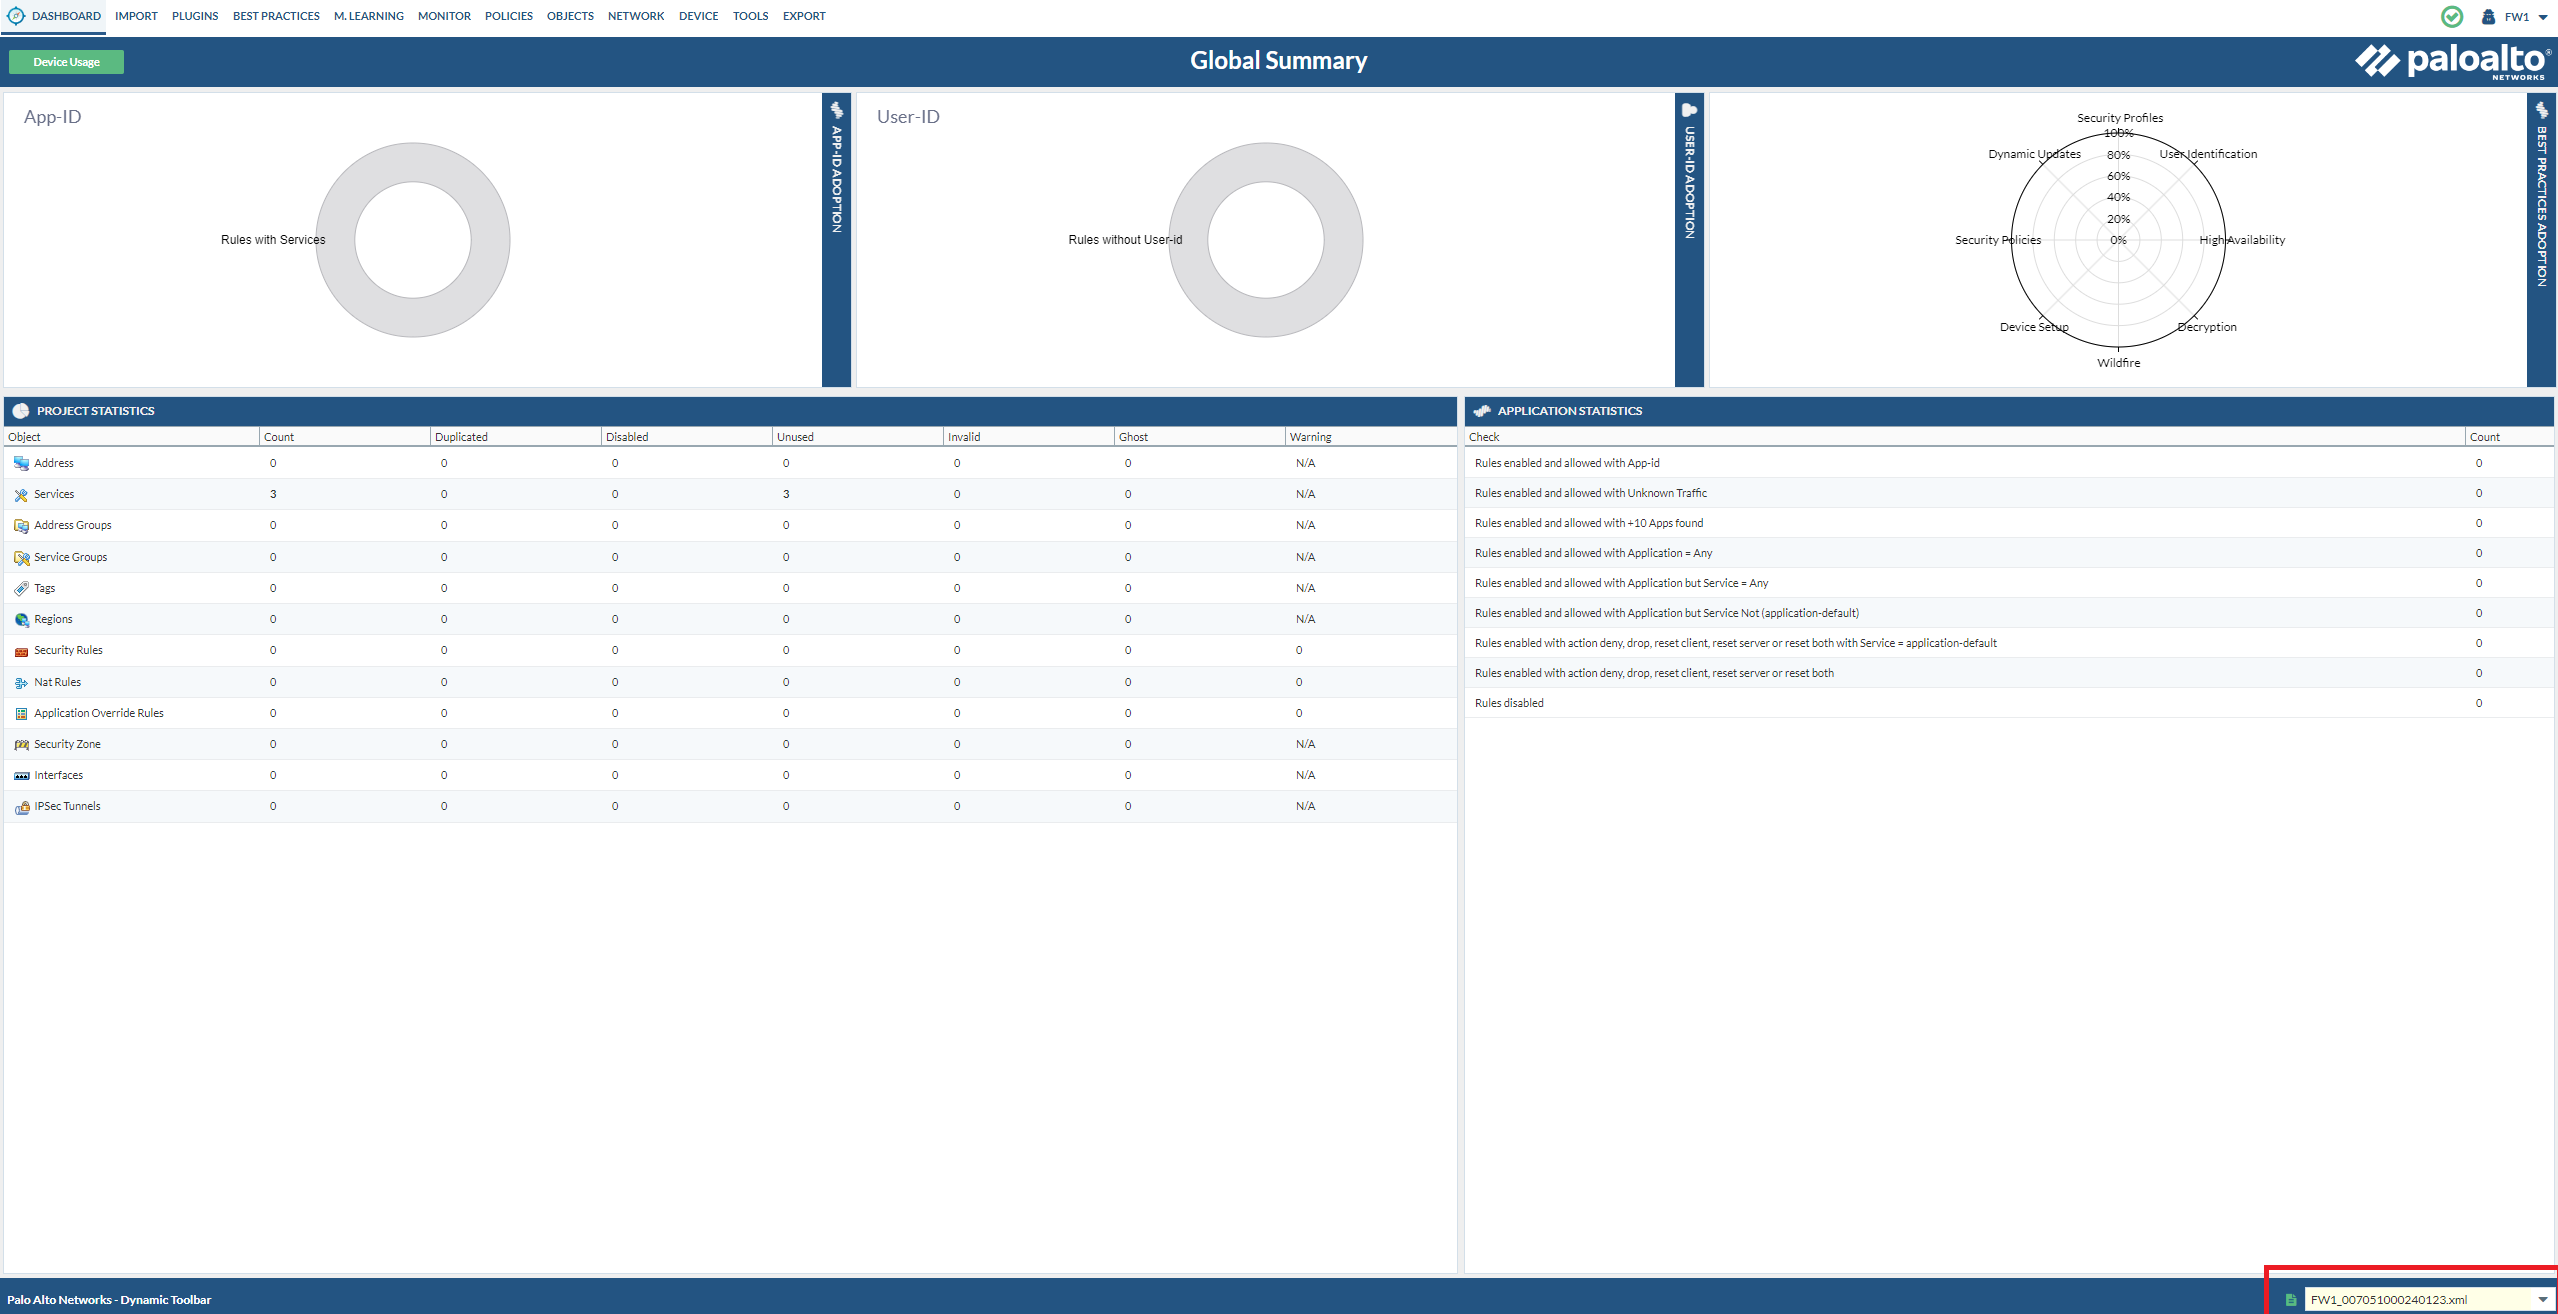
Open the project. Afterwards go to Import > and Import FW1 device

After that, we’ll get to see an overview of all the services (even invalid ones) and so forth. In the bottom right corner, that’s the current configuration file that you’re working on.
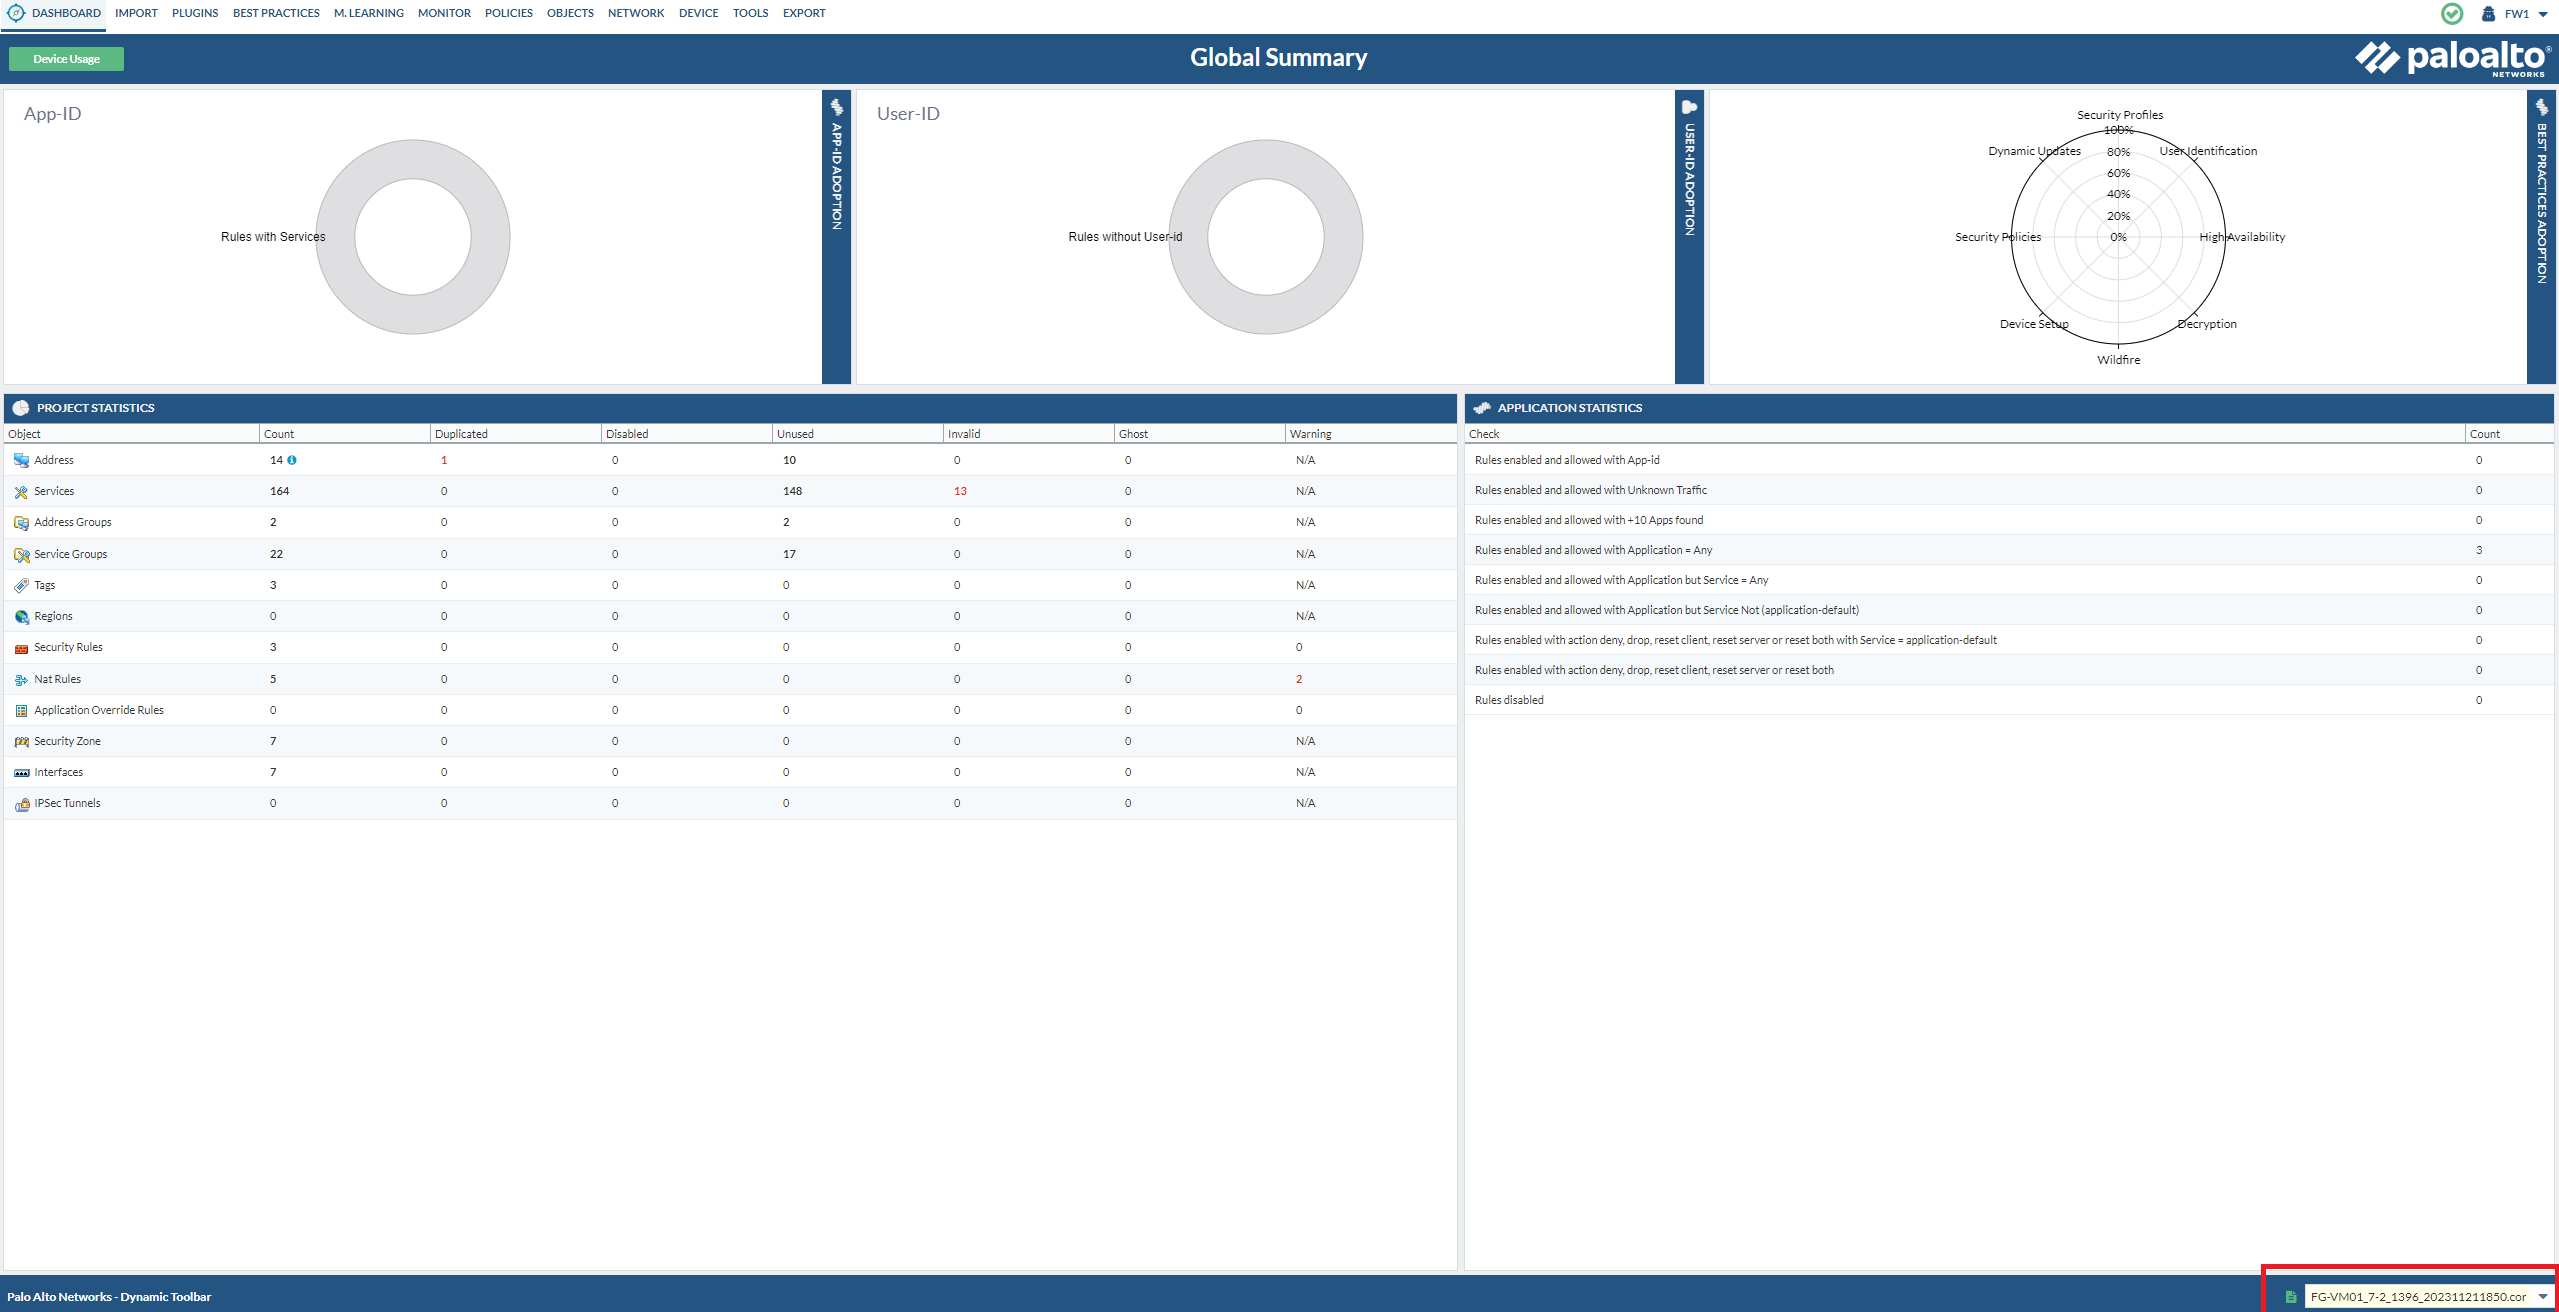
Next, go to Import > Fortinet > import the configuration file that we’ve retrieved from the FortiGate firewall and load it up here.

After that’s done, we’ll see the following below. An overview with invalid services, even. More on that later. But again on the bottom right corner, we see the current working configuration file we’re on. This time around, it’s the FortiGate one.
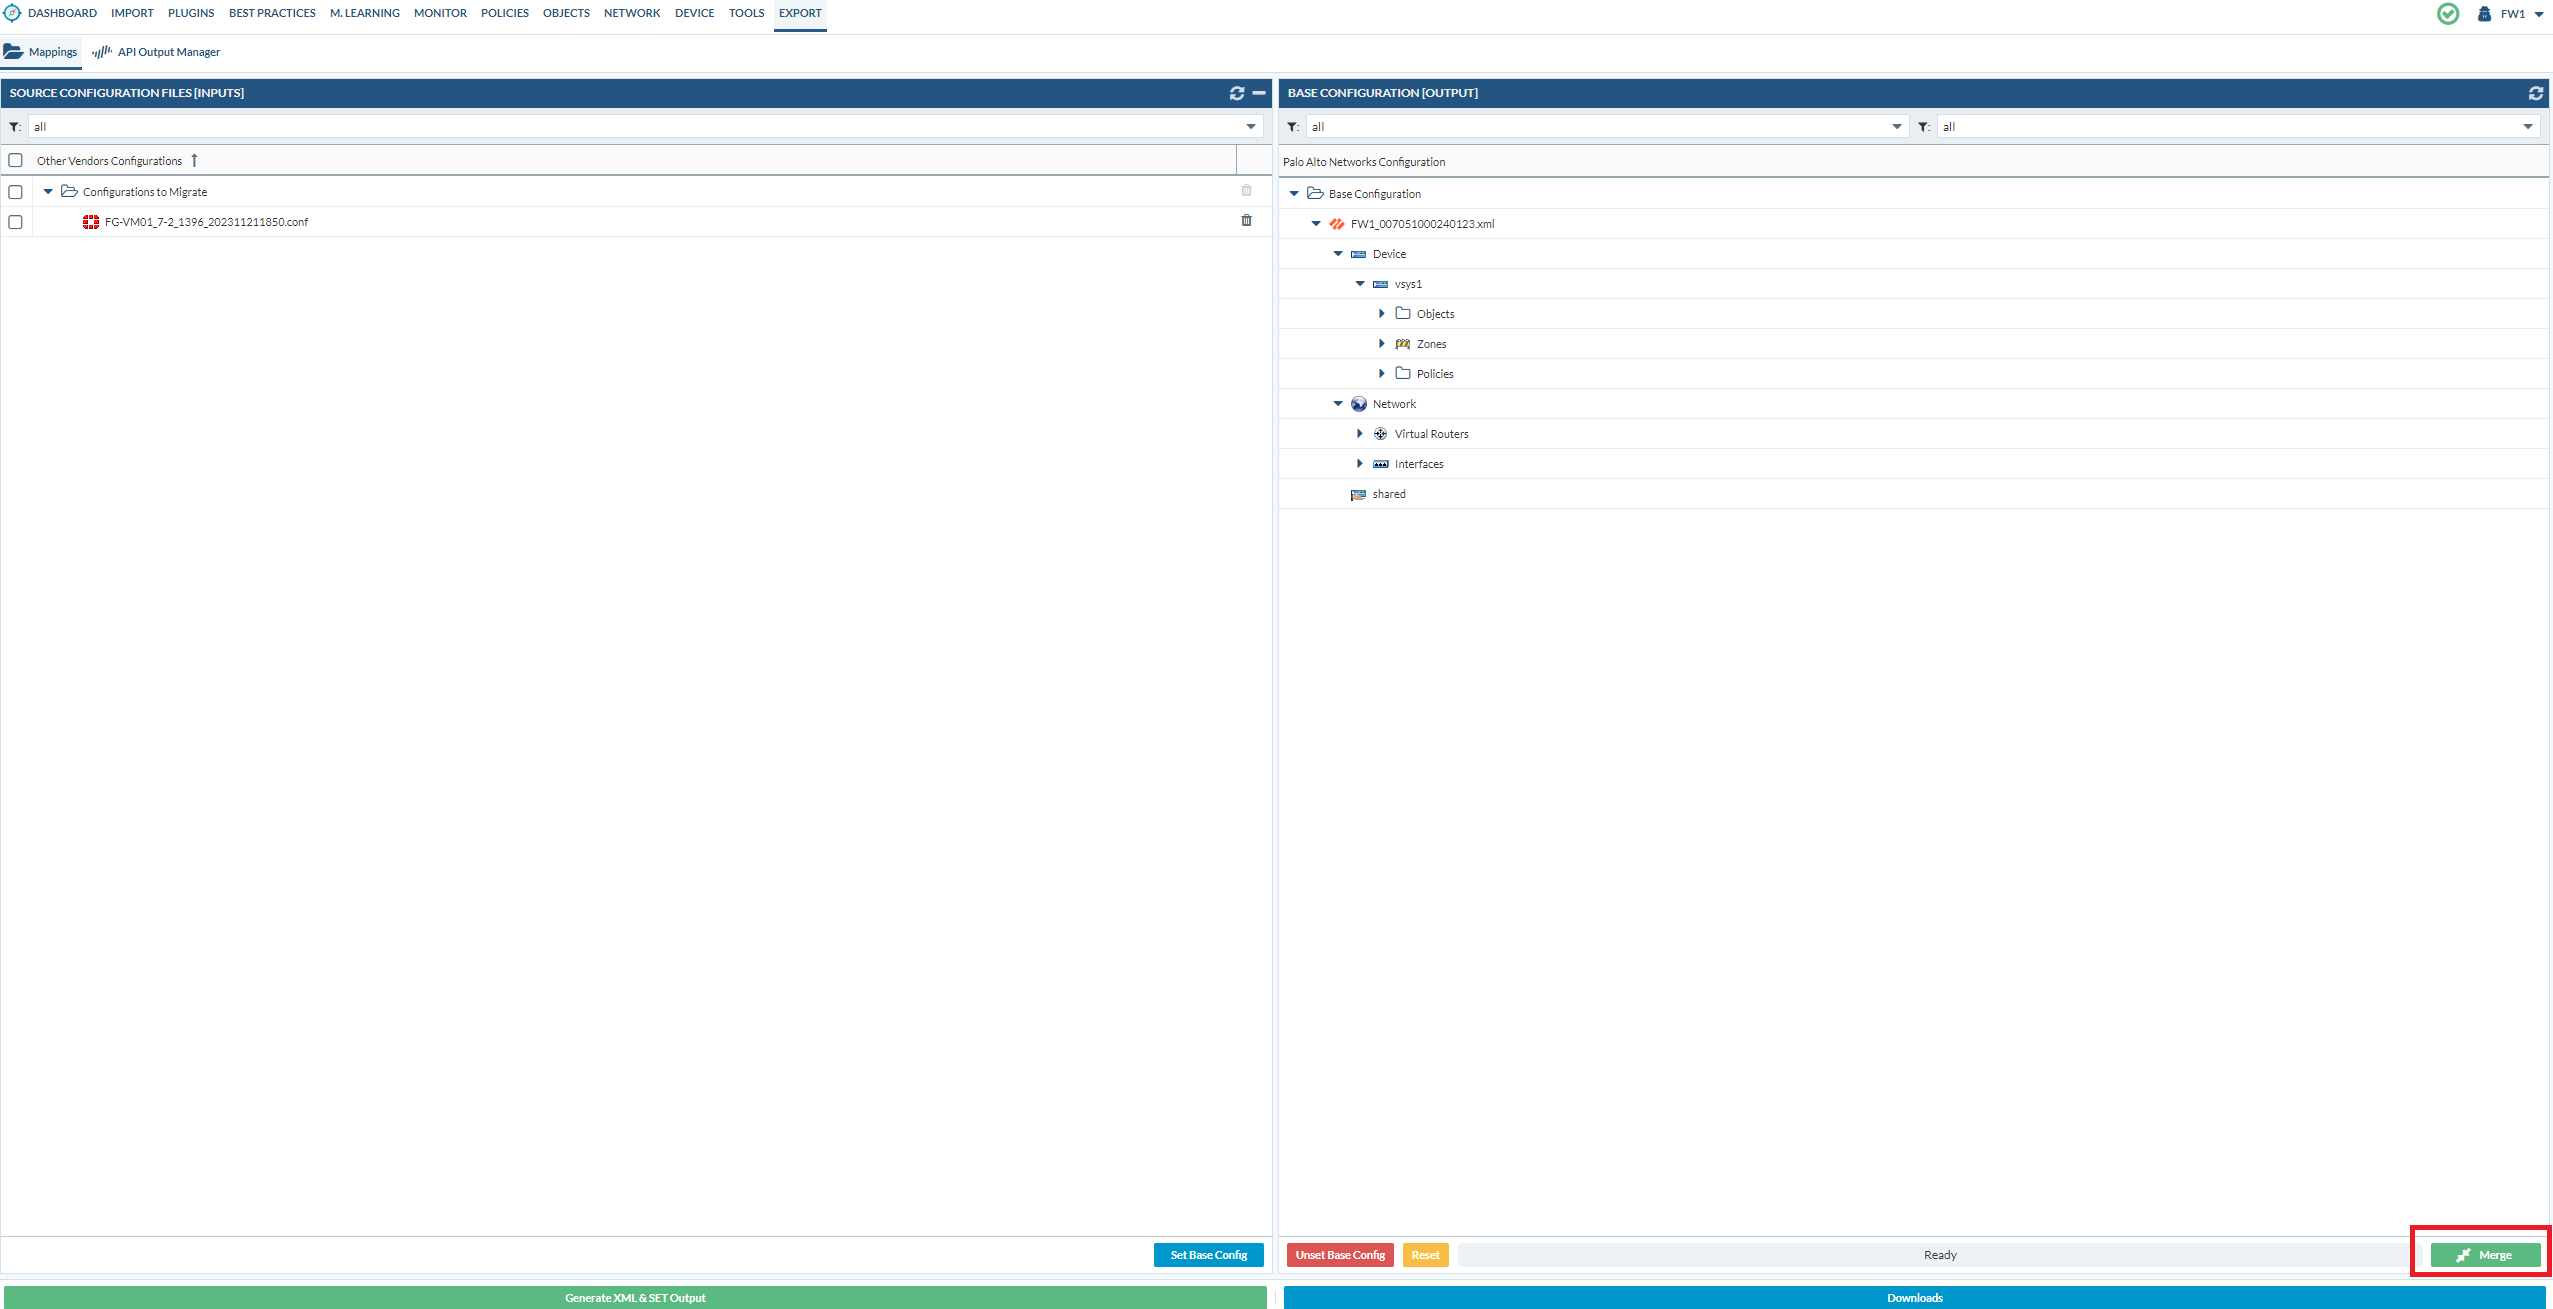
We have to merge the configuration files from the PAN & FortiGate together.
Go to Export > Mappings
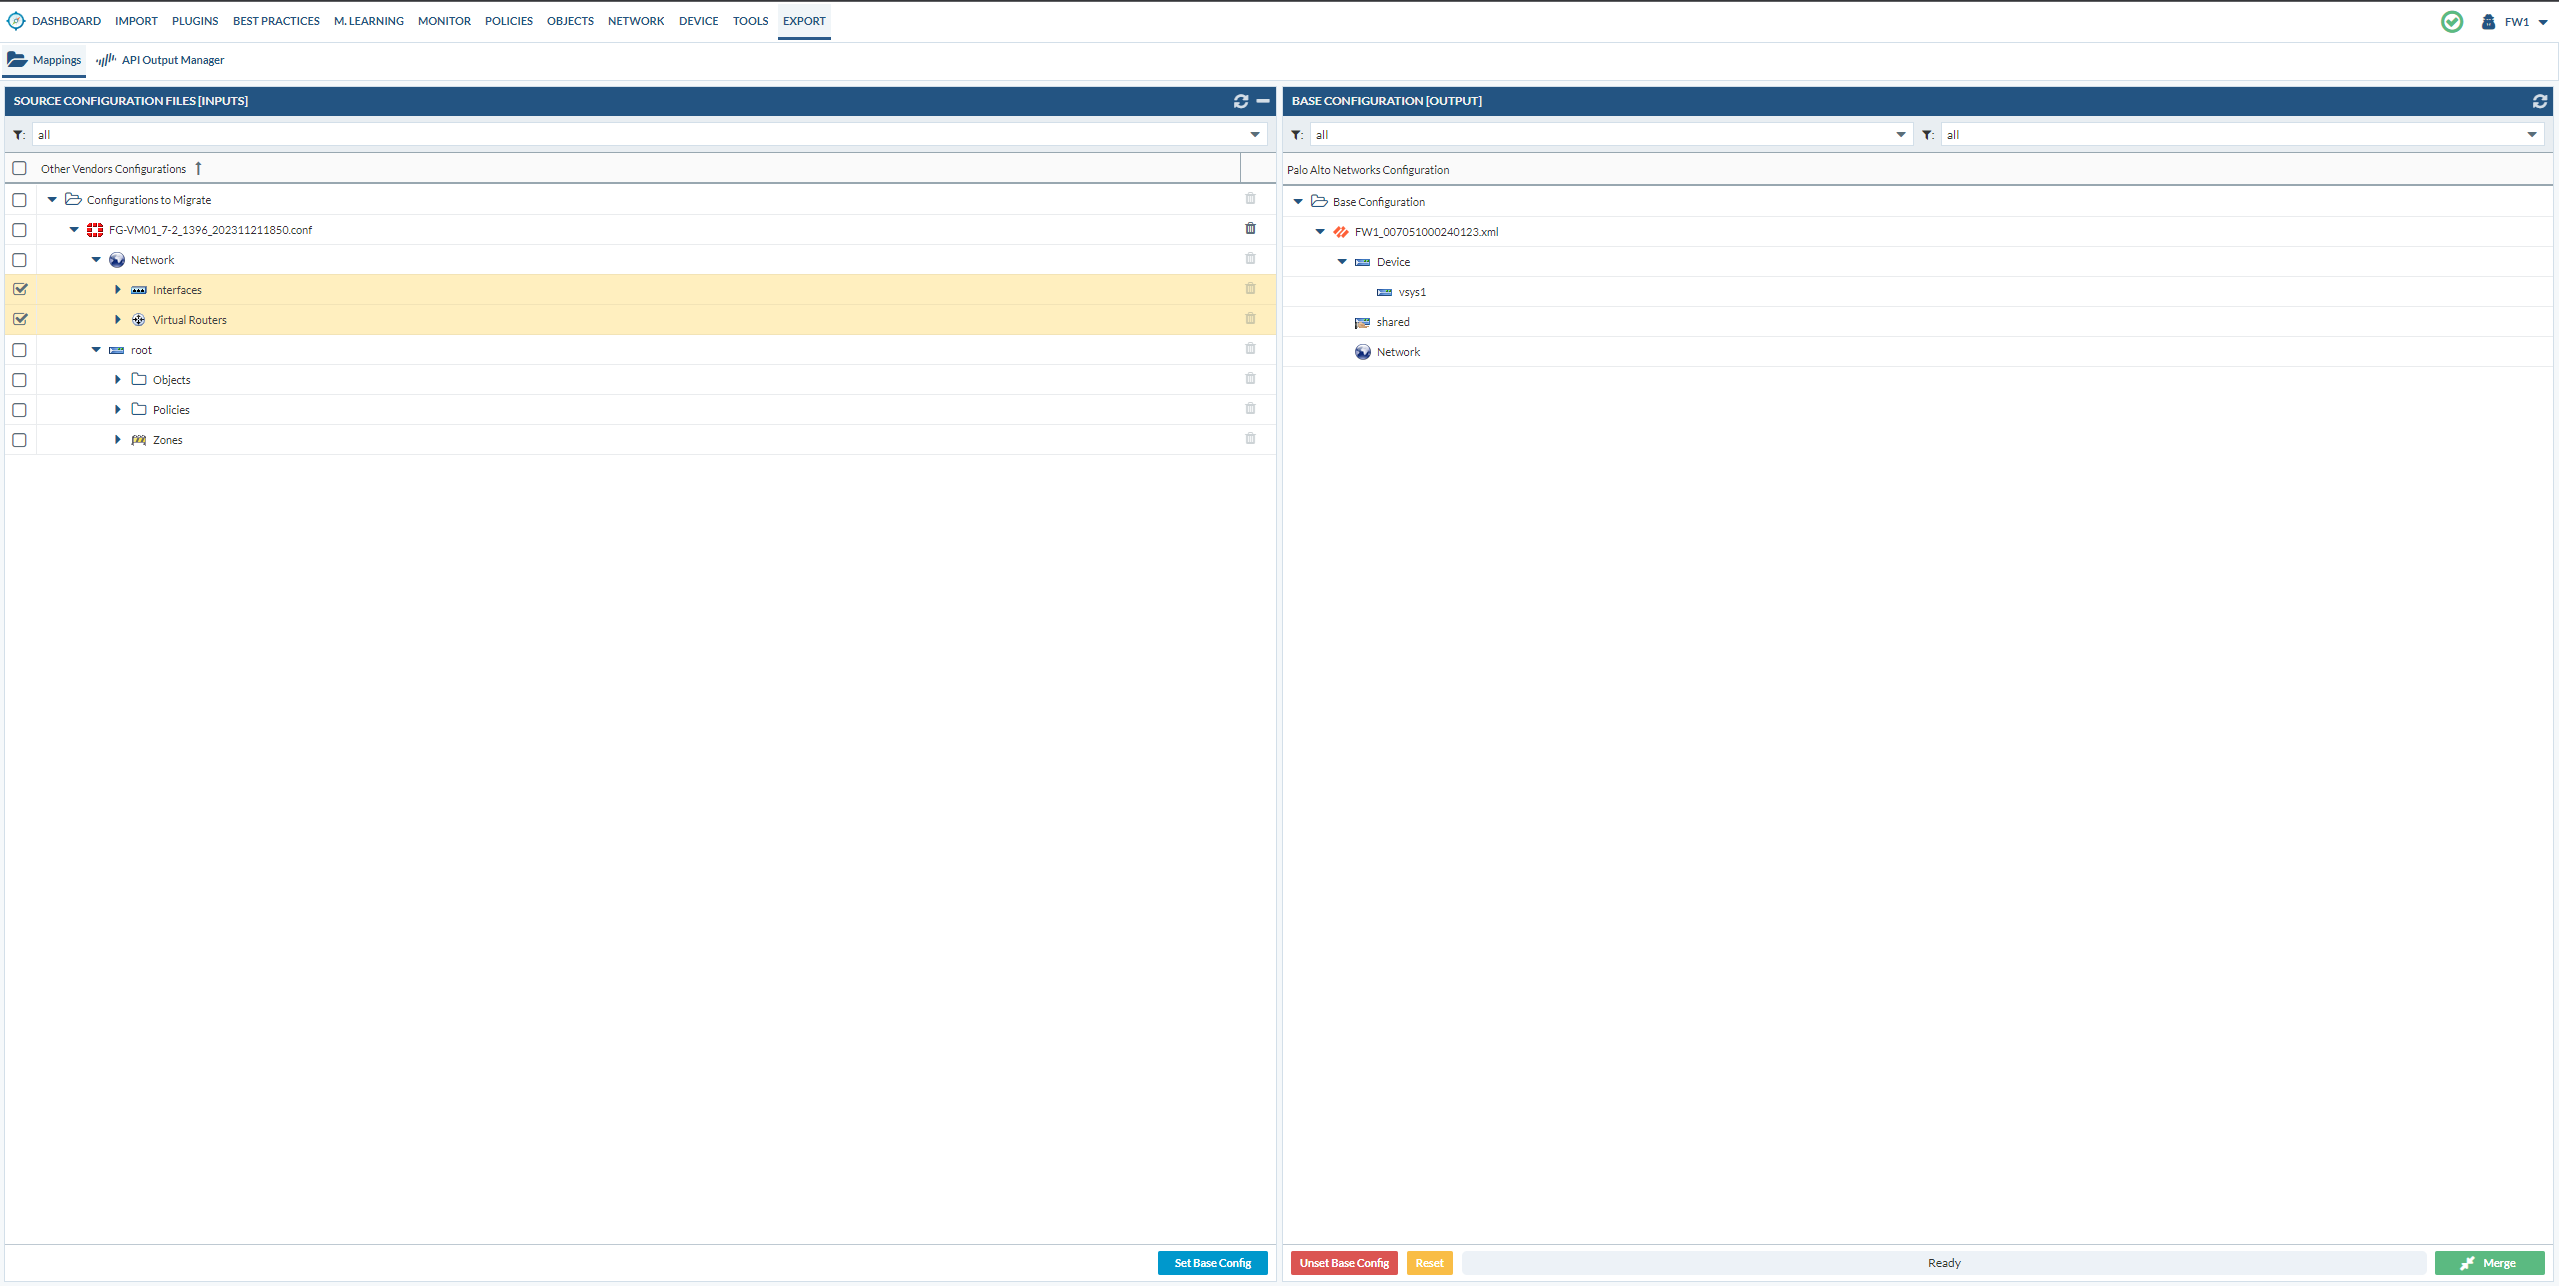
Drag & drop, so that it looks like below. And then merge it.
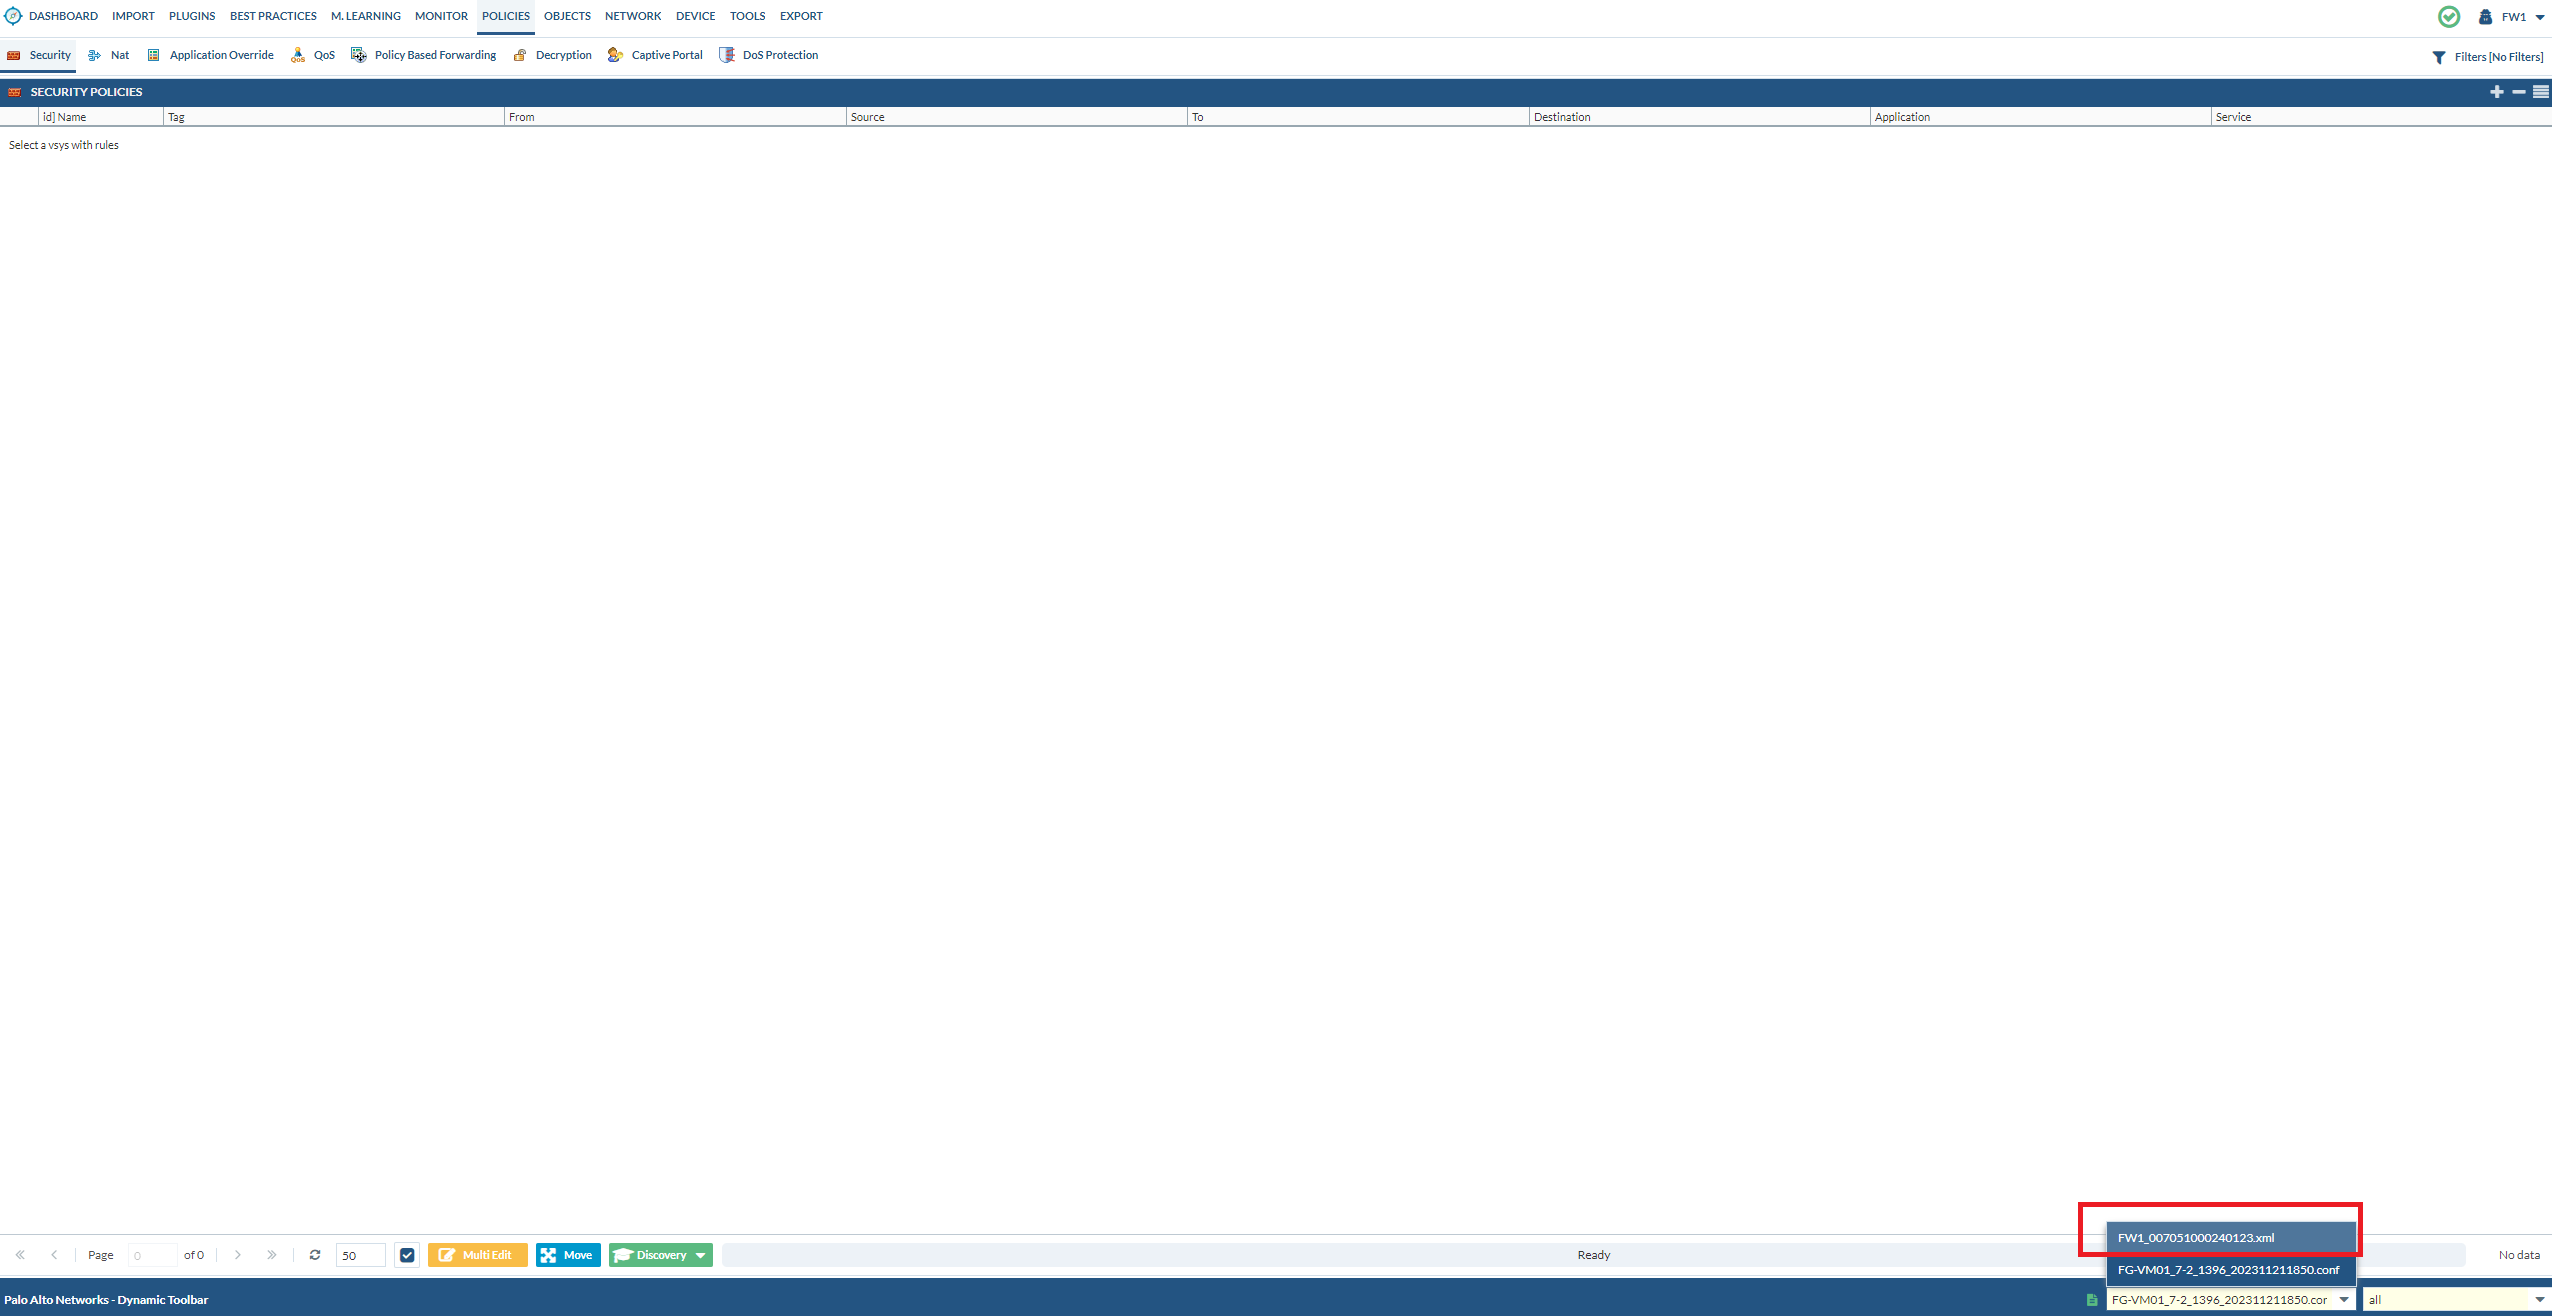
Once that’s done, go to policies and you’ll see that there’s virtually nothing. That’s because the loaded file is the FortiGate file, which we’ve migrated over to the PAN file.
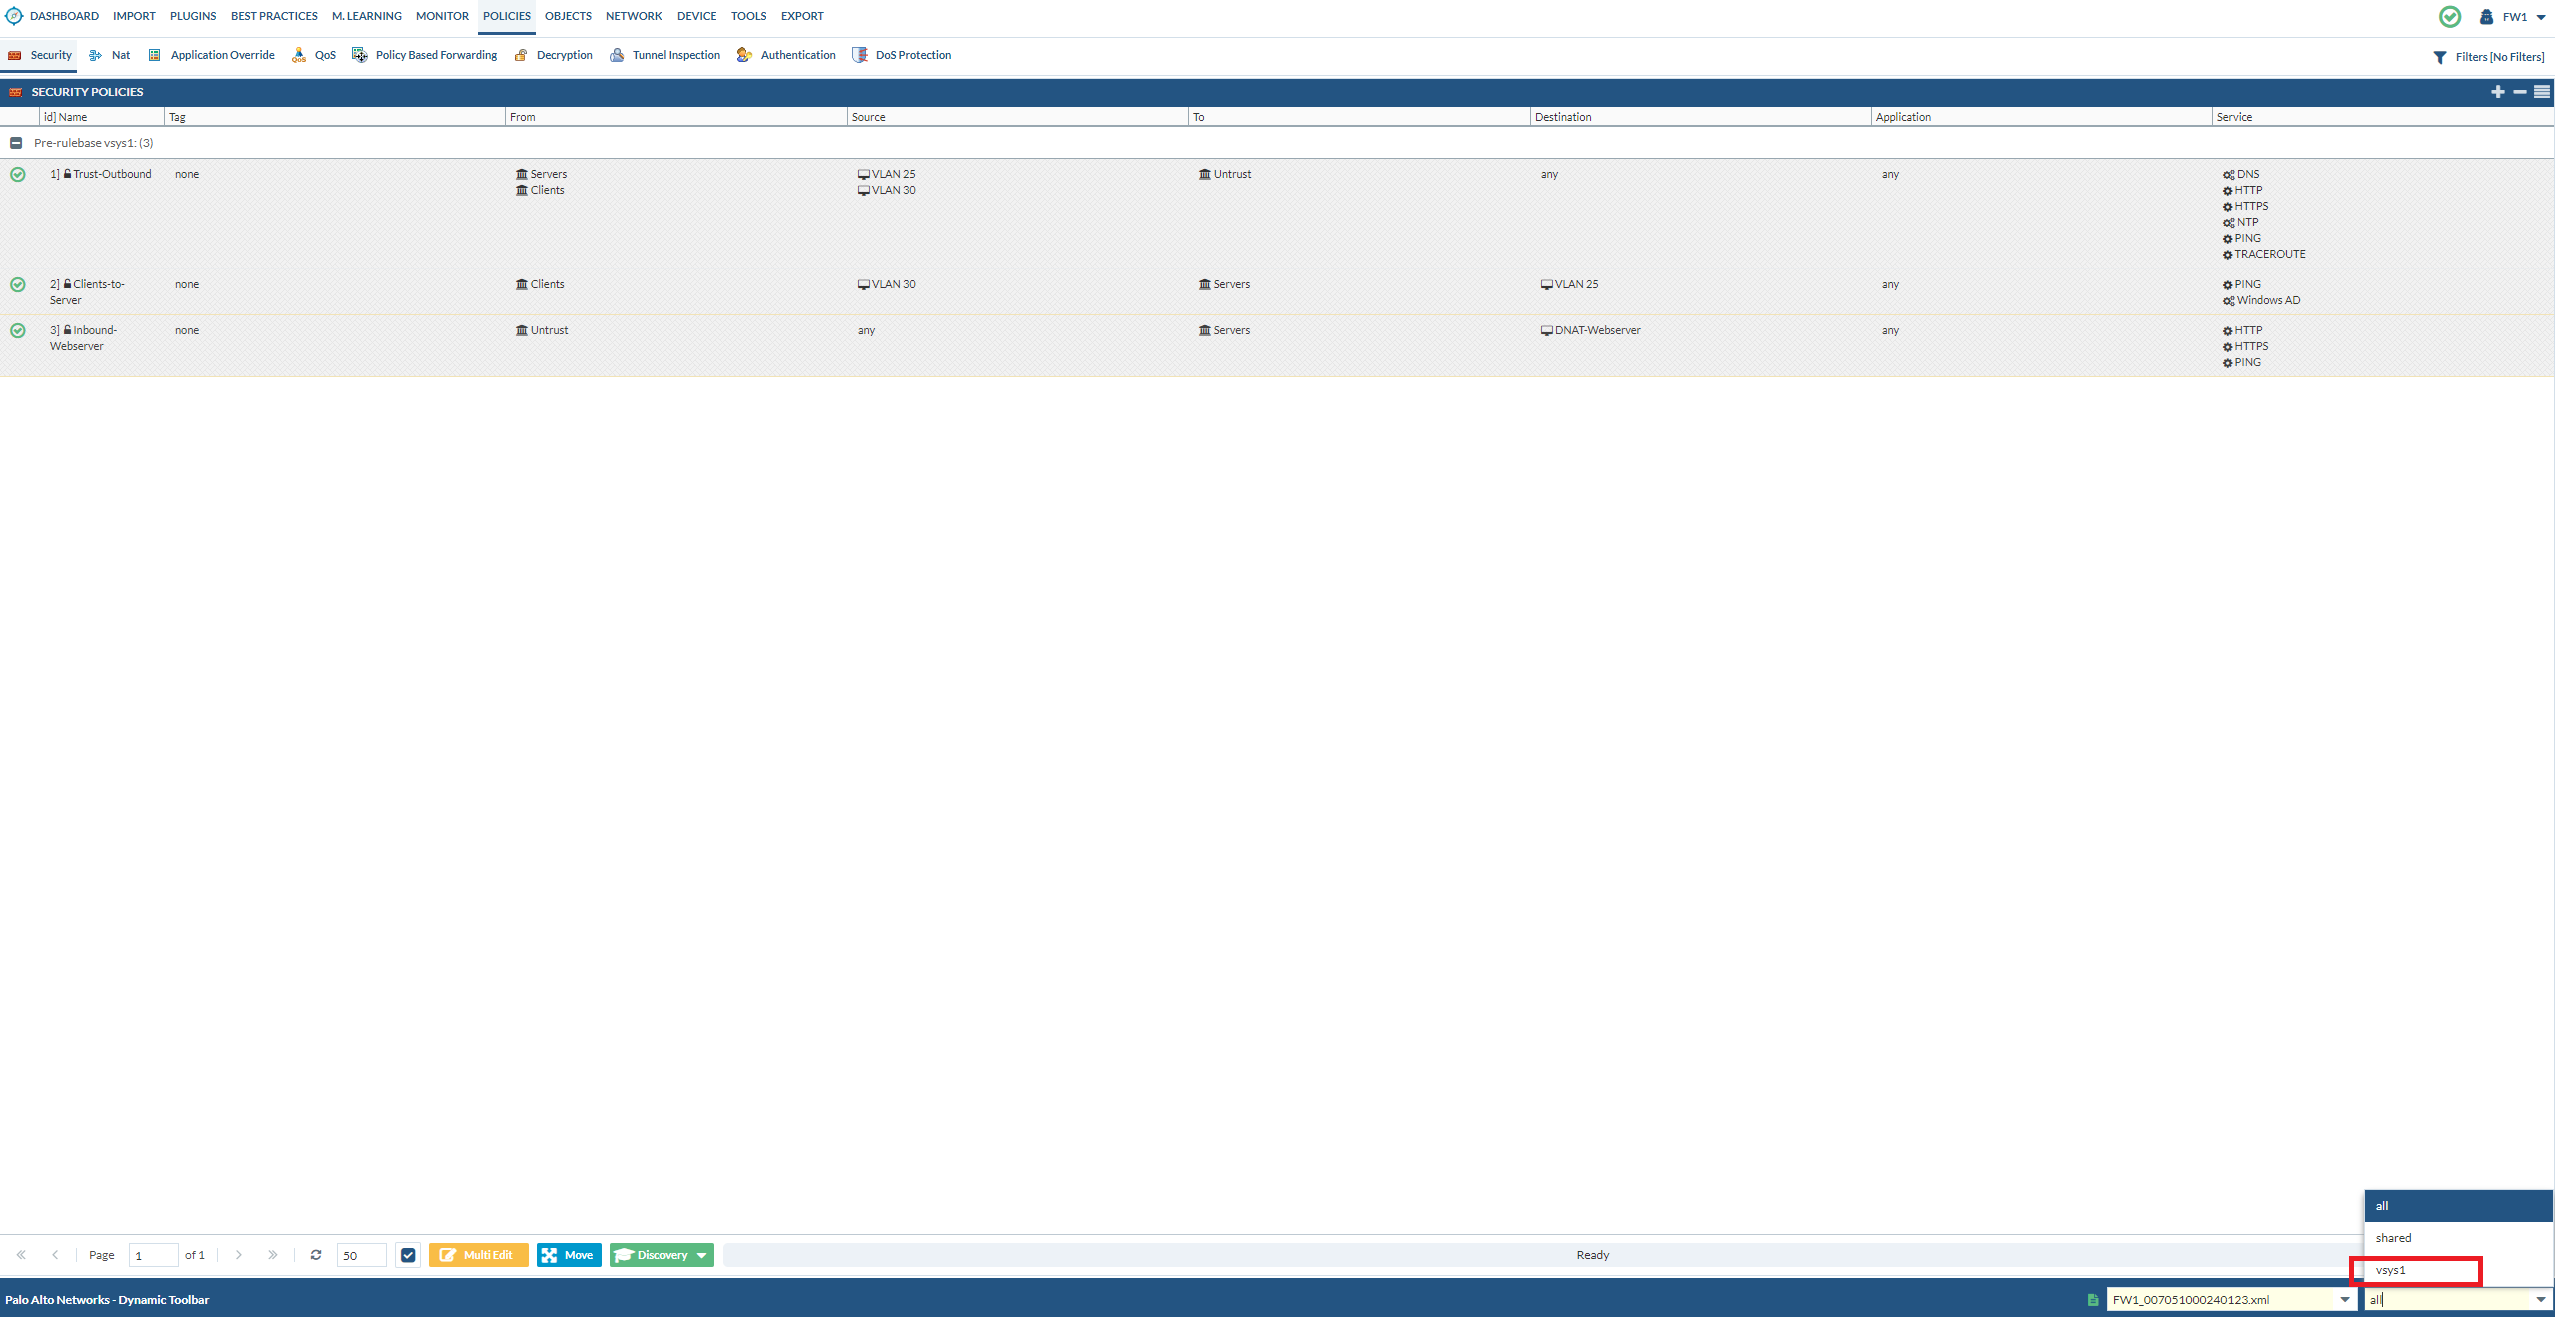
After loading the PAN file, you should see the policies coming up. Change it to vsys1 if you want to make any changes to your security policies at this point.
Remapping the interface naming
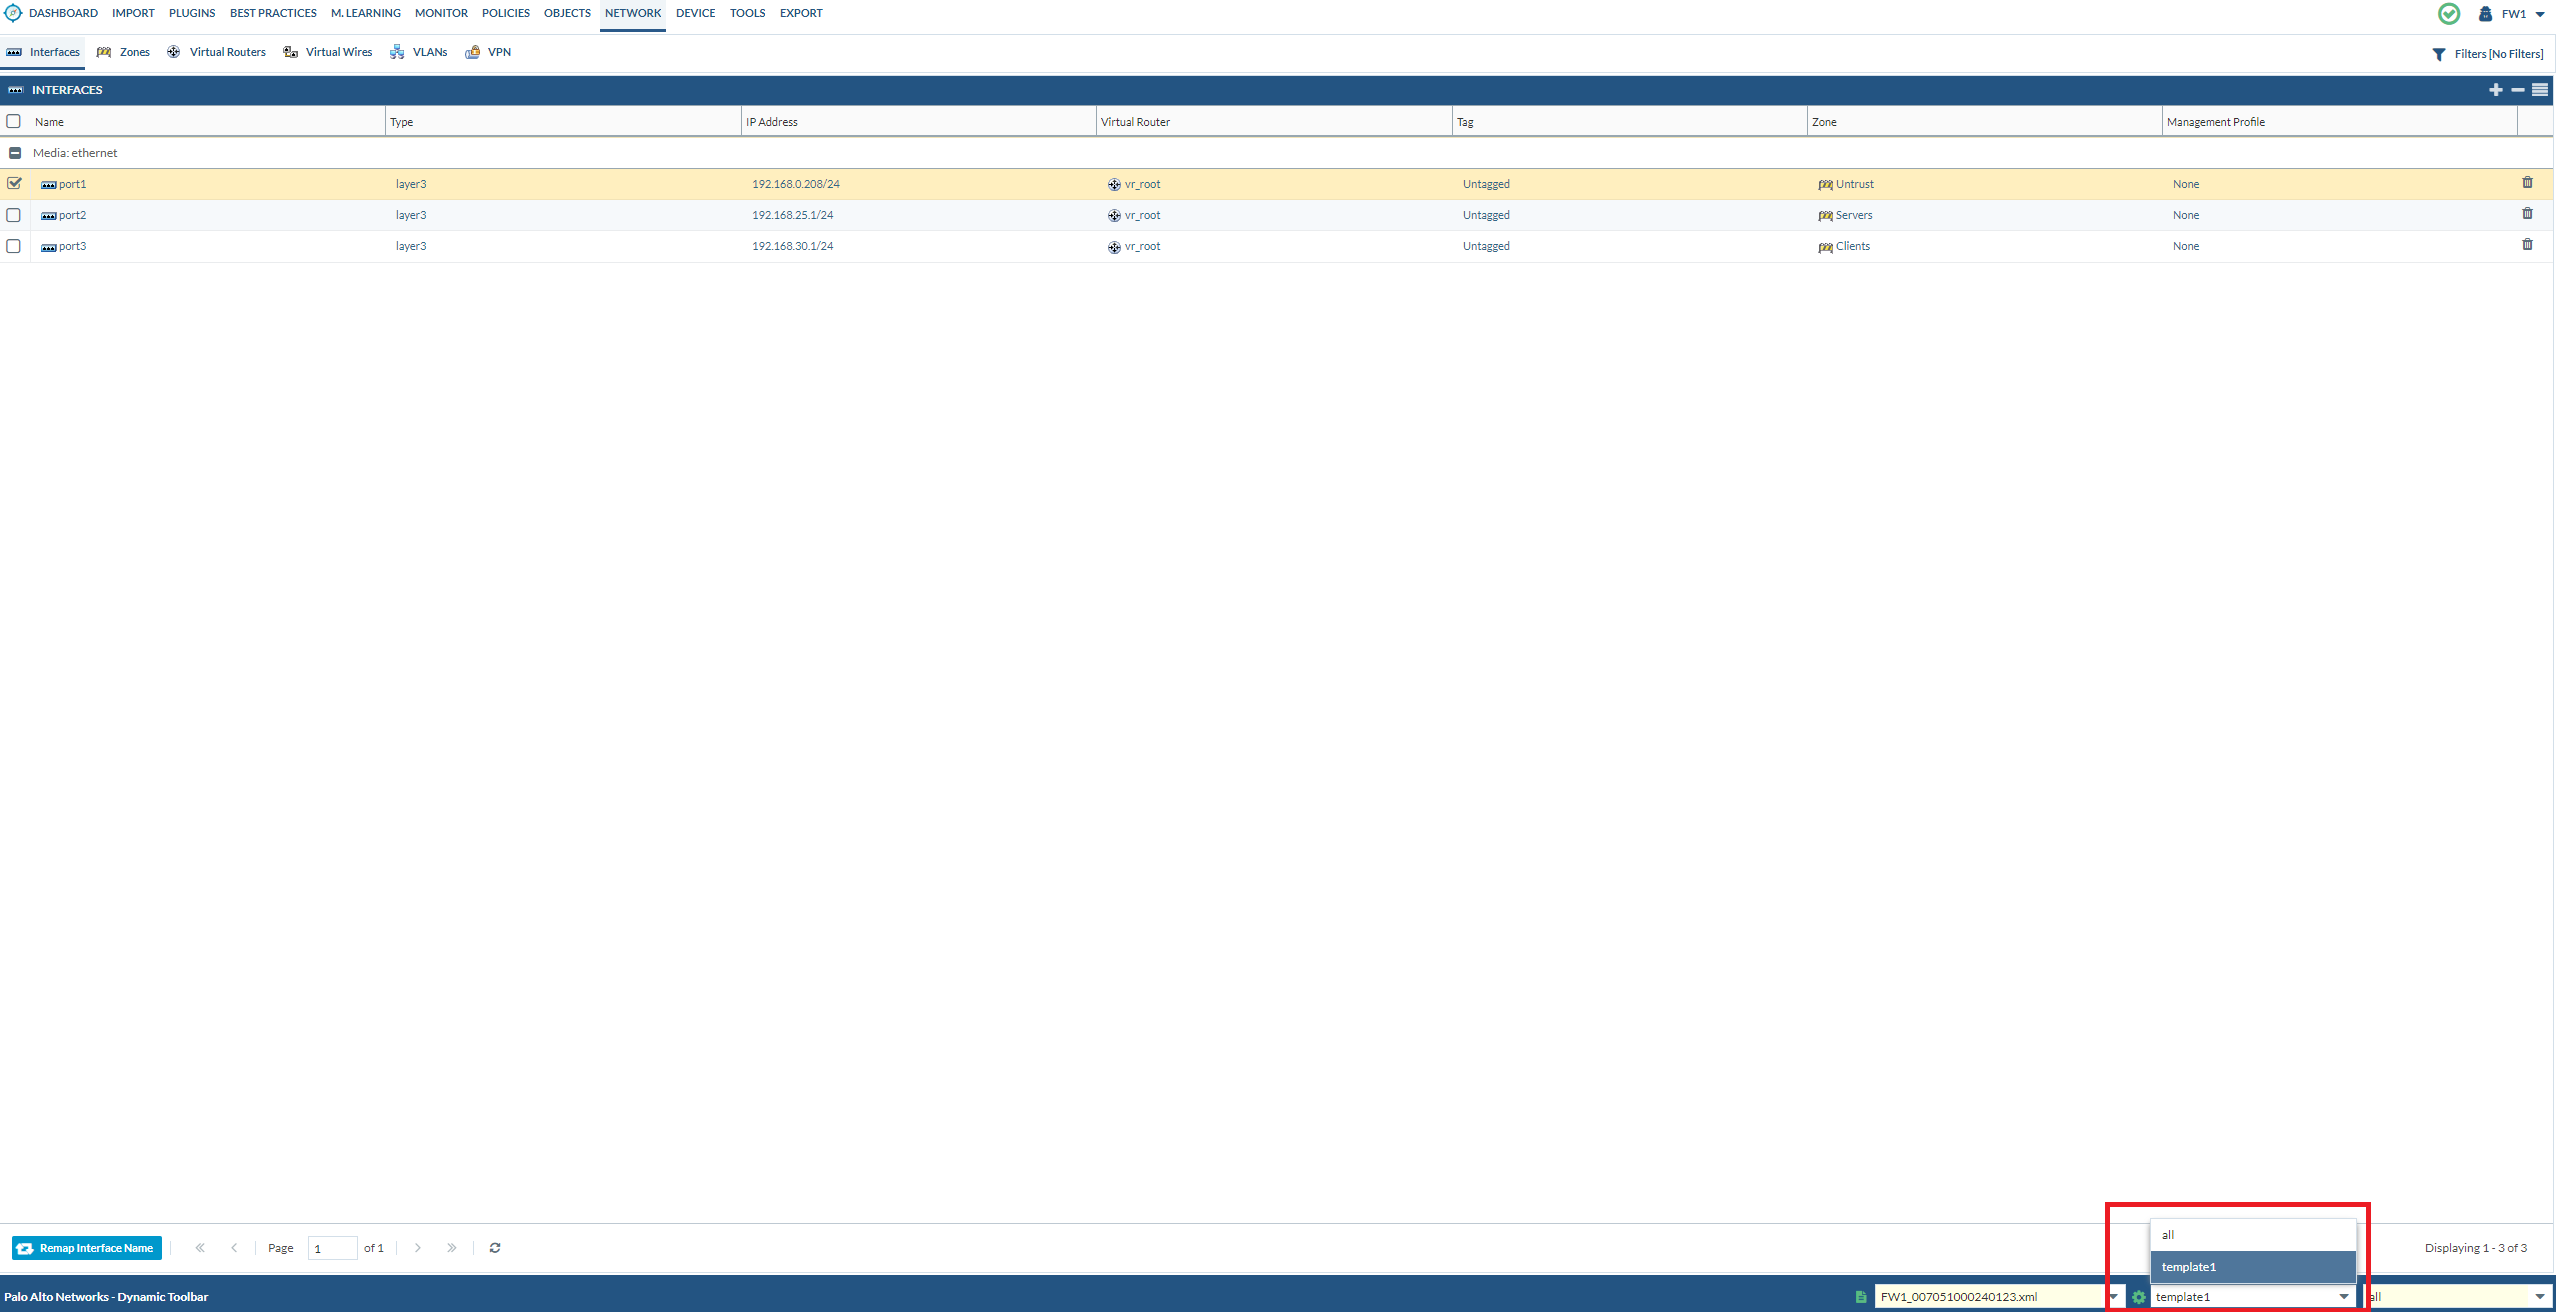
Go to interfaces and make sure that you’ve loaded the PAN file.
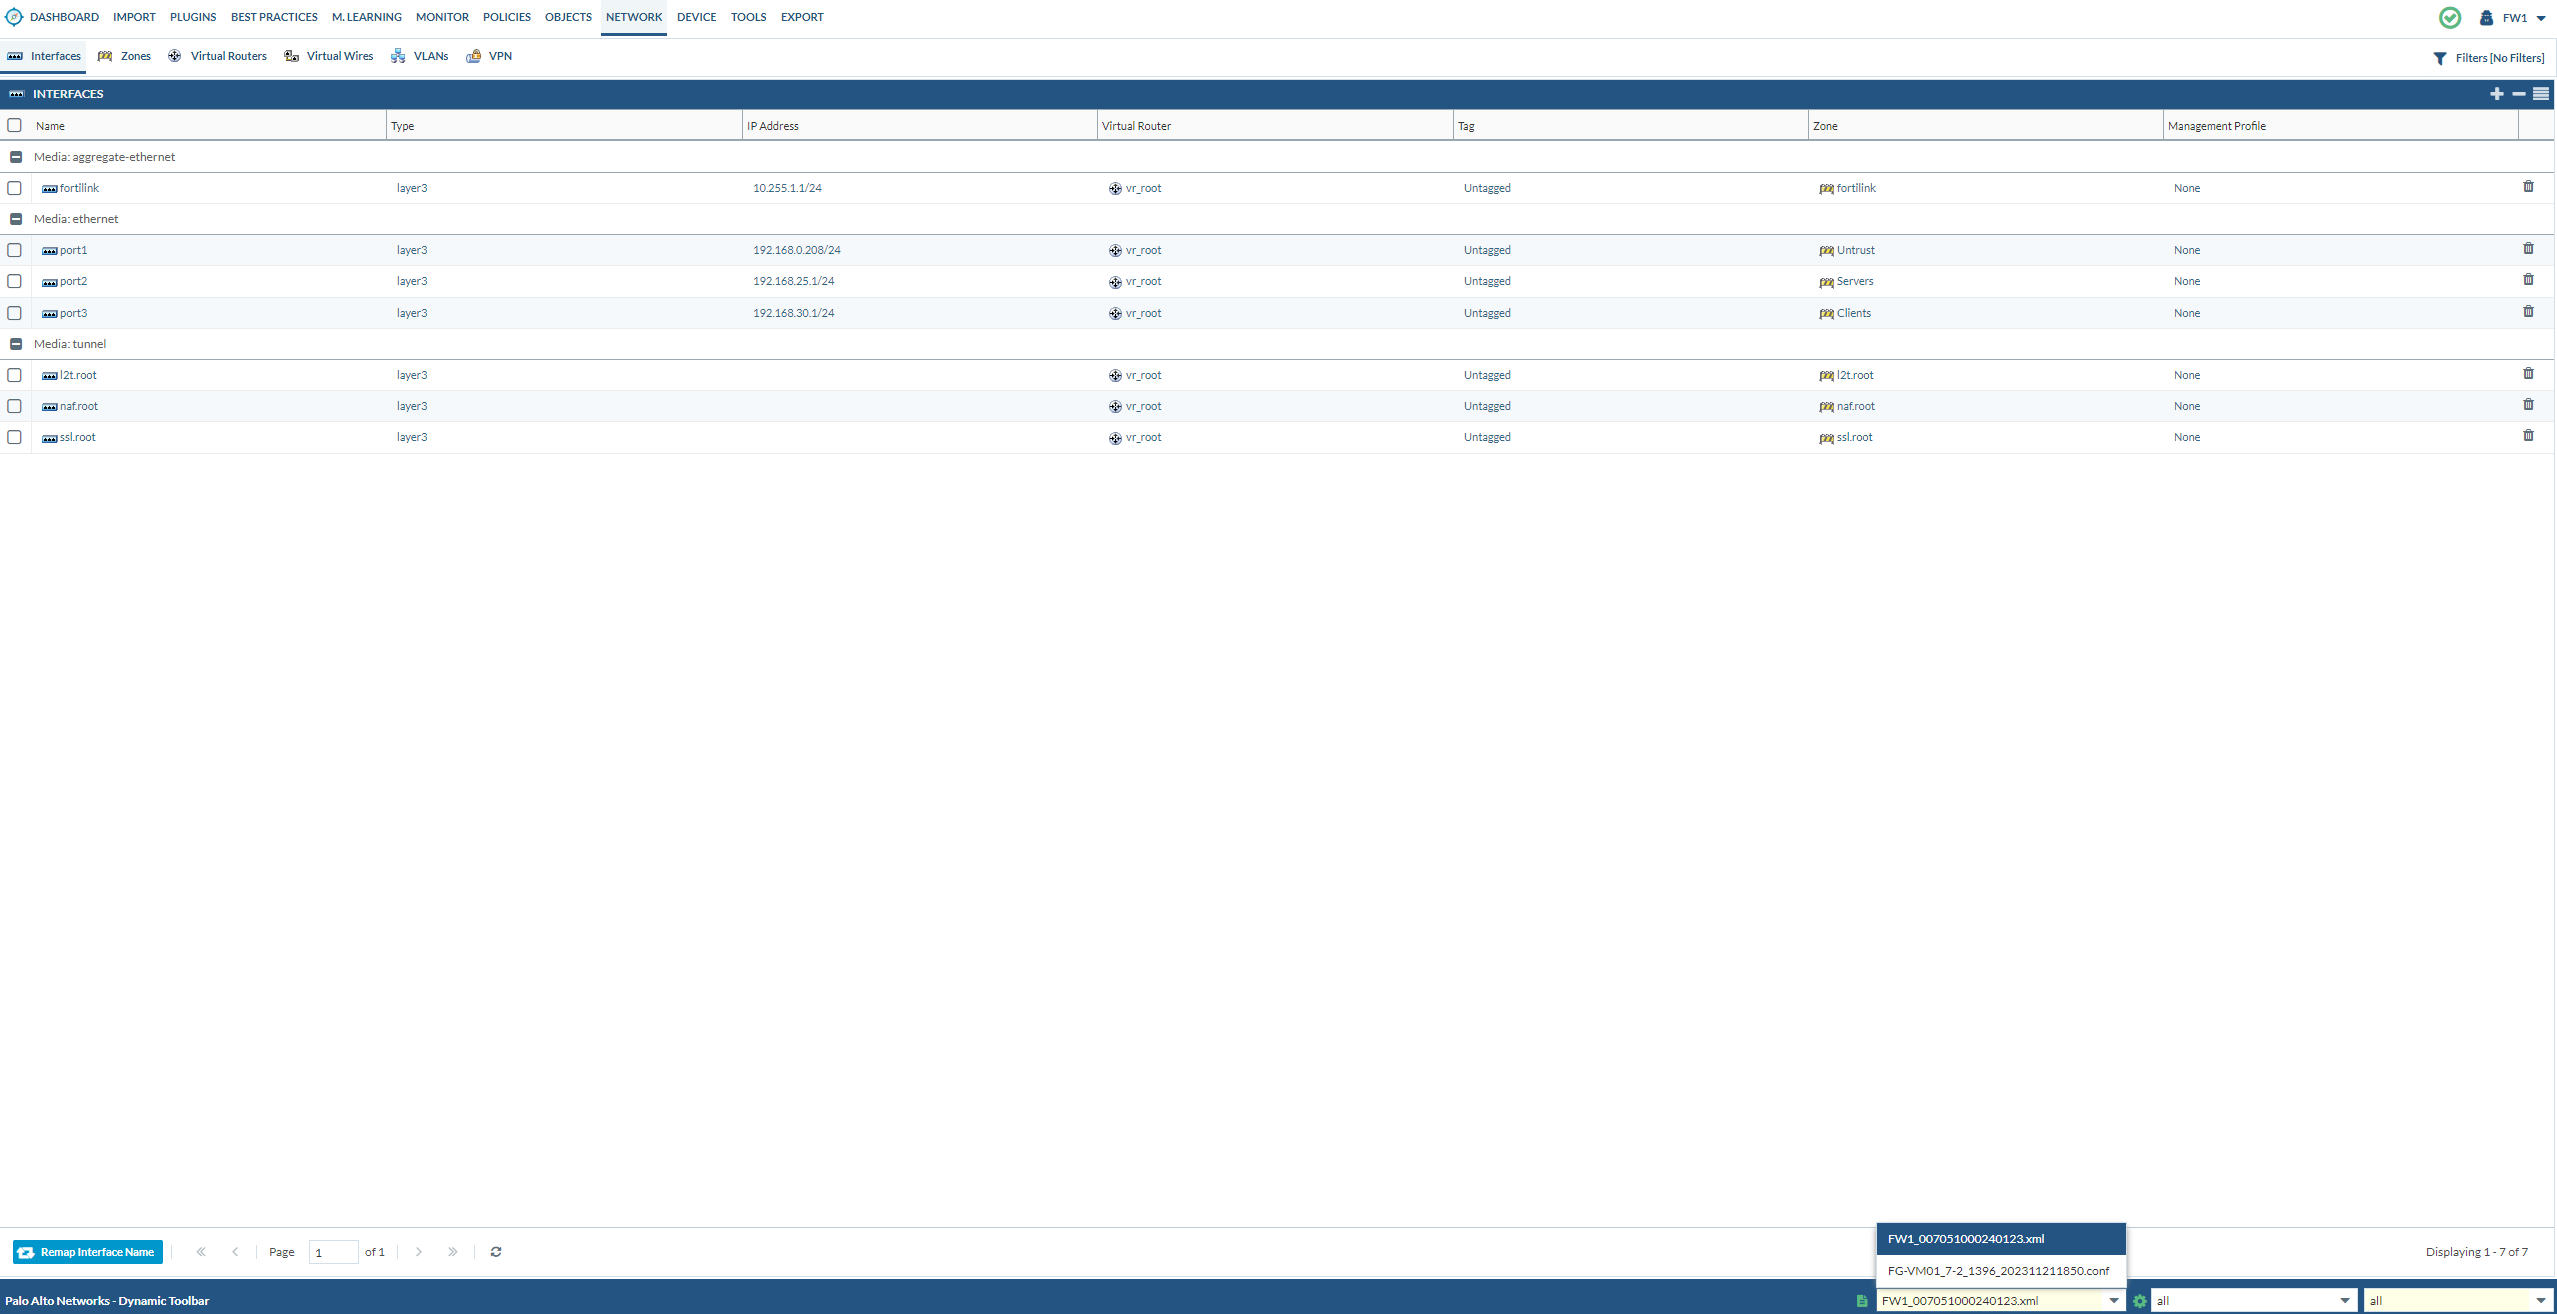
We don’t need the “fortilink, l2troot, nafroot and sslroot” interfaces anymore. So we can delete those.

We can also remove those associated zones with “fortilink, l2troot, nafroot and sslroot”

Next, select template1 before we move on.
We’ll be remapping the interface names
- Port1 -> Ethernet1/1
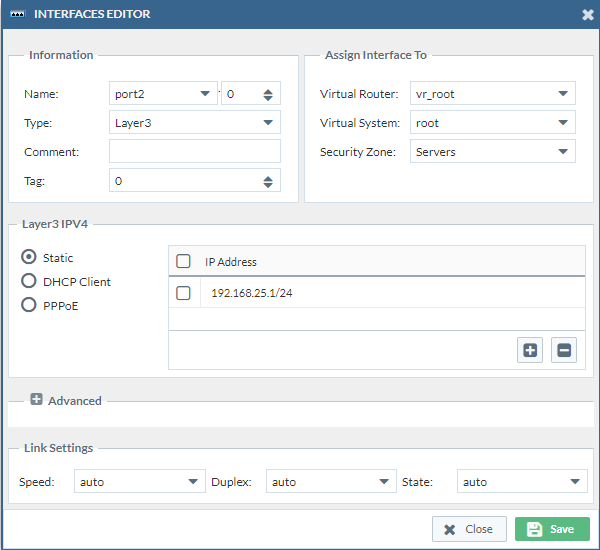
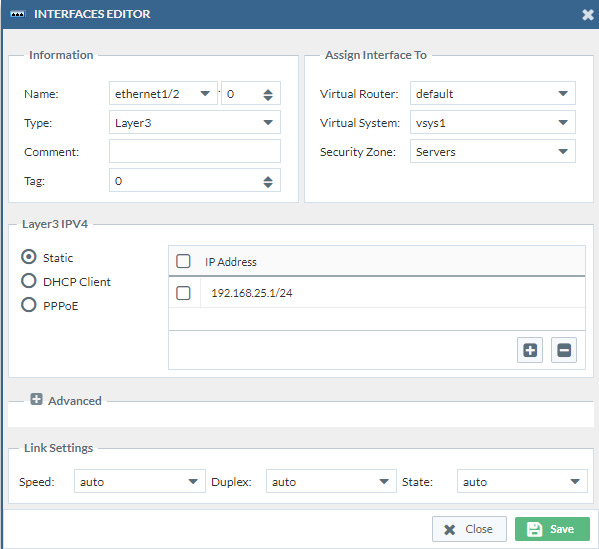
- Port2 -> Ethernet1/2
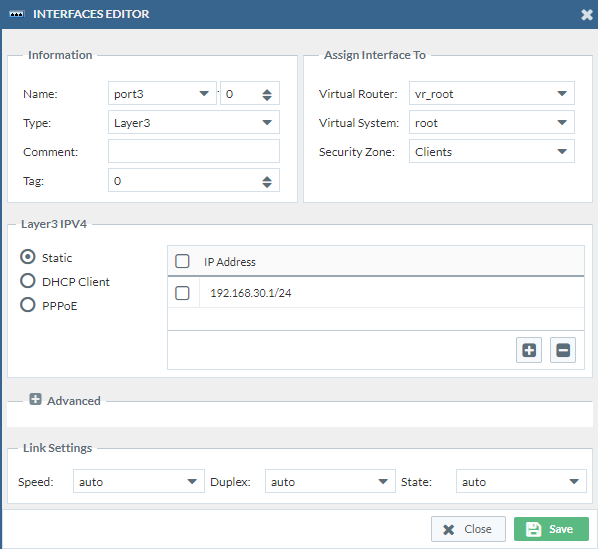
- Port3 -> Ethernet1/3
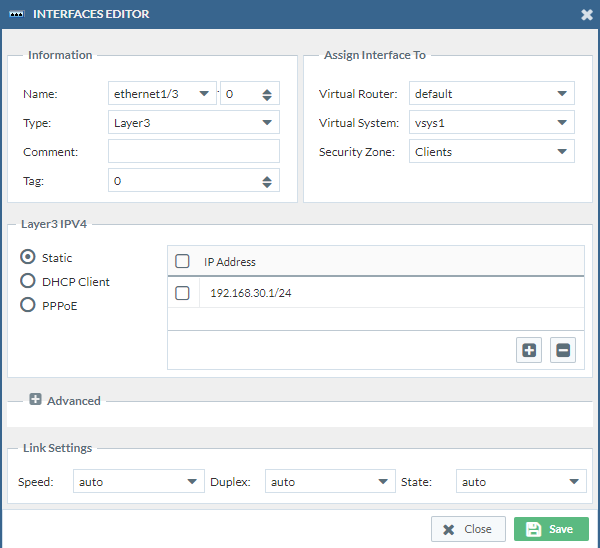
Then we have to change the virtual router to “default” which is the only virtual router we have on our PAN firewall currently. Change the Virtual System to “vsys1”. We do this three times. (Double check if the security zones are correct)
Port1:


Port2:
Port3:
Finalizing the virtual router
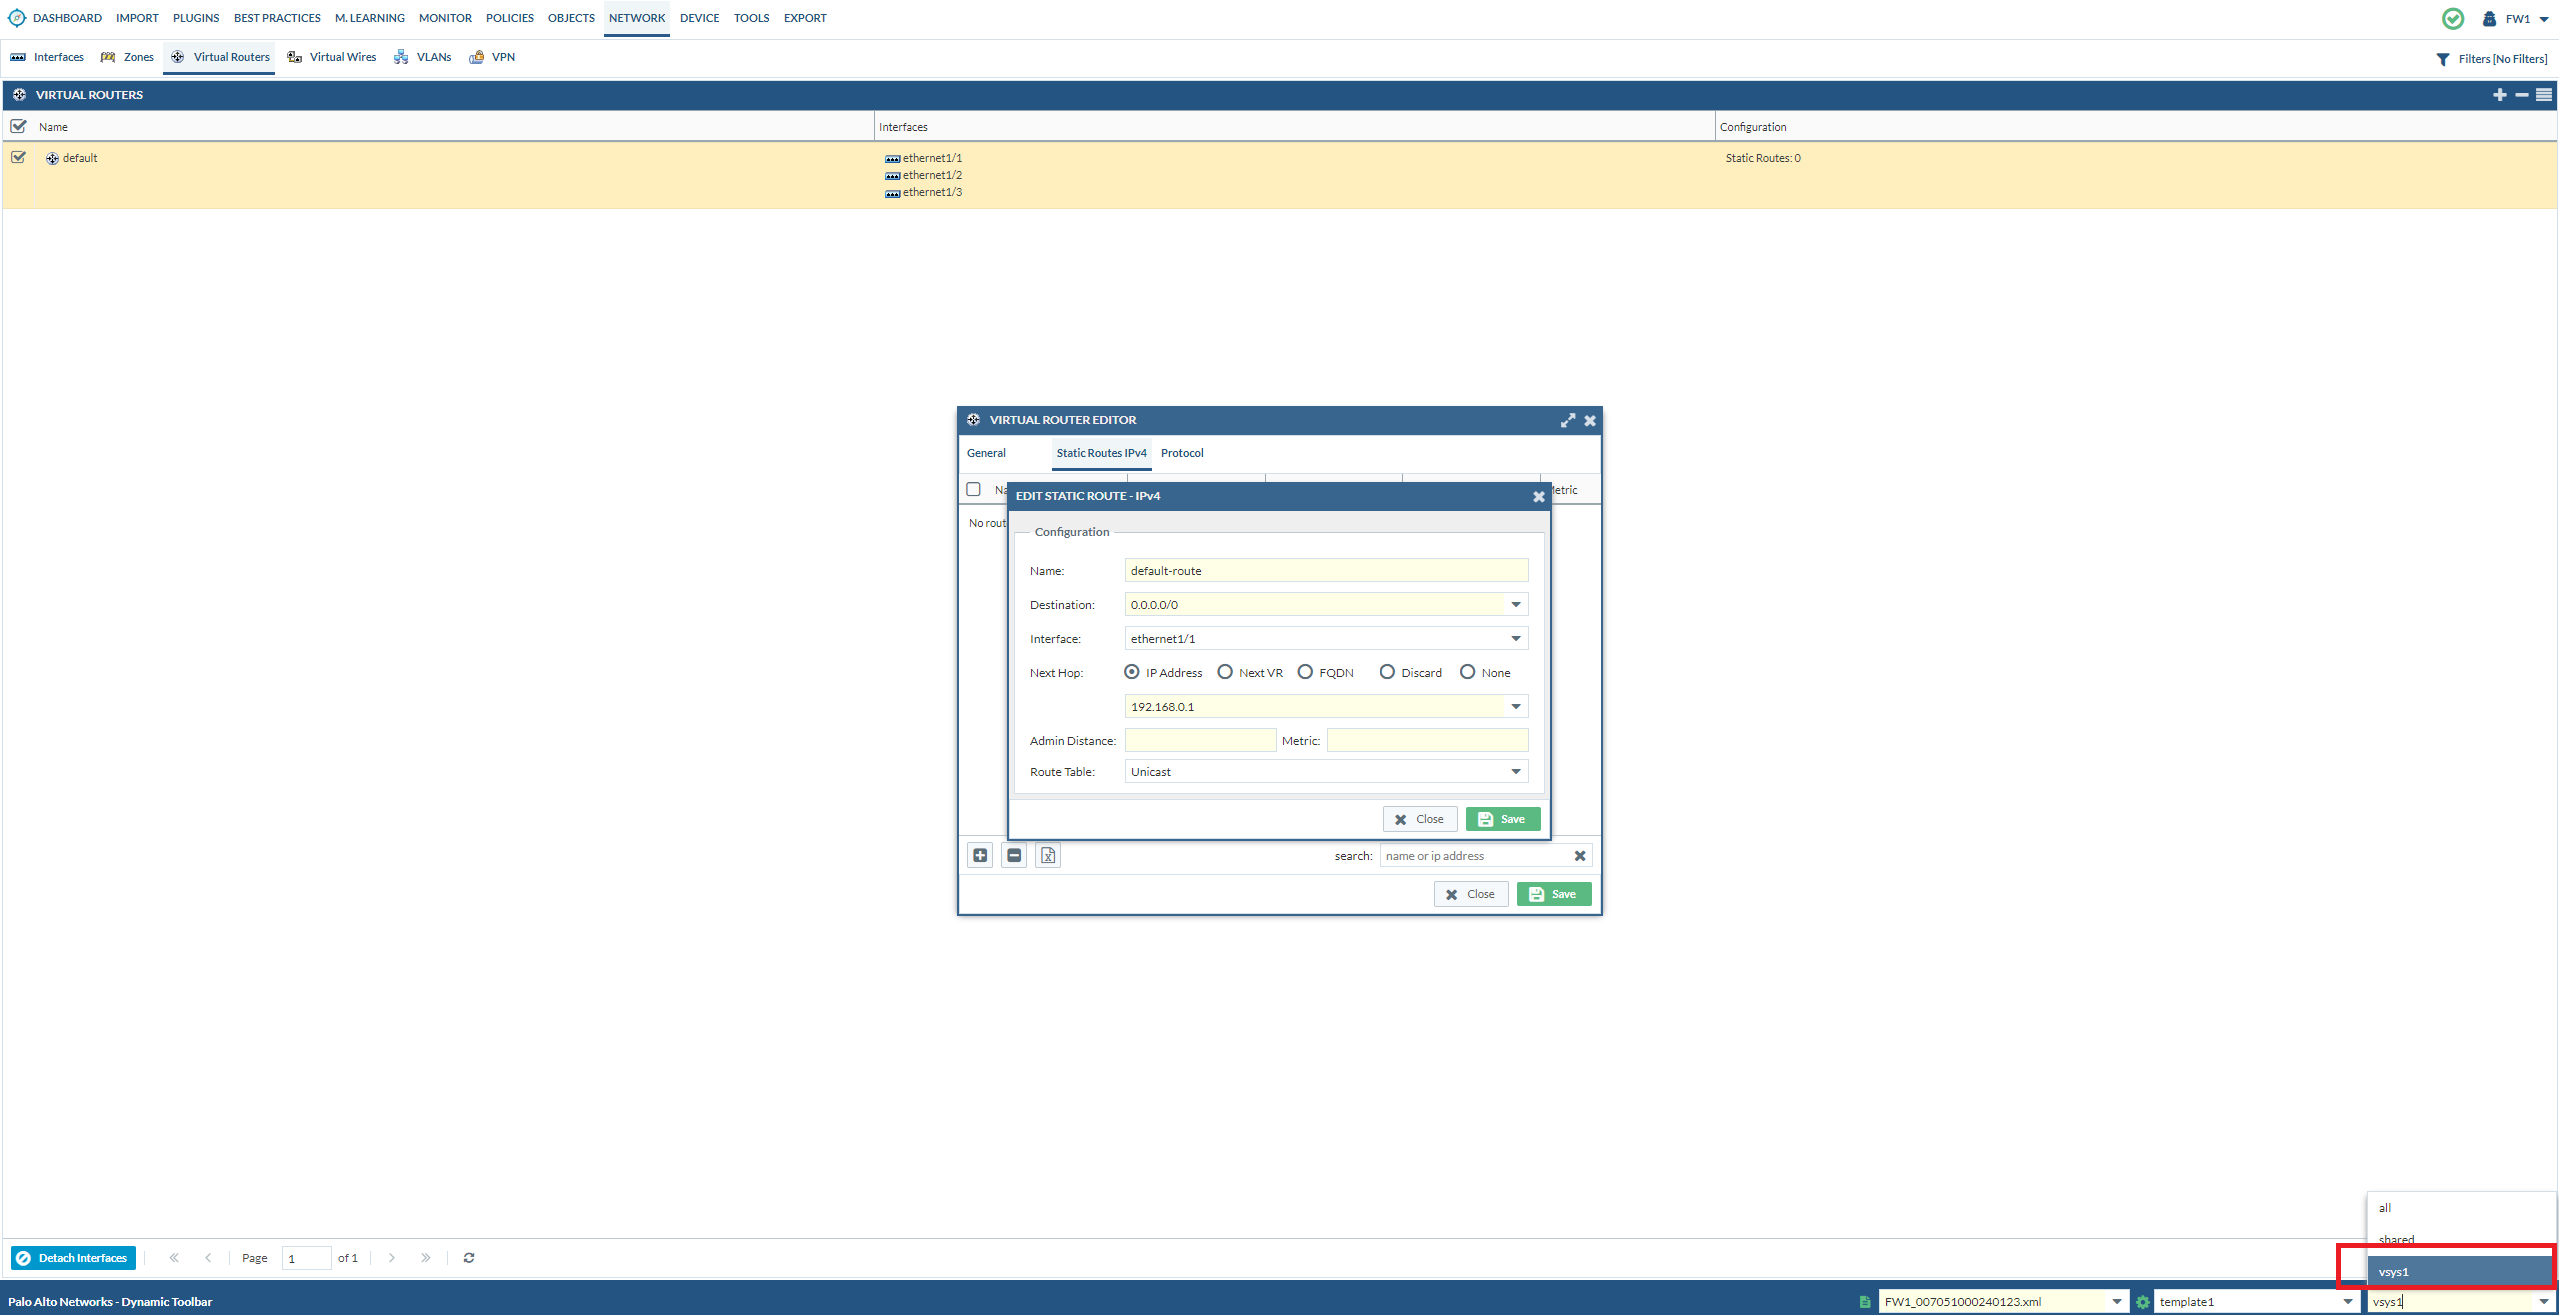
We can delete the “vr_root”, but it has a single static route configured. We’ll move this over as well to the “default” virtual router.

So we see a default-route that was added:
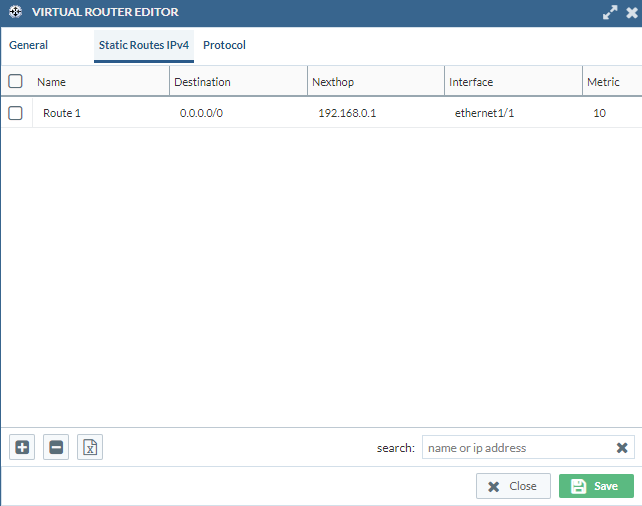
So it’s just a matter of simply adding this route to the “default” virtual router now. Make sure that you’ve selected vsys1.
Converting invalid services to applications
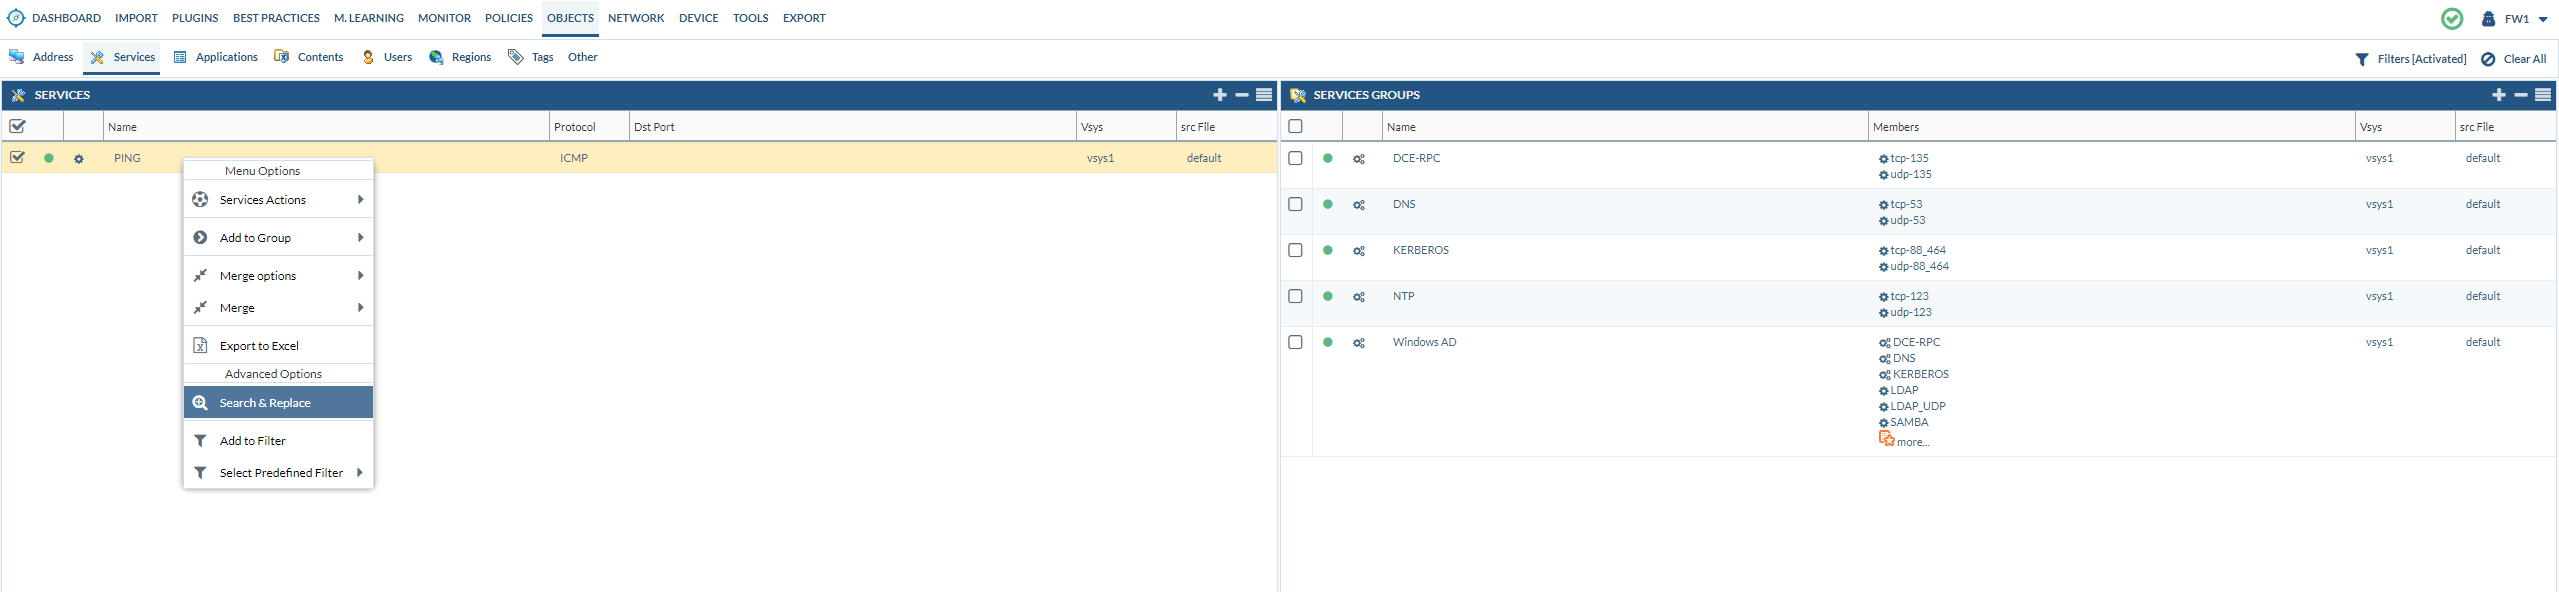
Services such as ICMP, ping, traceroute aren’t valid services on PAN firewalls because they can only be UDP/TCP based. So we have to convert a service such as ICMP or ping to an application (App-ID). Go to Objects > Services
Right click > Set Predefined Filter > Invalid
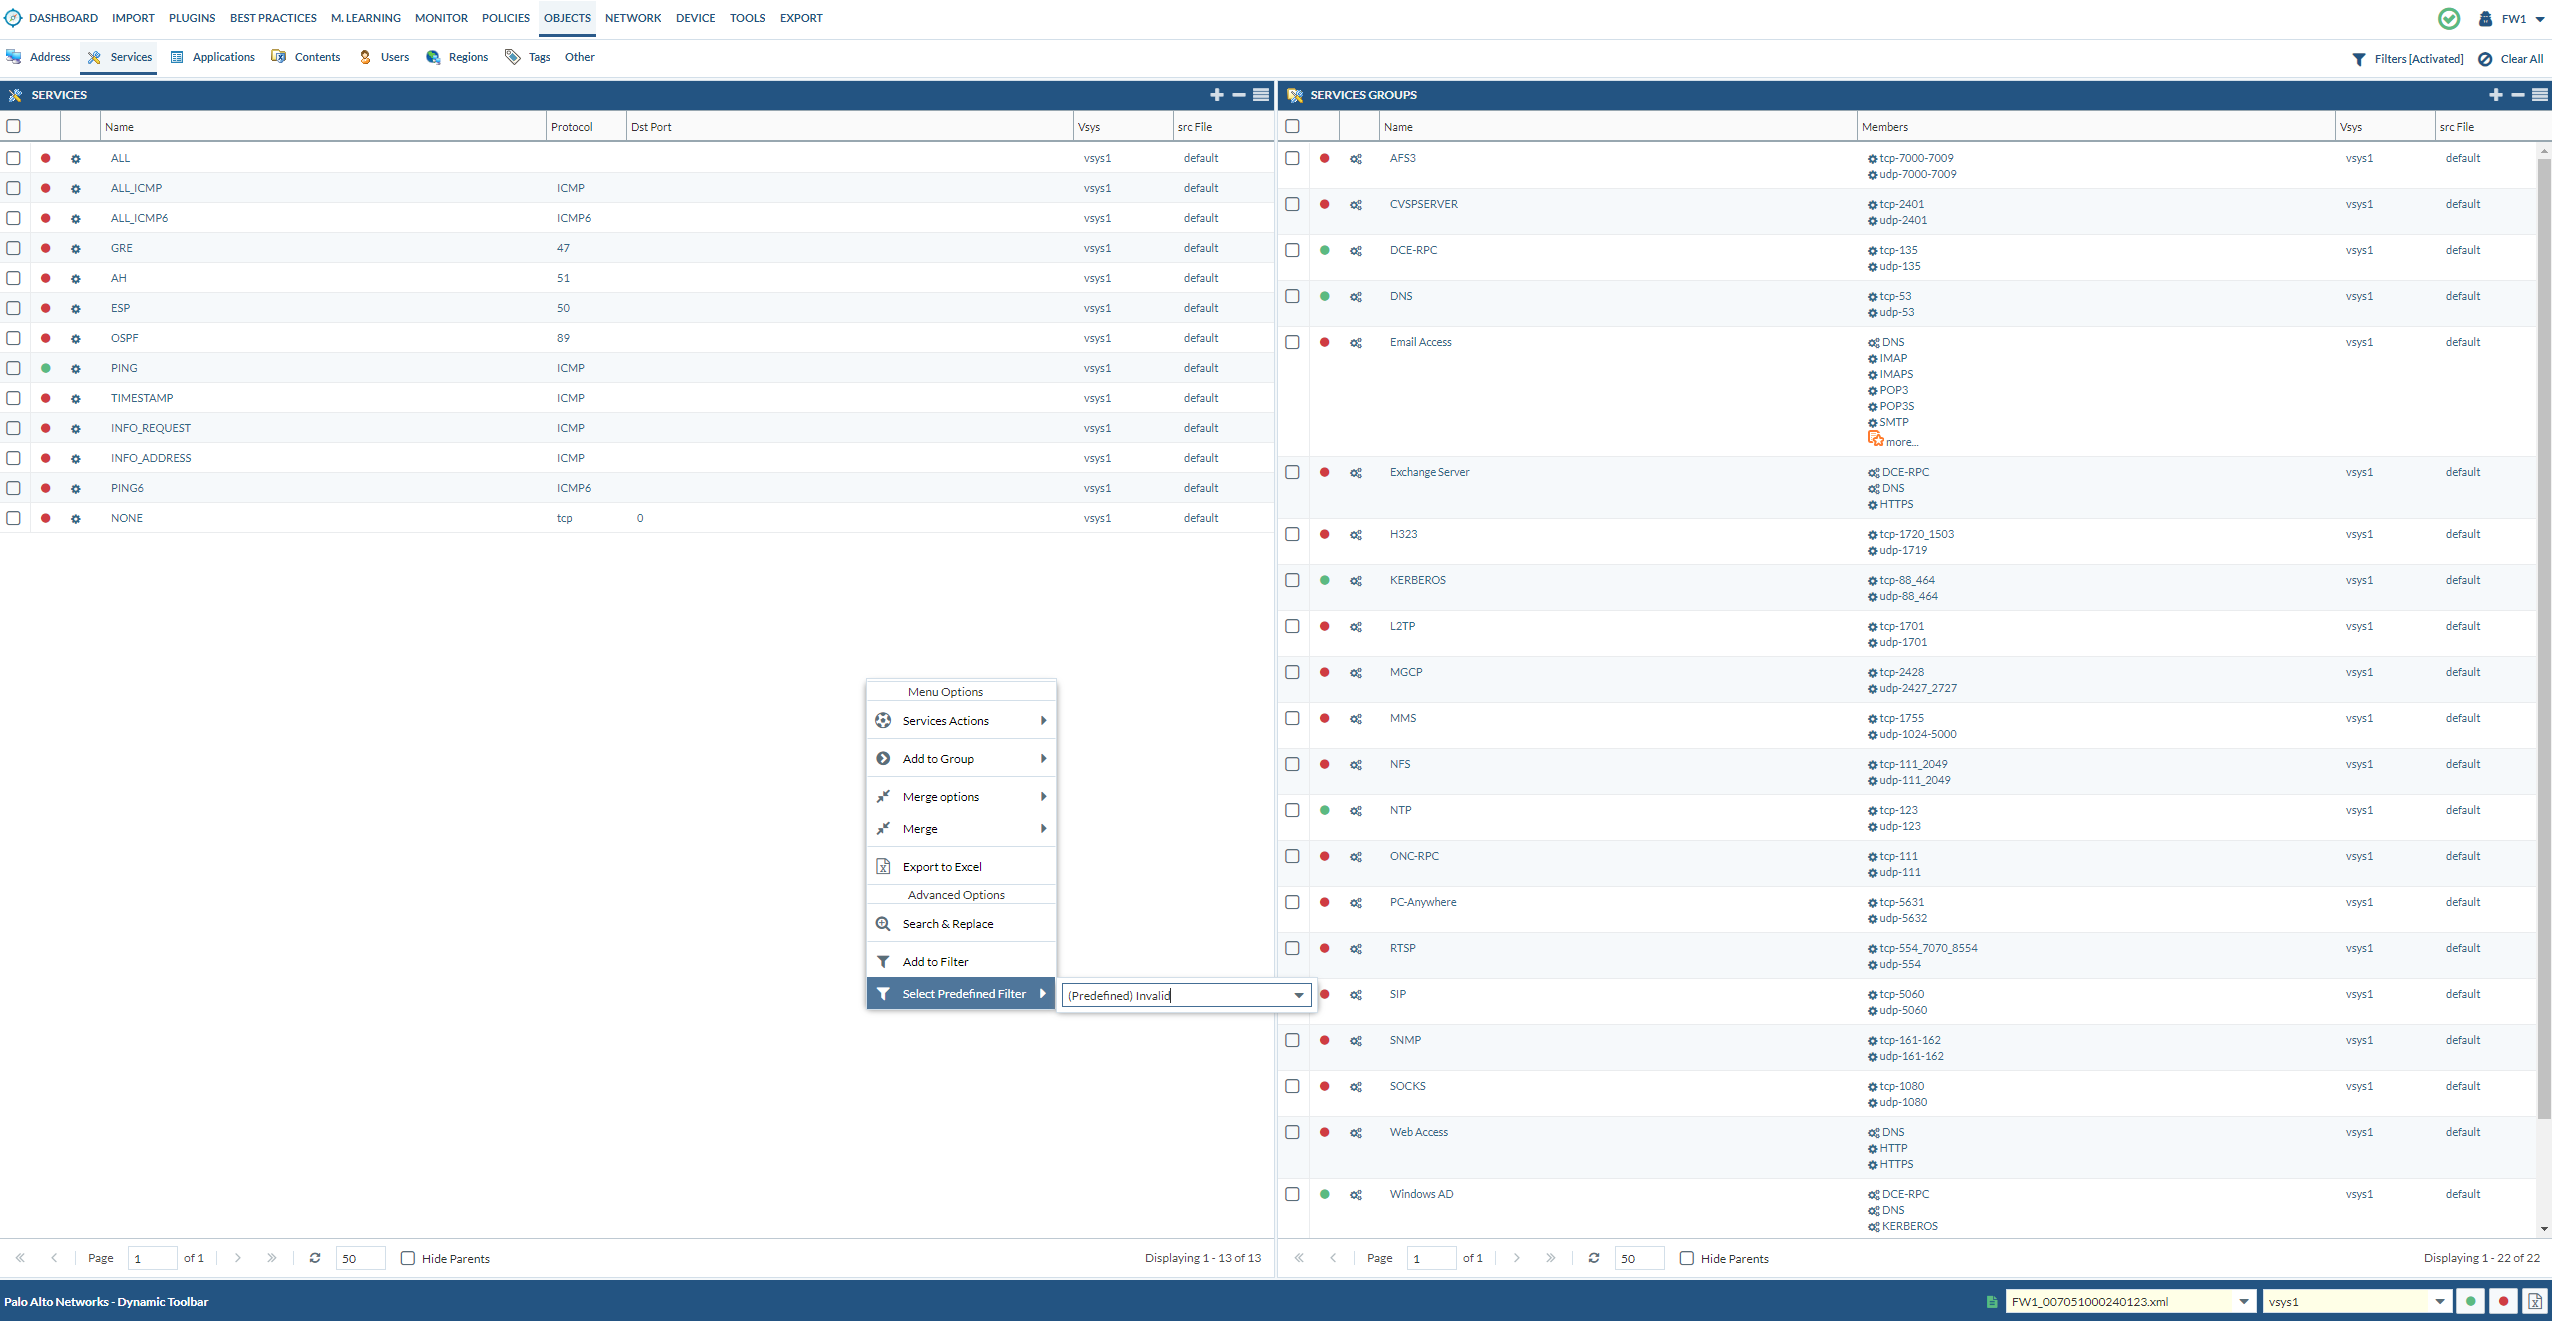
We can delete the services that are red because they’re not being used in our security policies at all. Right click on the “Ping” service and select “Search and Replace”
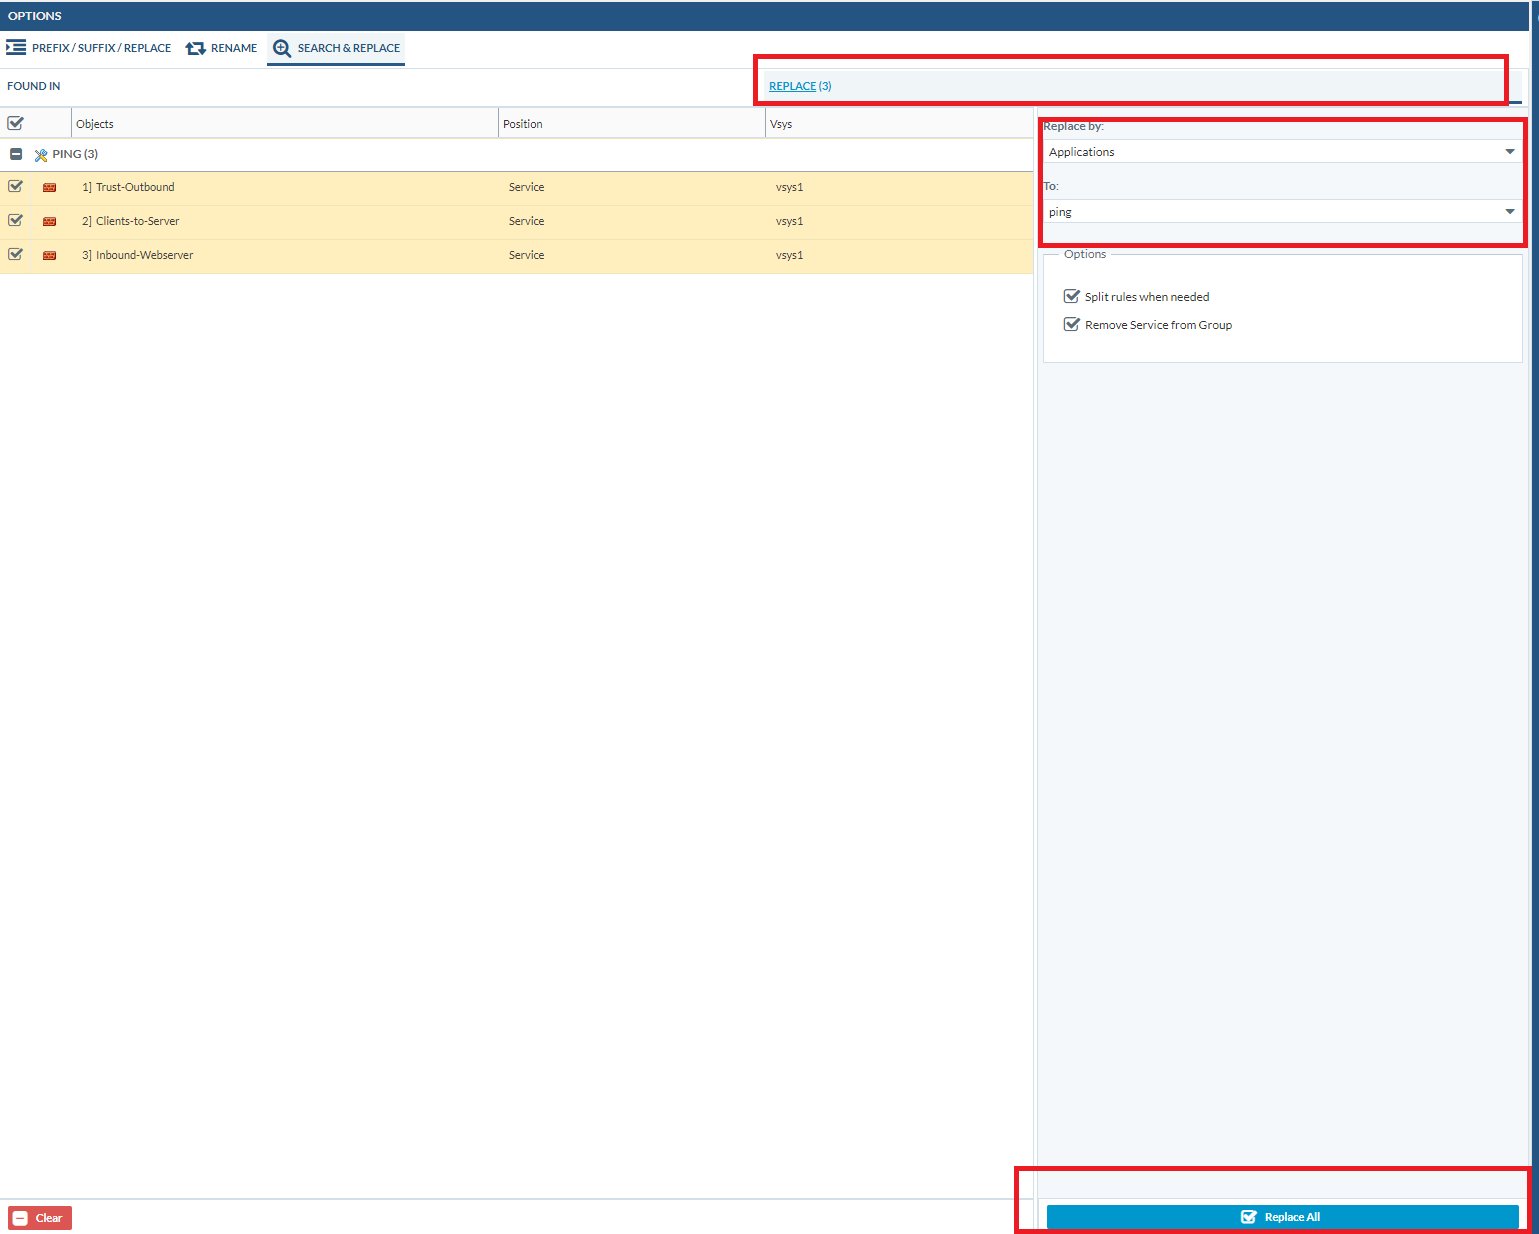
Select Ping. Select Security Policies. Select all Security Policies. Then click “Add to Replace”.

After that, go to “Replace”. Set the “Replace by” to Applications. And the application should be set to ping Lastly, click replace all at the bottom.
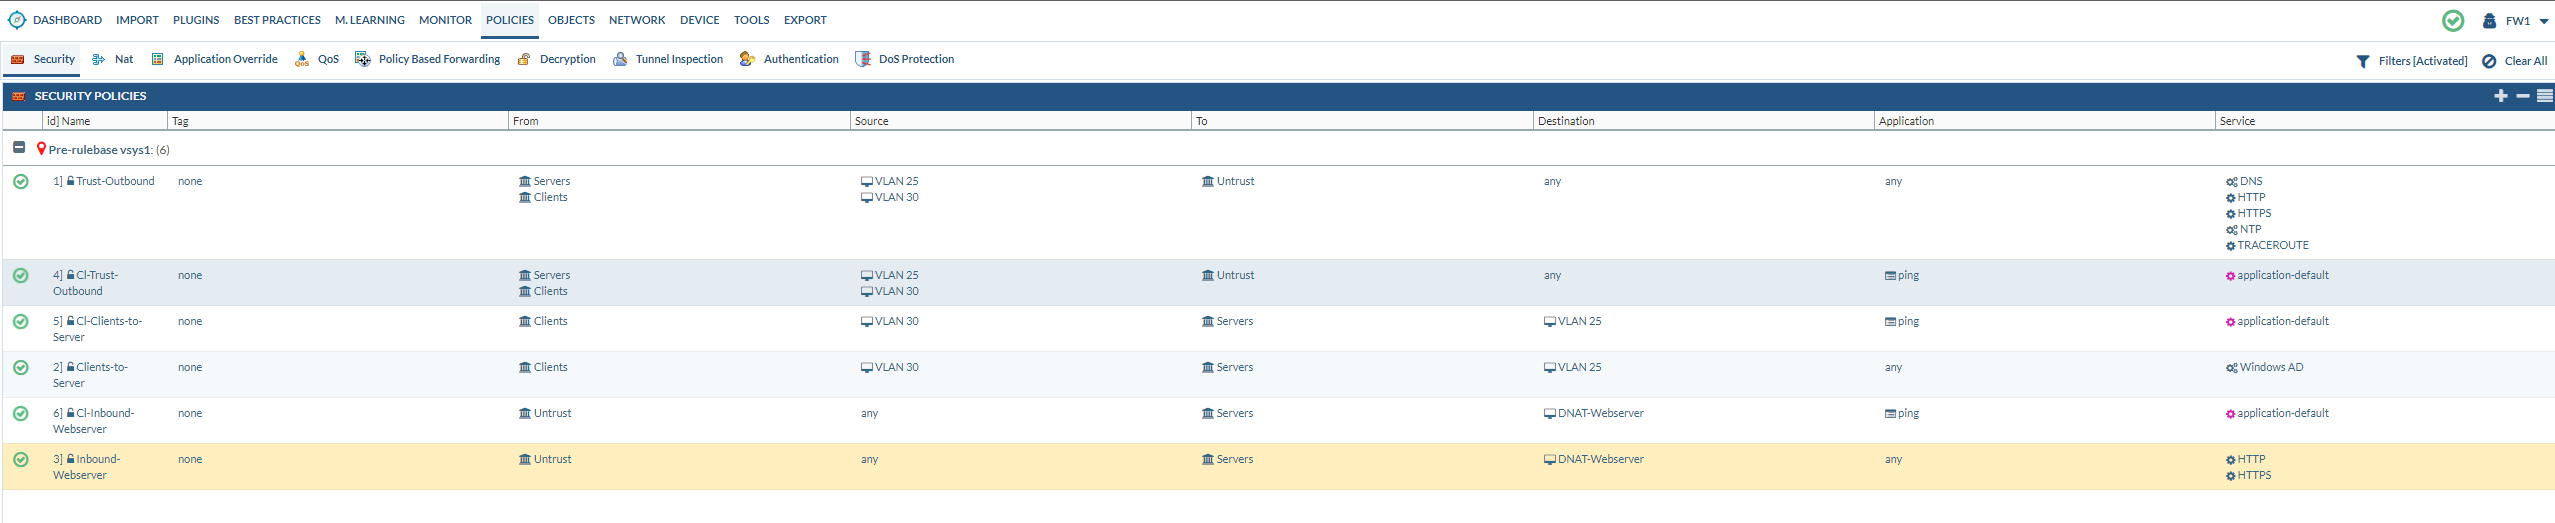
If we go back to policies, we see that ping has been removed from the services and the rules. And additional rules have been added that uses the ping application instead.
NAT Policies
The NAT policies are already configured for you. Including a UTURN policy, which is quite lovely considering it’s one of the more complicated NAT policies there is. The usual PAT policy (NAT overload or translating many-to-one or dynamic-ip-and-port) is also configured. A destination NAT policy for the webserver is also configured. Double-check if the rules are correct. Keep in mind that the destination zone for a destination NAT policy is always the external zone.

Exporting using the API output manager
At this point, we’ll just be exporting the configurations to the PAN firewall. We use the API output manager. Alternatively, you could download the .xml file and load it on the firewall. But that’s not what we’re doing. It’s vital that you learn to use the API output manager, because what if the PAN firewall isn’t empty and already has a lot of configured settings? You’re just not going to replace the running-config.xml with the one that you got from expedition. The idea behind Expedition is that you use it as minimally as possible.
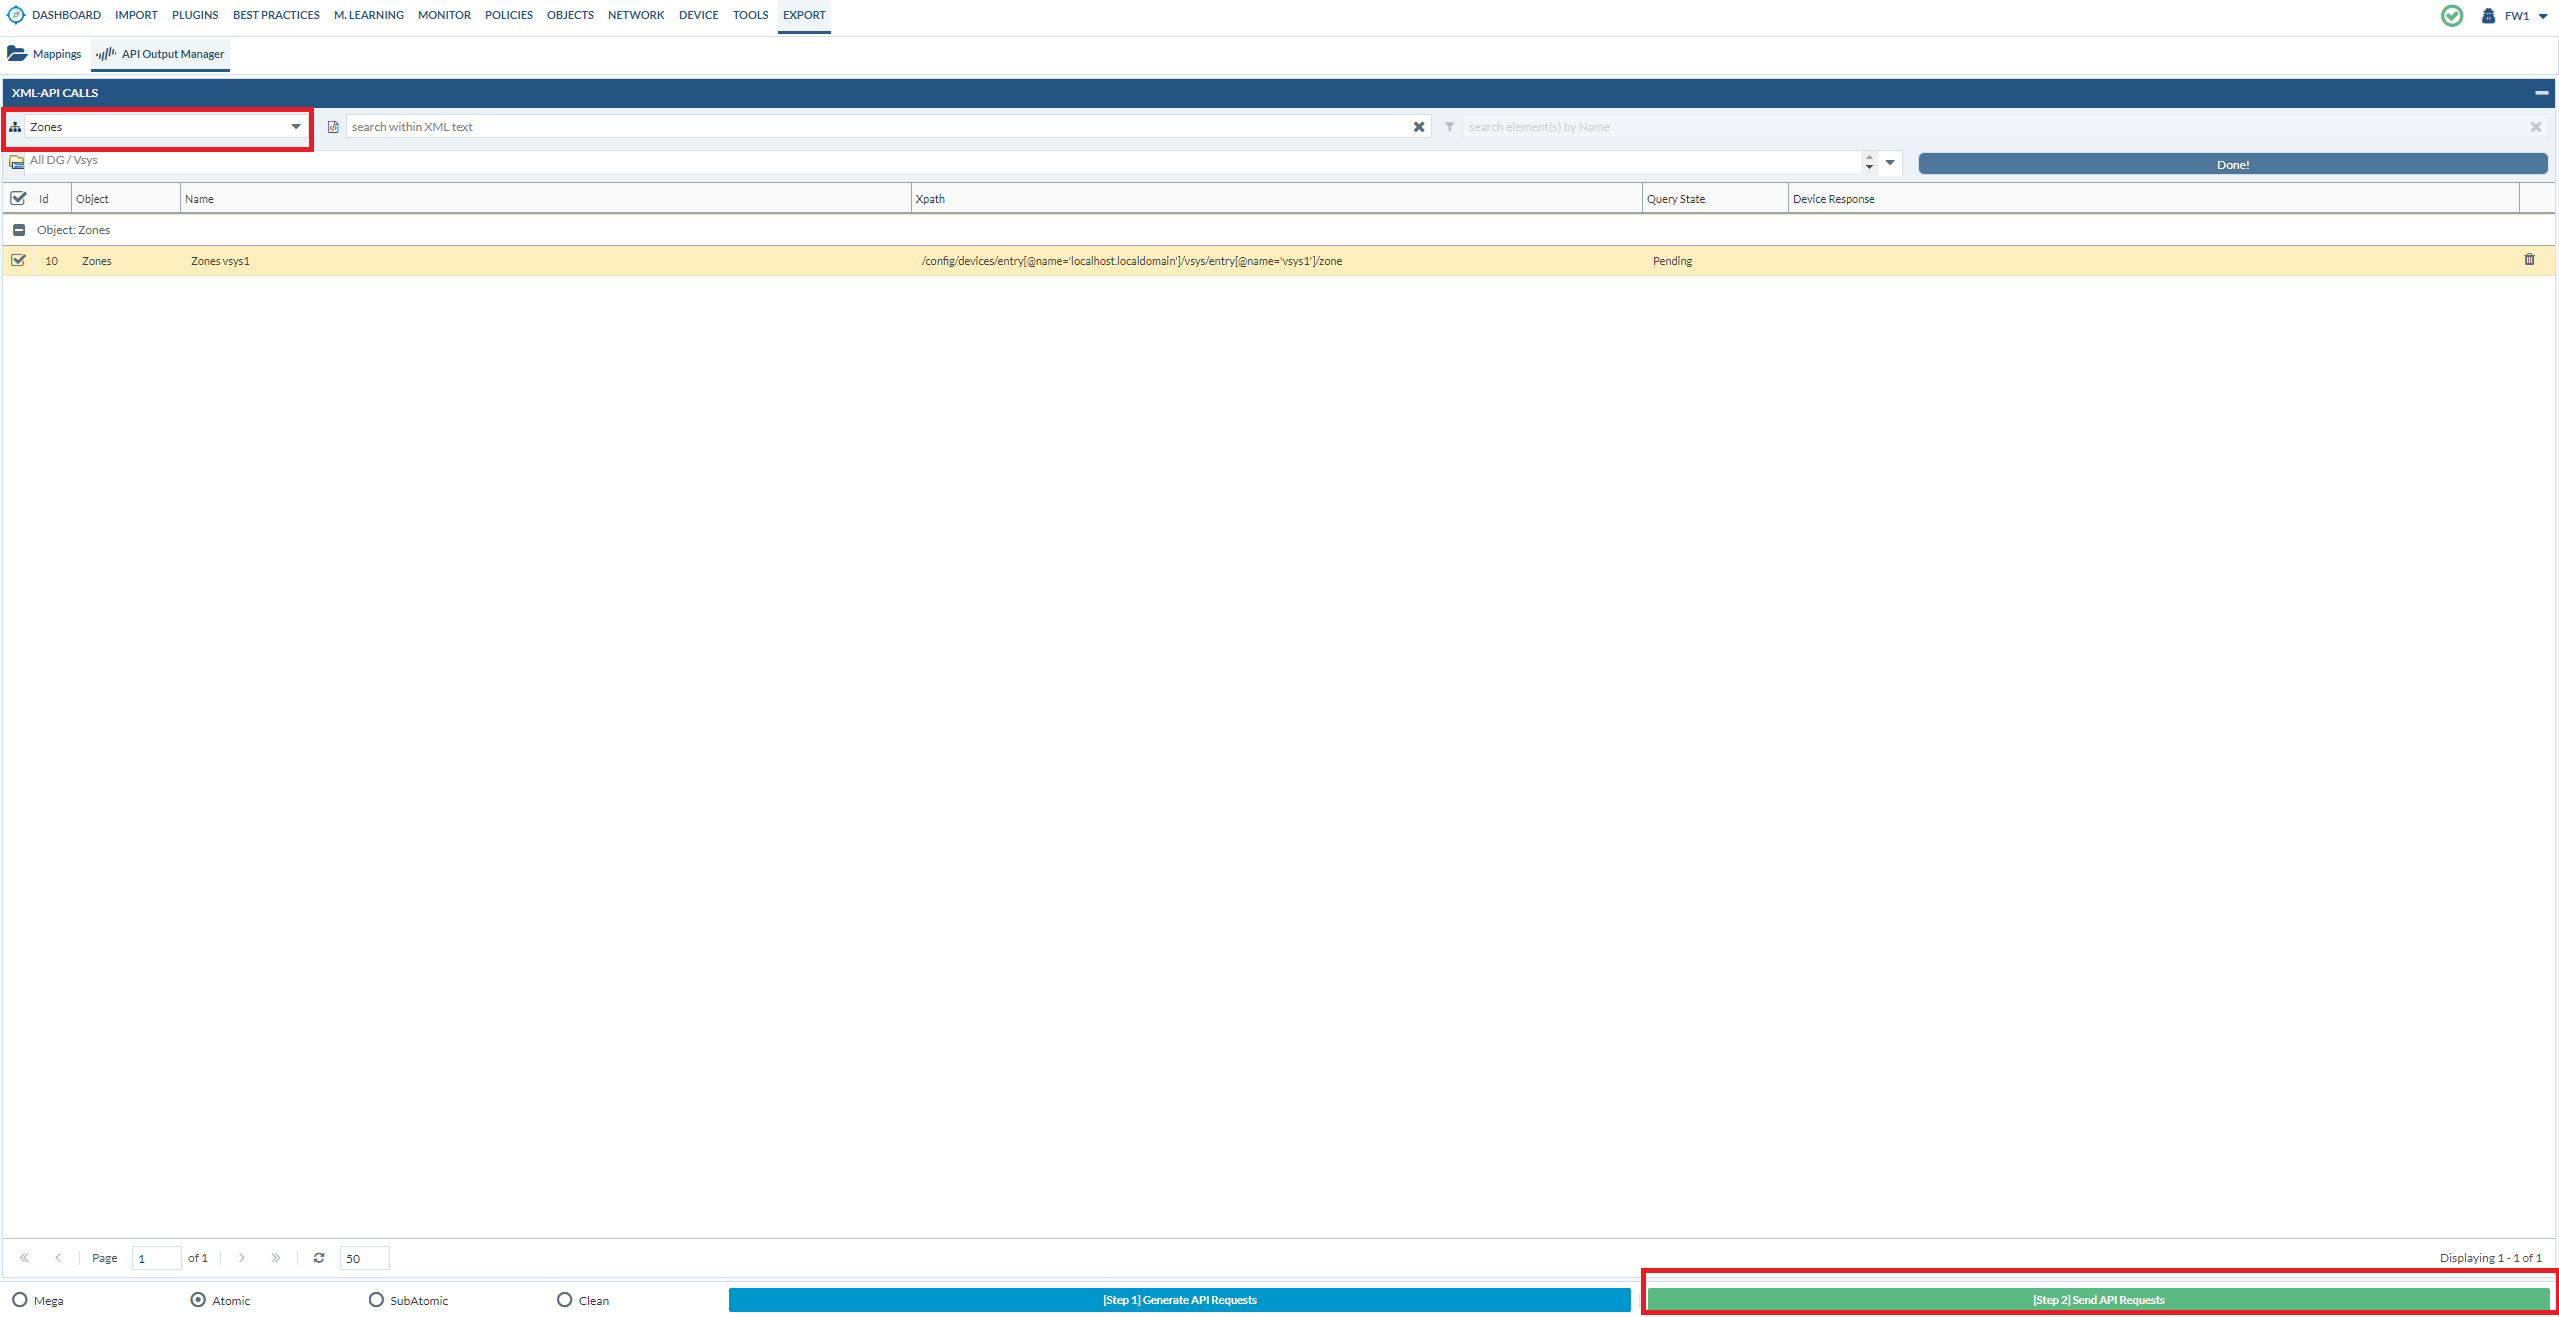
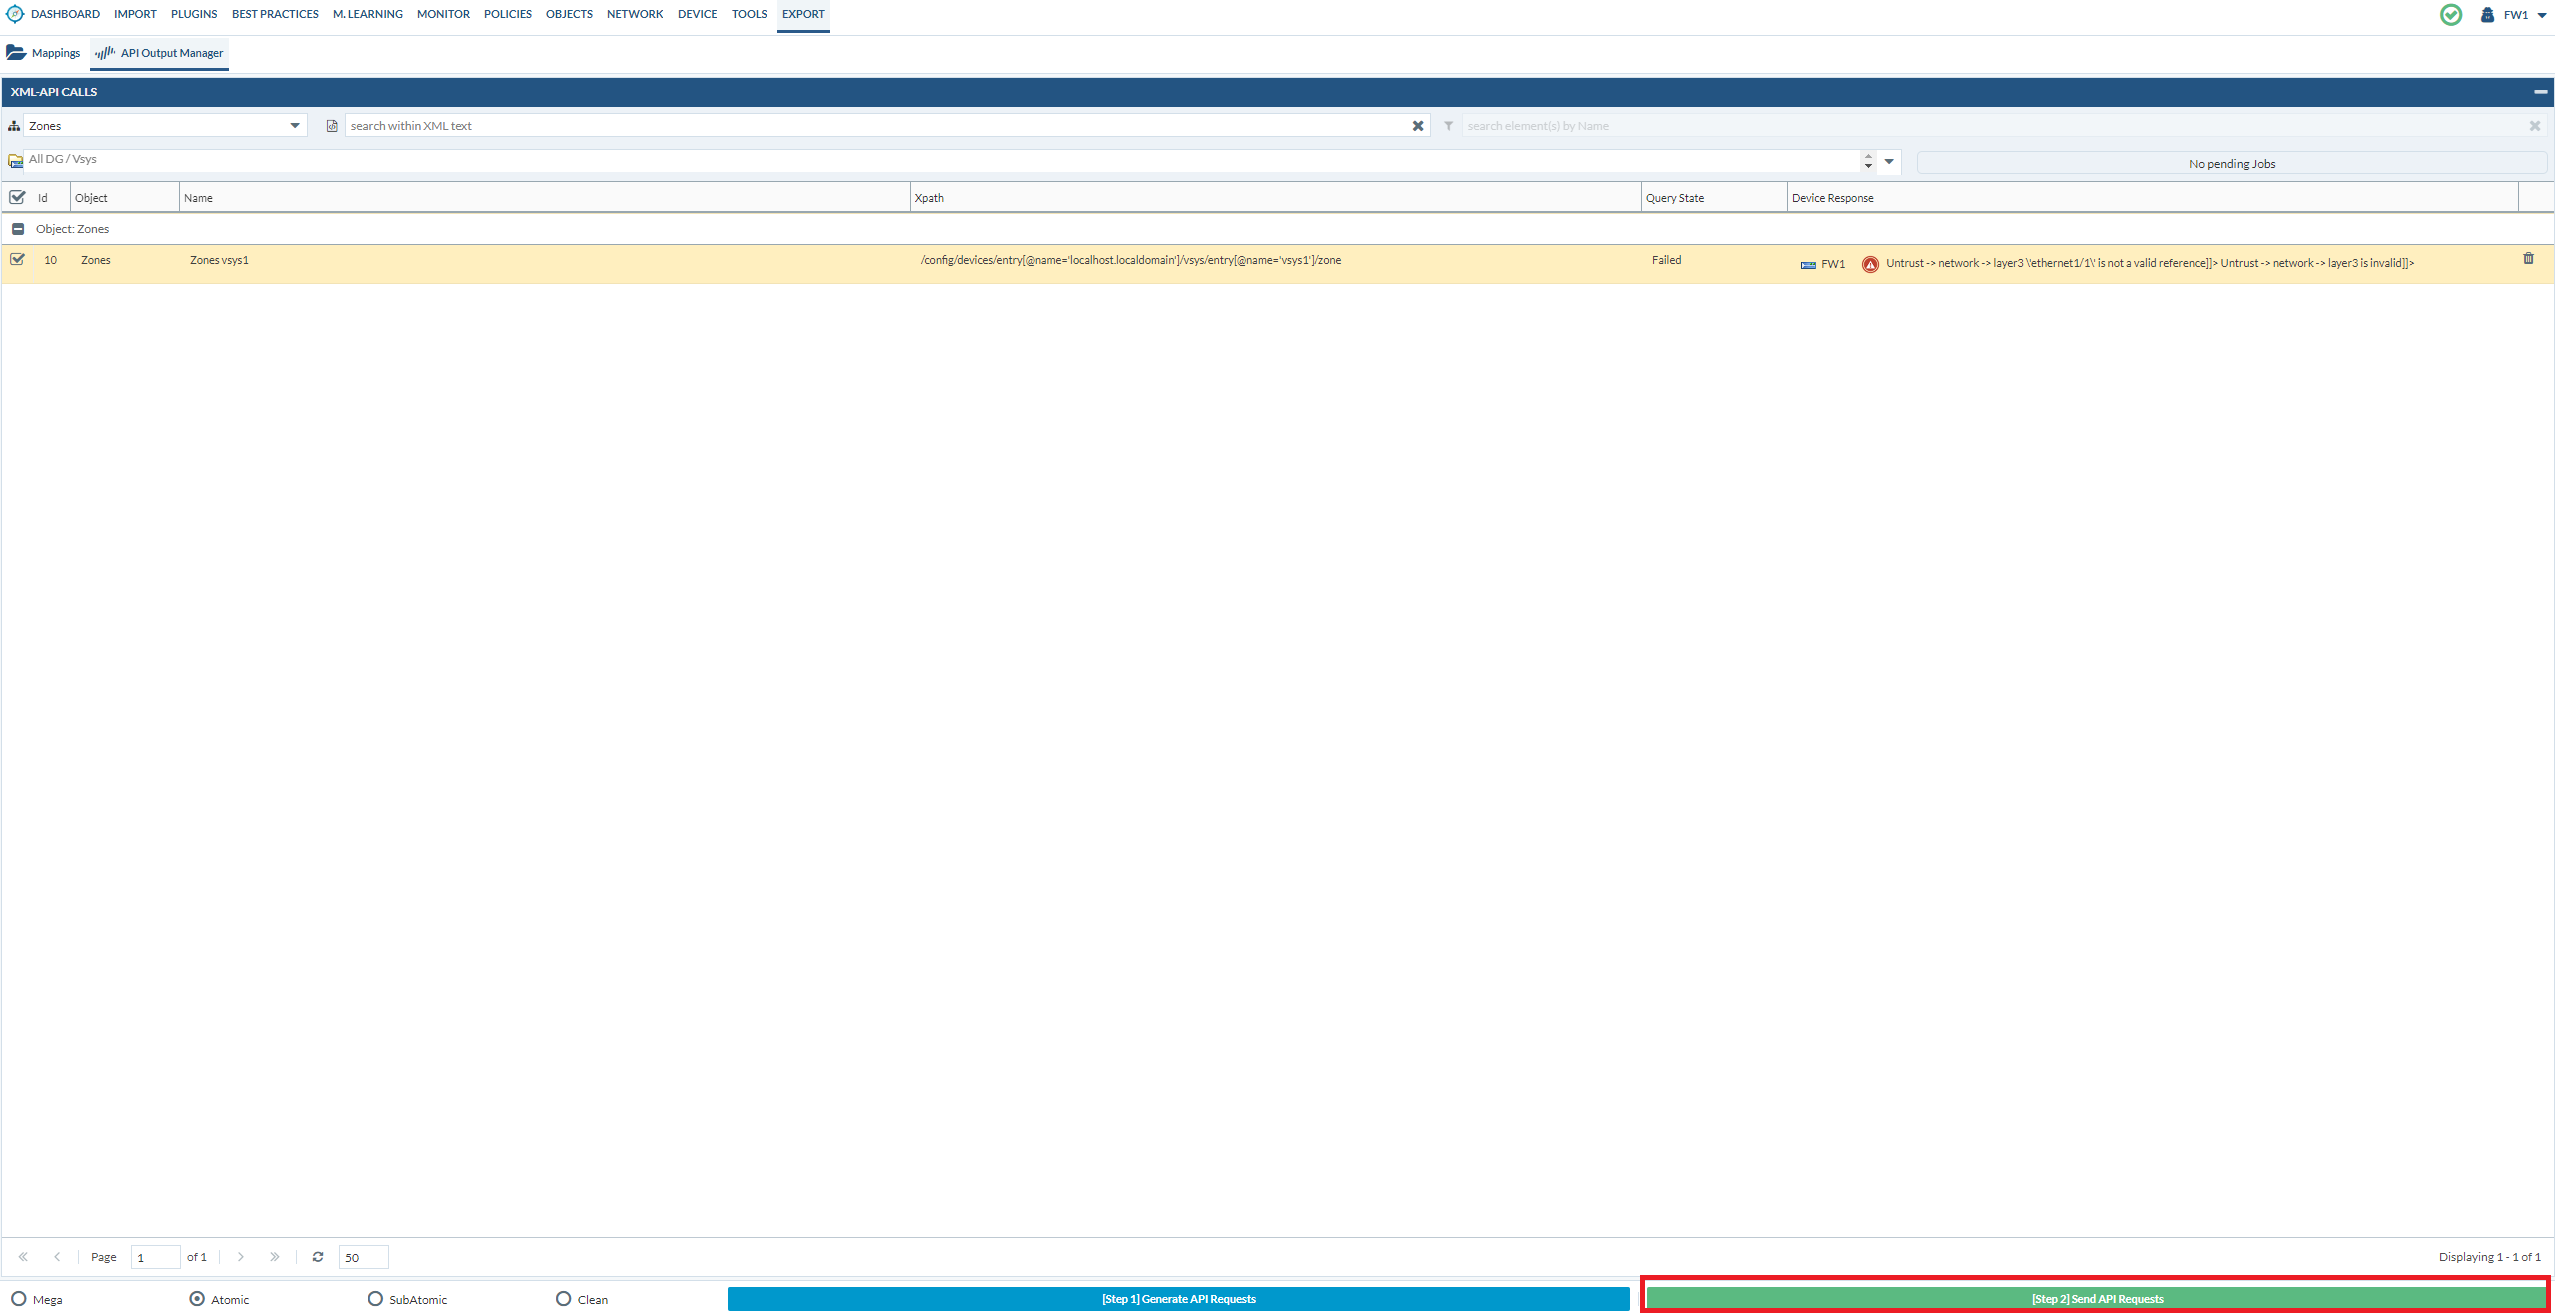
Go to Export > API Output Manager > Generate API requests
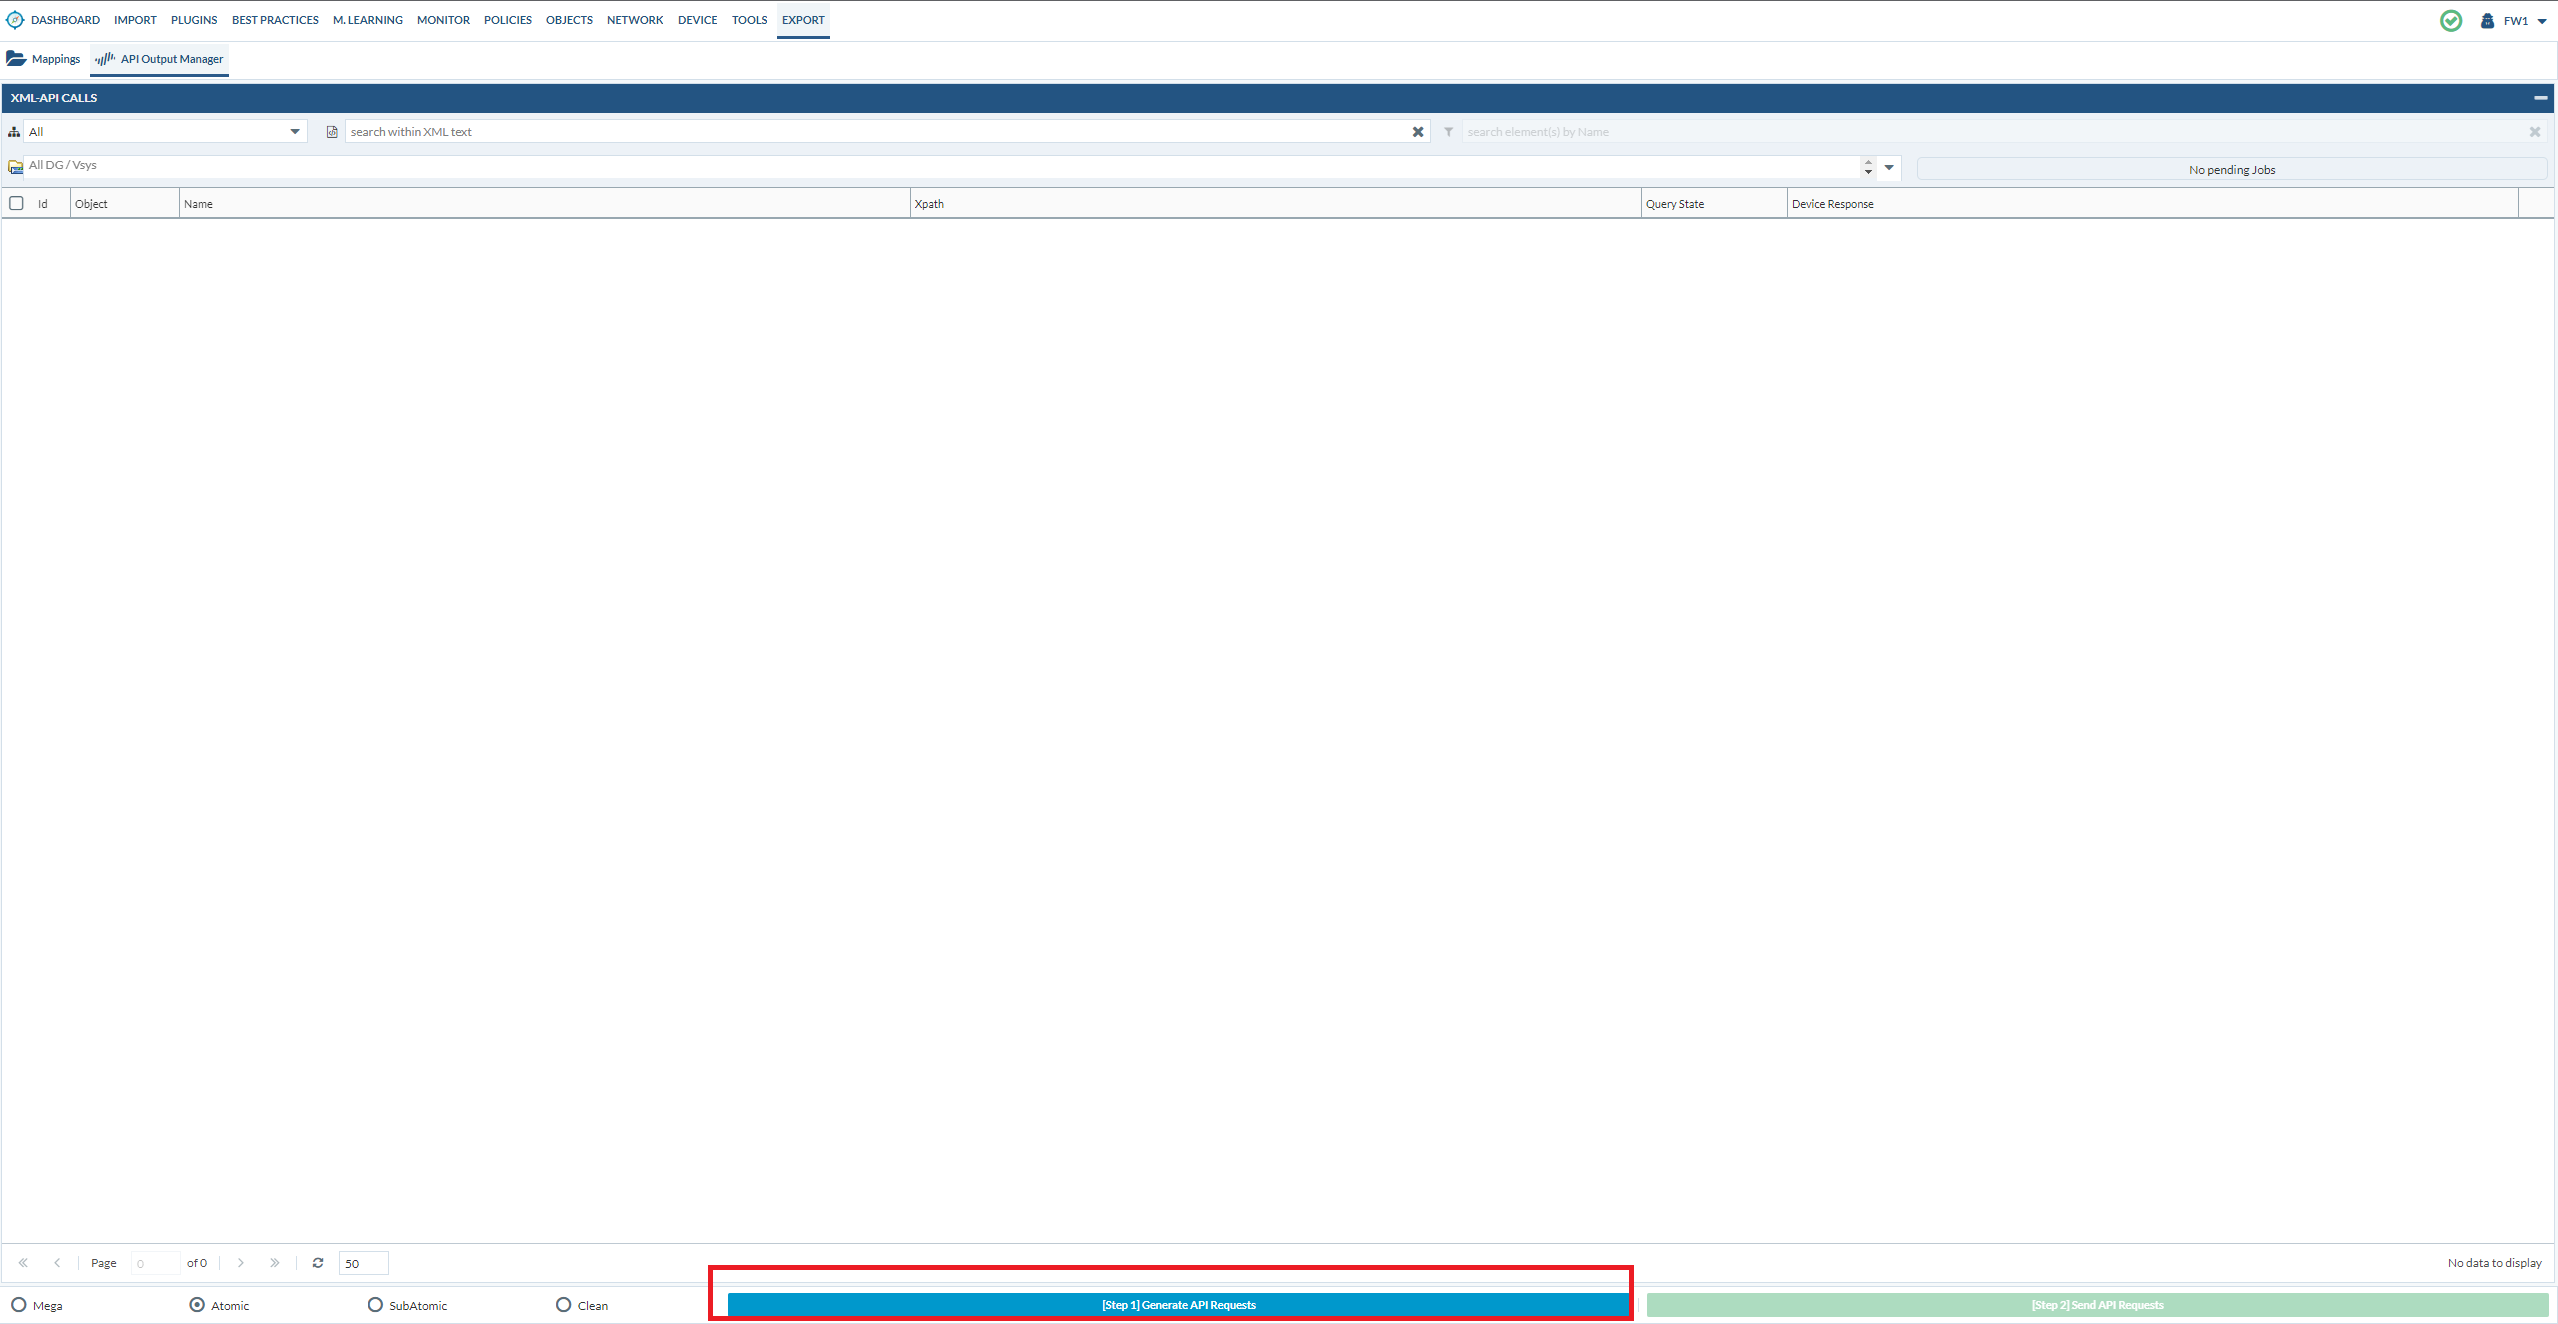
Let’s start off exporting the security zones. Then click “Send API requests”
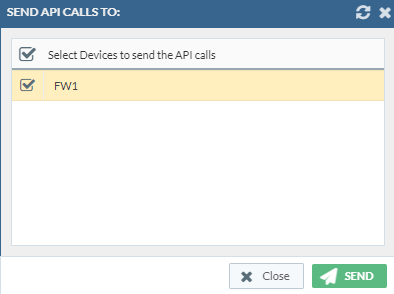
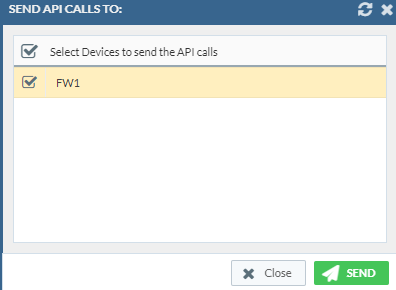
Select the device
We get the error that ethernet1/1 is invalid etc. Basically, we have to push over the interfaces configuration first. That’s the beauty of the API output manager, it gives you feedback.

So let’s try interfaces first:
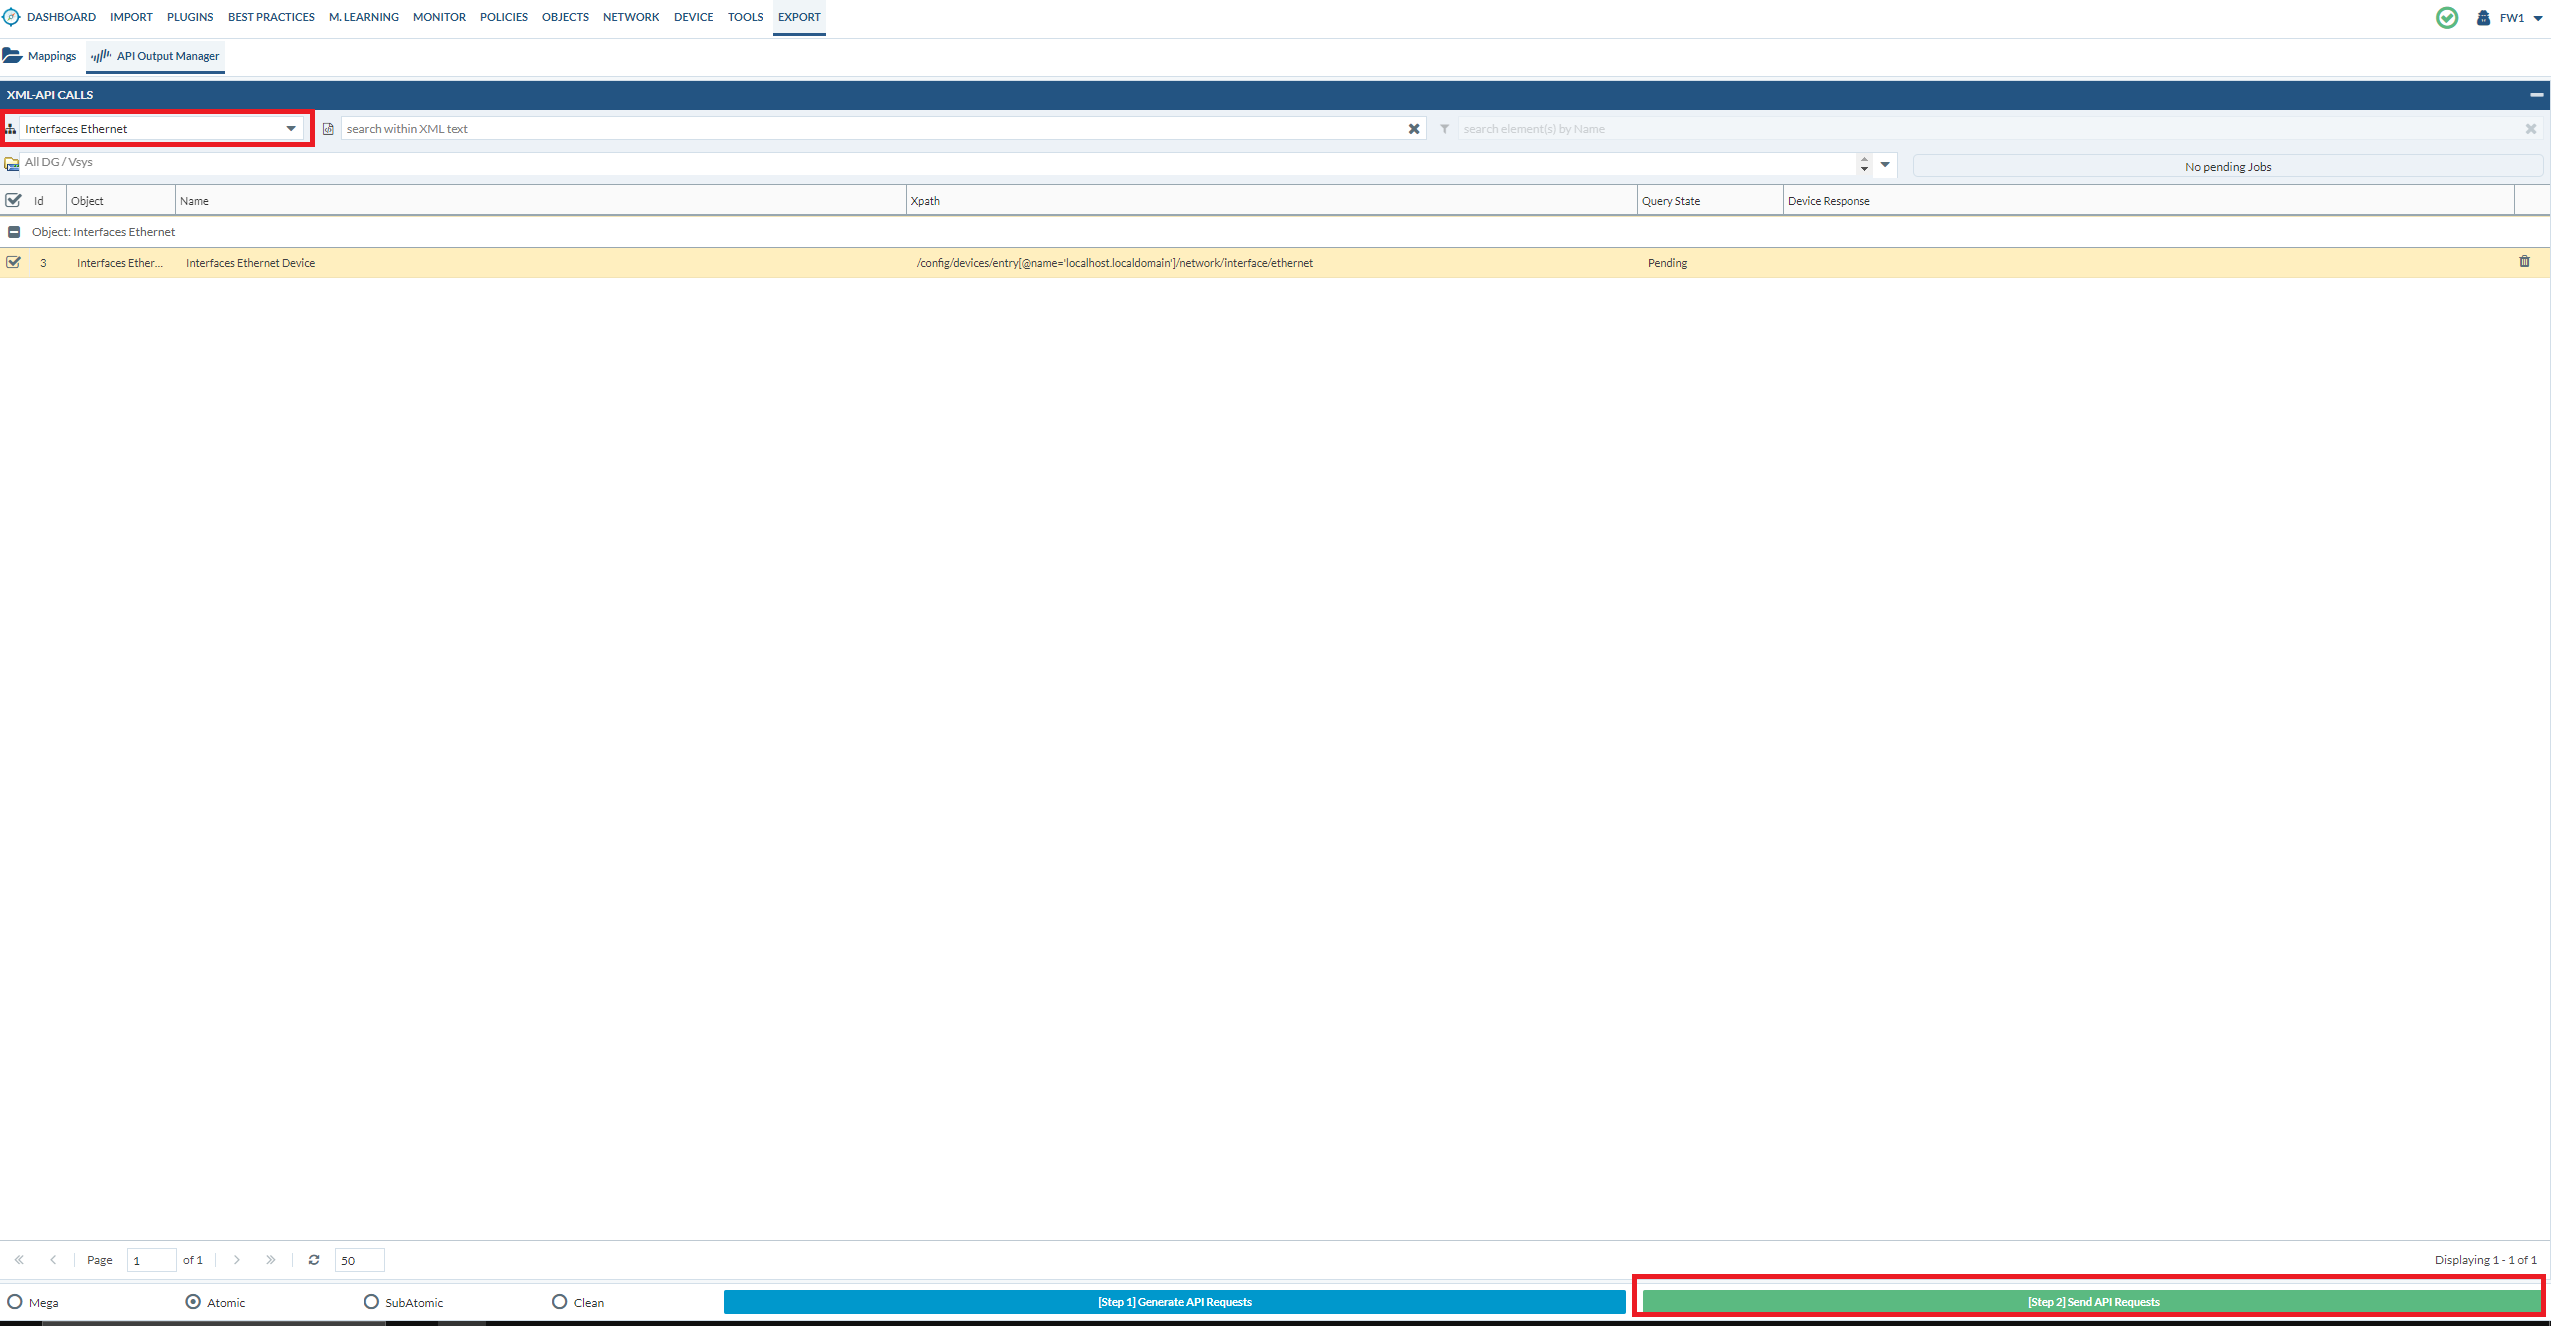
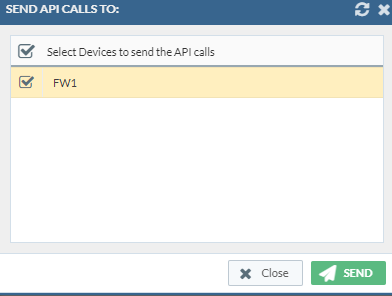
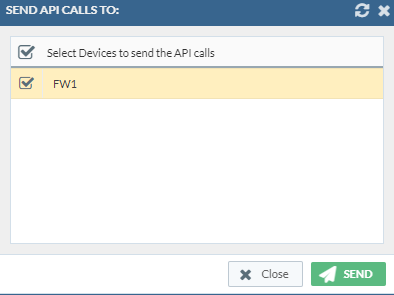
Select the device.
So the command was successful.

Let’s try the virtual-router:

Select the device.
The command was successful again.

Now let’s try the security zones again.
Select the device.
And the command was successful this time.

We’ve used atomic to generate API requests, but let’s say that you only want to export a single rule out of 500 – then you can generate subatomic API requests and select that single rule that you want to export. That’s another method of minimizing the use of Expedition.
Finalizing the results
Now, it’s just a matter of checking the PAN firewall and see whether the configurations have been pushed to the candidate-config. But before you commit your changes, validate the changes.
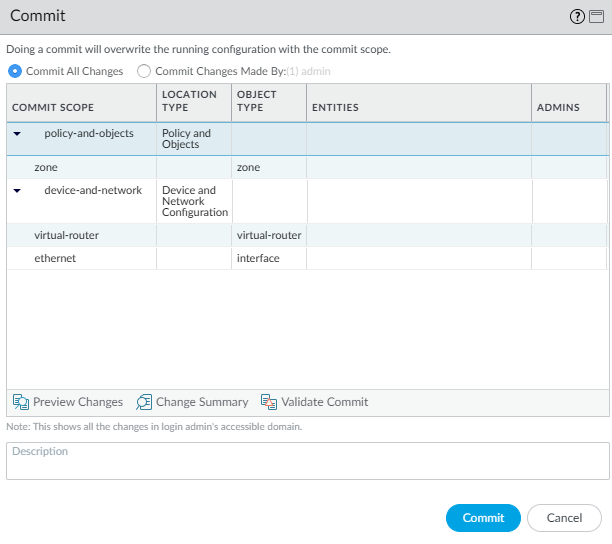
You’ve not pushed your policies yet, but you’ll do it in this order from top to bottom:
- address-objects
- address-groups
- service-objects
- service-groups
- security policies
- NAT policies