In this guide, we’ll be covering the best practices for security policies. Explaining the use of App-ID, security profiles, logging options, principles and methodology etc.
Intra-zone vs inter-zone policy vs universal
Intra-zone policies can only contain a single security zone in the source field. The destination field is greyed out. An example: untrust to untrust.
Inter-zone policies apply from security zone to a different security zone. An example: trust to untrust or untrust to trust. But it will not apply for trust to trust.
Universal is pretty much the default setting for any security policy that you create. It’s rare that you’ll be creating interzone or intrazone policies. I have yet created an interzone policy.
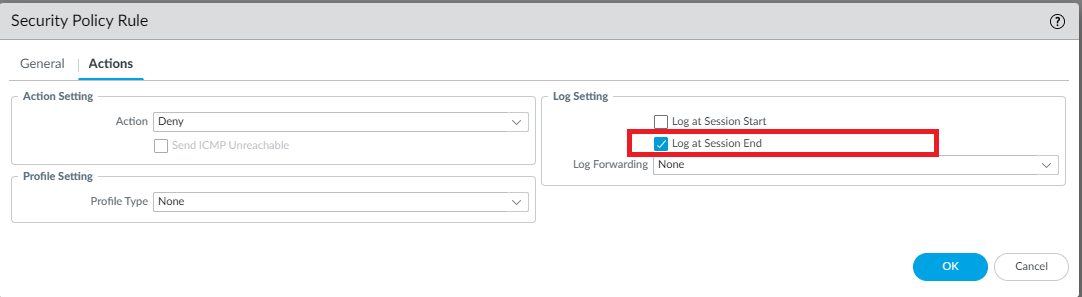
It’s highly recommended to override the default inter-zone policy and enable logging. This is because it’s your default drop rule if there’s no match.
Creating a security profile group
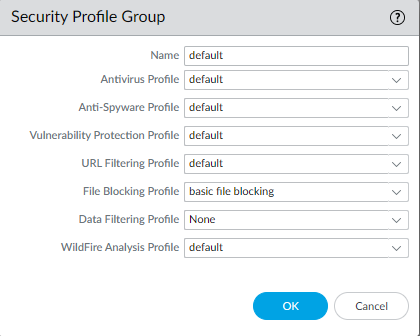
We’ll just use the default security profiles, it’s highly recommended to make your own security profiles and make it for each kind of direction: internal – outbound – inbound – alert-only. This will be applied to our security policies.
Call the security profile group “default” because when you would create a rule – the security profile group will be automatically configured.
Create a drop-all intra-zone policy for Untrust interface
This policy is created only for the untrust zone. The reason why we create this policy is because the default intra-zone policy allows everything from untrust to untrust, which affects your untrust interfaces. You can have certain services in the untrust zone such as GlobalProtect and IPSec VPN.
You might think that you could change the default intra-zone policy to block, but that would be a complete mess from an administration standpoint – if you have multiple interfaces sharing the exact same security zone. As best practice, each interface should have her own unique security zone, so the default intra-zone policy should not be used.
Always keep this rule right above the default intra-zone policy for better visibility.
Alternatively, you can create a universal rule from untrust to untrust. It’s essentially the same thing.

Create another intra-zone policy which will allow traffic originating from a certain country to let’s say your GlobalProtect portal/gateway. Place this above the intra-zone policy that drops everything.

Blocking QUIC
It’s highly recommended to block QUIC because 1) the firewall cannot always detect that the traffic is QUIC 2) the firewall cannot perform inspection on traffic that uses QUIC. In short; it’s just not secure enough. You have to create two rules; one that blocks the QUIC application and one that blocks UDP 80/443.
You’ll have to create two services; 80/UDP and 443/UDP.
These rules should ALWAYS be on top.
Using the predefined EDL’s in a policy
There are 3x predefined EDL’s available to use, which contains malicious IP addresses and tor IP addresses. It is managed by Palo Alto Networks. It requires a threat prevention license and have the latest anti-virus signatures installed. You can find it at Objects > External Dynamic Lists

We should create two policies; one that blocks traffic from the IP addresses in the EDL as the source and and another policy that blocks traffic towards those IP addresses in the EDL as the destination.
These rules should ALWAYS be on top.
Using App-ID for outbound traffic from trust
App-ID can significantly increase the security posture and make your life much easier as well. You simply do not have to know the port numbers and protocols that are used. App-ID does that for you.
For this example, we’ll create an outbound rule for our trust zone and we’ll specify common applications that are used.

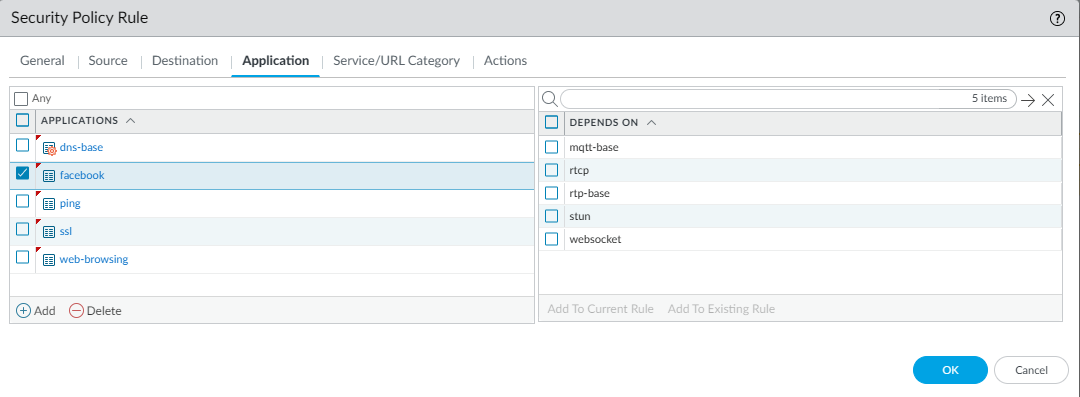
We’re seeing a red gear icon next to “dns-base” that means it’s part of a parent application. If we were to go with just “dns” it would also include the “dns-non-rfc” application.

Another example with facebook, we can restrict facebook usage to just facebook-games & facebook-posting.
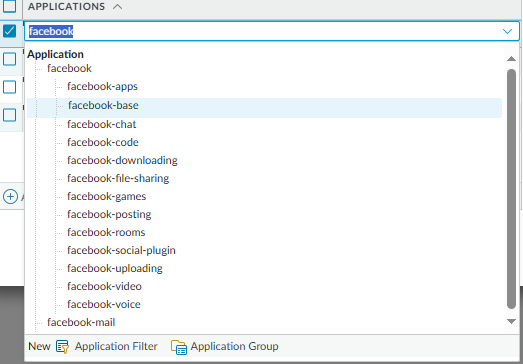
You’ll notice that the facebook application has dependencies. You simply just add them to the current rule.

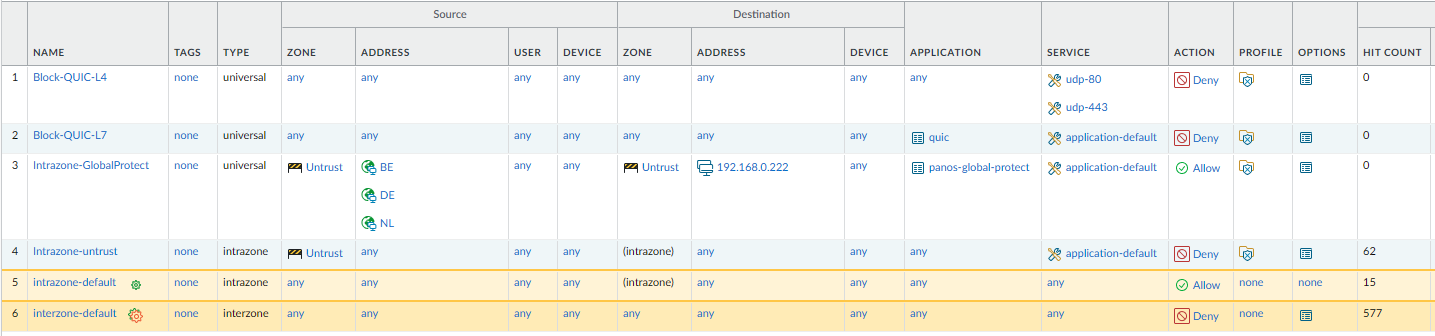
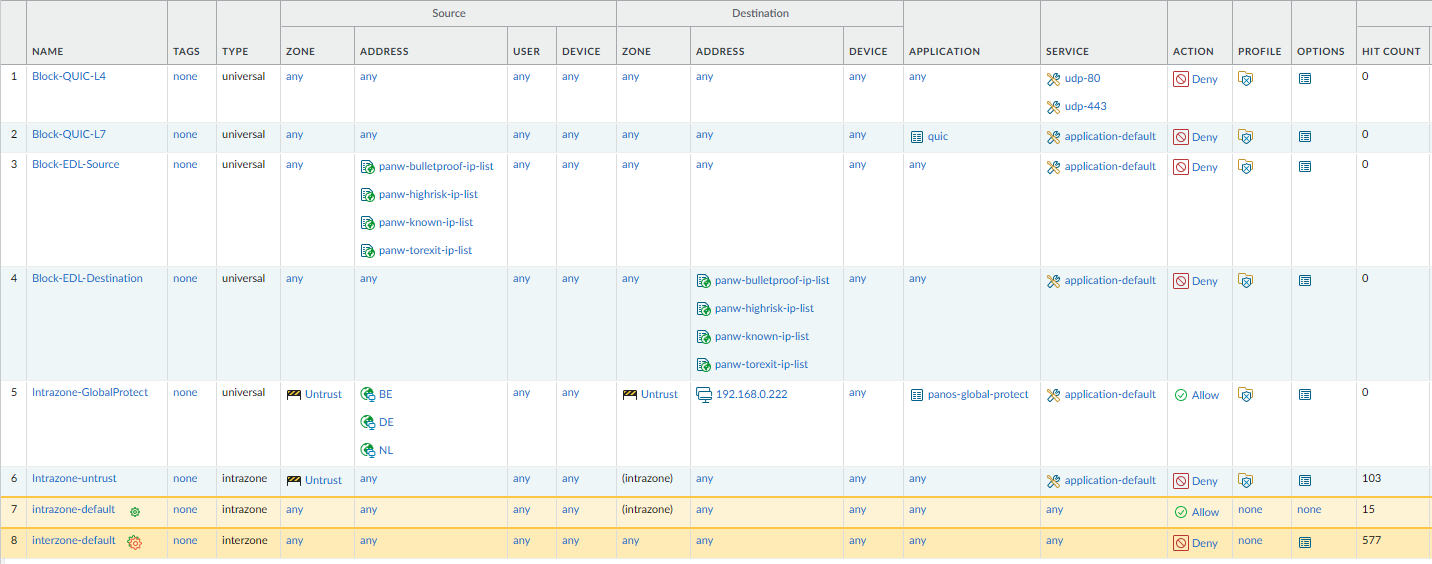
Finally, your security rule-base should look like this:

Finding applications in the logs
If traffic is blocked and you’re unsure which application that you have to add, you can check the logs. Using the filter (action neq allow) will show you traffic that has been denied and the application itself along with other useful information.
This is an environment with a lot more traffic. We can see that most traffic was dropped by the default inter-zone policy. And someone has tried the application netbios on my untrust interface, which was blocked by the intra-zone policy that I created.

Finding applications using the Policy Optimizer built-in feature
We can also see the applications that were used in L4 policies configured with just services (UDP/TCP and port number).
In the following example, I have two security policies. The one in the top is L7 with applications specified. The one in the bottom has rules with just services and acts as a catch rule to find applications. This example comes from a home network environment, so there are a lot of apps that were seen.

If you click on the “Apps seen” text, it’ll open a window and show the applications that were detected.

We have the option to create a cloned rule, which will create a new rule and add the selected applications to that rule.
And we also have the option to add to an existing rule, in case you already have a L7 rule and you would like to update it with the new applications that were found.
I would not recommend the option “Add to This Rule”. Simply because the point is to get rid of the L4 policy after you’ve identified all applications and added them in a rule.
After you’ve added the applications to your L7 policy, you simply should check if any new applications were found on the L4 policy, if so add them to your L7 policy. And check the hit counter, you should reset it every time that you add new applications to your L7 policy. Once there are no new applications found and no hits on the counter, then you can safely delete the L4 policy.
Deleting applications that are no longer used
In the bottom left, you can find the option to view the applications that are no longer used anymore for longer. You can also check how many L4 rules that you have with no applications specified.
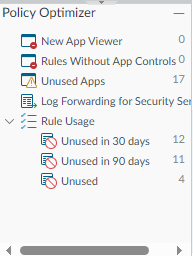
If we click on Unused Apps, we get to see an overview with policies that have unused applicatoins.

If you click on “Compare” – it’ll show you the traffic data for the applications that were either used or not used.
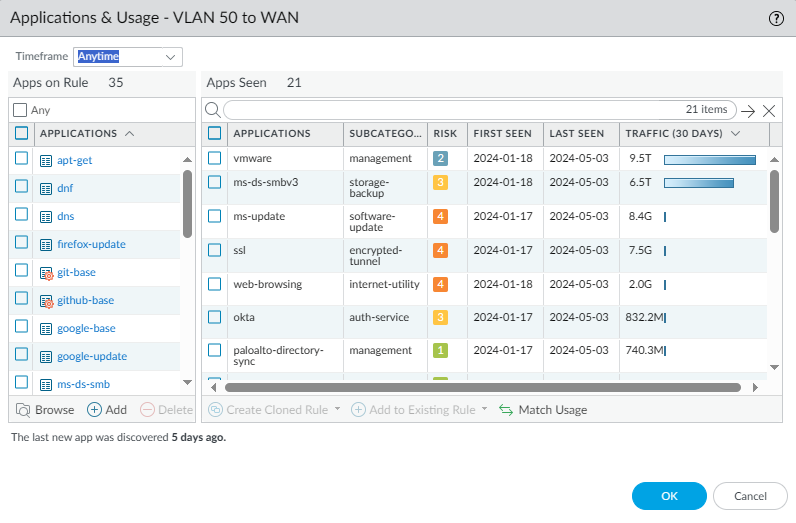
Basically vmware was used the most, which makes sense since that’s used for my Veeam backups. If we scroll down, we see applications with next to no traffic data and we can also see the first & last time it was used.
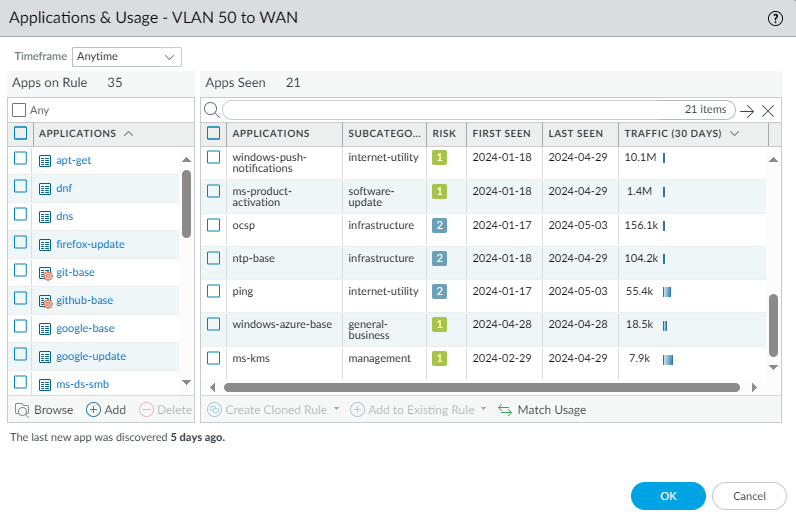
Don’t just delete applications that have been rarely used. In the above example, you can see that ping had almost no traffic which makes sense since ping packets are never that big or used as much. Evaluate whether you want to keep the application or not – something that you’ll have to decide internally.
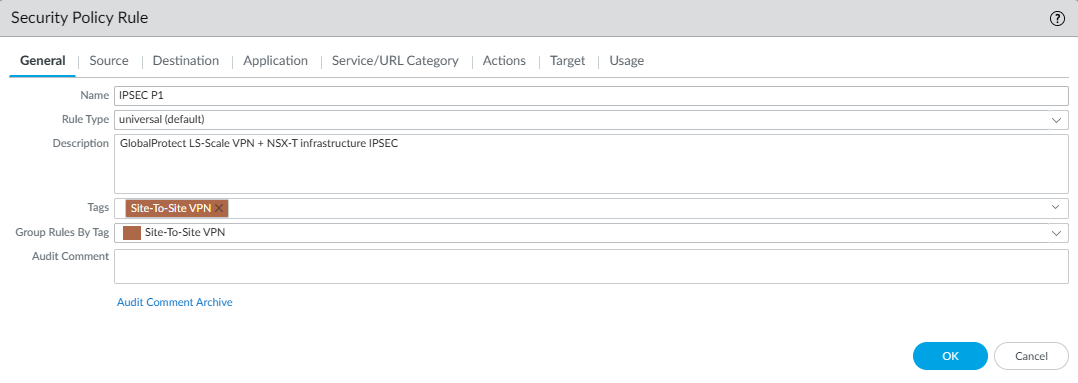
Using tags in policies
We can use tags for better visibility on any kind of policy including NAT etc. Simply just add the tags to the policy and that’s it.
You’ll see the 2nd option “Group Rules By Tag”, which basically gives you a more organized view if you change it from “default-view” to “Rulebase by Groups”. Which you can find in the bar where you find the option to add new rules or delete them. Or just simply at the bottom of the page.
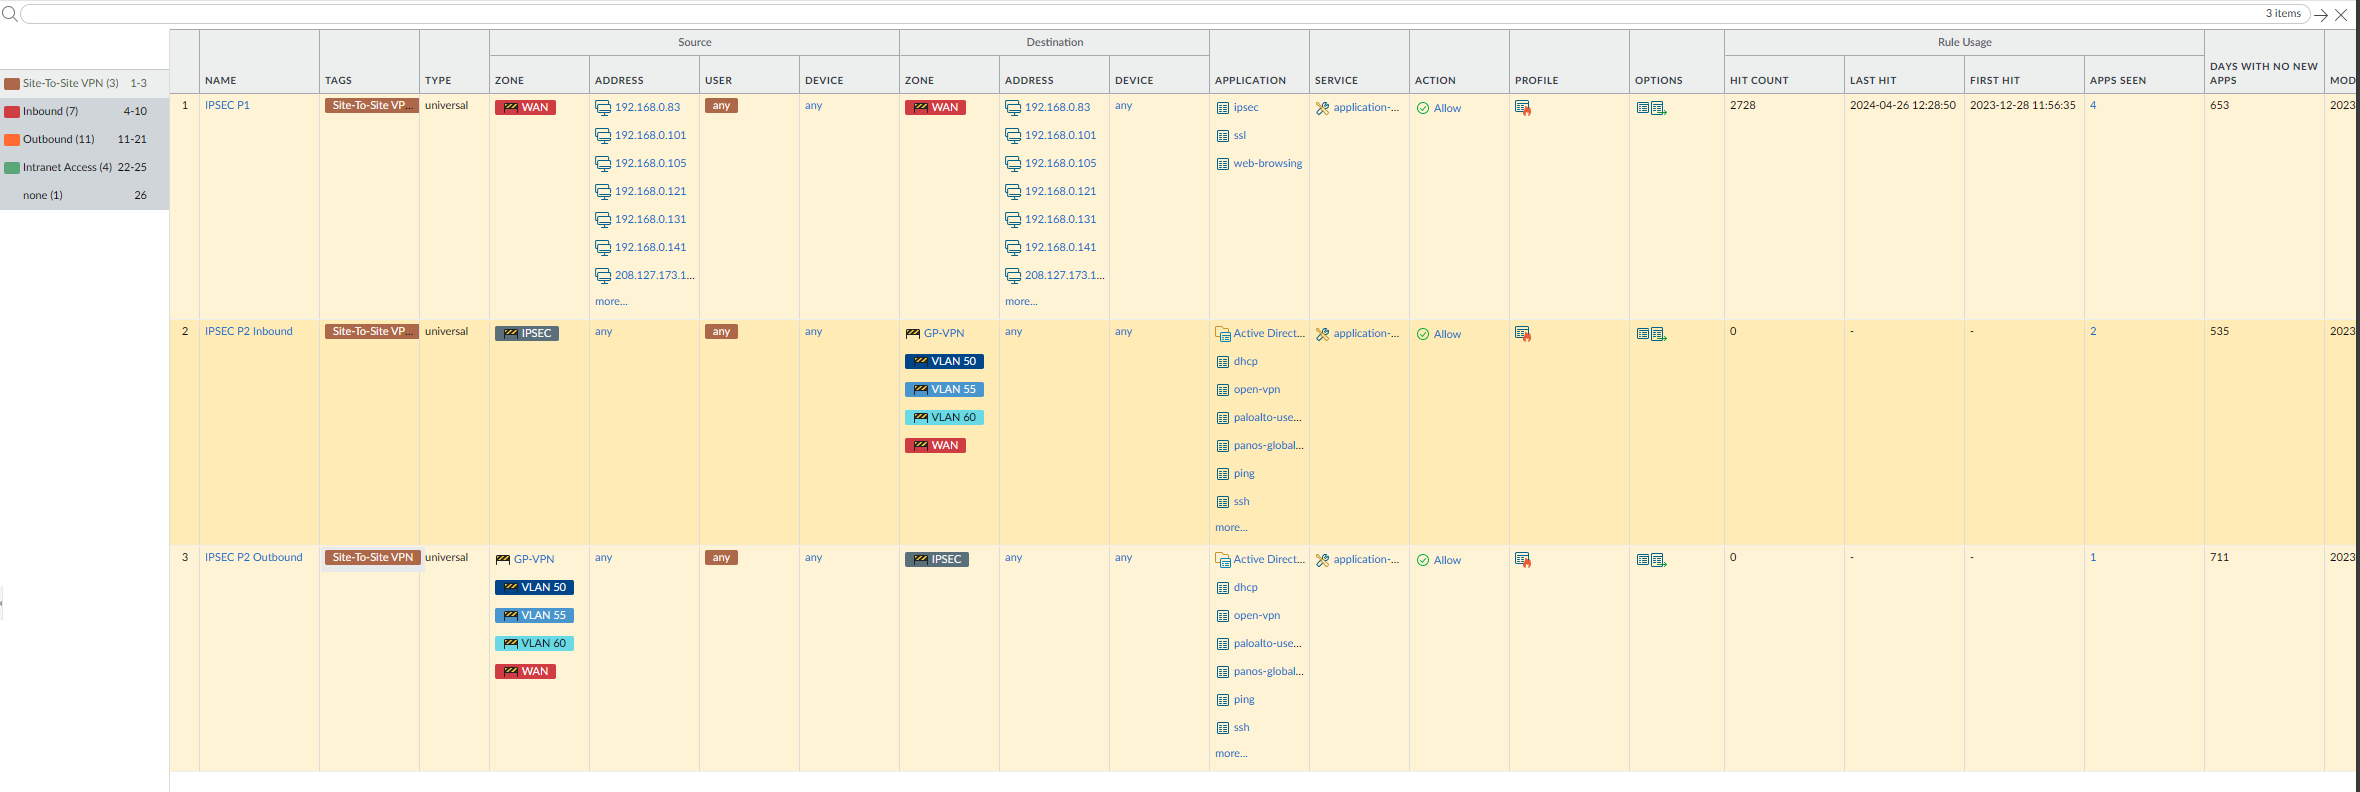
I had sorted it on Inbound, Outbound, Intranet and IPSec traffic as you can see on the left.
Filters & App-ID database
You can retrieve the App-ID database on the firewall at Objects > Applications. And you can create custom applications as well which are often used in application override policies.
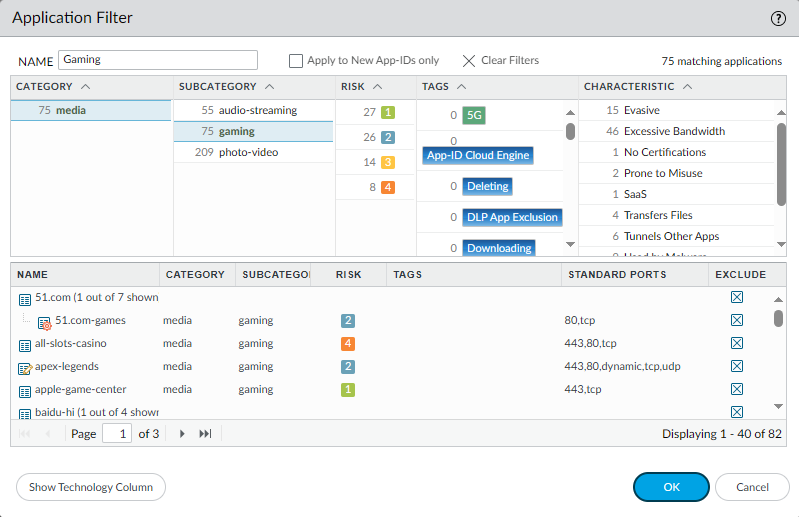
Optionally you can create filters based on categories and use those filters in the security policies. This might simply the process, for example if you want to allow all sorts of gaming traffic then you create a filter based on criteria that match gaming.
Objects > Application filters.
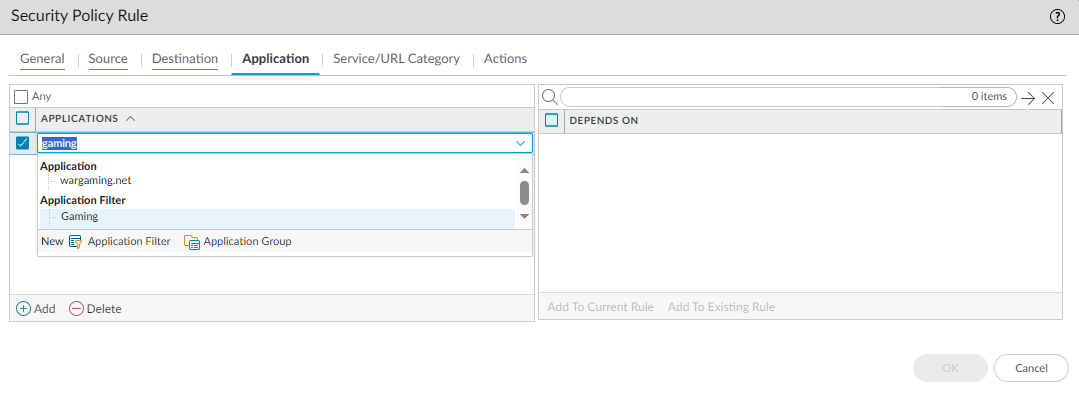
Simply just add the filter in the security policy like so:
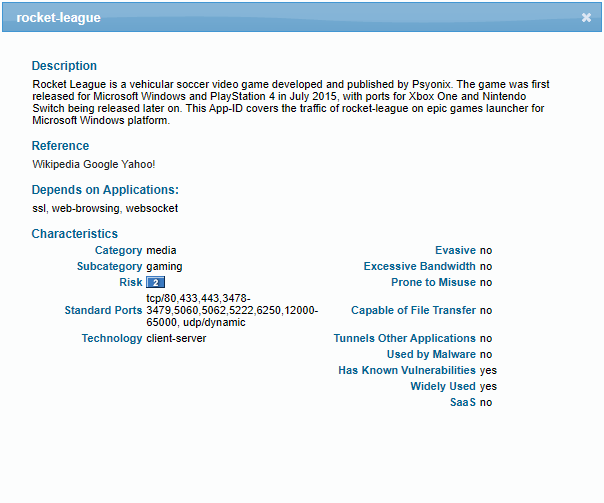
Lastly, https://applipedia.paloaltonetworks.com/ – is just a public facing App-ID database which might be easier to use. And it also shows the used ports, a description of the application and much more.