We will be setting up NSX-T from scratch. It’ll be a step by step guide, so everyone can easily follow because it’s really hard to get into NSX-T with nested environments and without the right equipment. It took me a very long time to understand NSX-T and it’s very confusing for beginners because it’s entirely different than a standard router or firewall.
We’ll be using a nested ESXI VM appliance because it allows us to add as many network adapters as we want because it’s just a VM after all. It’s easy to run out of physical interfaces on an actual ESXI host and it can be quite expensive buying another NIC or if you do not have an PCI-Express slot left. The nested ESXI VM’s will serve as ESXI hosts that are part of our NSX-T infrastructure. The physical server is NOT a part of it.
The guide will be split in three parts.
- Part 1: dSwitch configuration, installation/configuration pfSense, installation/configuration nested ESXI VM and vCenter installation.
- Part 2: Adding nested ESXI host to vCenter appliance, configuring the dSwitch, installing the NSX-T Manager and linking vCenter with NSX-T Manager.
- Part 3: Configuring NSX-T, deploying edge cluster, T0/T1 gateways, routing, segments and VM connectivity.
Prerequisites
- A physical ESXI server with a lot of RAM
- vCenter on the physical ESXI Server
- pfSense as a router
- Nested ESXI appliances which you can get from https://williamlam.com/nested-virtualization/nested-esxi-virtual-appliance
- NSX-T unified appliance with a valid license (a 60-day trial is available)
Topology overview
Carefully analyze the topology before you begin.
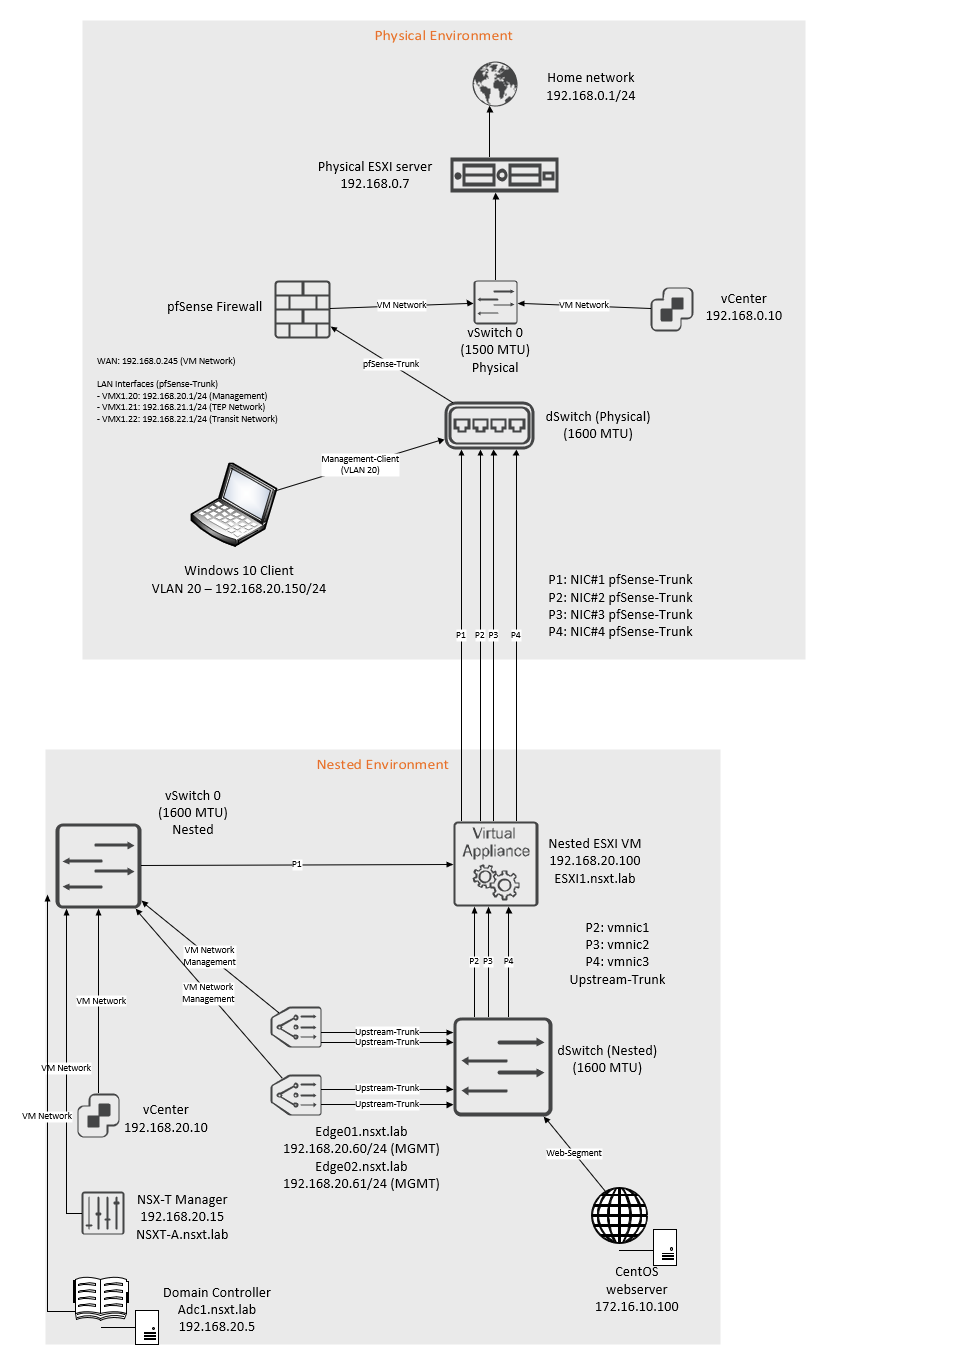
The IP blocks that are used are as follow:
| Network | VLAN ID | Subnet |
| Management Network | 20 | 192.168.20.0/24 |
| TEP Network | 21 | 192.168.21.0/24 |
| Transit Network | 22 | 192.168.22.0/24 |
The interfaces on the pfsense router:
| Interface name | VLAN ID | Address | MTU |
| vmx0 (WAN) | No VLAN | 192.168.0.245/24 | 1500 MTU |
| vmx1 | No VLAN | No IP address | 1600 MTU |
| vmx1.20 – Management Network | 20 | 192.168.20.1/24 | 1600 MTU |
| vmx1.21 – TEP Network | 21 | 192.168.21.1/24 | 1600 MTU |
| vmx1.22 – Transit Network | 22 | 192.168.22.1/24 | 1600 MTU |
Interfaces and switch configuration inside the nested environment:
| Uplink# | NIC# | Switch-type | Location |
| Uplink-1 | vmnic0 | vSwitch0 | Inside nested environment |
| Uplink-2 | vmnic1 | dSwitch | Inside nested environment |
| Uplink-3 | vmnic2 | dSwitch | Inside nested environment |
| Uplink-4 | vmnic3 | dSwitch | Inside nested environment |
Preparing the dSwitch on the physical environment
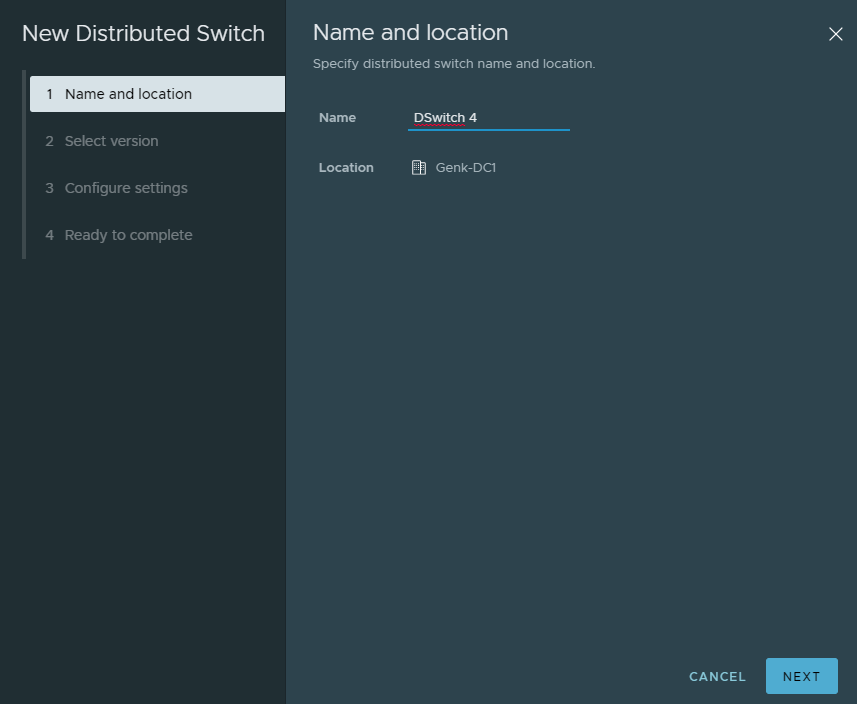
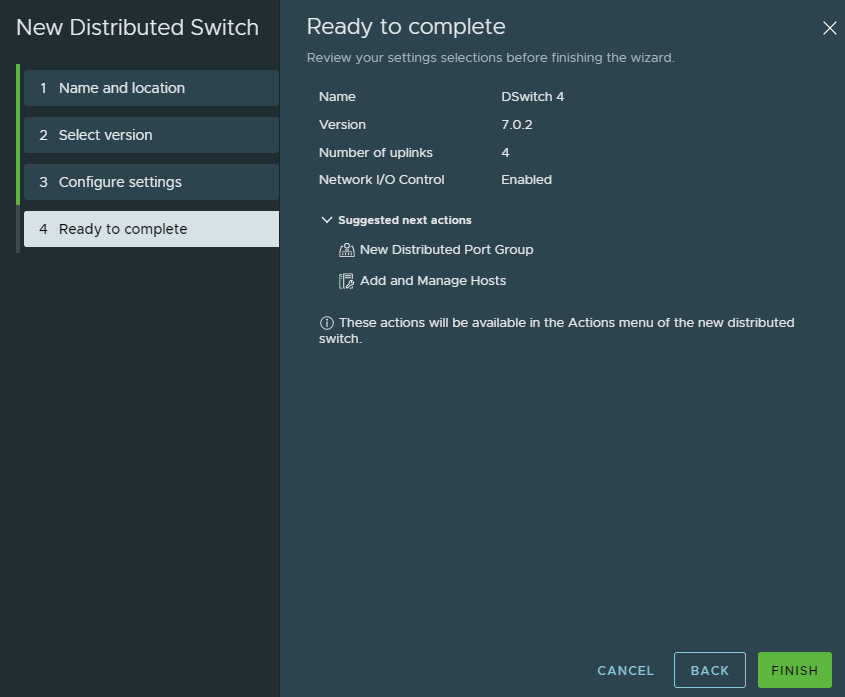
Create a new dSwitch.
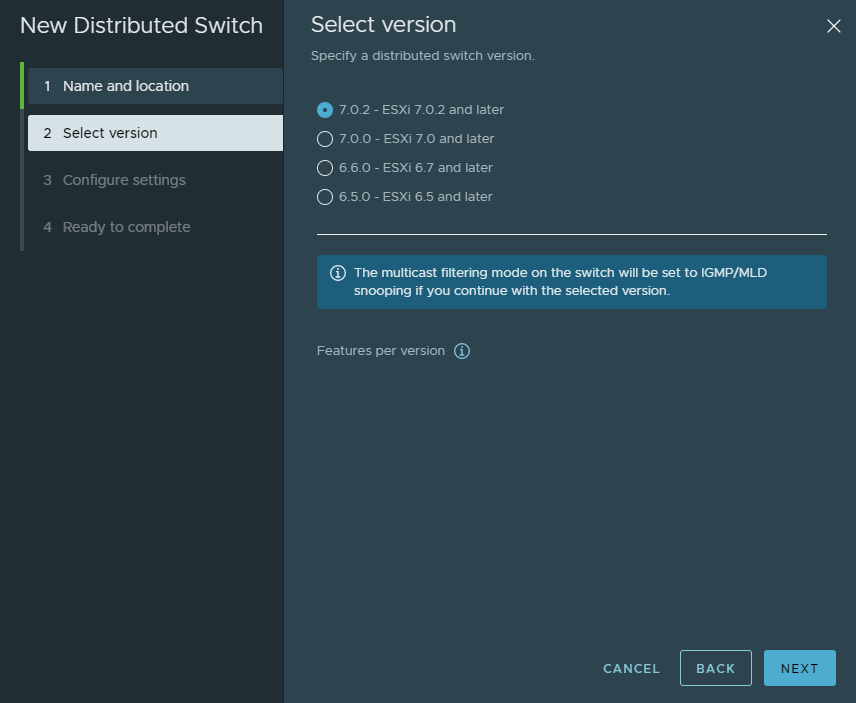
There’s no reason for me to select an older ESXI version.
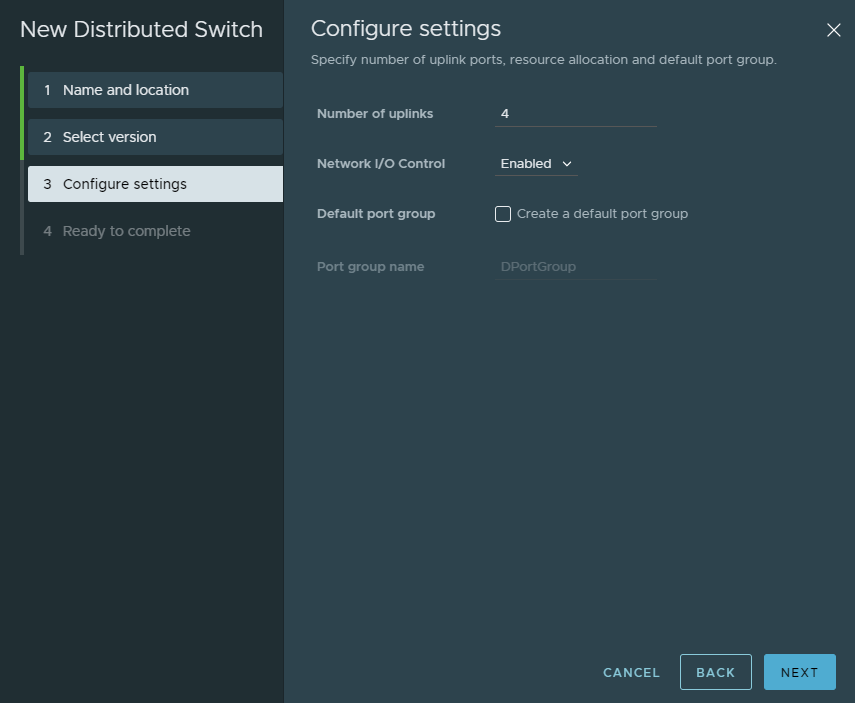
The number of uplinks doesn’t matter because we’re not using any real uplinks for this switch. Uncheck the box that creates a default port group.
Validate the configuration and click finish.
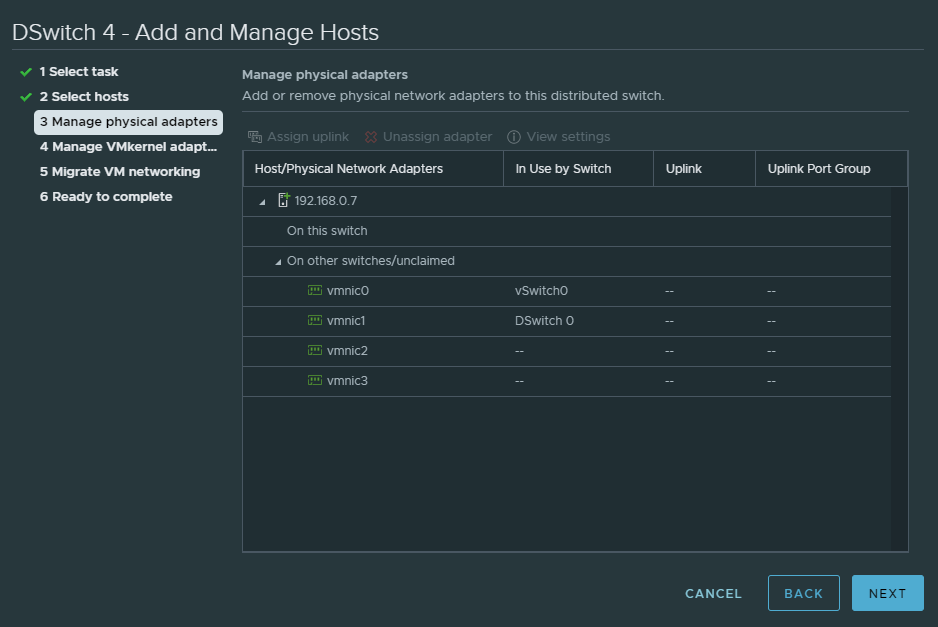
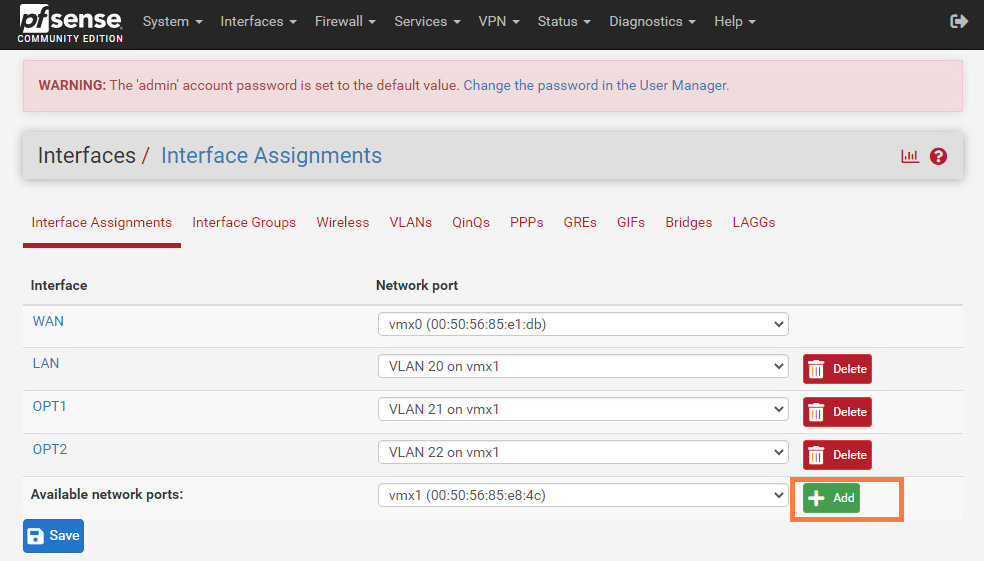
Next we have to add the physical ESXI host to the switch.
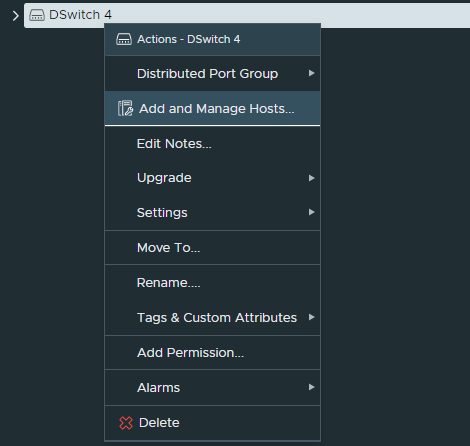
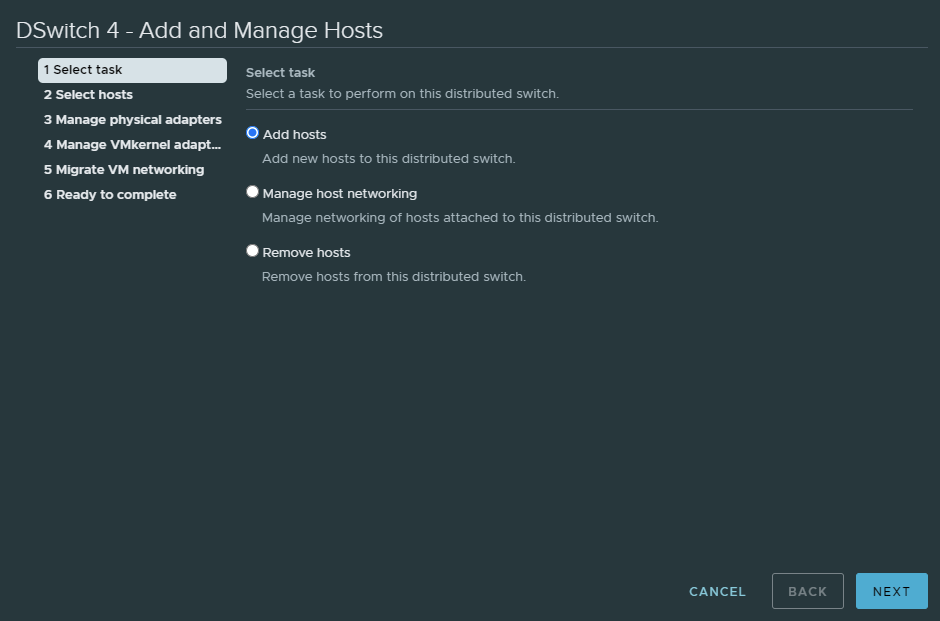
Click ‘New hosts…’ to add the physical ESXI host and click next.
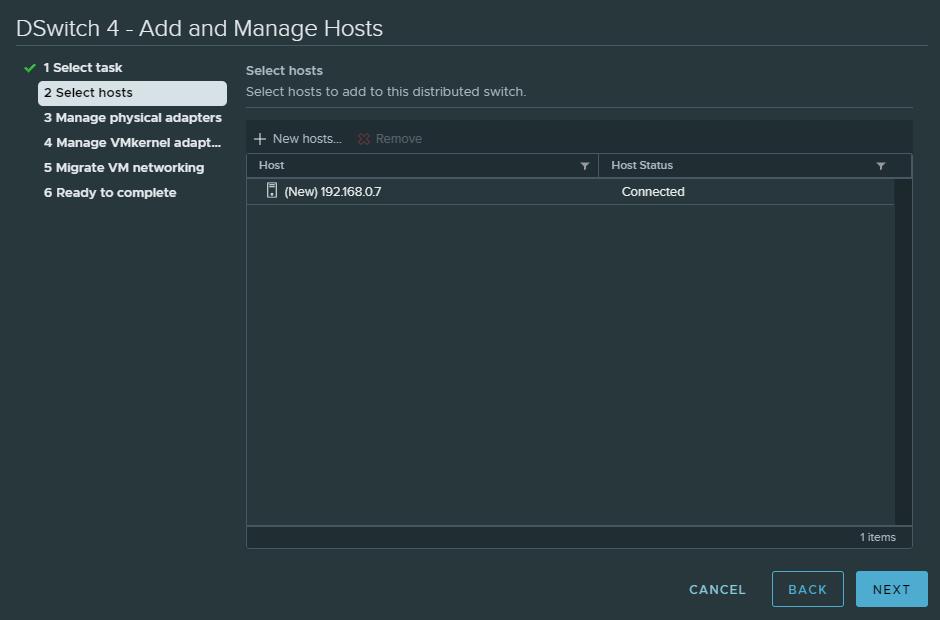
Do NOT change anything here because we don’t want to assign any of our physical NIC’s to this dSwitch. Simply just click next. It will prompt a warning that we’re not assigning any uplinks, but ignore it.
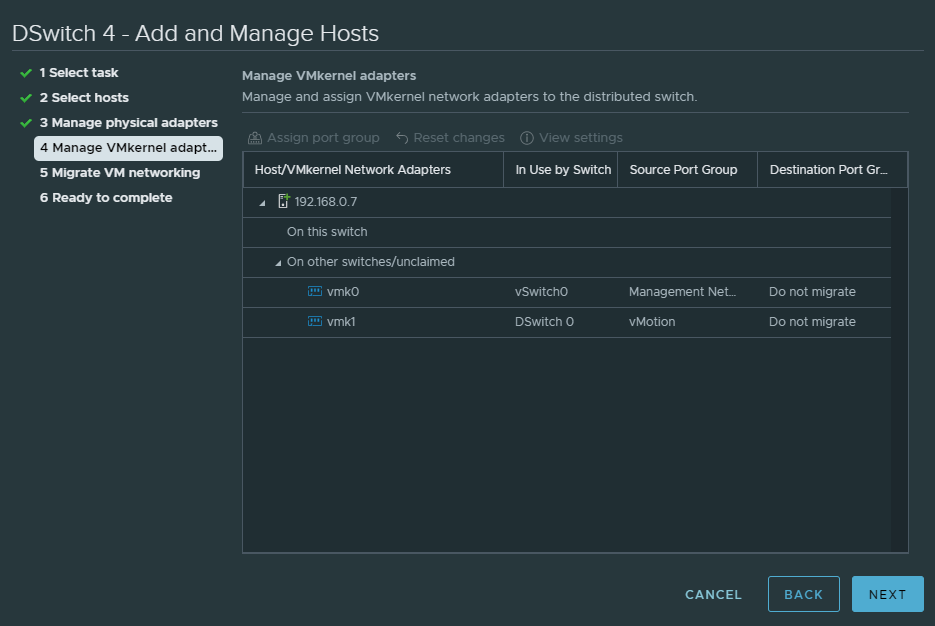
Again we don’t need to migrate any VMK’s, so just click next.
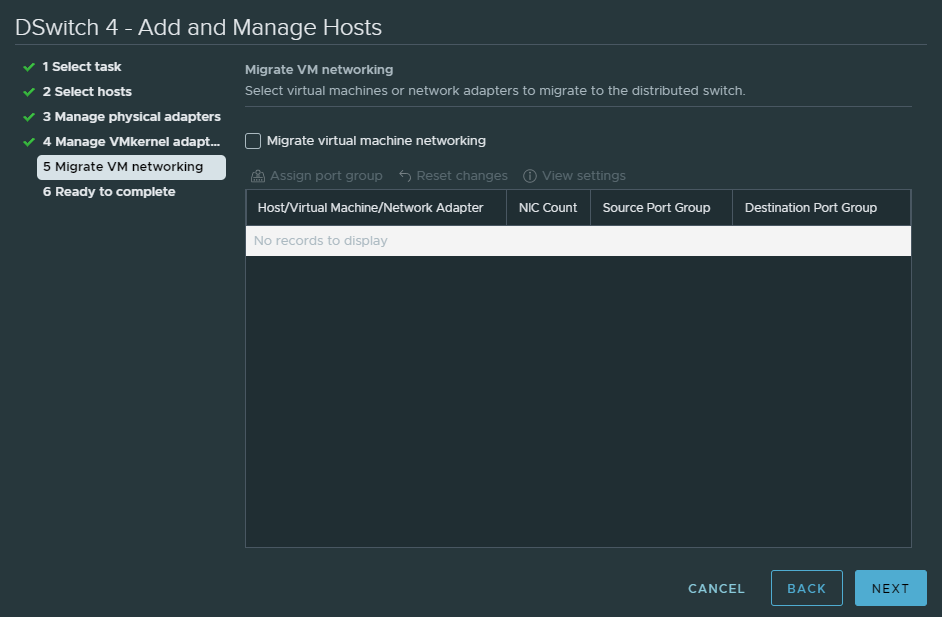
Click next because there are no virtual machines to begin with.
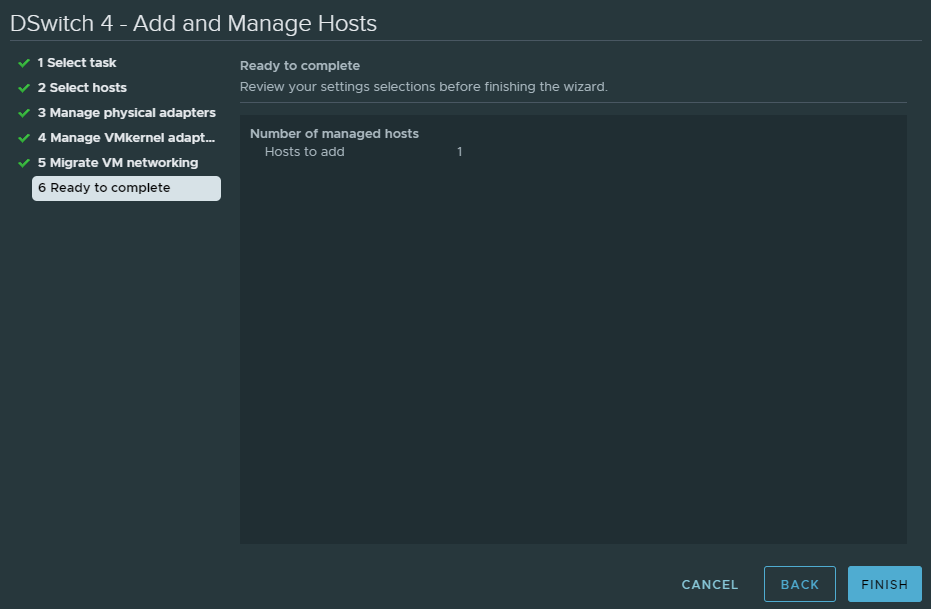
Click finish.
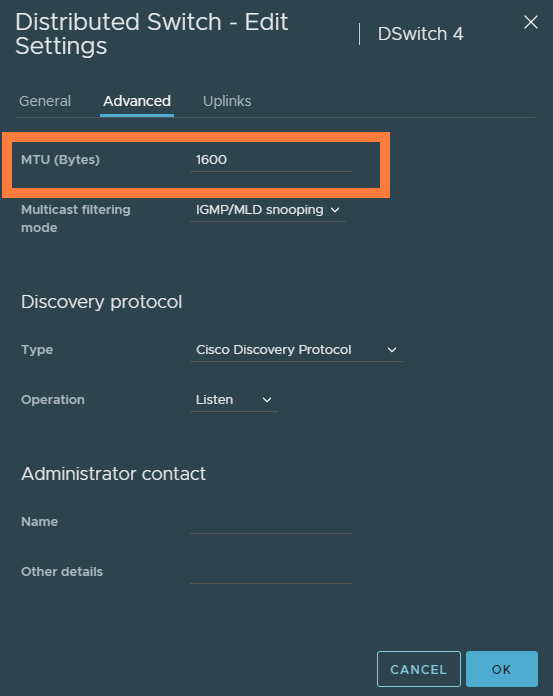
Right click the dSwitch and edit its settings. Change the MTU to 1600 as a minimum which is requirement for NSX-T.
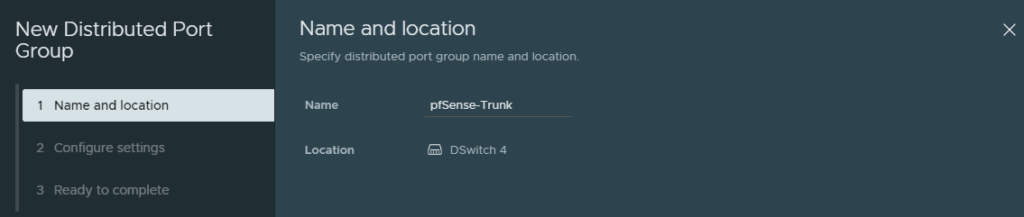
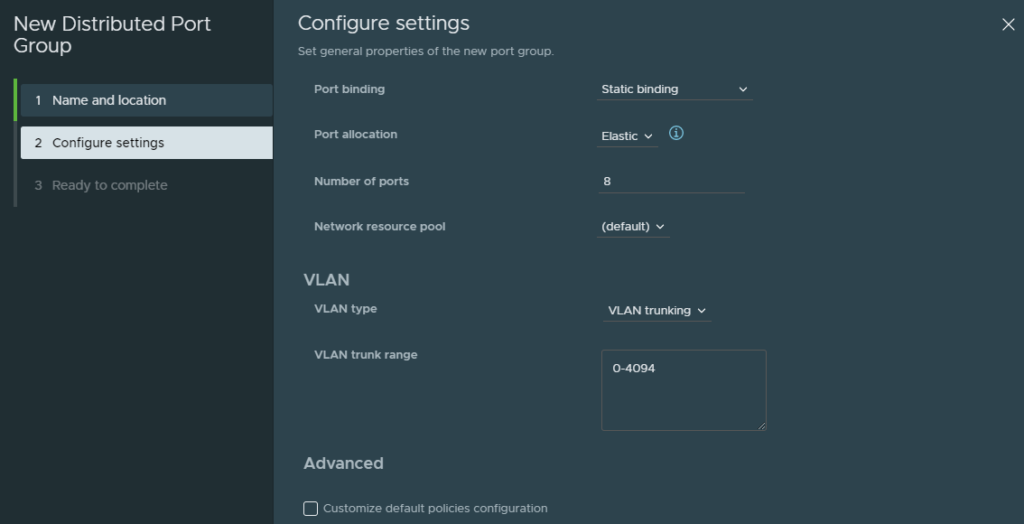
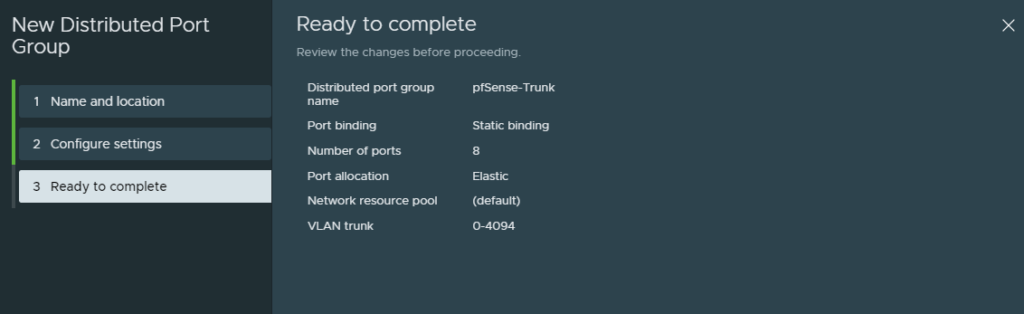
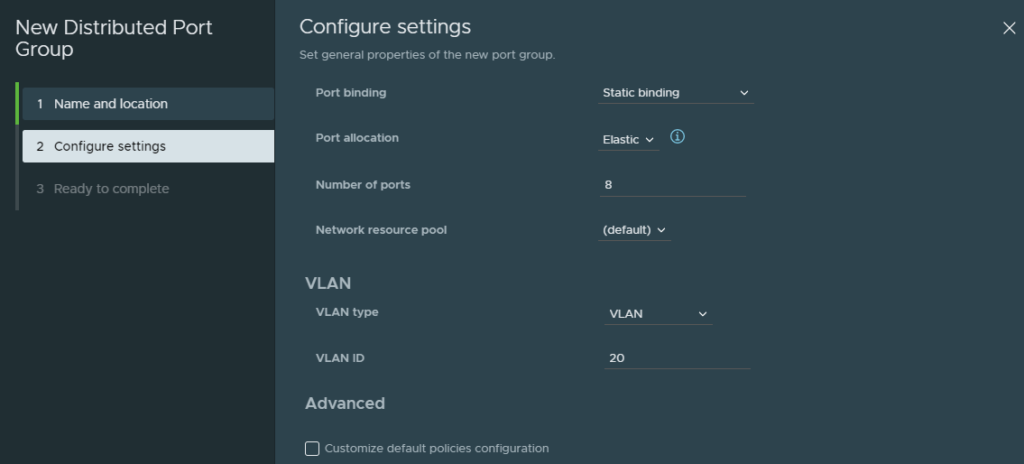
Next, create a new port group and tag it for VLAN 0-4094.
Select ‘VLAN trunking’. The default range is fine.
And finish.
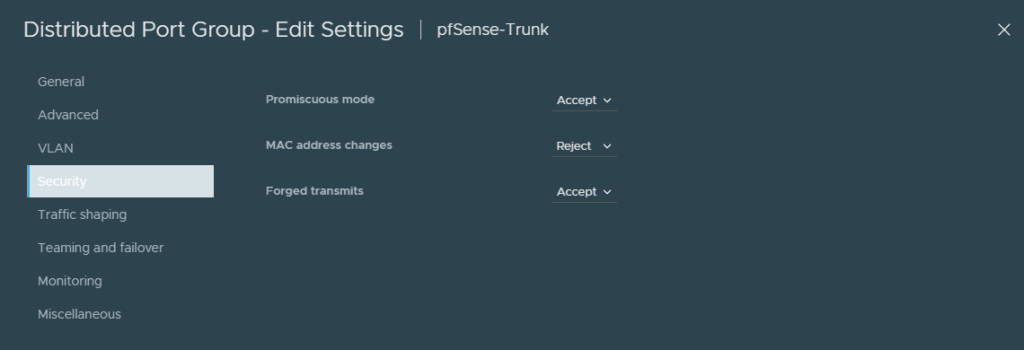
Edit the port group’s security settings and allow it for ‘Promiscuous mode’ and ‘Forged transmits’. This is mandatory or the nested ESXI VM won’t be able to communicate with pfSense.
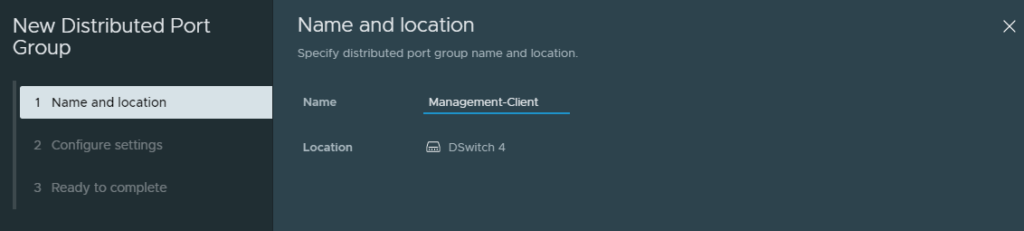
Create a new port group. It’ll be an access port group with ’20’ as the VLAN ID. We are doing this because we want to access pfSense’s web-interface to make any changes and we need a windows 10 client for this.
Pick VLAN 20 as the ID. (Not trunking)
Preparing pfSense
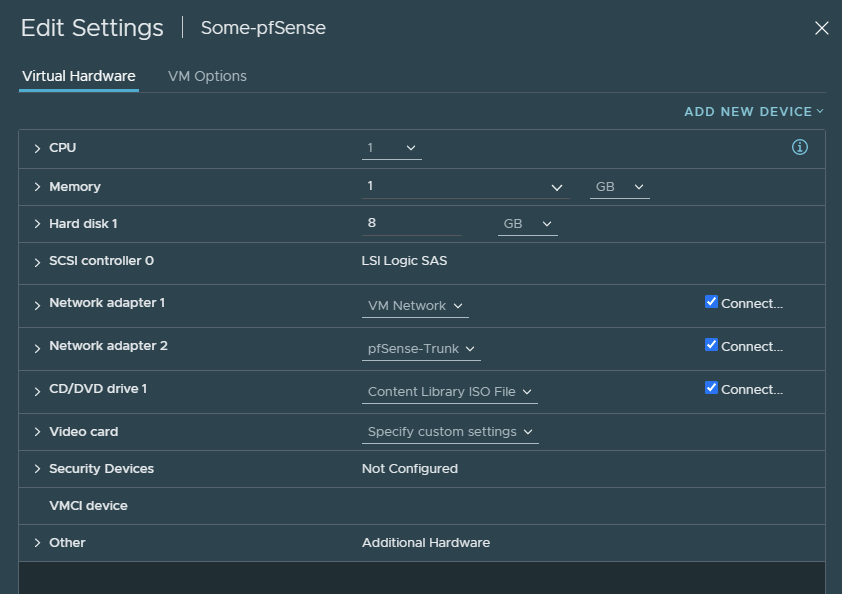
VM Network connects to my home network which will serve as an internet gateway. The second interface is the trunk we created earlier.
After the installation, it’ll ask us if we want to configure any VLAN’s and we do.
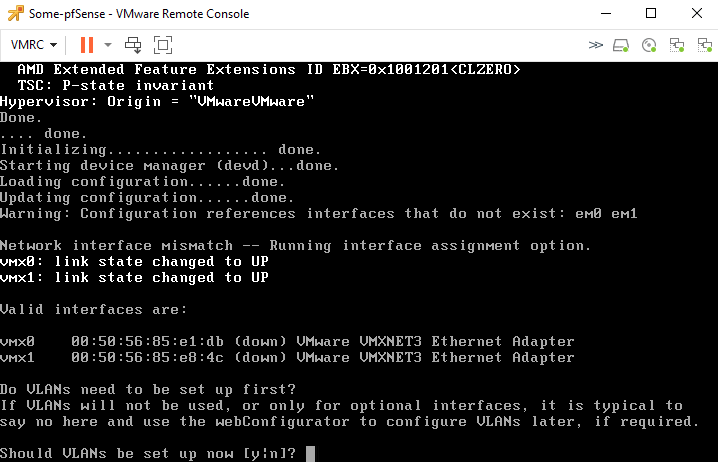
Make sure that ‘vmx1’ is the parent interface (type it out).
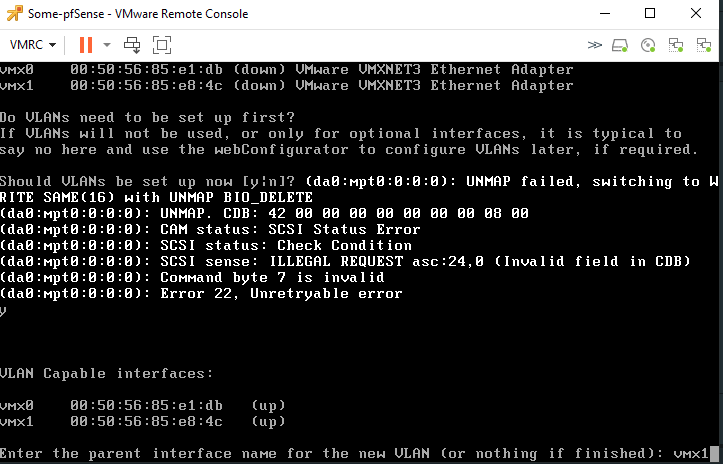
Enter 20 as the VLAN ID.
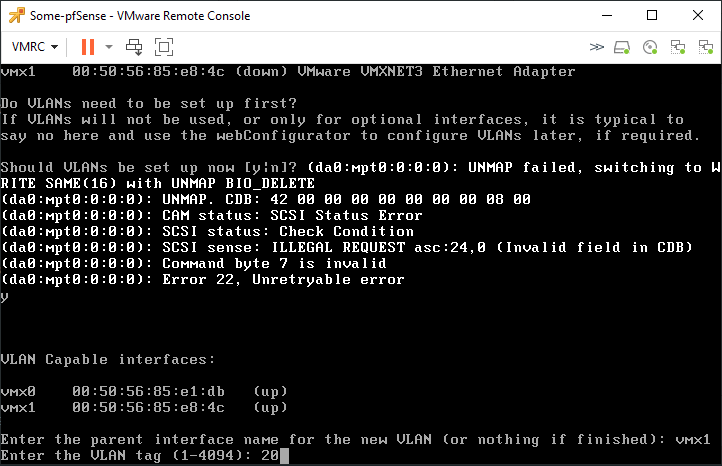
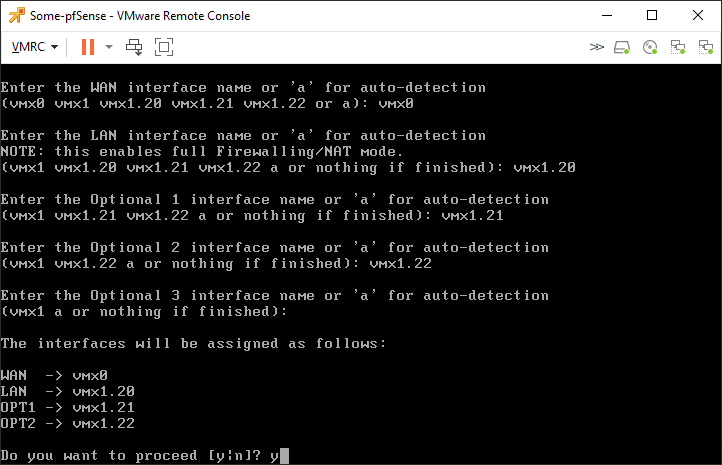
And repeat the same process for VLAN 21 and VLAN 22. When you’re done adding VLAN 22, just press enter. Then you’ll be prompted with the following and select ‘vmx0’ as the WAN interface.
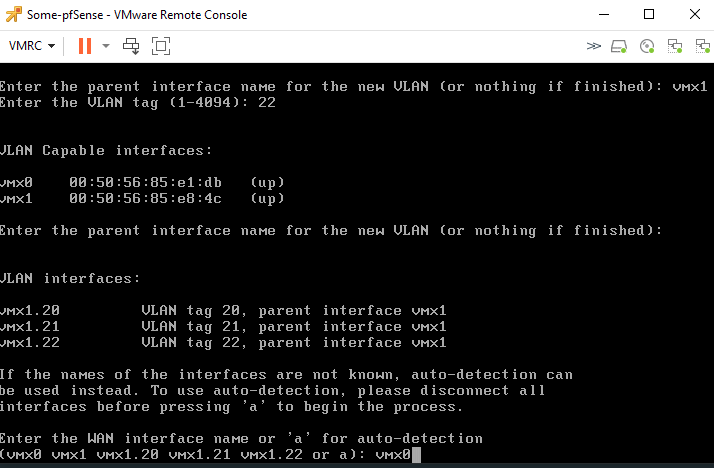
Then enter ‘vmx1.20’ as the LAN interface.
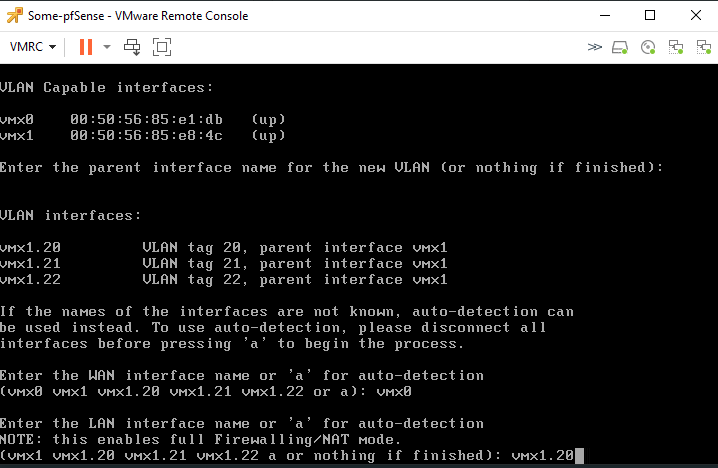
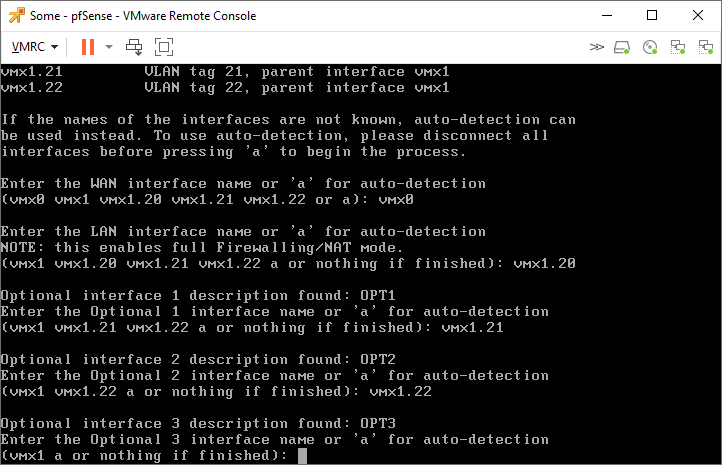
Then it’ll ask for an optional interface, enter vmx1.21.
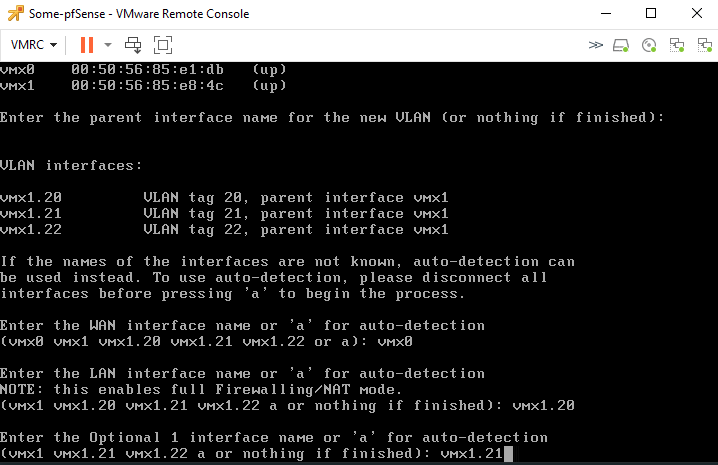
Then enter vmx1.22 for the 2nd optional interface.
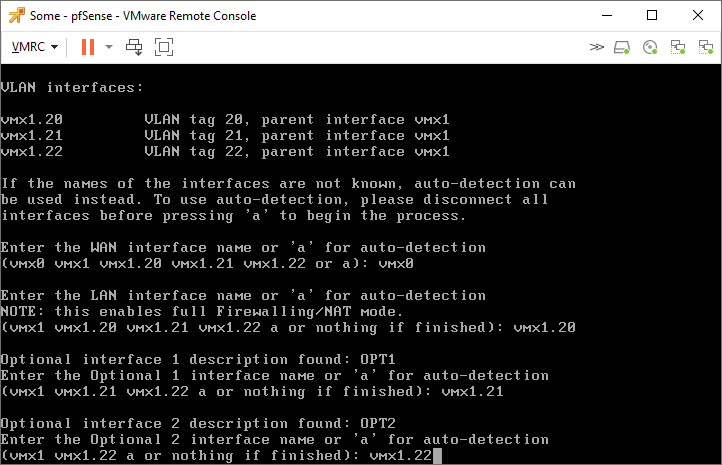
We don’t need any more interfaces, so just enter here to complete the configuration.
Type ‘y’ to confirm the configuration.
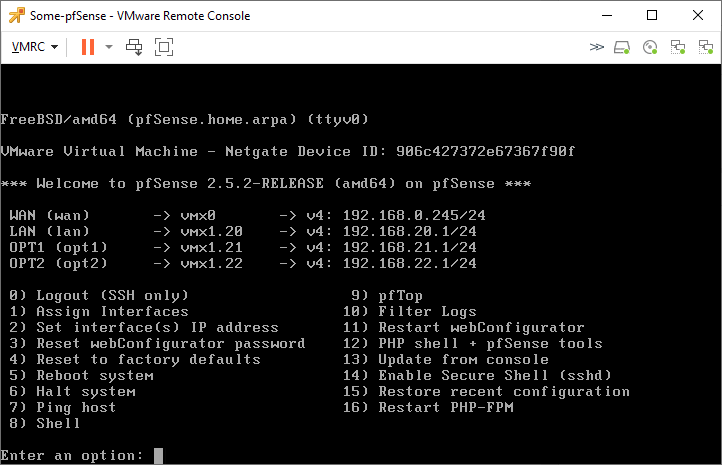
We still have to configure the IP addresses for each interface. This can be done with the web-interface or the CLI. I won’t demonstrate how to configure the IP addresses and DHCP scopes.
This is what it looks so far.
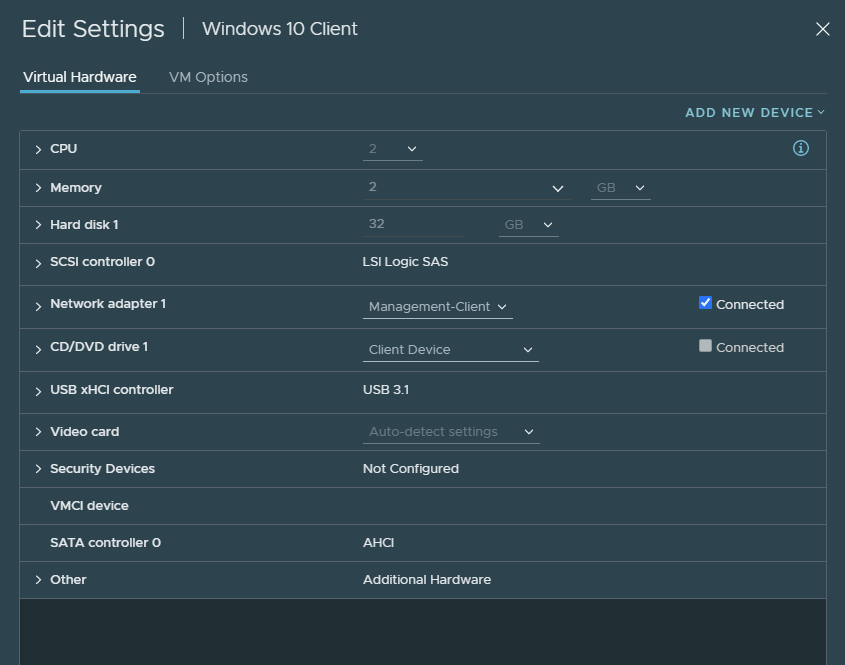
This is the Windows 10 client I’ll be using. I’ve added the ‘pfSense-WebGUI’ port group with VLAN 20.
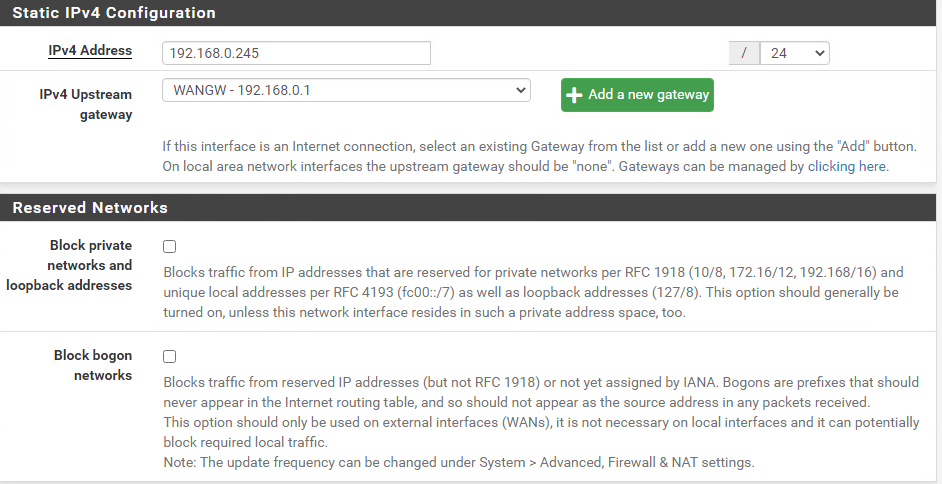
Browse to ‘https://192.168.20.1’ to access the web-interface. And under WAN settings, I’ve set it to a static IPv4 and turned off IPv6. The MTU should be left to default, because my home network doesn’t use MTU’s above 1500 which is the default value.
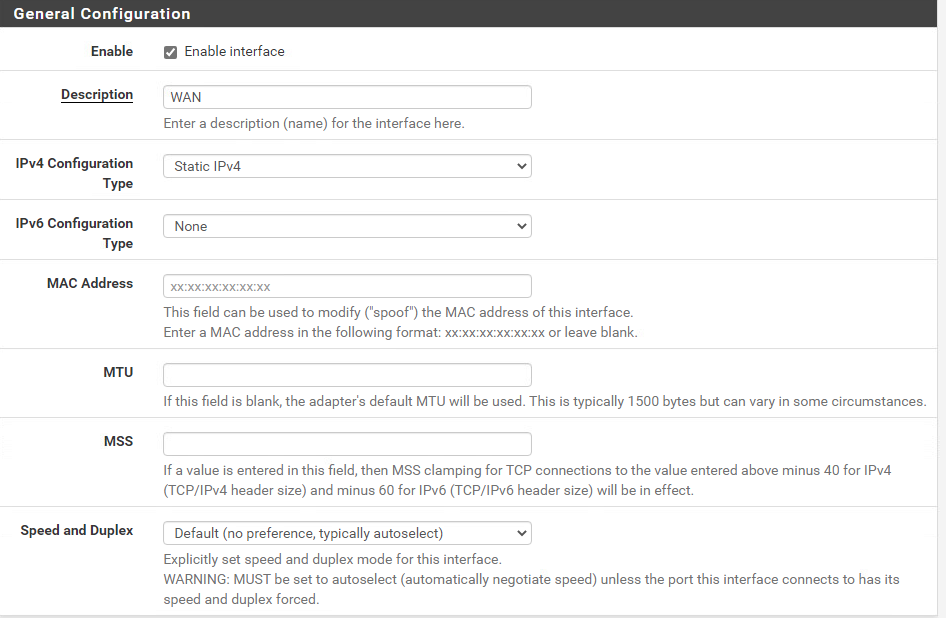
I’ve added my home-router as the default-gateway, which is 192.168.0.1. Uncheck the boxes shown below because we might want to access any of the LAN interfaces with an RFC1918 address.
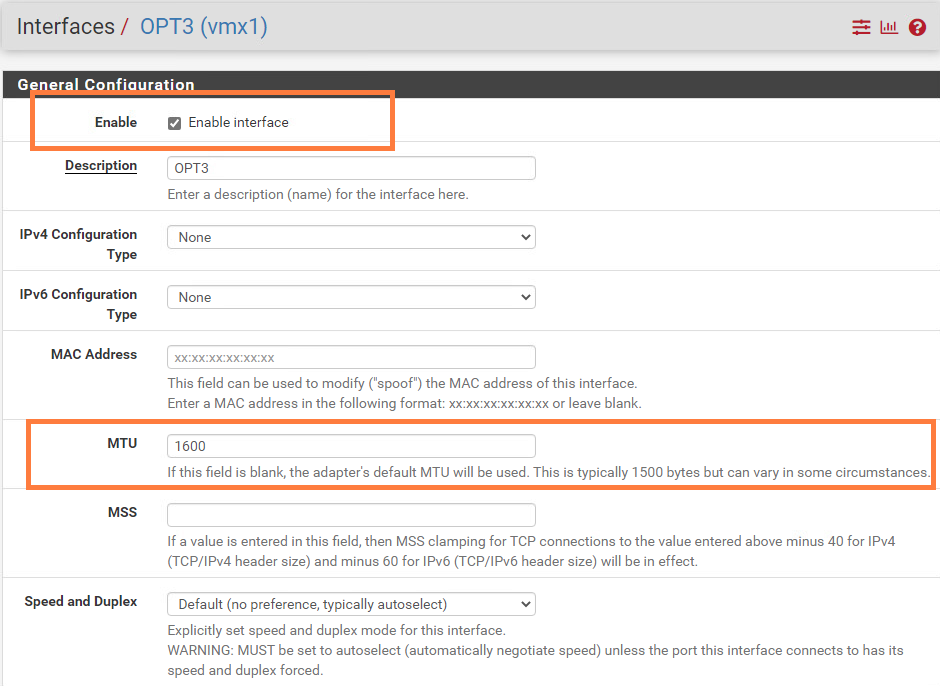
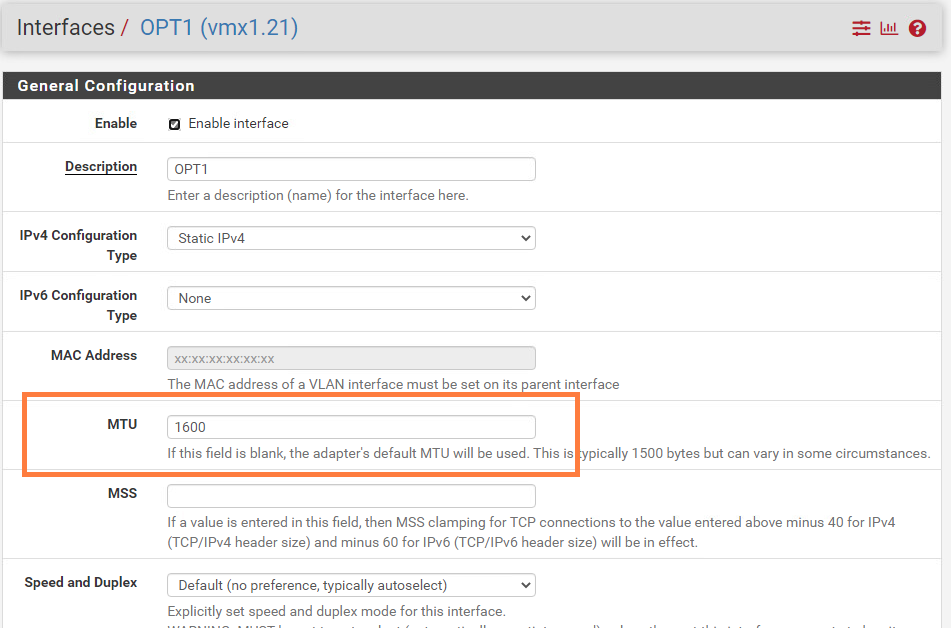
We have to add the parent interface (vmx1). The reasoning behind this is because the MTU of sub-interfaces (child-interfaces) cannot have an MTU value that’s greater than the one from the parent interface. The parent interface is disabled by default for whatever reason and thus preventing us from changing the MTU value.
Change the MTU value to 1600 and don’t forget to enable the vmx1 interface. The parent-interface does NOT need an IP address, so keep the IPv4 configuration type set to ‘none’.
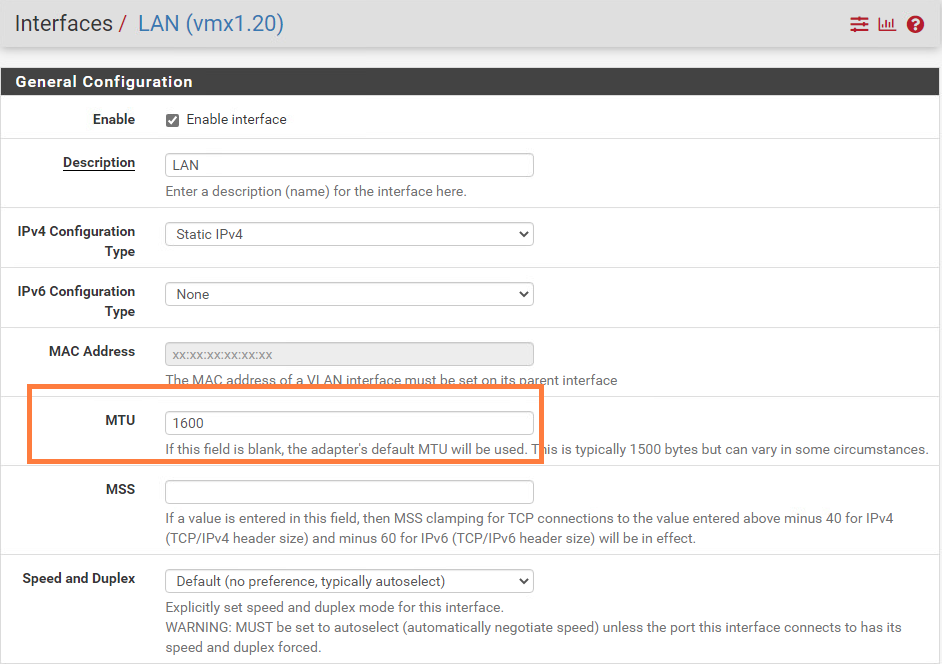
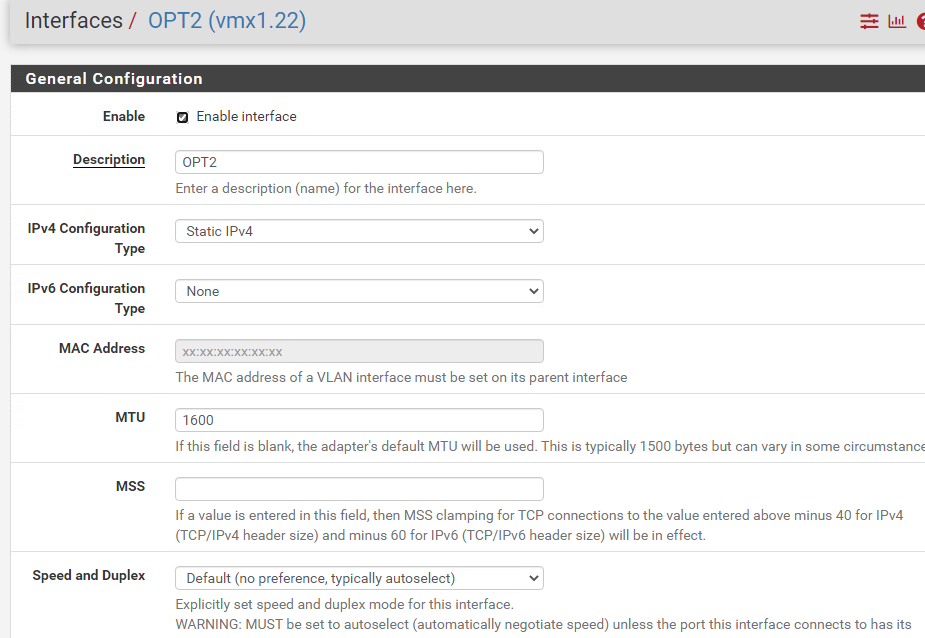
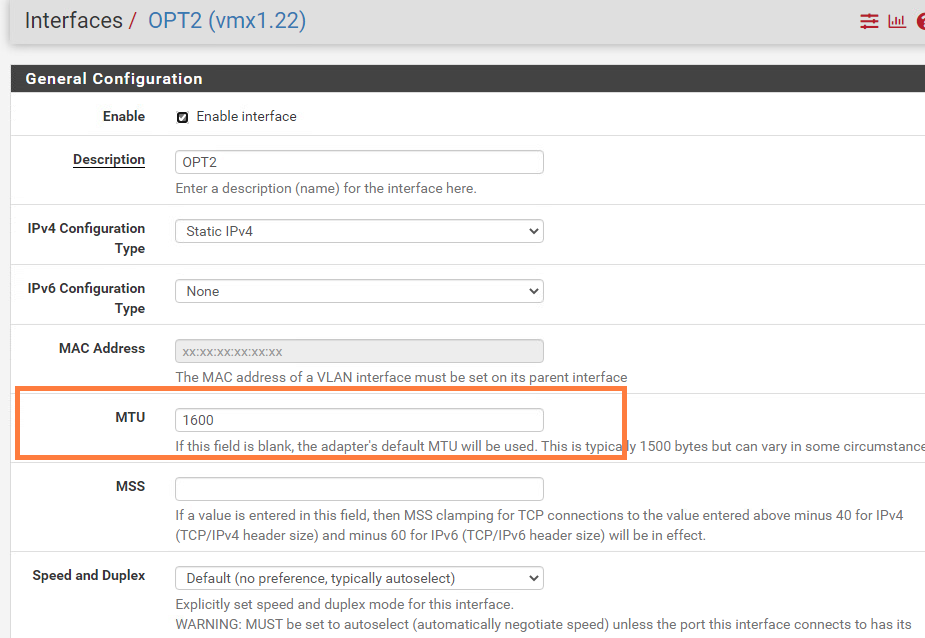
Next, we’ll change the MTU to 1600 for the following interfaces: vmx1.20, vmx1.21 and vmx1.22.
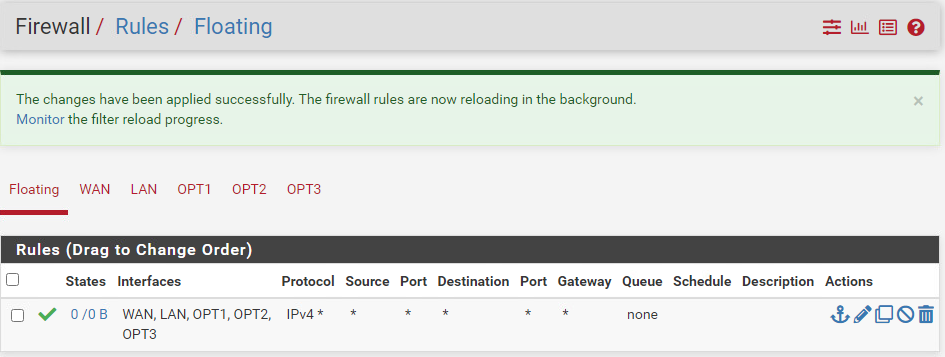
I’ve added a floating rule that allows traffic on all interfaces. This essentially makes our pfSense instance a router instead of a firewall. There’s not much of a reason to use pfSense’s firewall to NSX-T.
Deploying the nested ESXI VM appliance
Make sure to get the latest nested appliance from: https://williamlam.com/nested-virtualization/nested-esxi-virtual-appliance
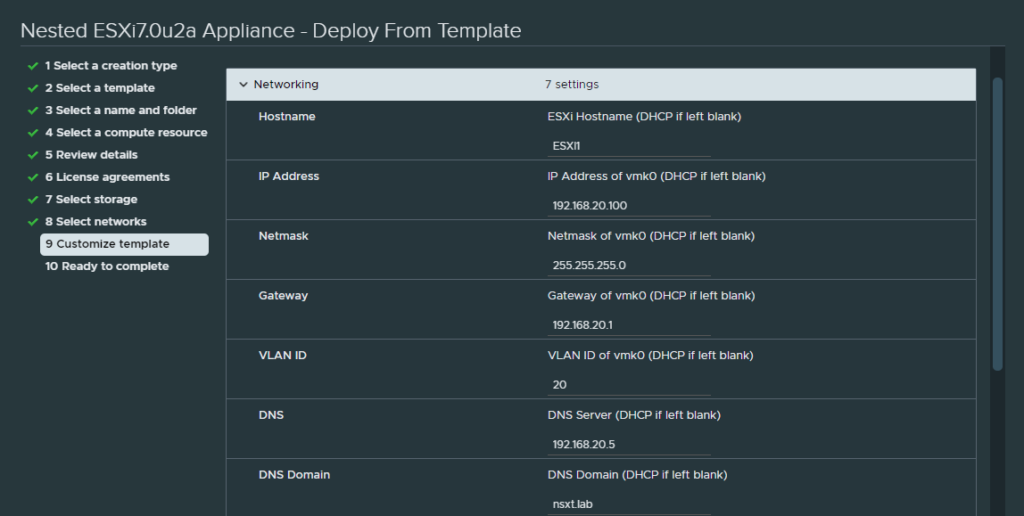
It is an .ova file so all you have to do is deploy it. The IP address for the management VMK will be 192.168.20.100. The DNS server and the domain is 192.168.20.5 and ‘nsxt.lab’. Do not forget to set the VLAN ID to 20, so that the management VMK knows which VLAN ID to use.
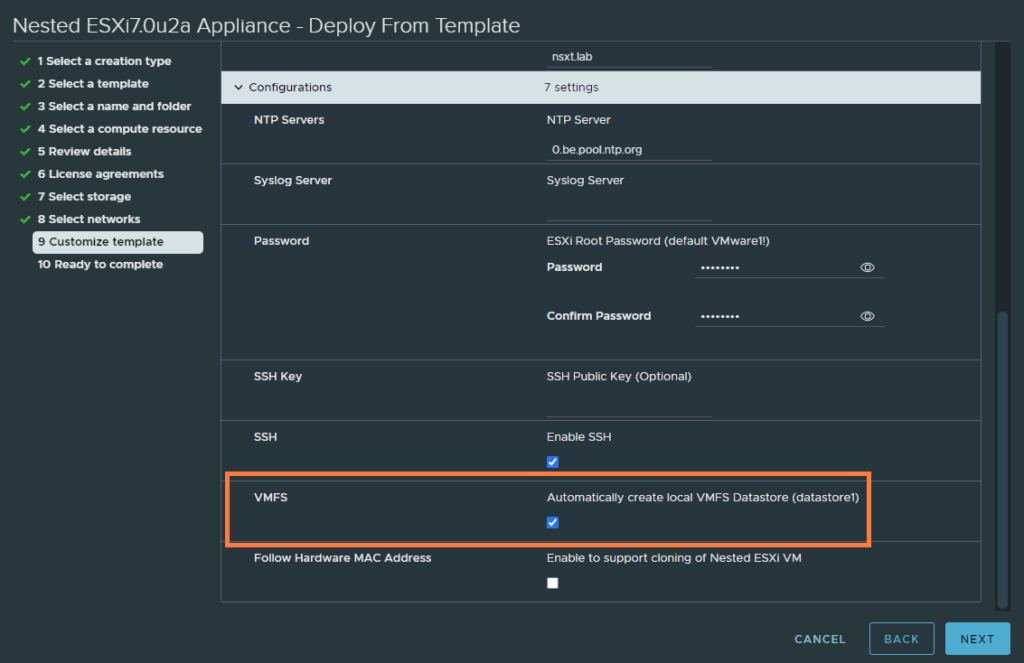
And check the box ‘Automatically create a local VMFS datastore (datastore1)’.
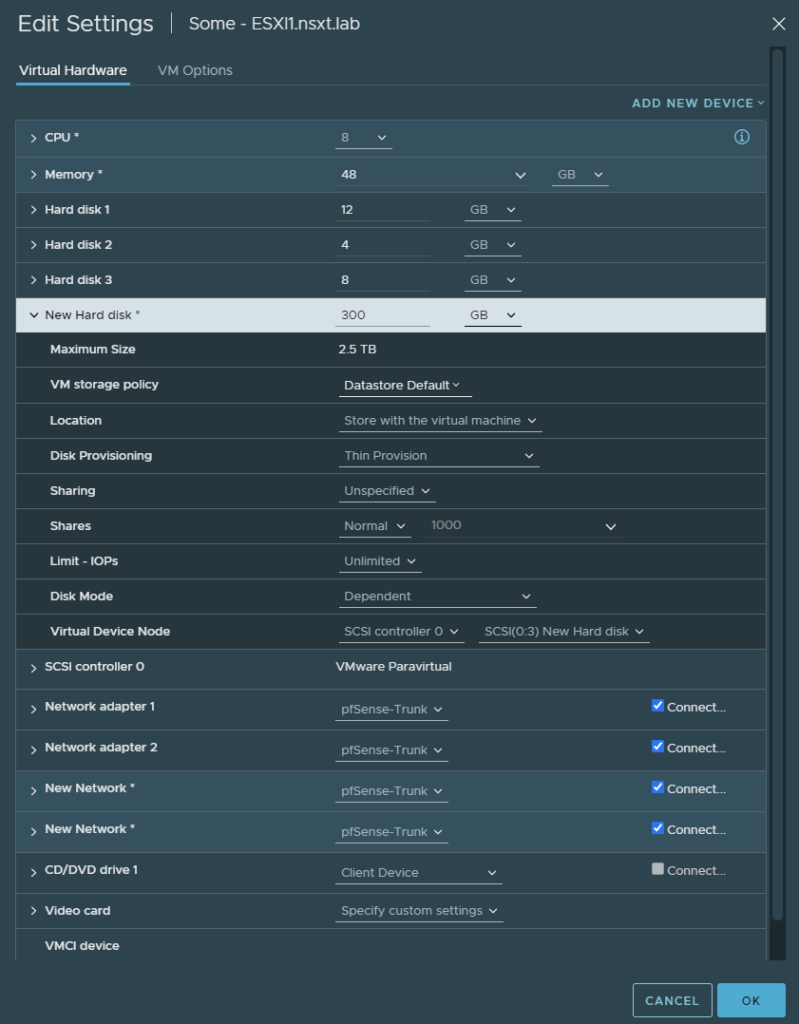
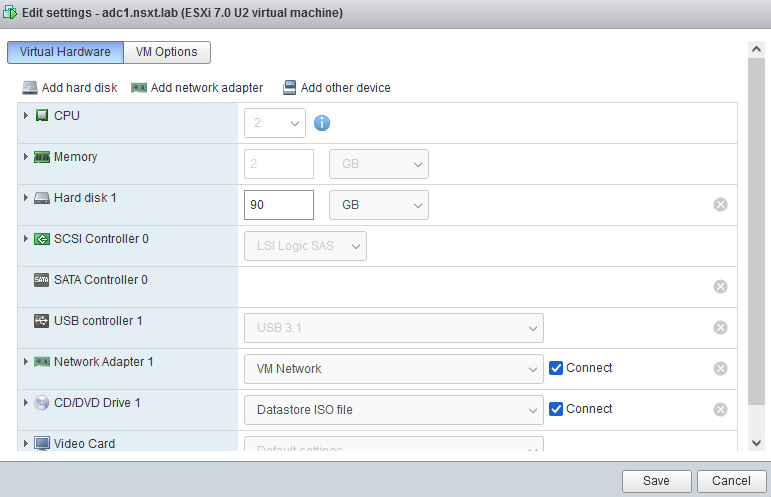
After it’s deployed, edit the settings.
- Increase the core count
- Increase it to 48 GB of RAM
- Add a new hard disk and make sure to set it to thin provisioning
- Add two network adapters
- Change all network adapters to the ‘pfSense-trunk’ port group
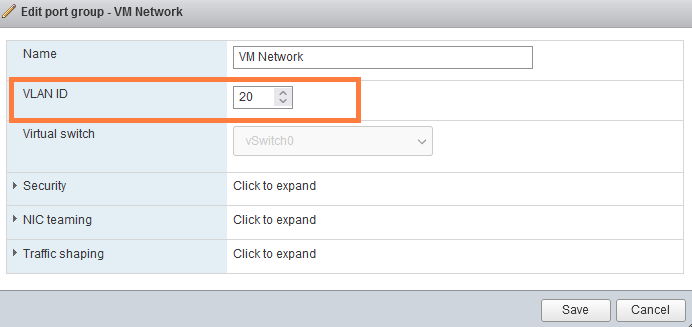
Once it has booted, you may browse to ‘https://192.168.20.100’. Go to networking > Port groups > edit ‘VM Network’ and assign VLAN ID 20. This step is required for our VM’s like vCenter, NSX-T manager, NSX Edges and the domain controller.
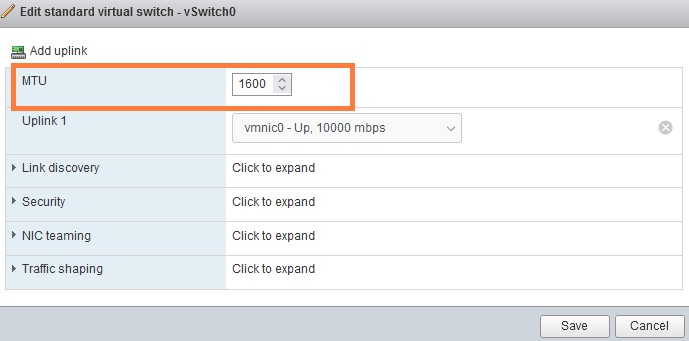
Lastly, we need to change the MTU of vSwitch0 to 1600. Go to Network > Virtual Switches > edit vSwitch0 and change it to 1600 MTU.
Go to Storage > Datastore browser > create a new directory named ‘ISO’s’ and upload a Windows Server 2019 ISO and a linux distribution of your choice. We need the Windows Server ISO to install Active Directory (DNS).

And this’ll be our Domain Controller. I’ve used the VM Network port group (VLAN 20).
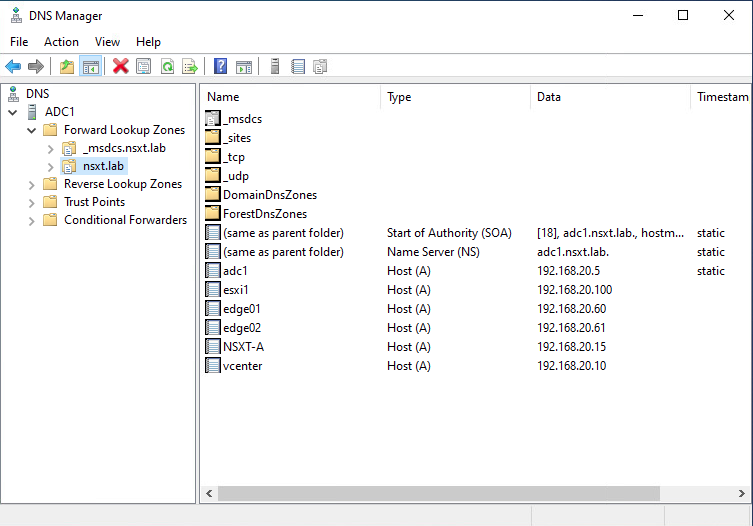
You may want to add some DNS records after you’ve installed Active Directory.
Installing vCenter on the nested ESXI host
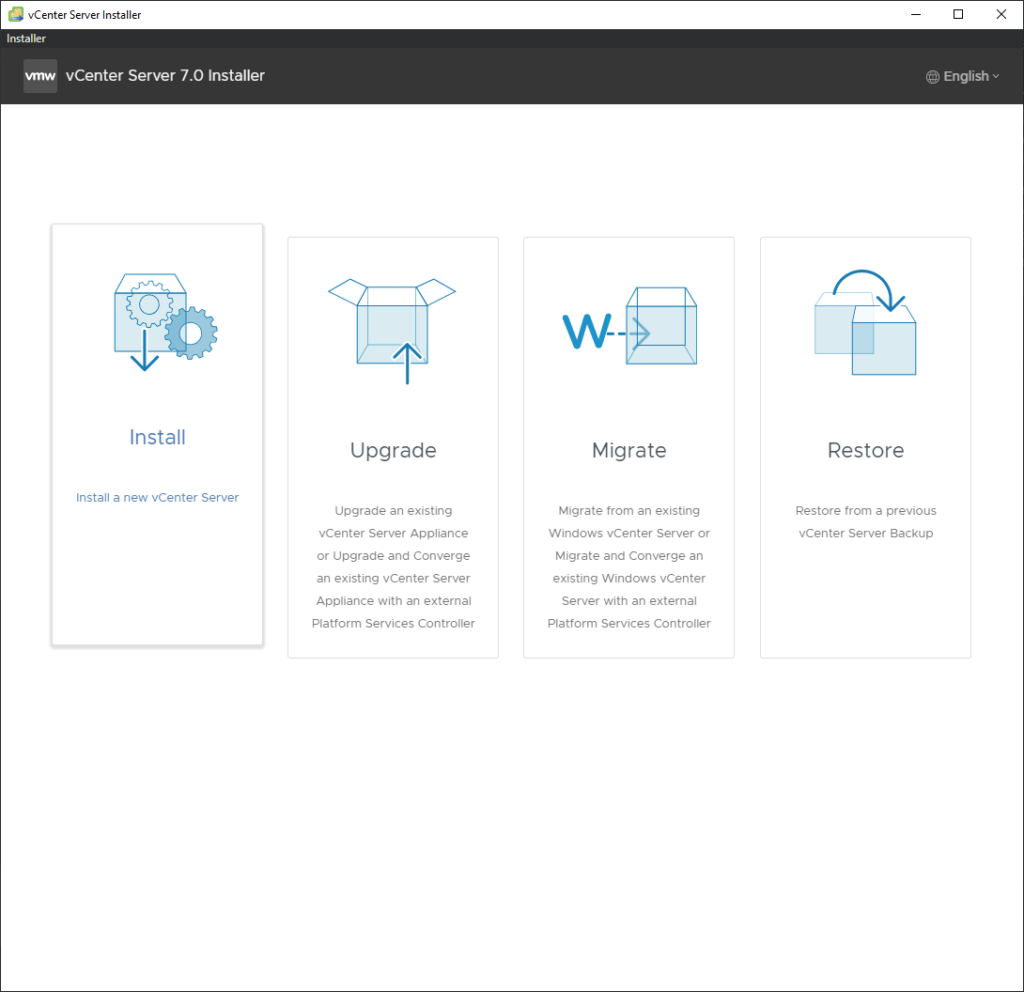
The next step is to get the VCSA (vCenter appliance) on a Windows 10 client. So you’ll have to download it on your Windows 10 client from VMware’s download page.
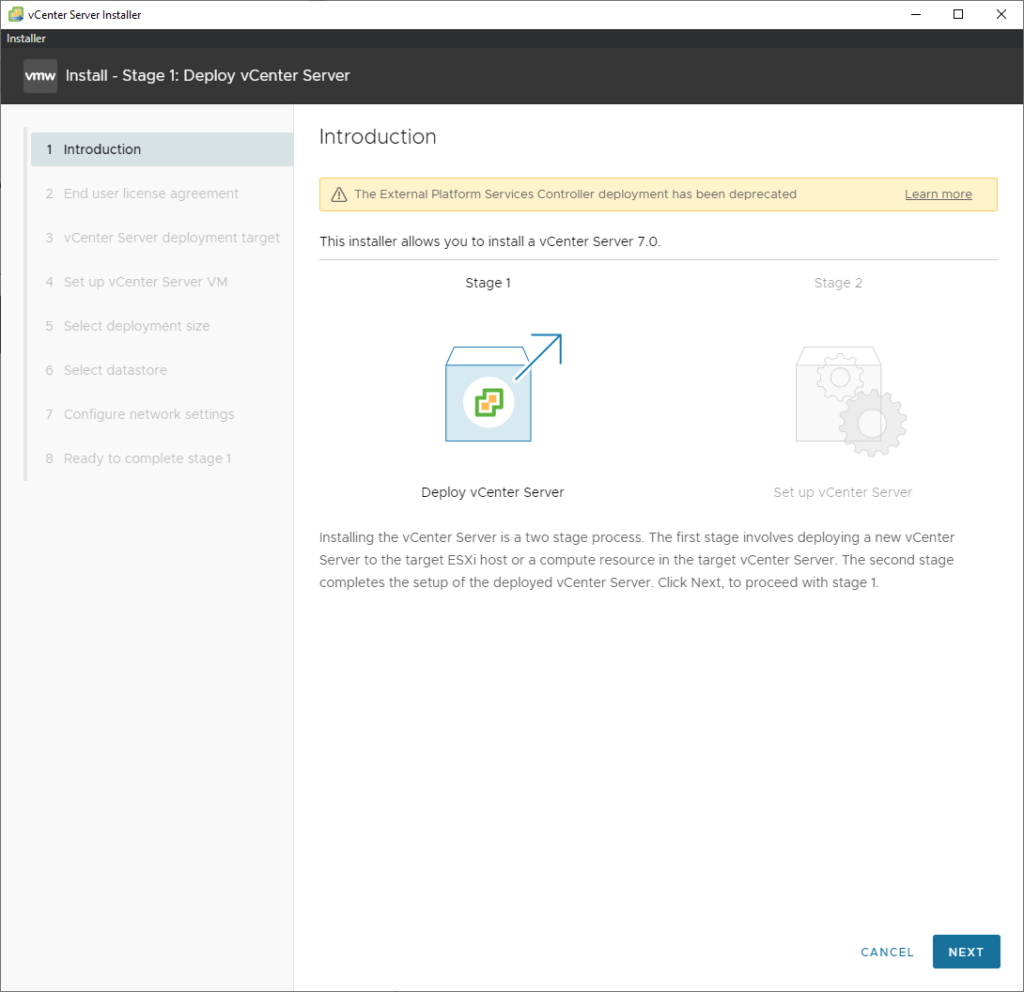
Once the GUI installer is loaded, select ‘Install’.
Click next.
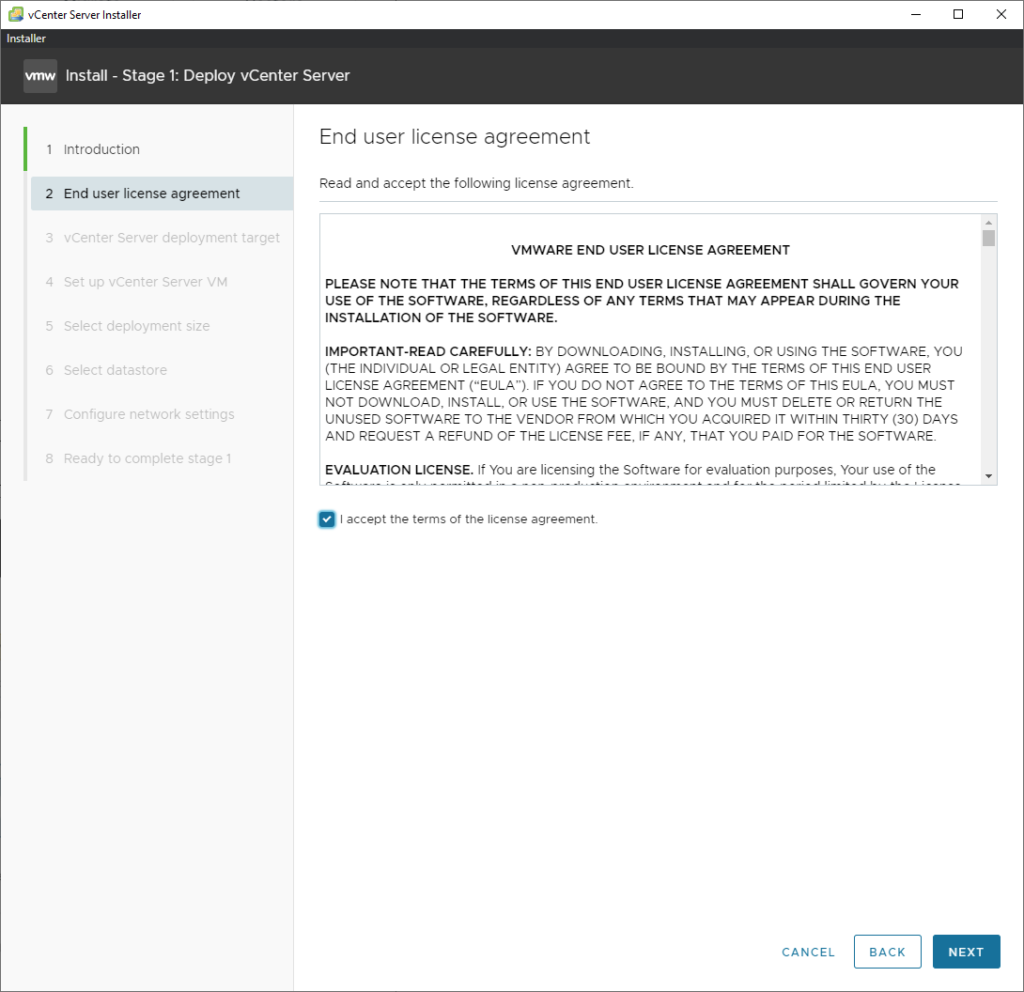
Agree with it.
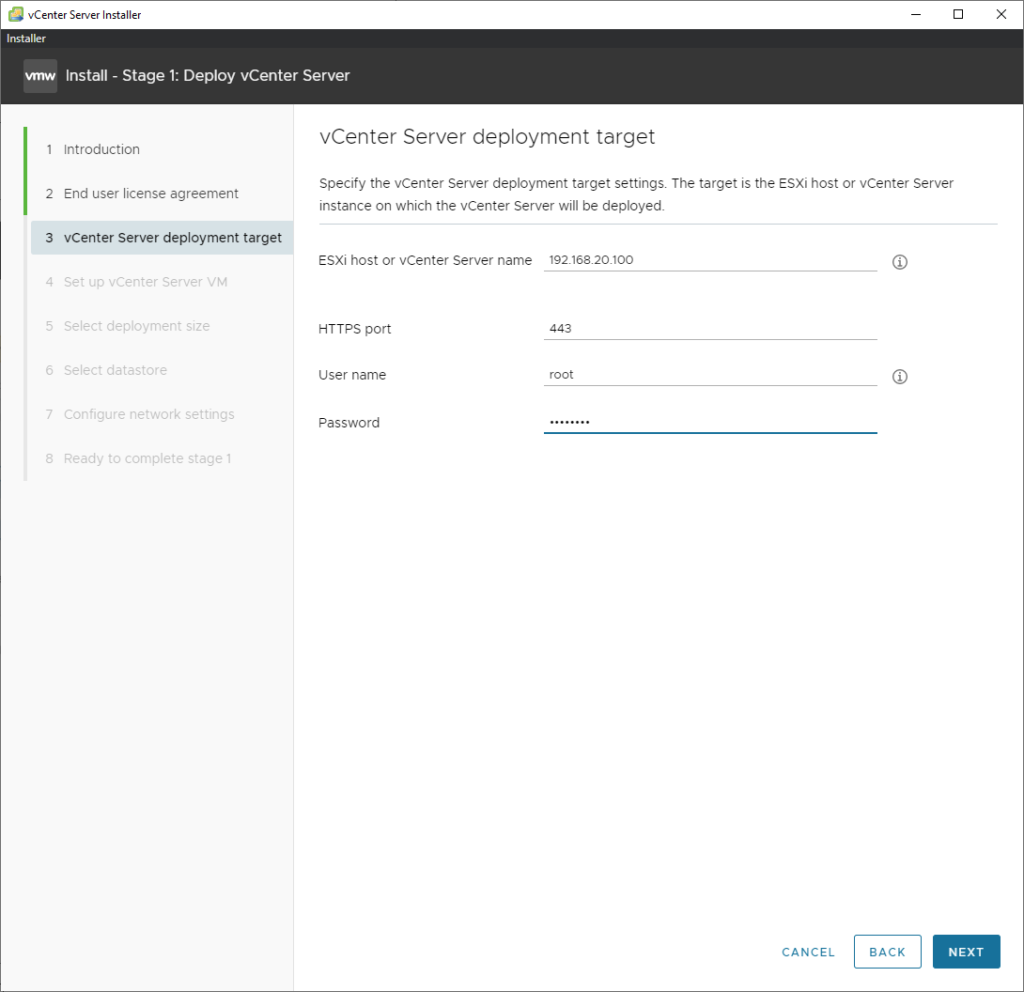
Then enter the IP address of the nested ESXI server and its login credentials.
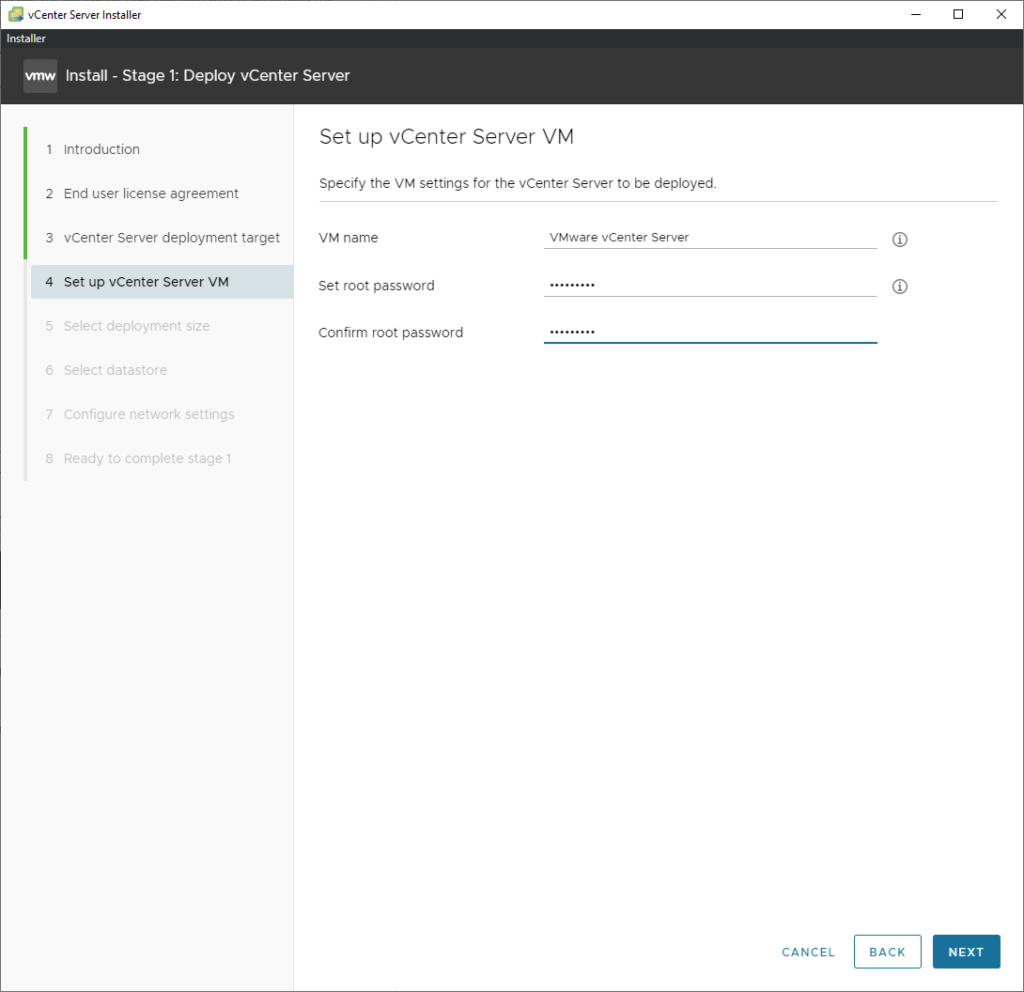
Enter a password for the root user. This is the root user for the vsphere.local domain and not the nested ESXI server.
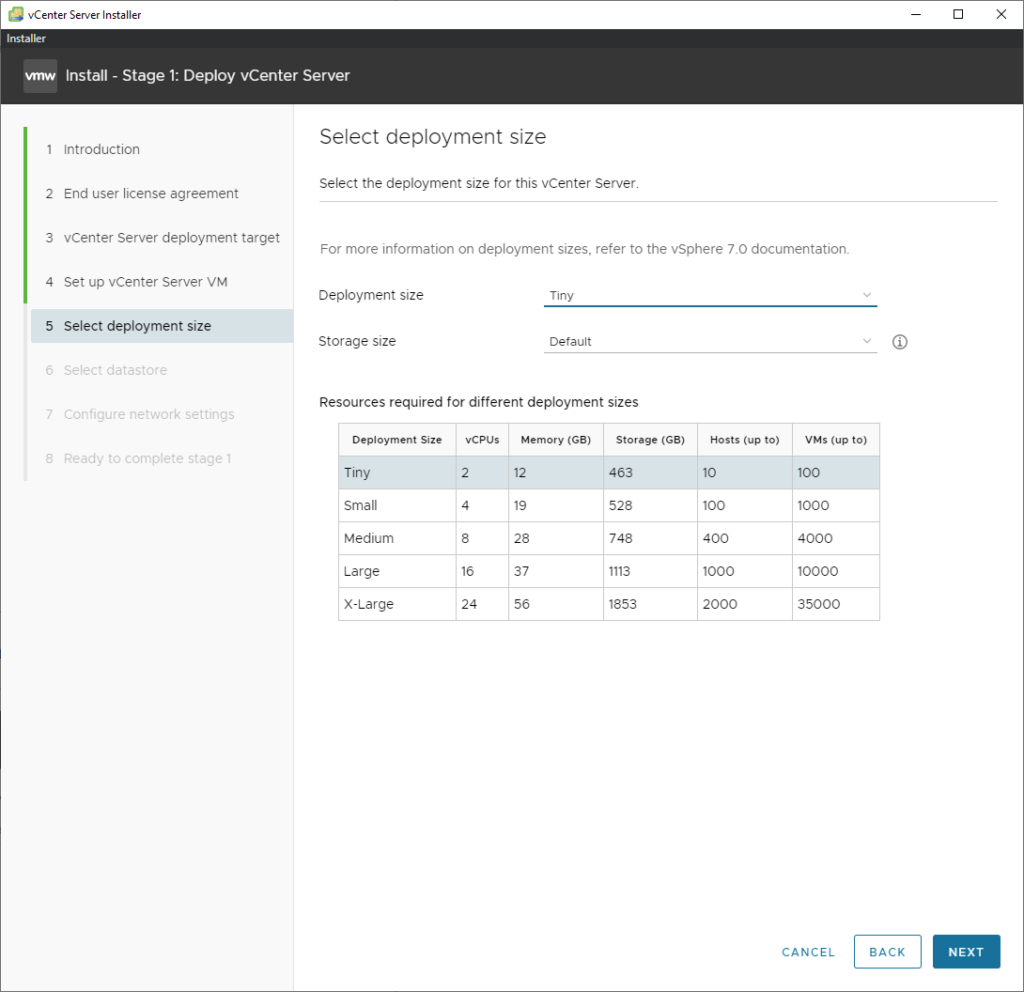
Tiny is fine for a lab environment.
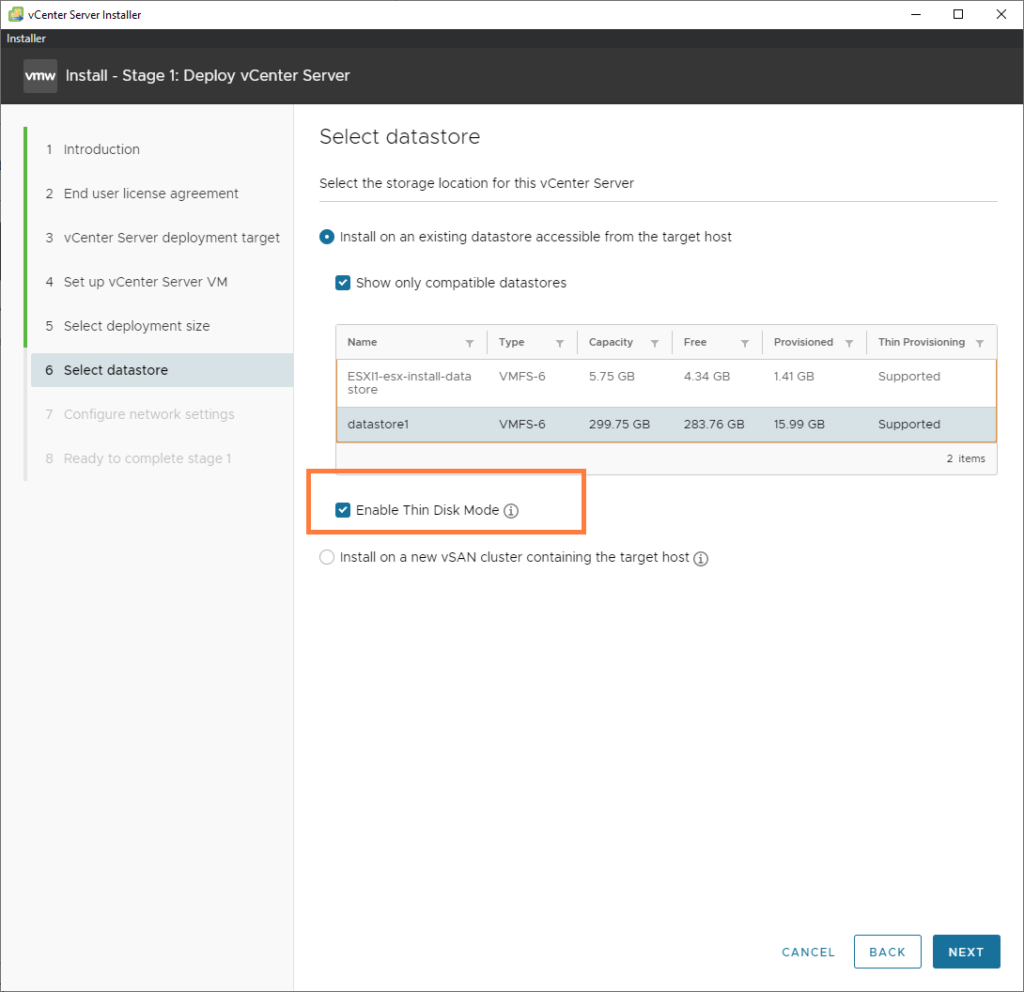
Select the appropriate datastore and make sure to check the box ‘Enable Thin Disk Mode’ which is just thin provisioning. We are quite restricted on resources, so it’s wise to keep an eye out for that.
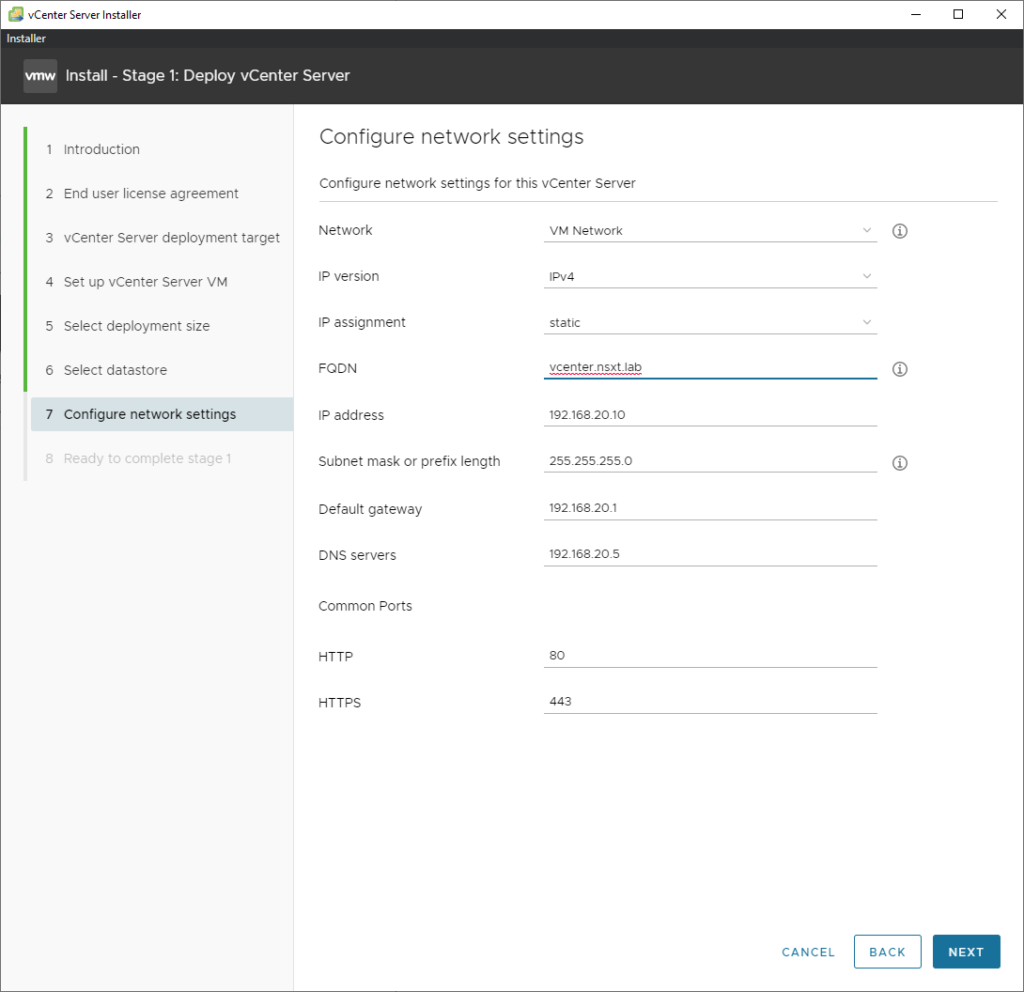
The interface will be ‘VM Network’ with a VLAN ID of 20. The IP address will be the address of the vCenter appliance. I’ve included the FQDN as well (make sure that is actually an A-record in our DNS server).
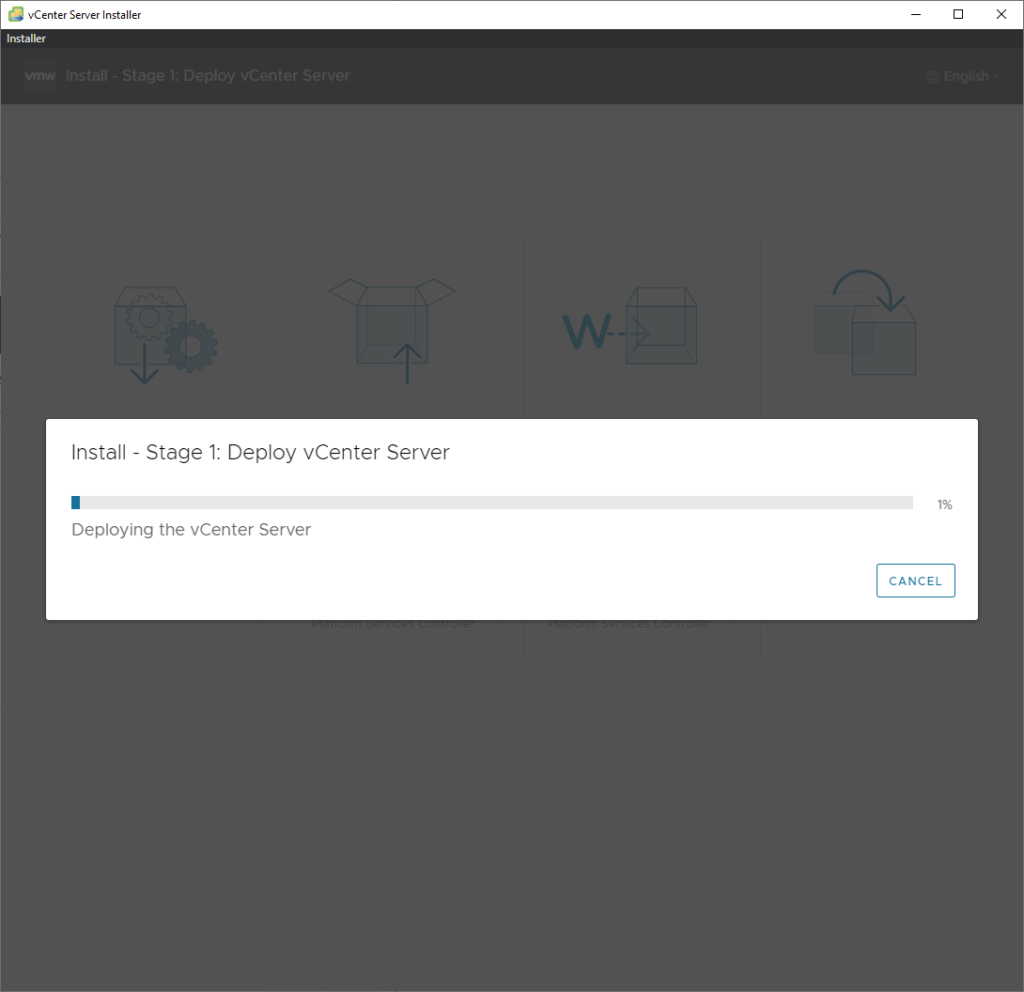
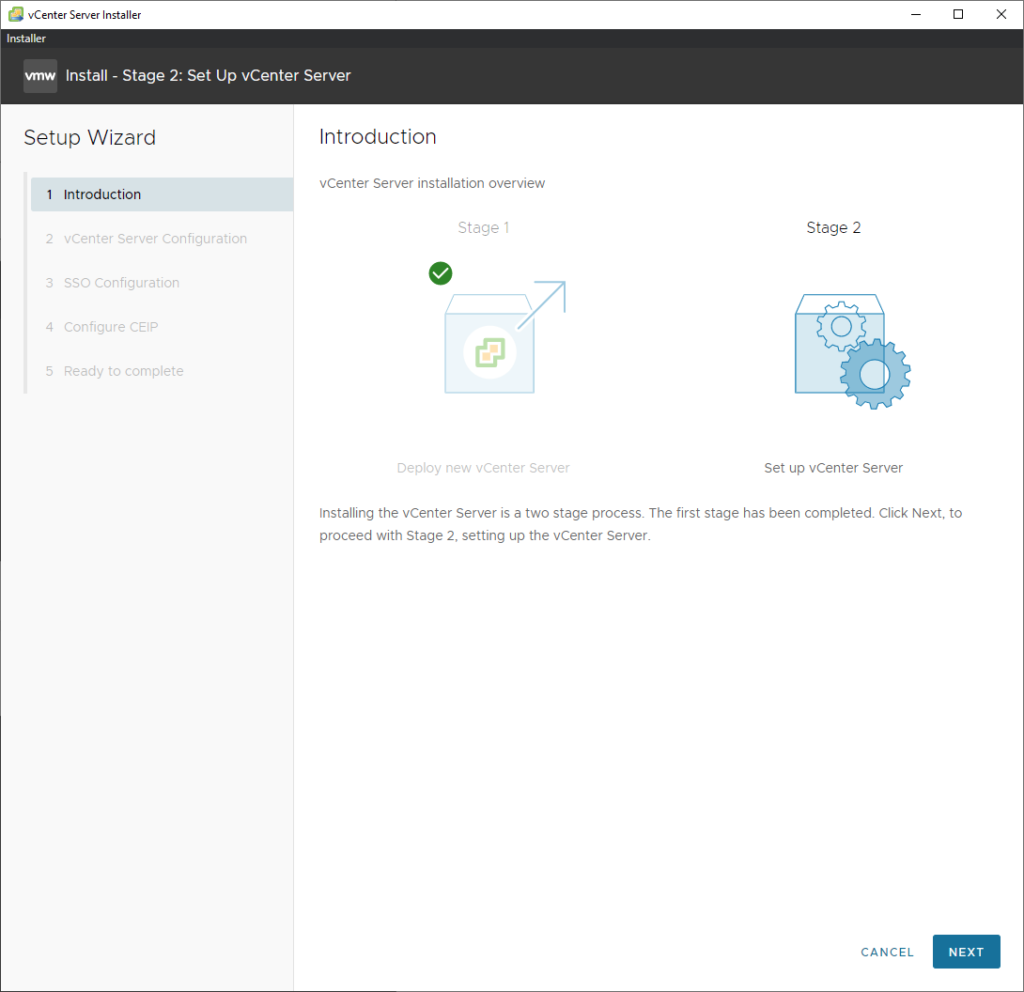
Stage 1 installation should begin now.
Once it’s complete, stage 2 should start. Just simply click next.
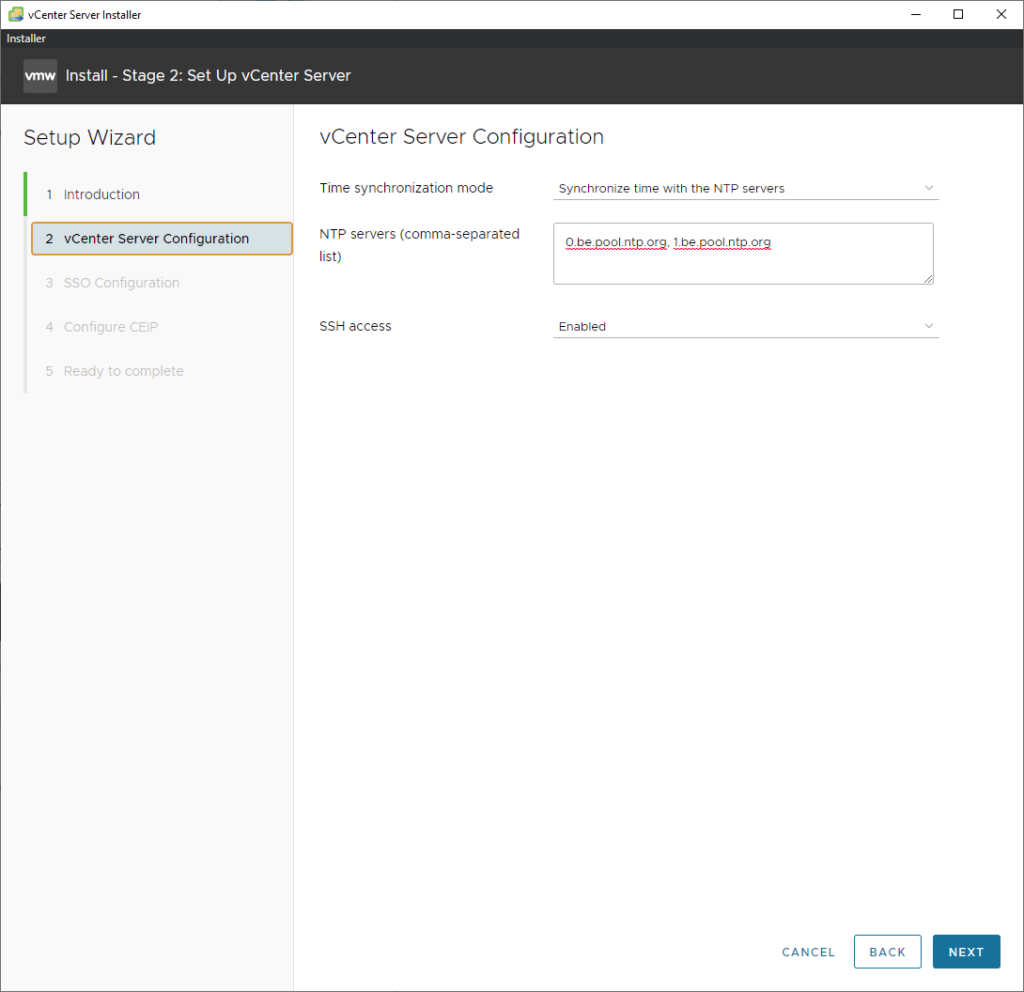
SSH can be enabled and NTP should be configured.
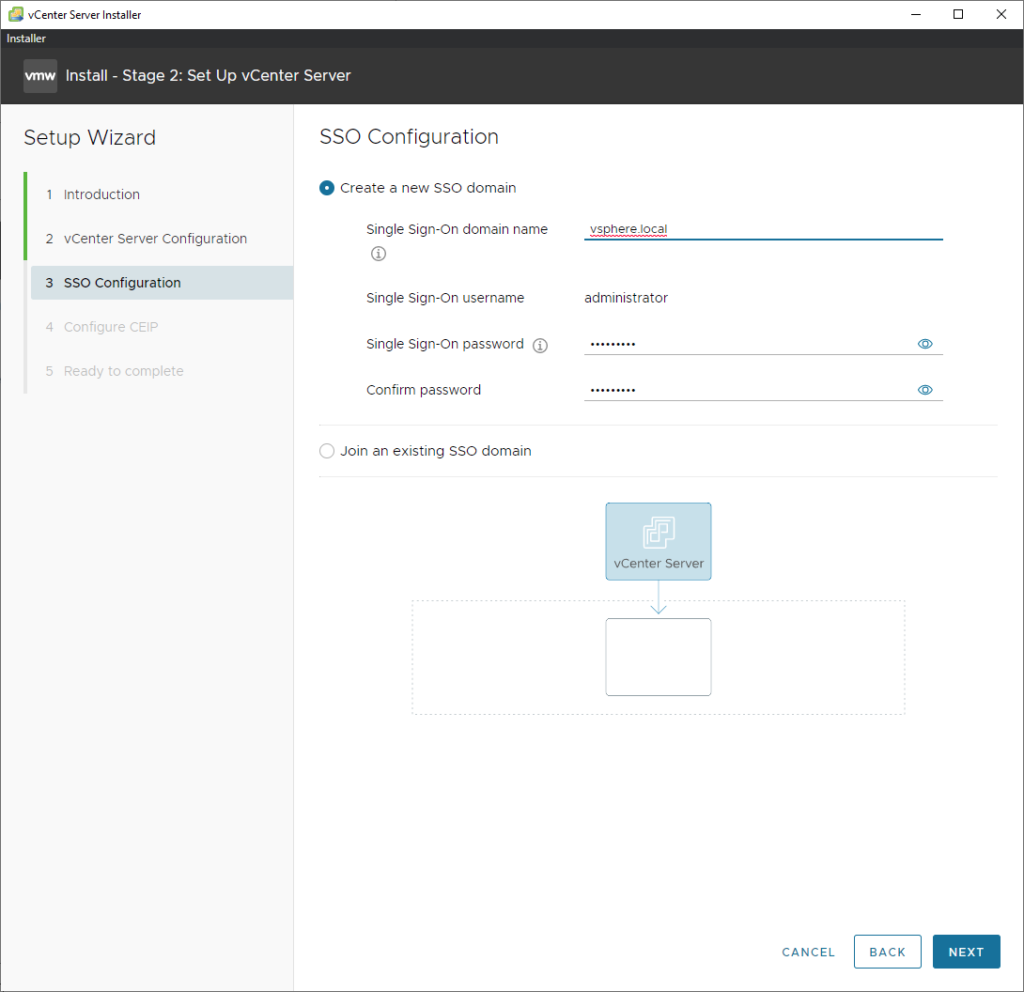
Enter a password for the administrator@vsphere.local user. And just click next until it finishes.
Ending part 1
In the next part we will add the nested ESXI host to vCenter and install the NSX-T manager. Click here to continue with part 2.
Super great guide.
Up to date 3.1 with nested ESX config