Palo Alto Network’s WildFire Analysis Engine protects your organization from unknown threats by sending a sample of the file to the WildFire cloud for inspection. Wildfire is proactive, meaning that its approach is behaviour-based instead of relying on up-to-date signature databases to validate a file to be whether malicious or not. Classic anti-malware solutions such as Windows Defender are considered a reactive countermeasure because they rely on a signature database to detect malicious files. WildFire also observes changes made to the host such as: registry modifications, running services, disabled host-based security features and various other malicious techniques.
The WildFire inspection process takes a couple of seconds in a virtualized sandbox environment and on average new Wildfire signatures are available every 5 minutes. The same signatures are made available within 24-48 hours for those with a threat prevention subscription.
WildFire’s deployment is quite flexible with the options to choose from such as public cloud, private cloud or a hybrid cloud. Most of us will opt for the public cloud solution because the WildFire appliances are super expensive. The WildFire appliances are used to keep the inspection process local for sensitive and confidential data. A WildFire cluster can support up to 20 WildFire appliances. But we can benefit from both worlds, so meet the hybrid model. For non-sensitive data we can leverage the public cloud and obviously for sensitive data the local WildFire appliance will be used.
WildFire initial configuration
Device > Setup > WildFire
Here we can specify the region we want to use. The Private Cloud is for those with a WildFire appliance or a cluster. Check “Report Benign & Grayware files” because it doesn’t hurt.

Device > Setup > Content-ID
Enable the option to forward decrypted content to WildFire by checking the box below.

Keep it mind that it requires SSL decryption such as Forward Proxy, Inbound Inspection and SSH Proxy – in order to work properly.
WildFire Analysis Security Profile
Objects > Security Profiles > WildFire Analysis
We can use or clone the default security profile or just add our own. The default security profile is configured to inspect all file types and applications and it’s highly recommended to use the default profile unless there’s a WildFire appliance around. If so, file types that are configured to be inspected by the Private WildFire appliance take priority over Public WildFire. For demonstration purposes, I decided to specify the file types.

Attaching WF Profiles to Security Policies
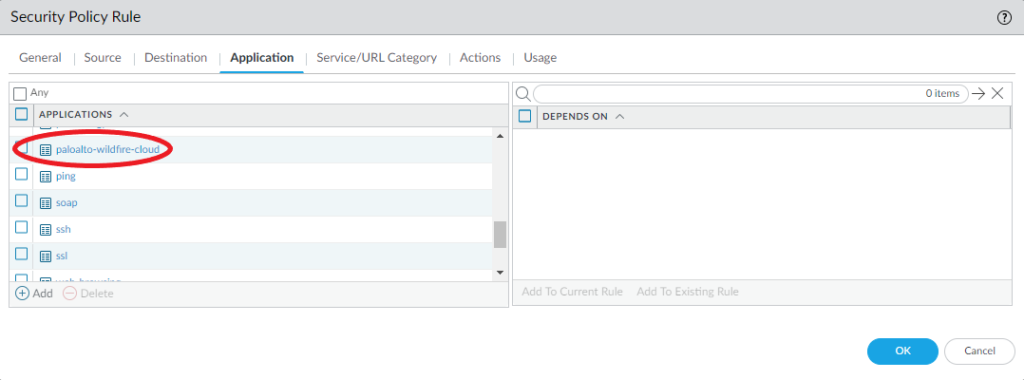
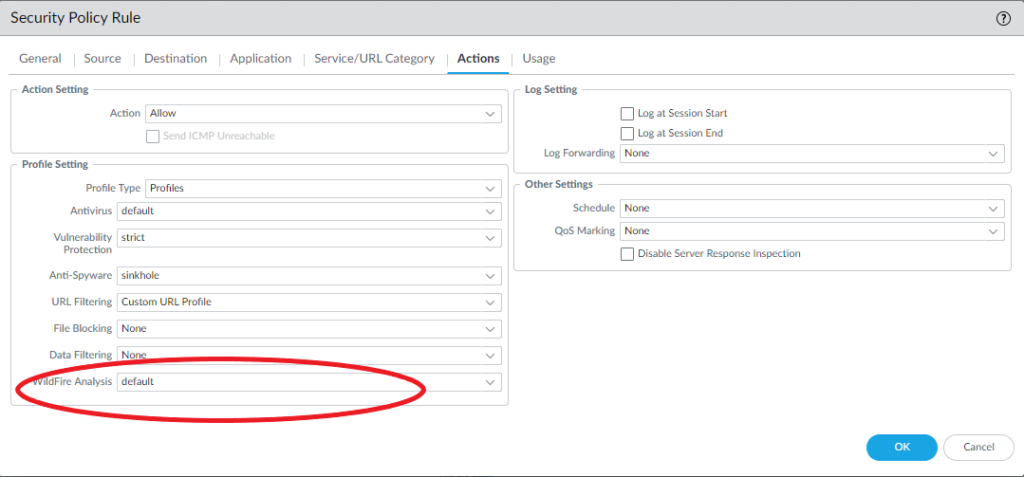
We also have to add the WildFire security profiles in our security policies and allow the application “paloalto-wildfire-cloud” in order to forward the traffic to WildFire’s public cloud.


Verify WildFire submissions
Monitor > Logs > WildFire Submissions
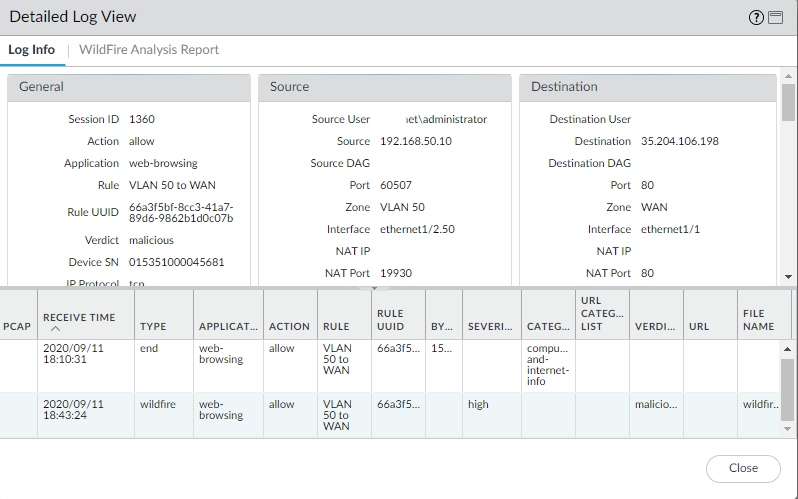
We do have the option to check if WildFire is successfully submitting files for inspection to the cloud. Also we can inspect the WildFire report to see where the file came from and who it was destined for. Do not download the “Sample file” because it’s actually the (malicious) file itself and definitely do not execute it. We can report the incorrect verdict if we think that it isn’t malicious. This could happen when developers actually send applications across the network. Or if the company is writing drivers for hardware devices etc. You do have to be specific in your explanation and provide solid information to prove it.
Palo Alto provides some test malware files that can be downloaded to test WildFire submissions. For your convenience Palo Alto also provides the download through http for those who do not have SSL decryption in place. These aren’t malicious at all but were classified in the WildFire database as malicious for testing purposes.
We can see that the user ‘Administrator’ downloaded the test file:

Some information about the package and the URL’s:

We can see the behavior of it is classified as ‘benign’ and the virtual machine it was inspected on:

If we want to report an incorrect verdict:
