The primary purpose of User-ID literally is just mapping users to an IP address, defining policies based on user credentials and identifying users through monitor logs. It can be a tedious process trying to find out who’s behind which IP address and it’d be an absolute nightmare in a large enterprise.
Active Directory, Microsoft Exchange and Novell Edirectory are supported but Active Directory should make the most sense. User-ID can be deployed using the integrated User-ID or with a Windows-based agent. The Windows-based agent can be installed on any member server and it better be not a domain controller although it’s fine to do so. On the other hand we have the agentless User-ID that’s integrated within the firewall itself. Obviously that doesn’t require an agent to be installed, but it demands quite a bit of processing power from the firewall, so instead opt for the Windows-based agent solution to offload it from the firewall.
In this guide we will cover the configuration of the integrated User-ID.
User-ID configuration
The configuration below will allow us to identify users in the logs. For policy control we have to configure group mappings and a LDAP server profile. That’ll be covered later on.
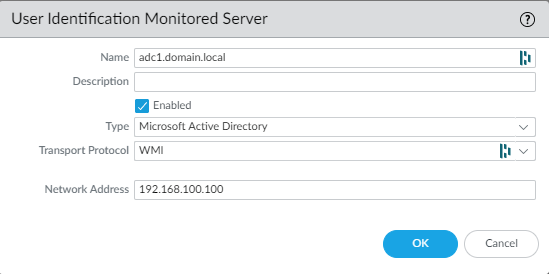
Device > User Identification > Server Monitoring
Add your domain controller. The name of it doesn’t matter but the network address does.
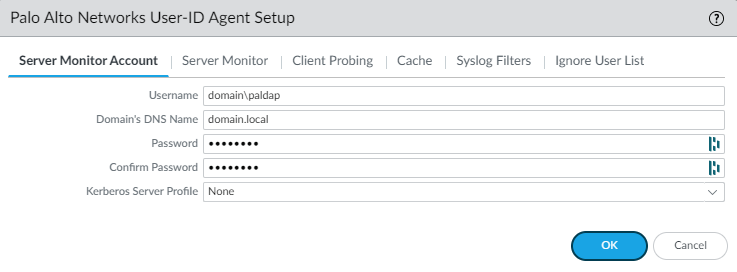
Device > User Identification >
Create a new user “paldap” with “Domain Admins” privileges and enter the username in the format following format: “domain\user”.
Check the box “Enable Session” to allow the firewall to keep a track on the sessions.

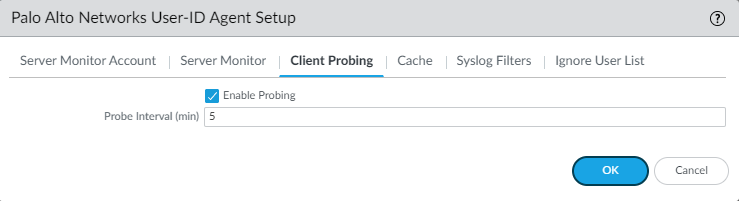
Client Probing will probe a client within a set interval to identify whether or not the user has changed or if the user has logged in with a different device (or IP address). Increase the interval time if processing power is an issue. Somewhere down the road consider to ditch Client Probing in favor of Palo Alto’s Captive Portal with an authentication policy (with MFA).
Last but not least, User-ID should be enabled in the security zone. Enable it for every single zone that’s taking part in the Active Directory infrastructure.
Network > Zones
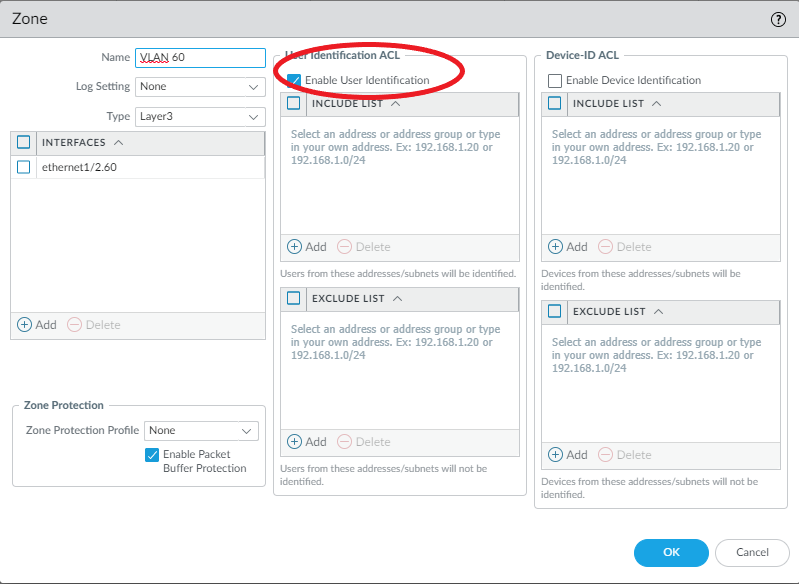
At this point users should be displayed in the logs.
Group Mappings configuration
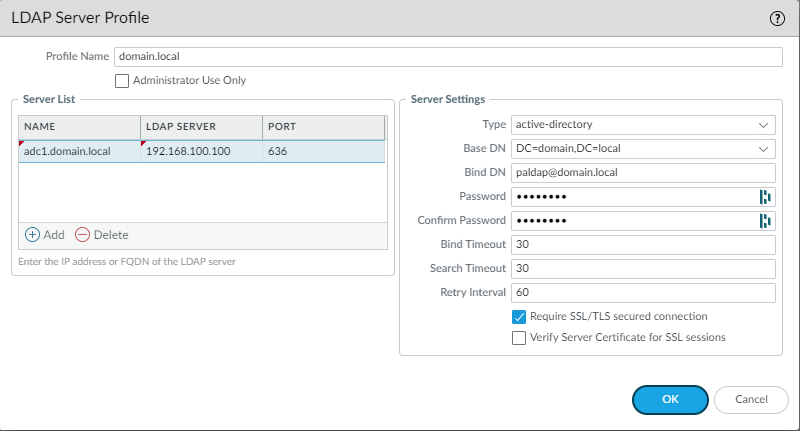
Like mentioned before, if we want to include our users in security policies we need group mappings and an LDAP server profile.
Decide whether you want LDAP (389) or LDAPS (636). Either one works flawlessly so opt for LDAPS instead. Uncheck SSL and change the port to 389 if you prefer to use LDAP.
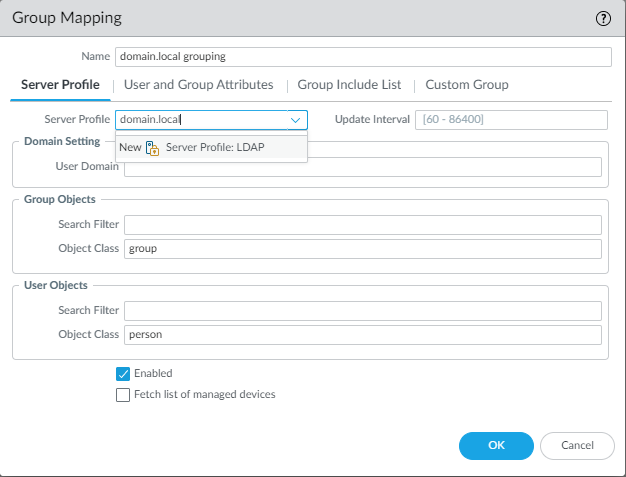
Device > User Identification > Group Mappings
Select the LDAP profile and nothing else has to be done here.
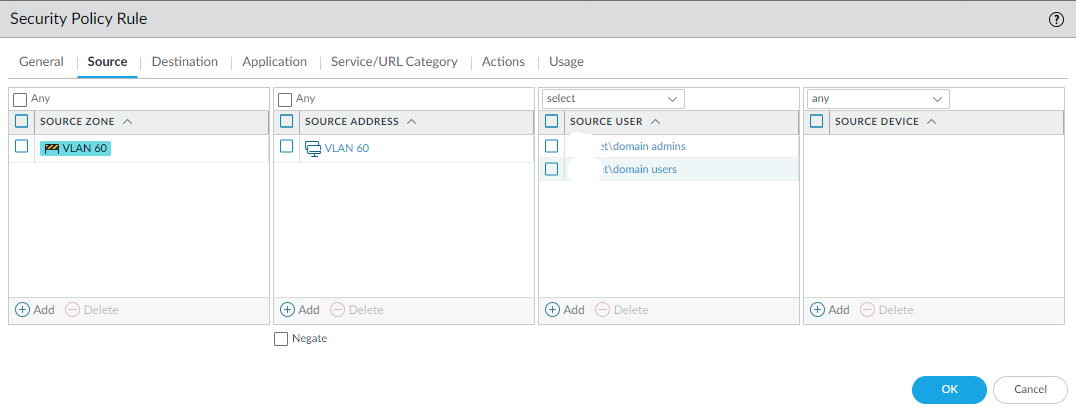
Under Group Include List, add the groups “Domain Admins” and “Domain Users”. If this isn’t working then it means something is improperly configured.
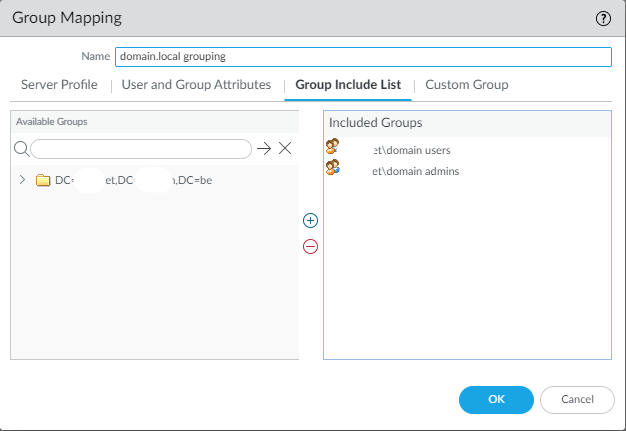
Finally, we should be able to add users to a policy for tighter control.