There are plenty of reasons to adopt an MFA solution to your infrastructure. Primarily because of the zero trust model which just means “never trust, always verify”. The end-user has to go through a sequence of authentication after logging in. Proving their identity by verifying the login on their phones with any multifactor authentication like SMS, voice call, OTP, Pushes and even other MFA/2FA Providers such as Google Auth.
We’ll be using RADIUS for this guide although SAML is by far the better choice in my opinion because of Single-Sign-ON (SSO).
Prerequisites
- GlobalProtect Portal + External Gateway configured
- 30-Day Trial account @ okta.com
- Active Directory Domain Controller
Management Interface service settings
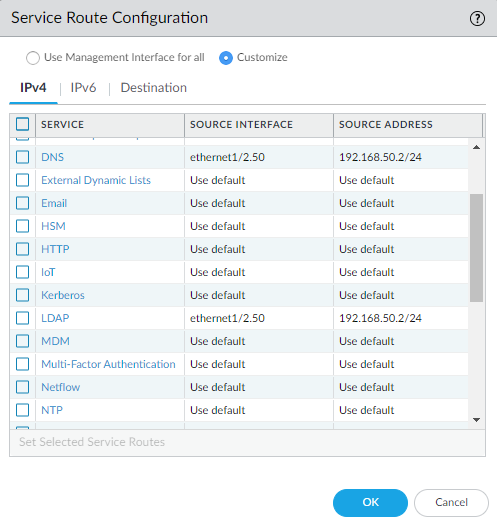
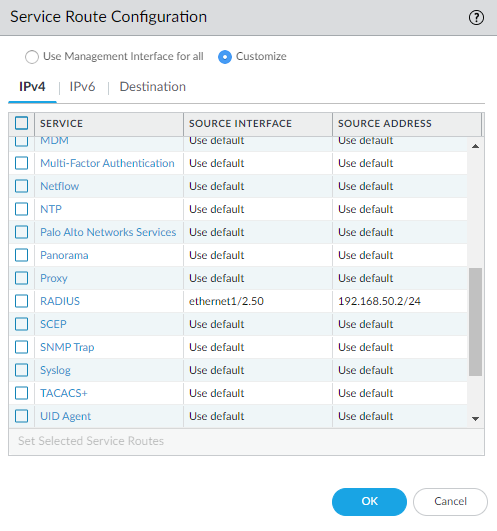
The DNS should be configured with the IP address of the Domain Controller. The DNS, LDAP and RADIUS service routes should be set to the same interface of which the Domain Controller resides on. For example, my Domain Controller uses Eth1/2.50 (VLAN 50 Subinterface) and the IP address is 192.168.50.10.
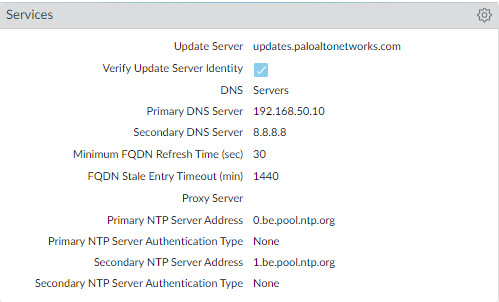
Make sure the physical default gateway of that interface is set as the “Source Interface”. The default gateway here is 192.168.50.2/24
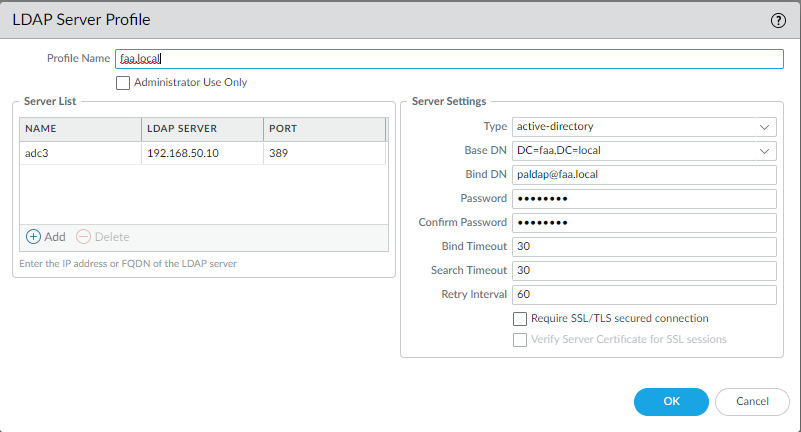
LDAP and User-ID Configuration
Enter your domain credentials and make sure the given domain account is a member of the group: “Domain Admins”.
After configuring the “User-ID Agent”, we’ll be granted with the ability to monitor traffic and create policies based on domain credentials for even more granular control, to secure your environment even further and much better visibility. Configure the “User-ID Agent” settings to match the below configurations.
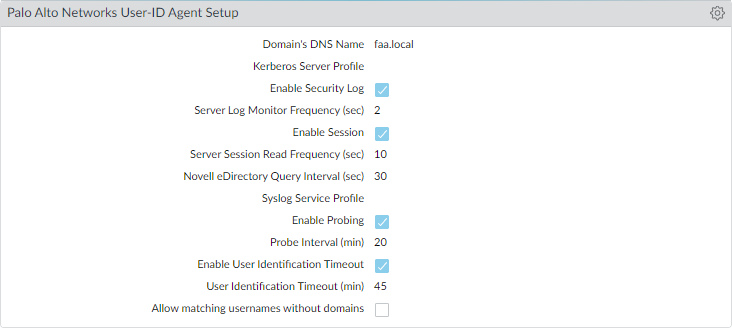
There’s also the option to monitor the connection to the Domain Controller.

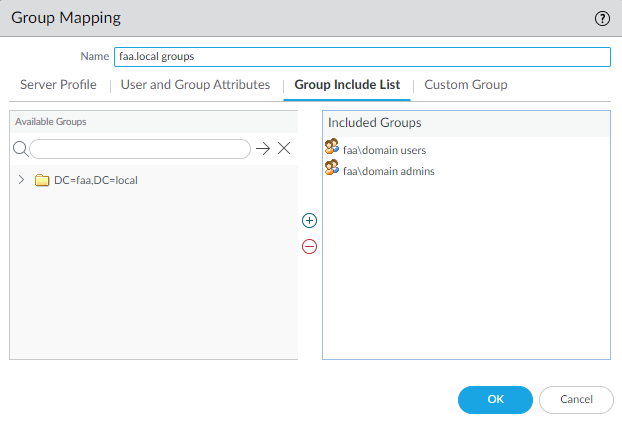
Under Device > User-ID Identification > Group Mapping Settings > create a new group mapping. Make sure to select your LDAP Server Profile. Enter your domain name under “User Domain”. It shouldn’t include a TLD like .local, or .com – just “faa” from faa.local.
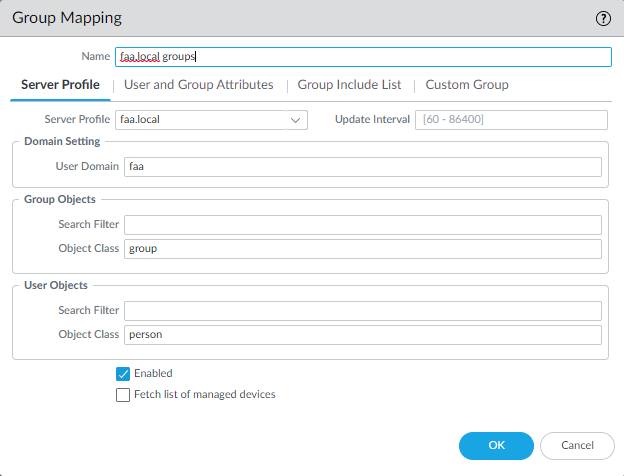
If the groups can’t be found then check your connection with the Active Directory Domain Controller.
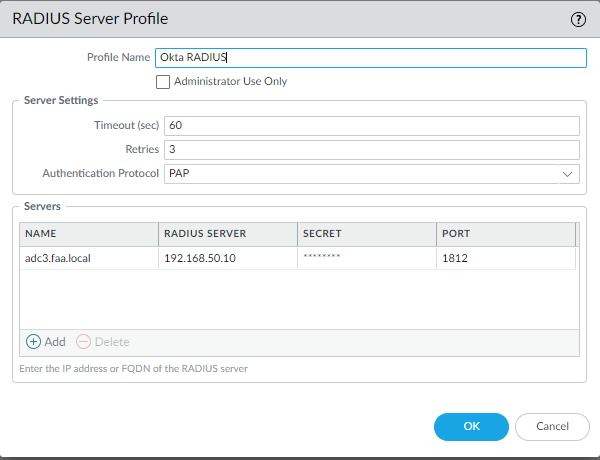
Radius Server Profile
This’ll be used later for an authentication profile. Enter the IP address of your Domain Controller where you will install a “Radius Agent Server” later on.
Authentication Profiles
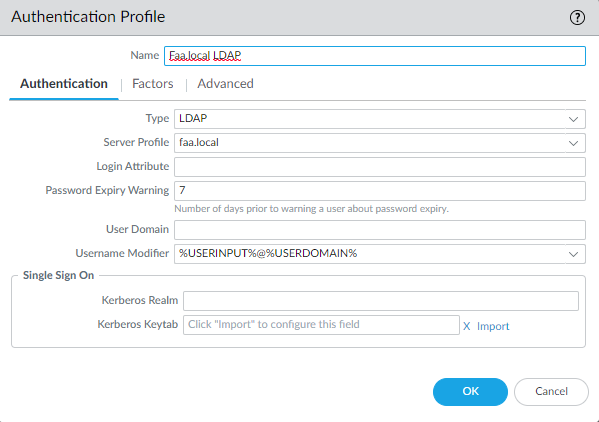
LDAP (GP Portal).
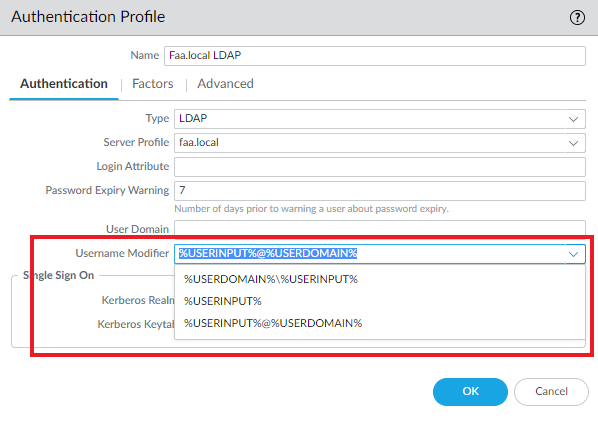
Which will be used for the Global Protect Portal. Select your LDAP Server Profile. Make sure the Username Modifier is set to: %USERNAME%@%USERDOMAIN%
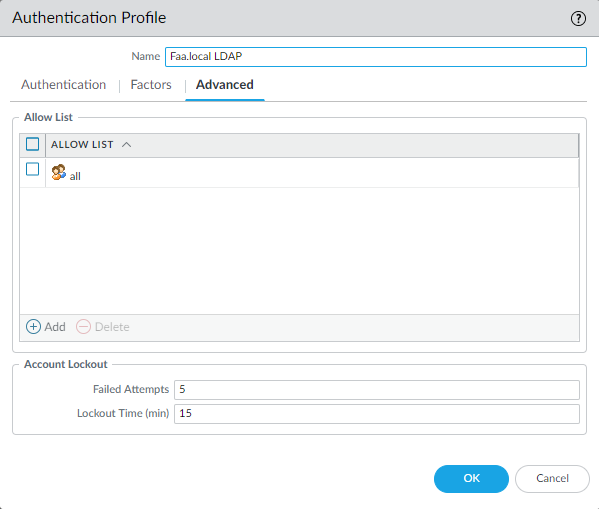
Select “all”.
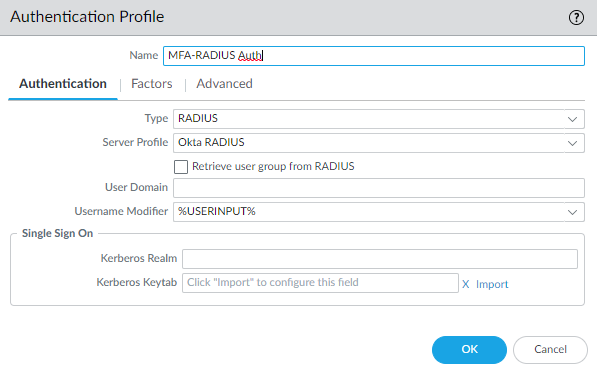
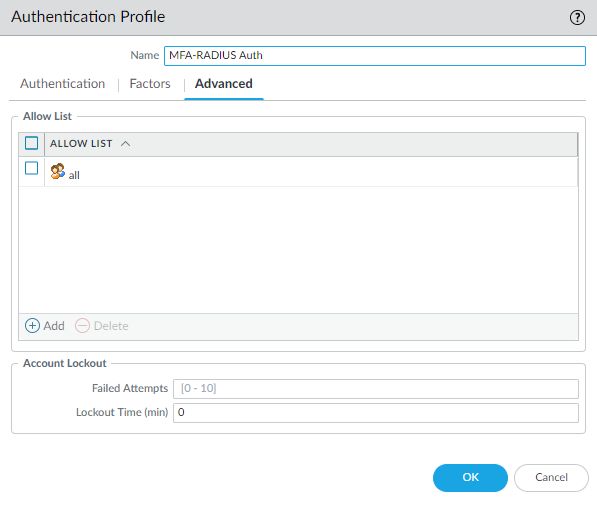
MFA-Radius-Auth (GP External Gateway)
This profile will be used on the External Gateway and where we will have to use Okta’s MFA to authenticate with the External Gateway.
Select the Okta Radius Server Profile. Make sure the Username Modifier is set to %USERINPUT% which will be explained later in this guide.
Allow “all”.
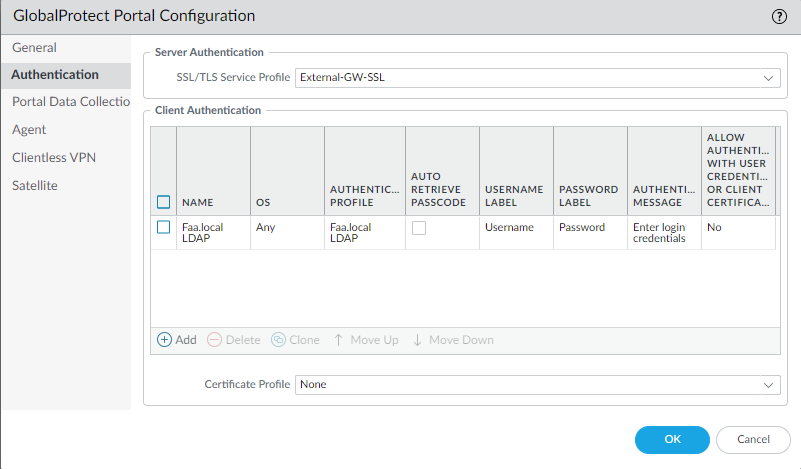
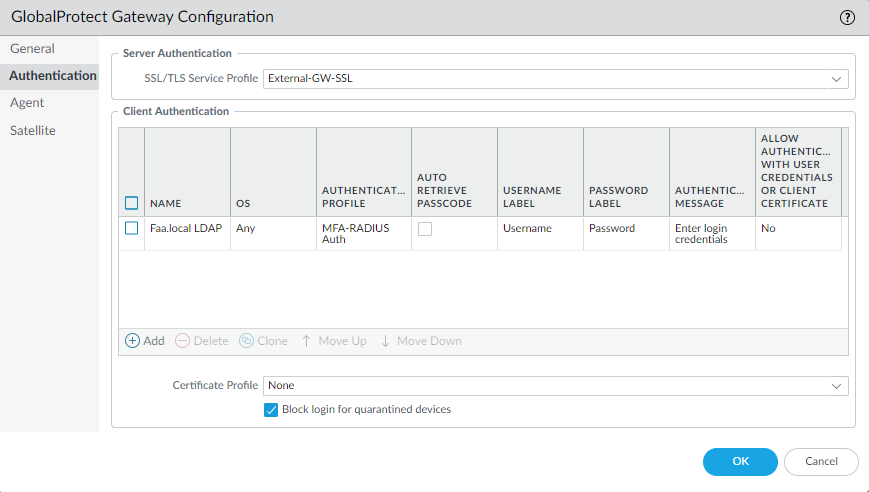
Portal & Gateway Authentication profile
Select the LDAP Authentication profile
Select the Radius Authentication profile
At last, commit.
Integrating AD with Okta
Once you find your way of navigating through their user-interface, it’s fairly easy to set it up.
Head over to Directory > Directory Integrations
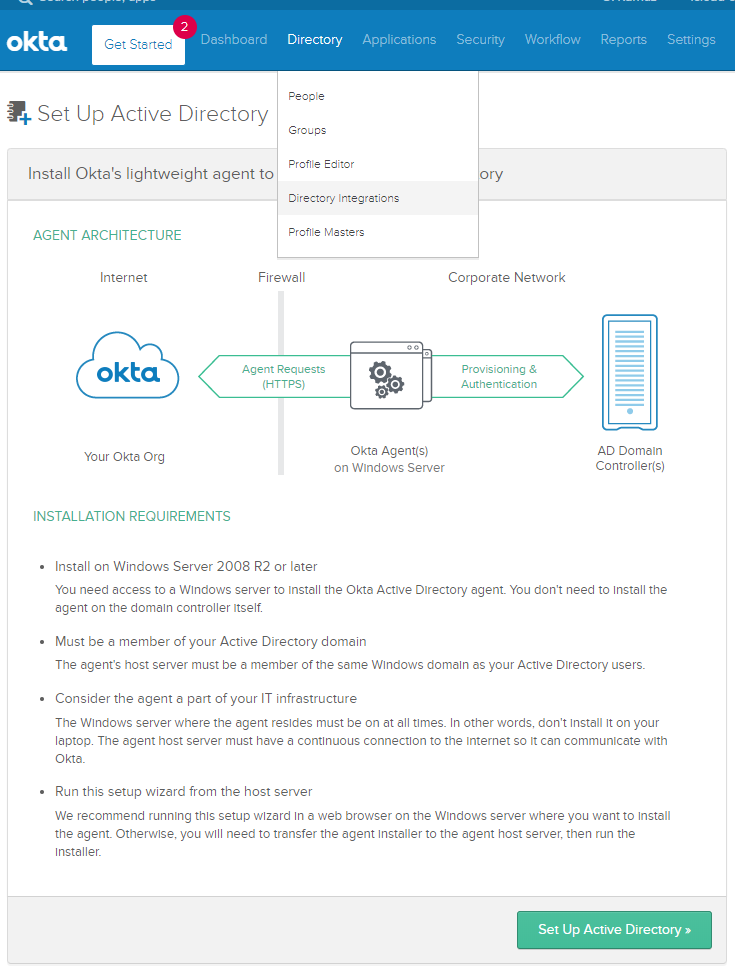
Follow the wizard, it’s pretty straight forward. It’ll ask to install the AD-Agent and automatically create a new user named “OktaService”. Make sure that user is a member of the group “Domain Admins”. Import users and groups after it’s complete.
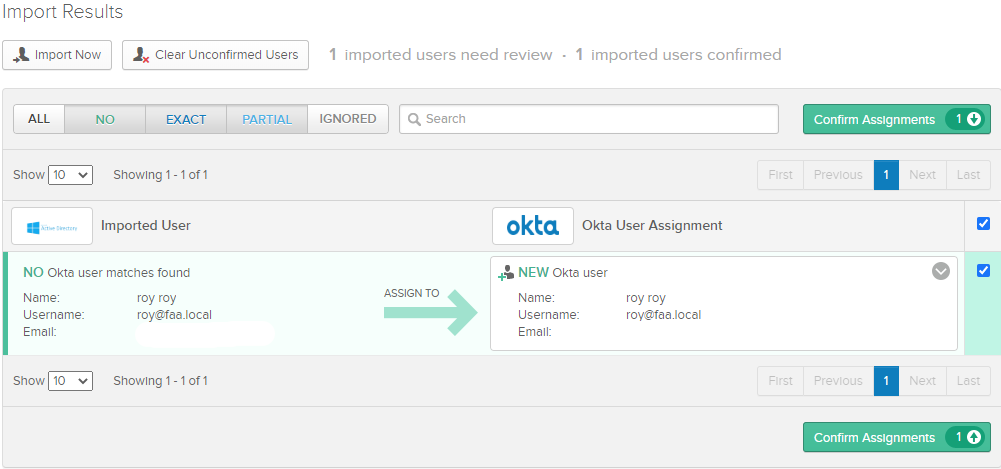
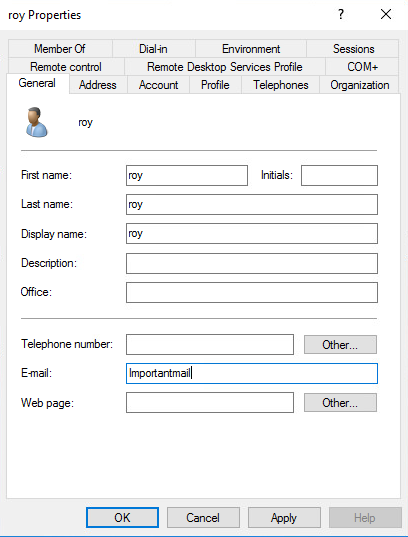
If users fail to import but groups successfully do, it’s because the user has to have a valid e-mail address in Active Directory.
Finally, activate the imported user.
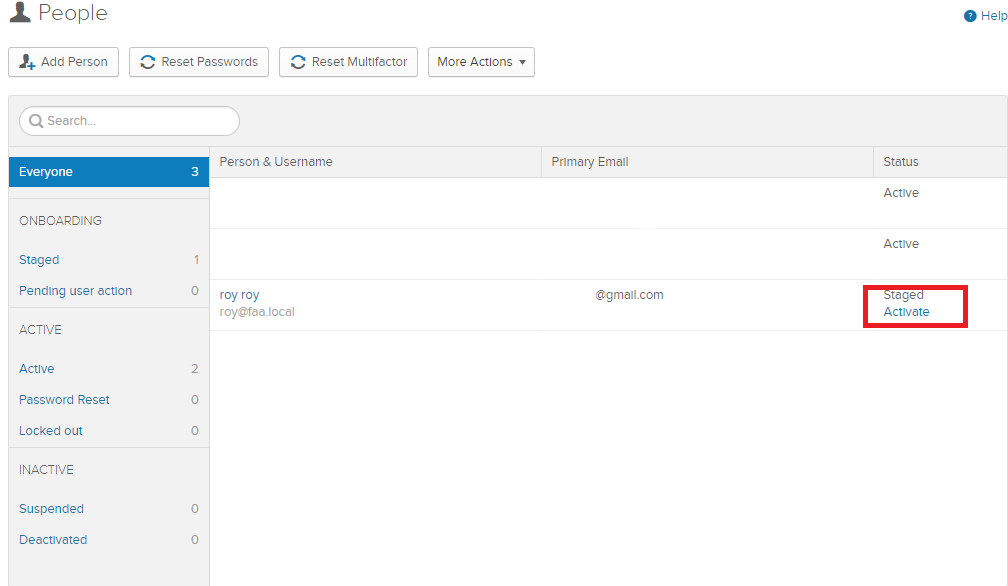
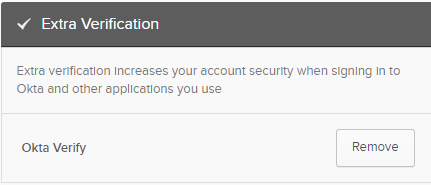
The user will receive an email to verify it and so on. Then login with the user’s domain credentials on https://<yourURL>.okta.com. Enable Okta Verify authentication and hook it up with their Okta-Verify App on a Android/iOS Device.
Installing Radius Agent
Head over to Applications > Add application

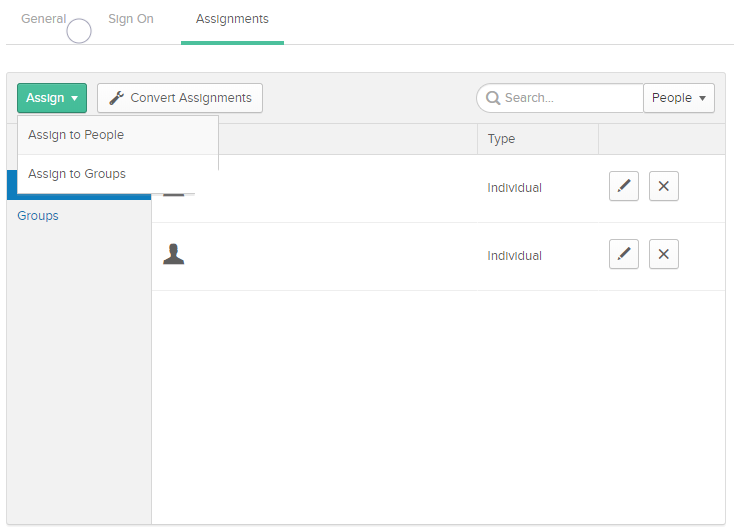
The wizard will guide you through it. A Radius Agent will be installed on the Domain Controller. Pick 1812 UDP as the port and a secure secret-key. Finally assign the necessary users to the Palo Alto Networks GlobalProtect app. Assign > Assign to people > select one of your imported users from Active Directory.
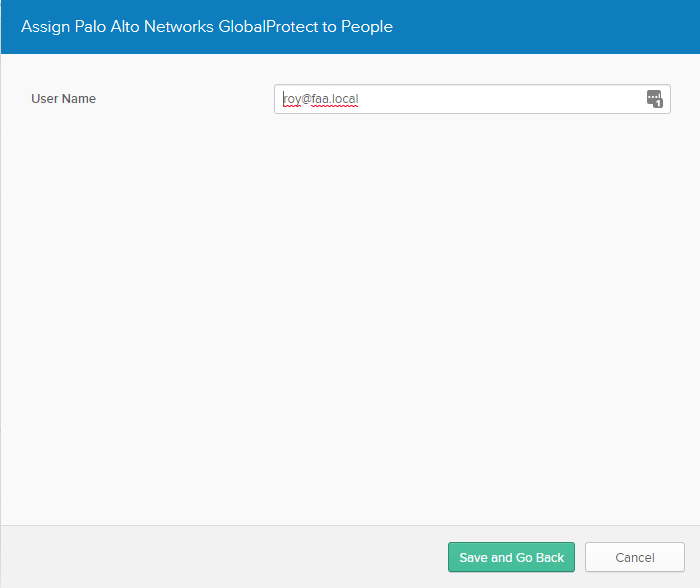
Here it is

This will be the username you’ll have to give in when connecting to Global Protect. In the form of user@example.local. Up until now if you followed my guide precisely, it’s set to %USERNAME%@%USERDOMAIN%. If you prefer another format such as domain\username or just username alone, adjust the “Username Modifier” in the LDAP & RADIUS Authentication profiles. Make sure to do it for both profiles to keep consistency.
%USERDOMAIN%\%USERNAME% = domain\username
%USERNAME% = username
Conclusion
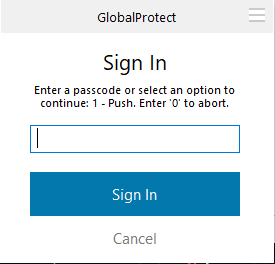
When connecting to the External Gateway, it’ll ask to prompt the following:
- The OTP code like 333333
- 1 to PUSH or in other words authenticating passwordless
- 0 to Abort