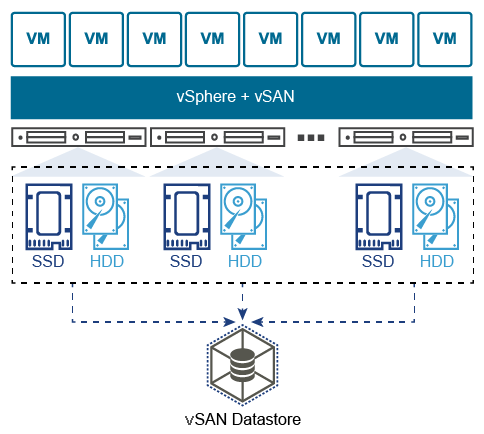
vSAN requires at least three hosts and each of them should have unallocated storage drives. Typically in a lab environment, we’re restricted in terms of resources, so meeting the minimum specs to configure vSAN in a lab environment will be quite expensive if we were to purchase the required hardware.
Instead we’ll deploy ESXI as a virtual machine on top of our physical ESXI host – often referred to as “nested ESXI”. Then hook it up to our vCenter appliance and add it in a cluster. This method allows us to add as many hosts/drives as we want – even though they don’t exist physically. I highly recommend to use the ESXI Virtual Appliance from virtuallyghetto.com because it makes the installation so much easier and faster.
Prerequisites
- A server running ESXI
- vCenter appliance
- Download the Nested ESXI Virtual Appliance: https://www.virtuallyghetto.com/nested-virtualization/nested-esxi-virtual-appliance
Lab environment
We’ll deploy 3 nested ESXI hosts. A 50 GB virtual drive will be added that is pretending to be our cache drive. Typically SSD’s are used for caching because they’re a lot more expensive per GB and hard drives are used for large-capacity storage because they’re much cheaper. So we’ll add 2x 200 GB virtual disks that’ll pretend to be our large-capacity hard drives.
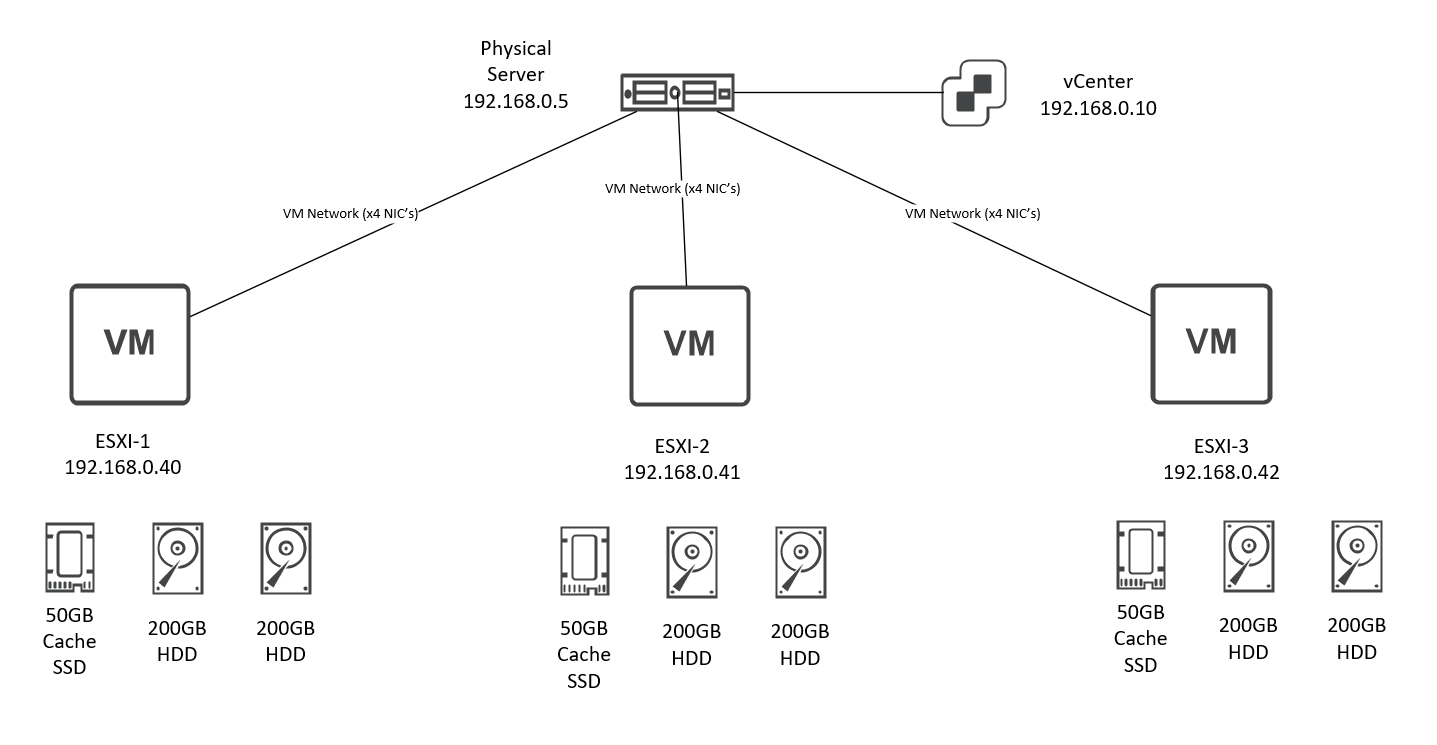
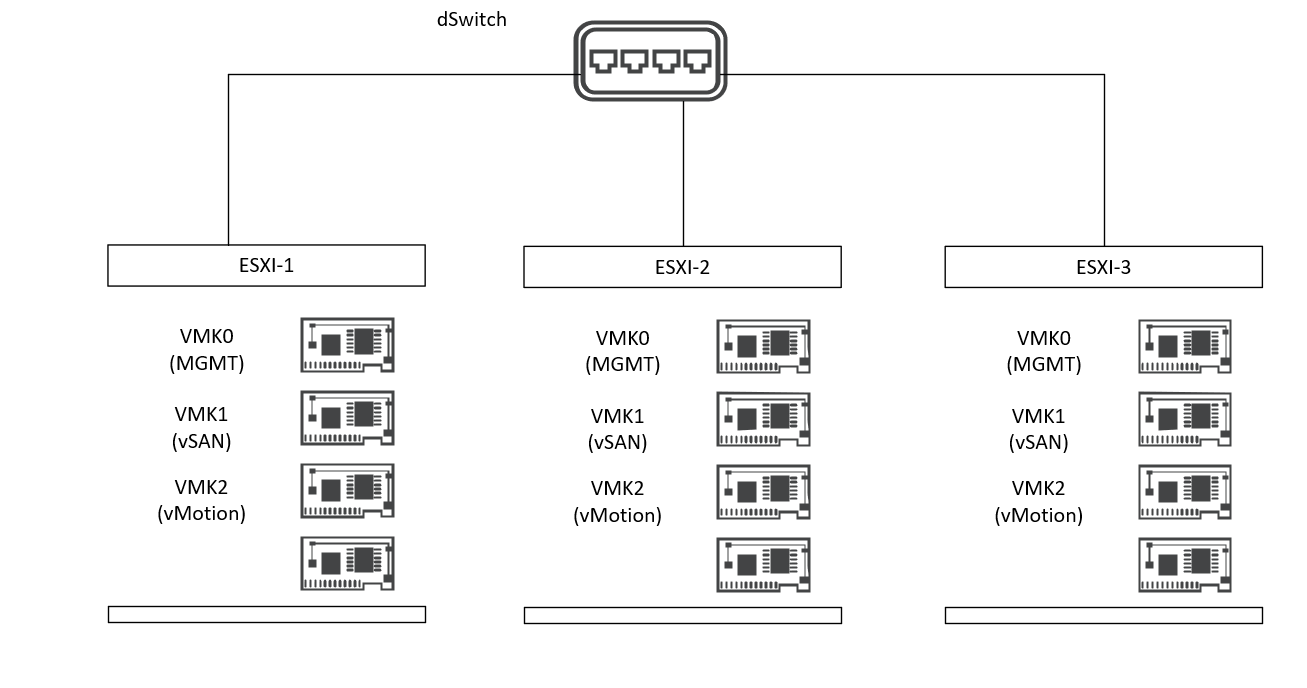
For our networking we’ll add 4x NIC’s to our nested ESXI VM’s. The first NIC will be used as the management, second vSAN and the third for vMotion. Migrating the management VMK to a dSwitch is completely optional. However I highly recommend to use dSwitches for vSAN and vMotion. Enhanced vMotion requires dSwitches to migrate virtual machines without downtime.
Deploying nested ESXI hosts
Deploy the OVA file and during the installation do not select “Automatically configure datastore”. And do not start it yet.
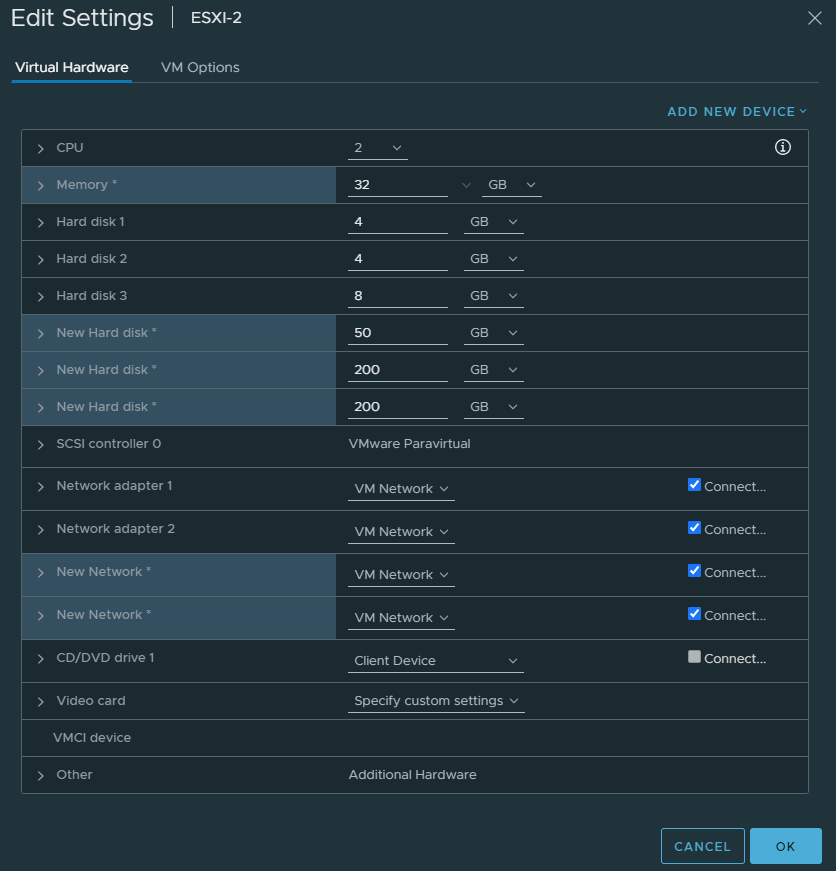
Edit the settings of the VM. Select Thin Provisioning every time you add a new hard disk. Or you’ll run out of resources quite quickly. Add 3x drives: 50 GB, 200GB and another 200GB. Then add 2 more NIC’s for a total of 4. Bump up the memory as well. I’ve allocated 32GB and that’s fine because these nested ESXI hosts will never use more than 1 or 2GB anyways.
Repeat the same process for two more hosts because we do need 3 hosts.
Cluster preparation
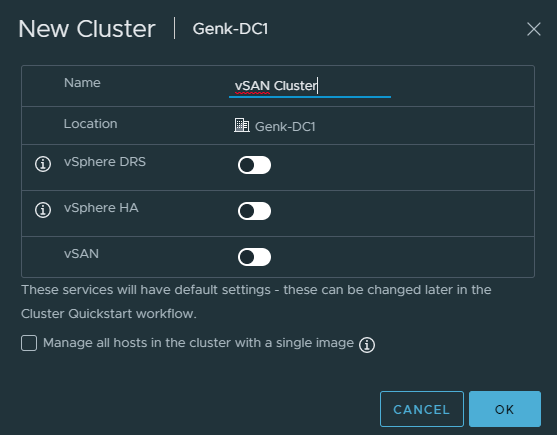
Add a new Cluster and do not select vSAN here.
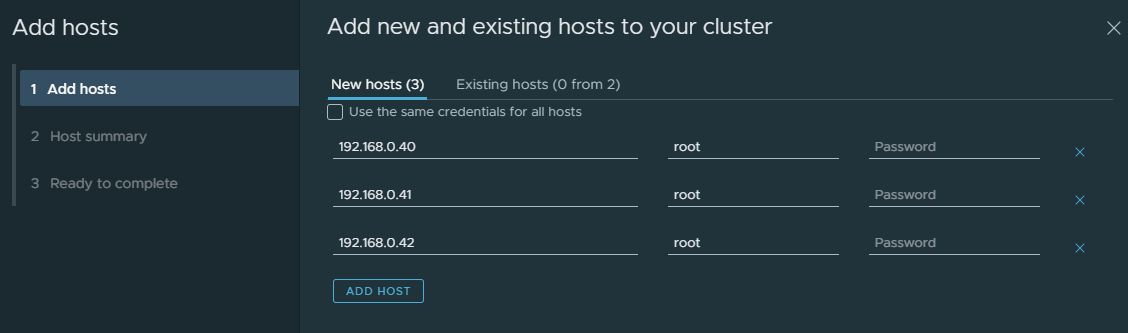
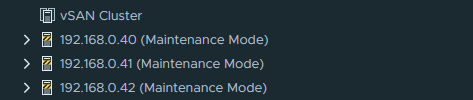
Add the nested ESXI hosts to the cluster.
dSwitch and VMware Kernel Adapters configuration
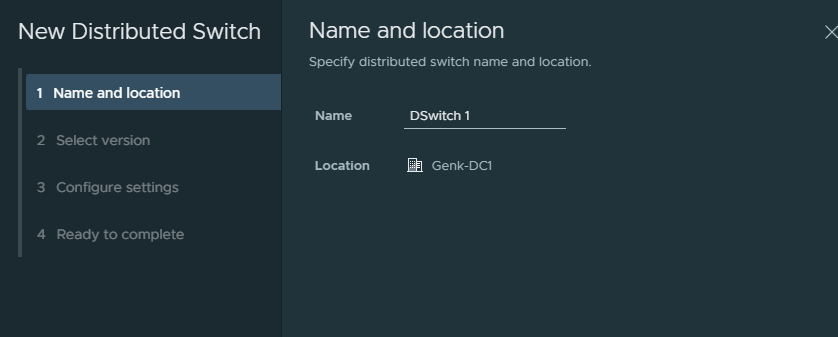
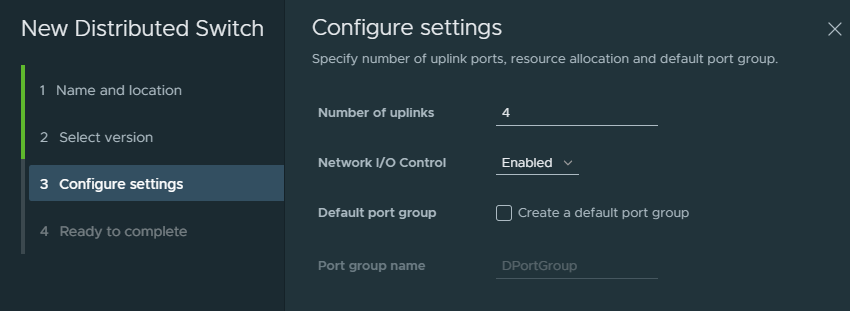
Add a new dSwitch.
4 uplinks equals the amount of uplinks we have available to our nested ESXI hosts. Uncheck the box to create a default port group because we’re creating our own anyways.
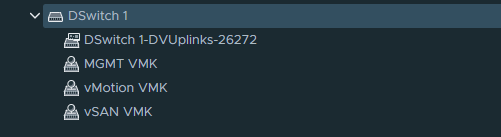
Create 3 new port groups:
- MGMT VMK (Our management ort group migrated from vSwitch)
- vSAN VMK (vSAN port group)
- vMotion VMK (vMotion port group)
Right click on the dSwitch and select “Add hosts”.
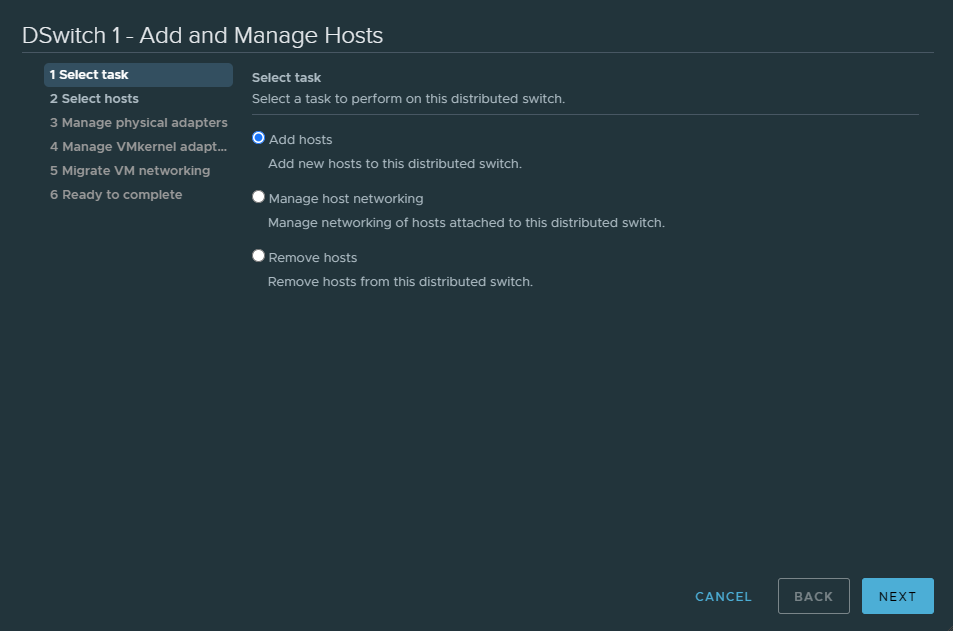
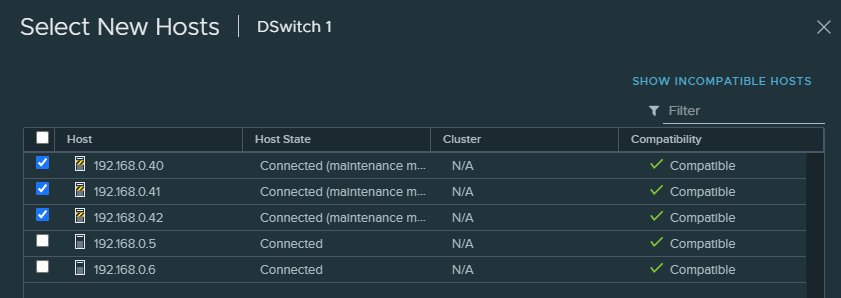
Only select the nested ESXI hosts and not your physical host(s).
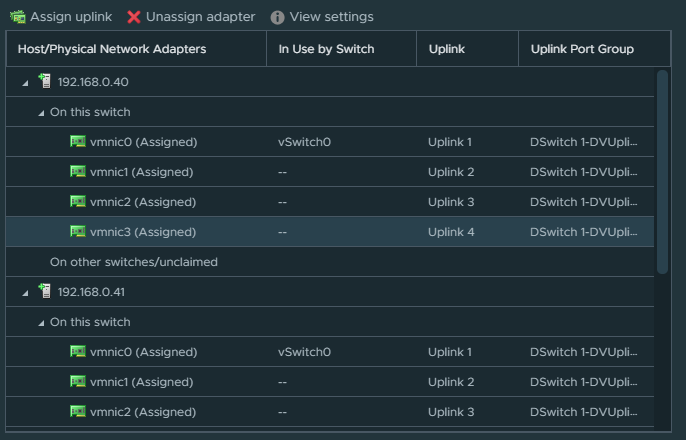
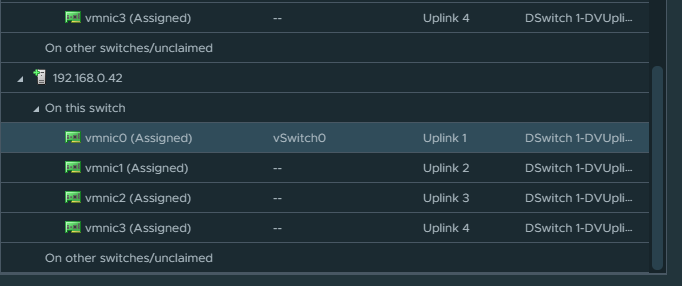
Assign uplinks. There’s a checkbox to apply it for other hosts as well which is faster.
If you don’t want to migrate the management VMK to a dSwitch, don’t select an uplink for vSwitch0.
Now it’s the time to migrate the management VMK from the default vSwitch to our dSwitch.
If you don’t want to migrate the management VMK from vSwitch0, skip this step and click next.
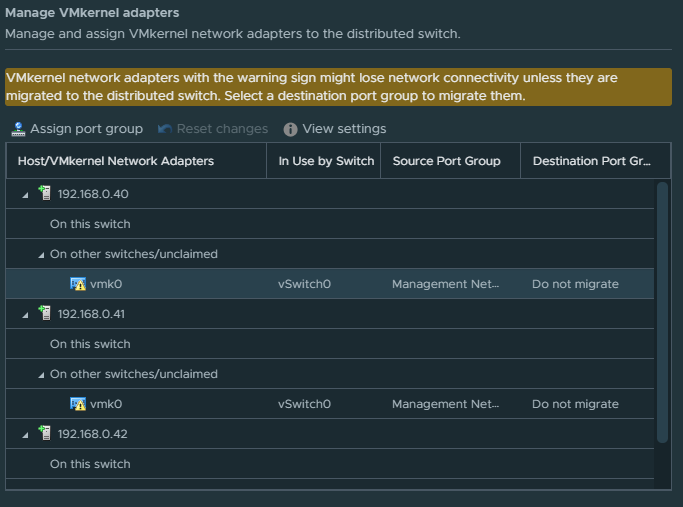
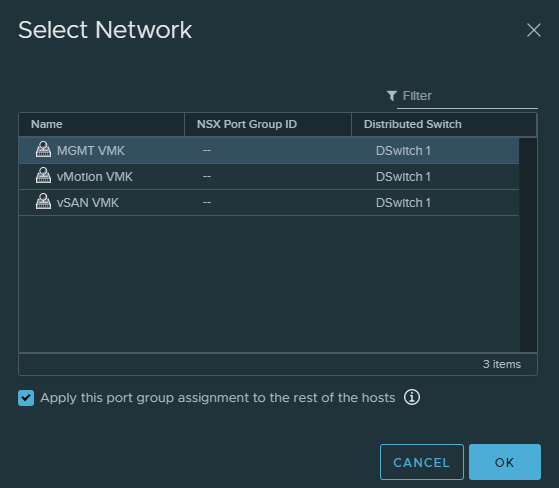
Click “Assign port group” and select the “MGMT VMK” port group. Check the checkbox to apply the same setting for the other two hosts.
Finish the installation.
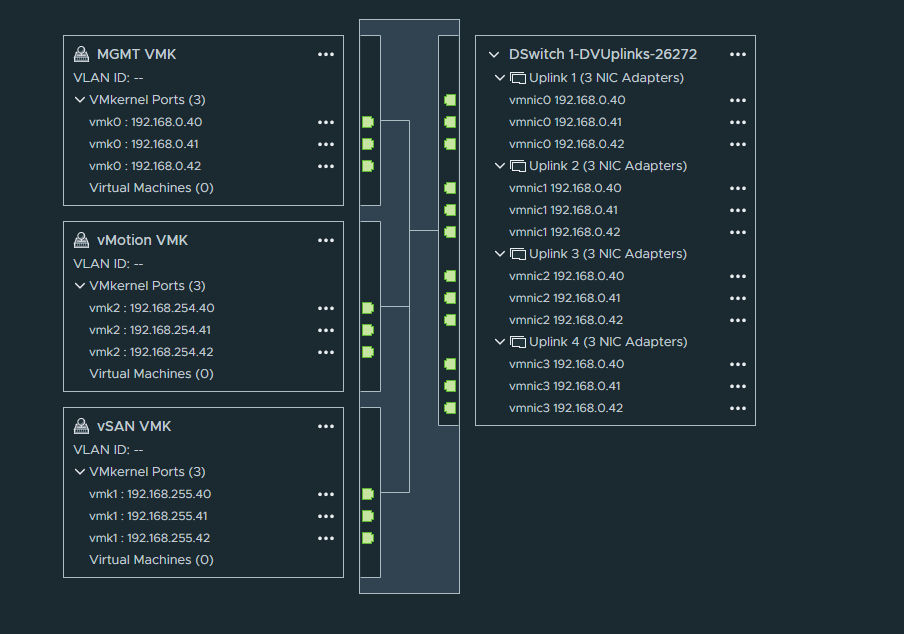
The topology should look like this:
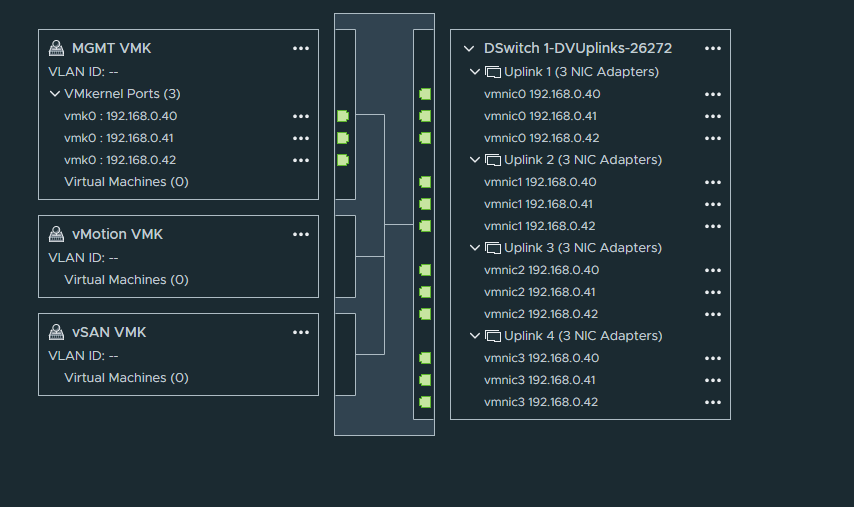
The Management VMK adapter has been successfully migrated but we still have to assign an VMK Adapter to vSAN and vMotion port groups.
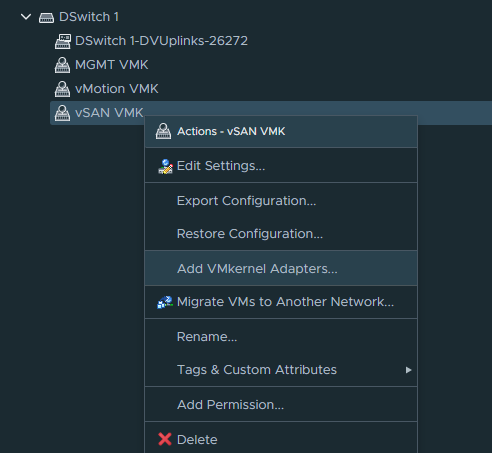
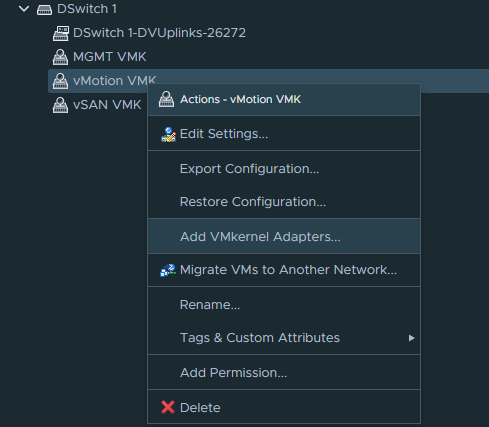
Right click the “vSAN VMK” portgroup and click “Add VMkernel Adapters”.
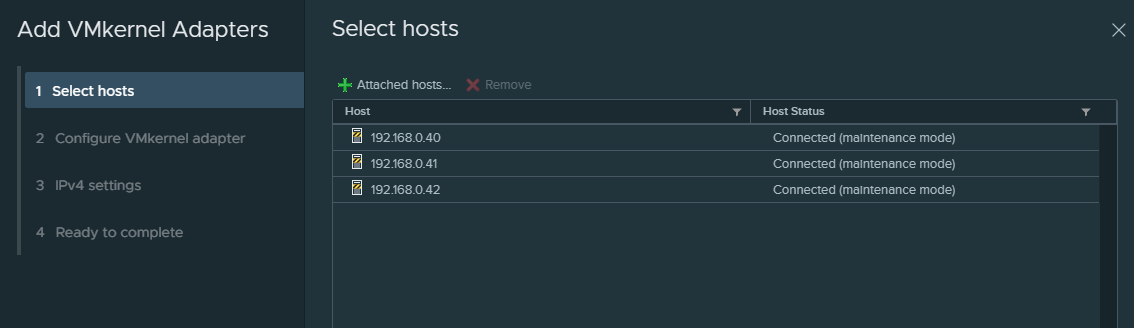
Select the nested ESXI hosts.
Check the box “vSAN”
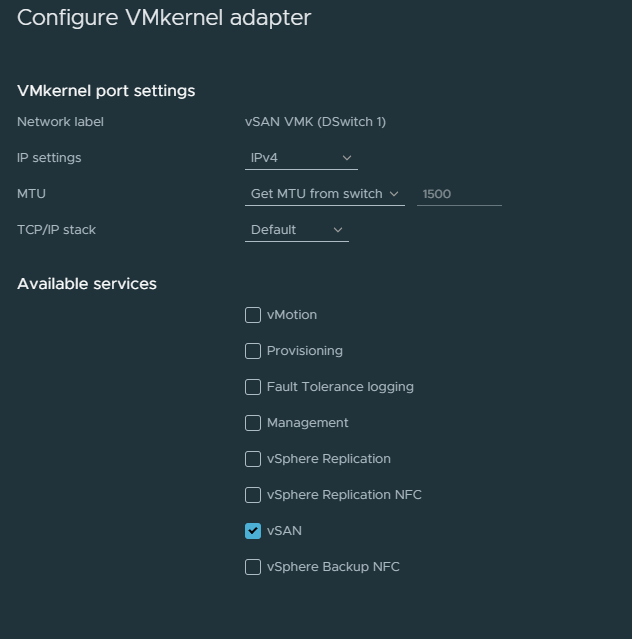
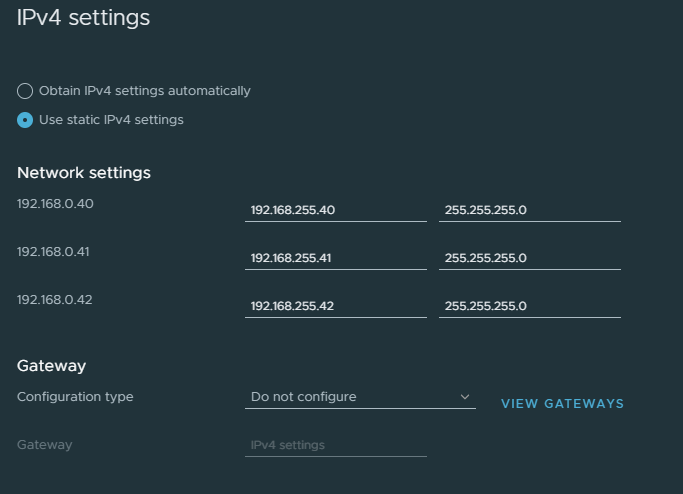
Pick a subnet that’s not within the range of your home network, so make something up. But make sure they’re all within the same subnet. There’s no need for a default gateway here. Simply because the vSAN adapter doesn’t need to route its traffic outside of this subnet – as long as it can communicate with the other hosts.
While we’re at it, configure the vMotion VMK.
Select the nested ESXI hosts.

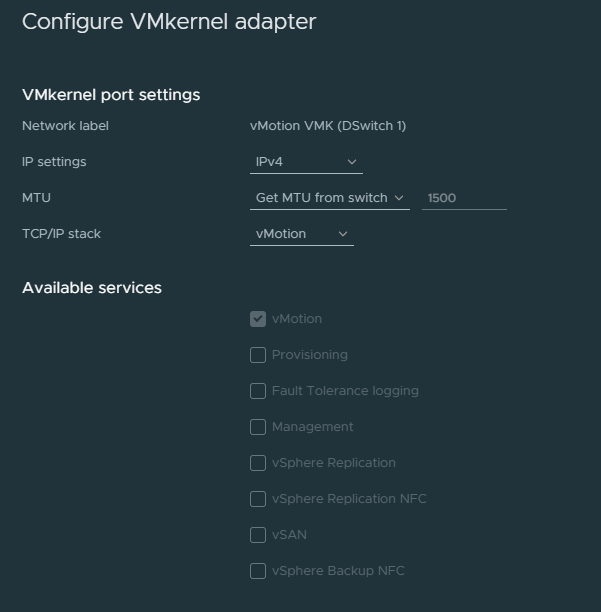
Select vMotion as the “TCP/IP Stack”.
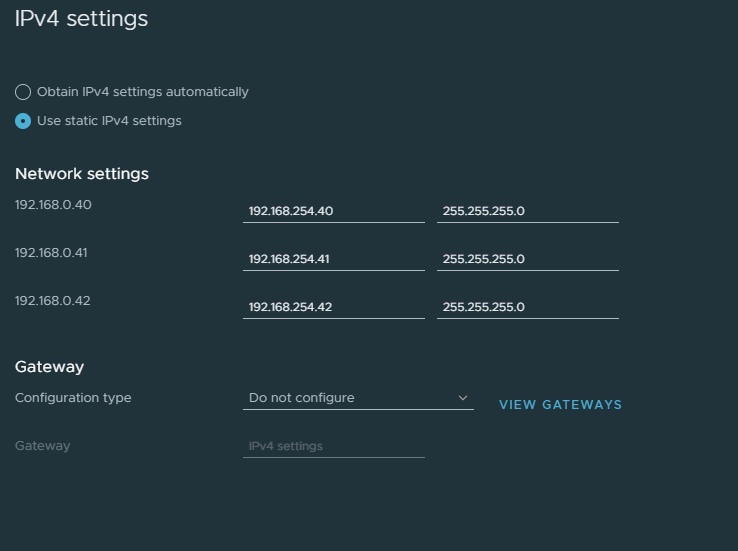
Make sure the vMotion & vSAN subnets are different. Again there’s no need for a default gateway.
And our topology should show that the vSAN & vMotion VMK’s are configured and hooked up to their uplinks.
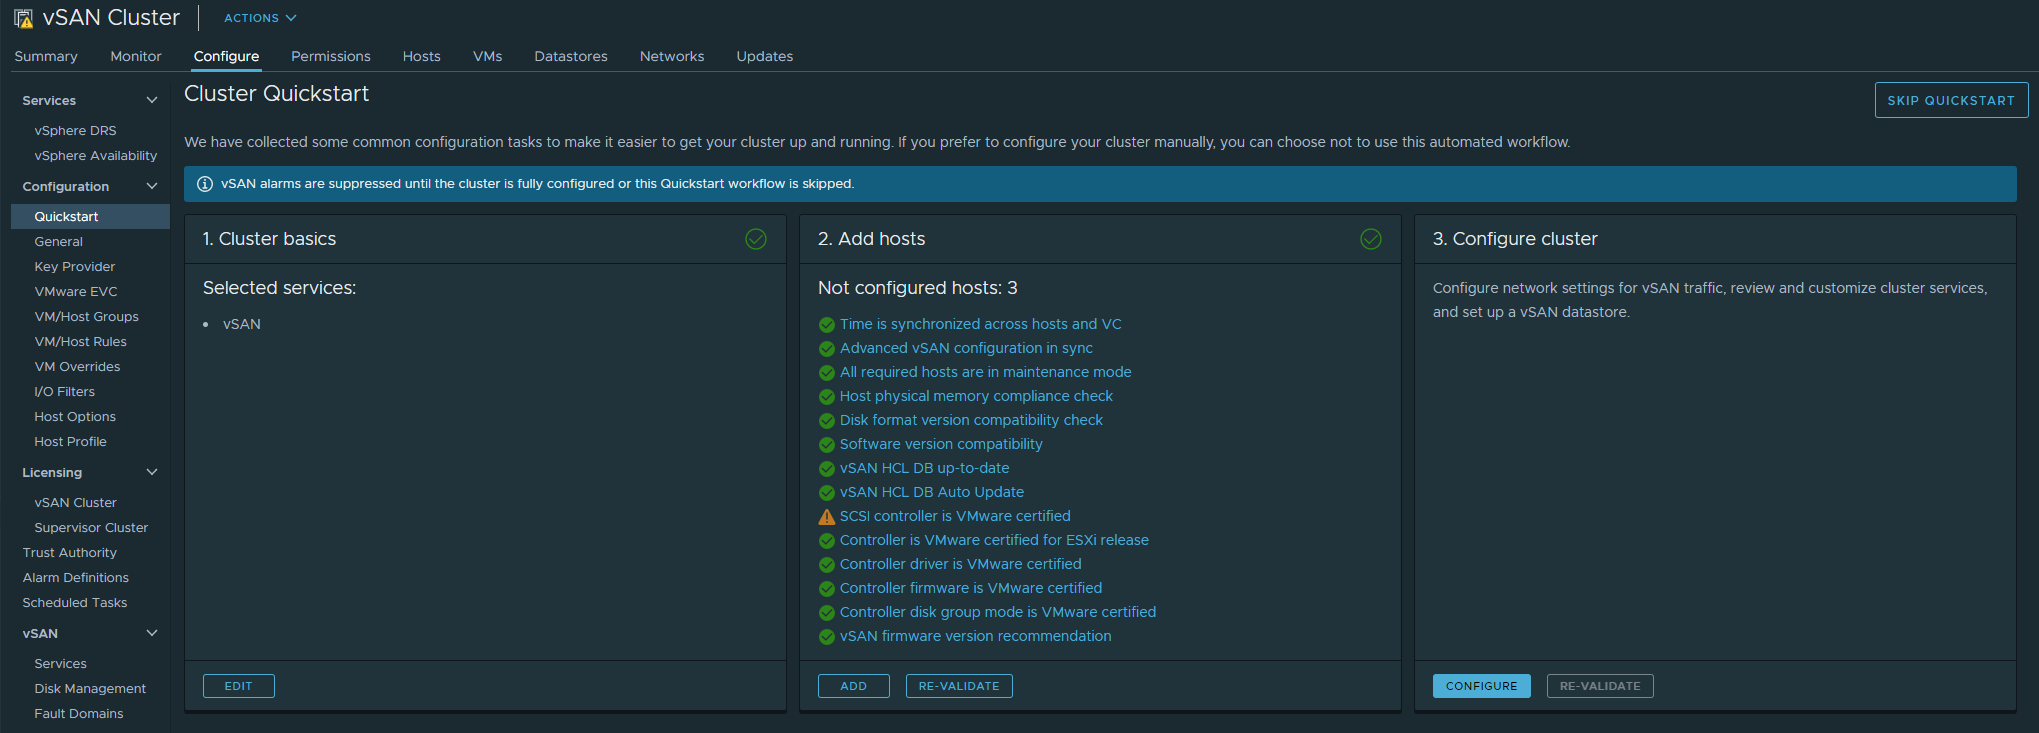
vSAN configuration
Cluster > Configure > Quickstart
Click Configure at Step 3.
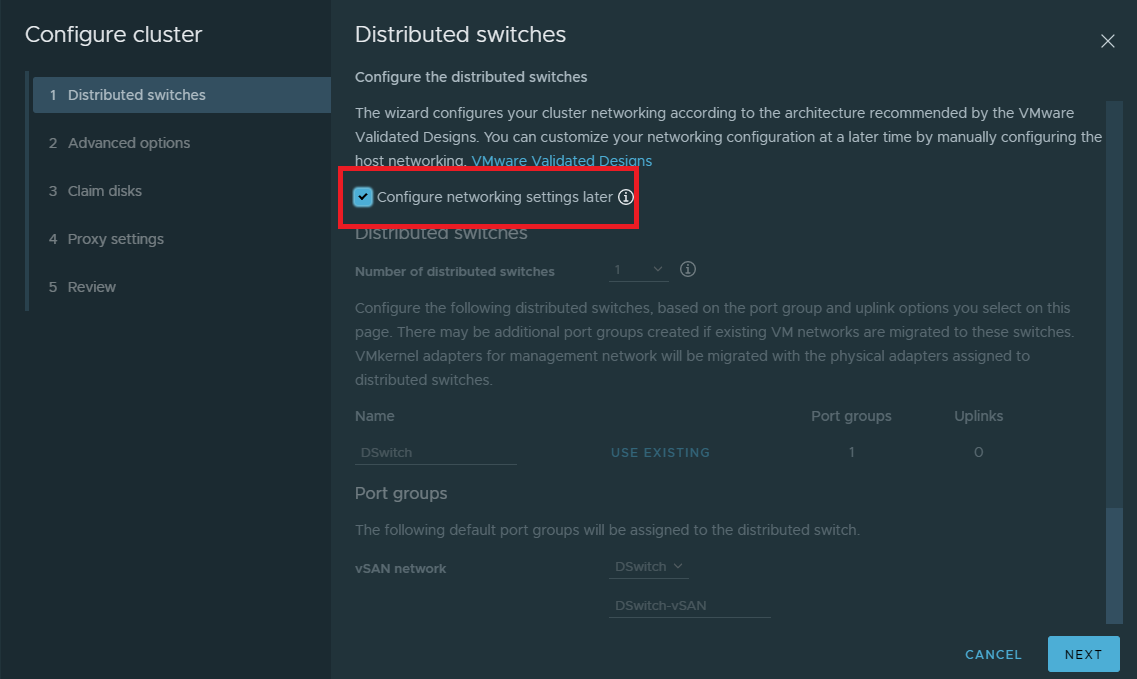
Check “Configure networkin settings later” because we’ve already done it.
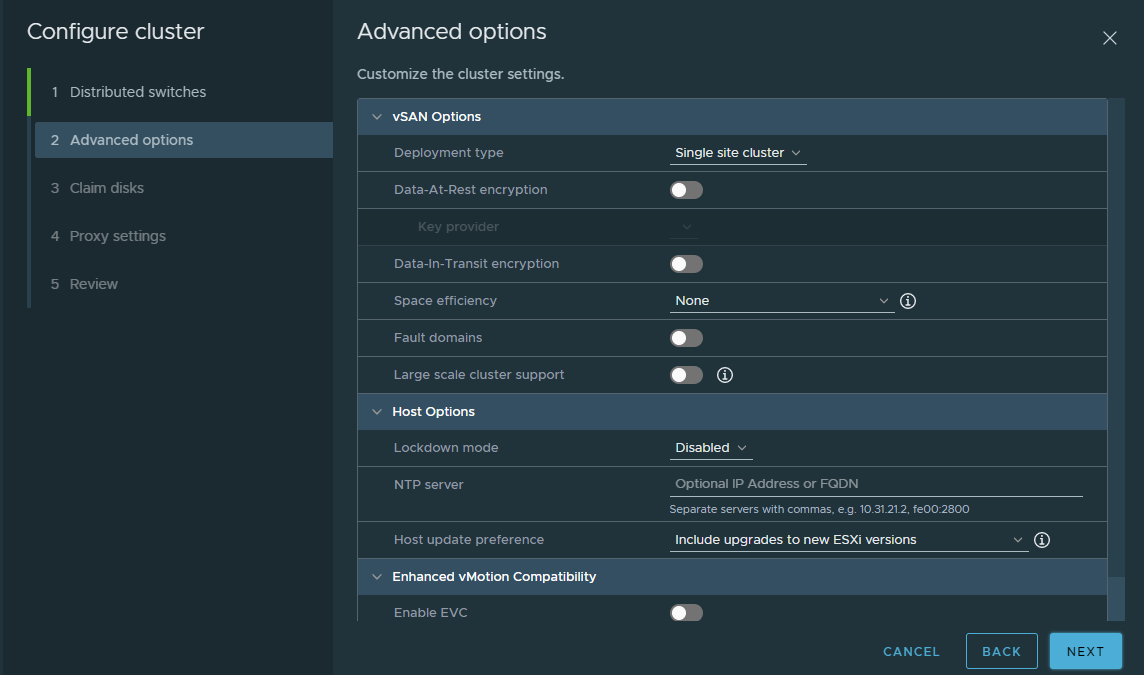
The default settings here are fine.
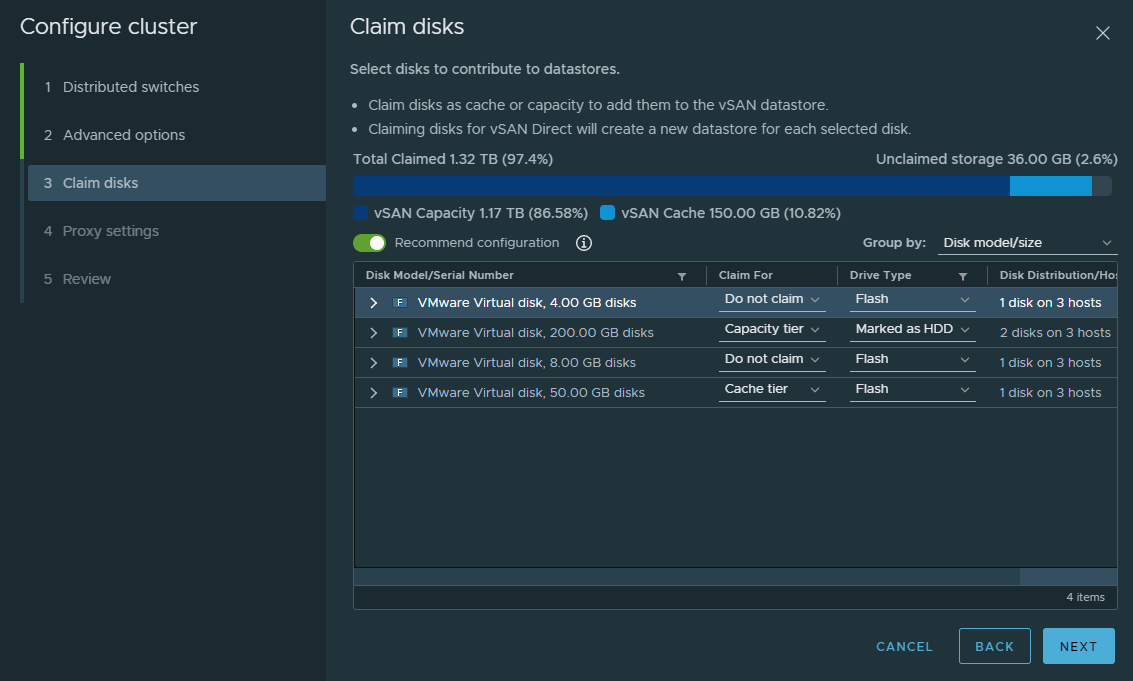
Ignore the 4GB and 8GB drives because they came with the appliance. Select the 50GB as your cache drive and keep it marked as flash. Then select the 2x 200GB drives as a capacity tier and mark them as a HDD. Although that’s not necessary, but it illustrates the idea.
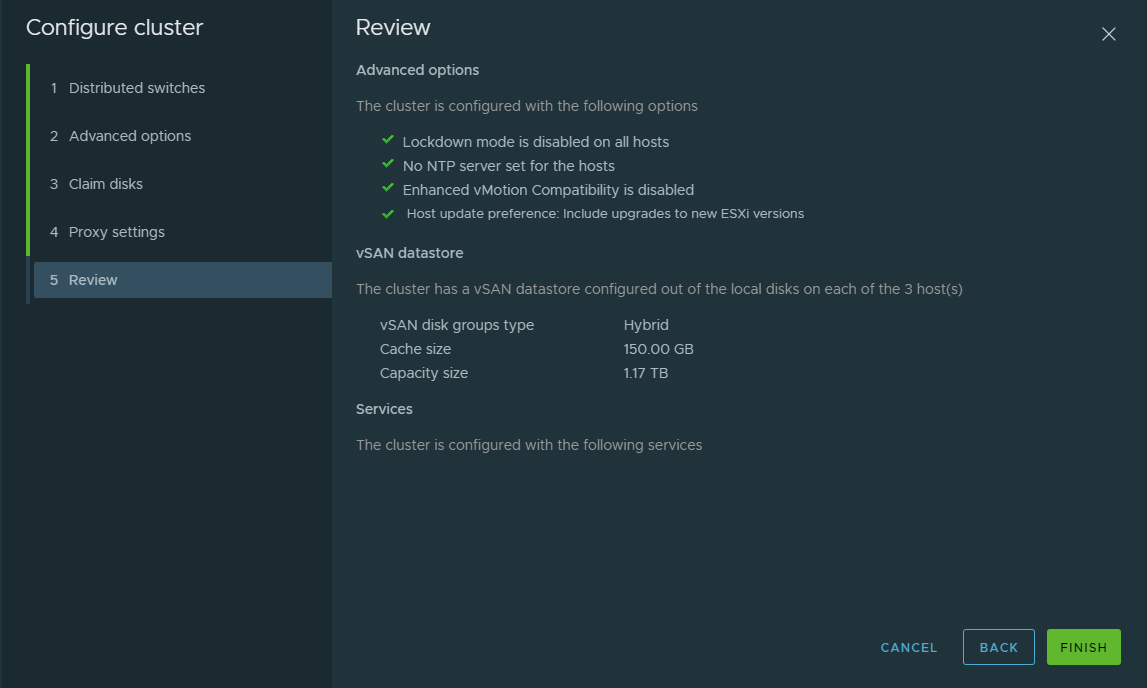
We’re skipping the proxy settings because we don’t need it. And review the configuration.
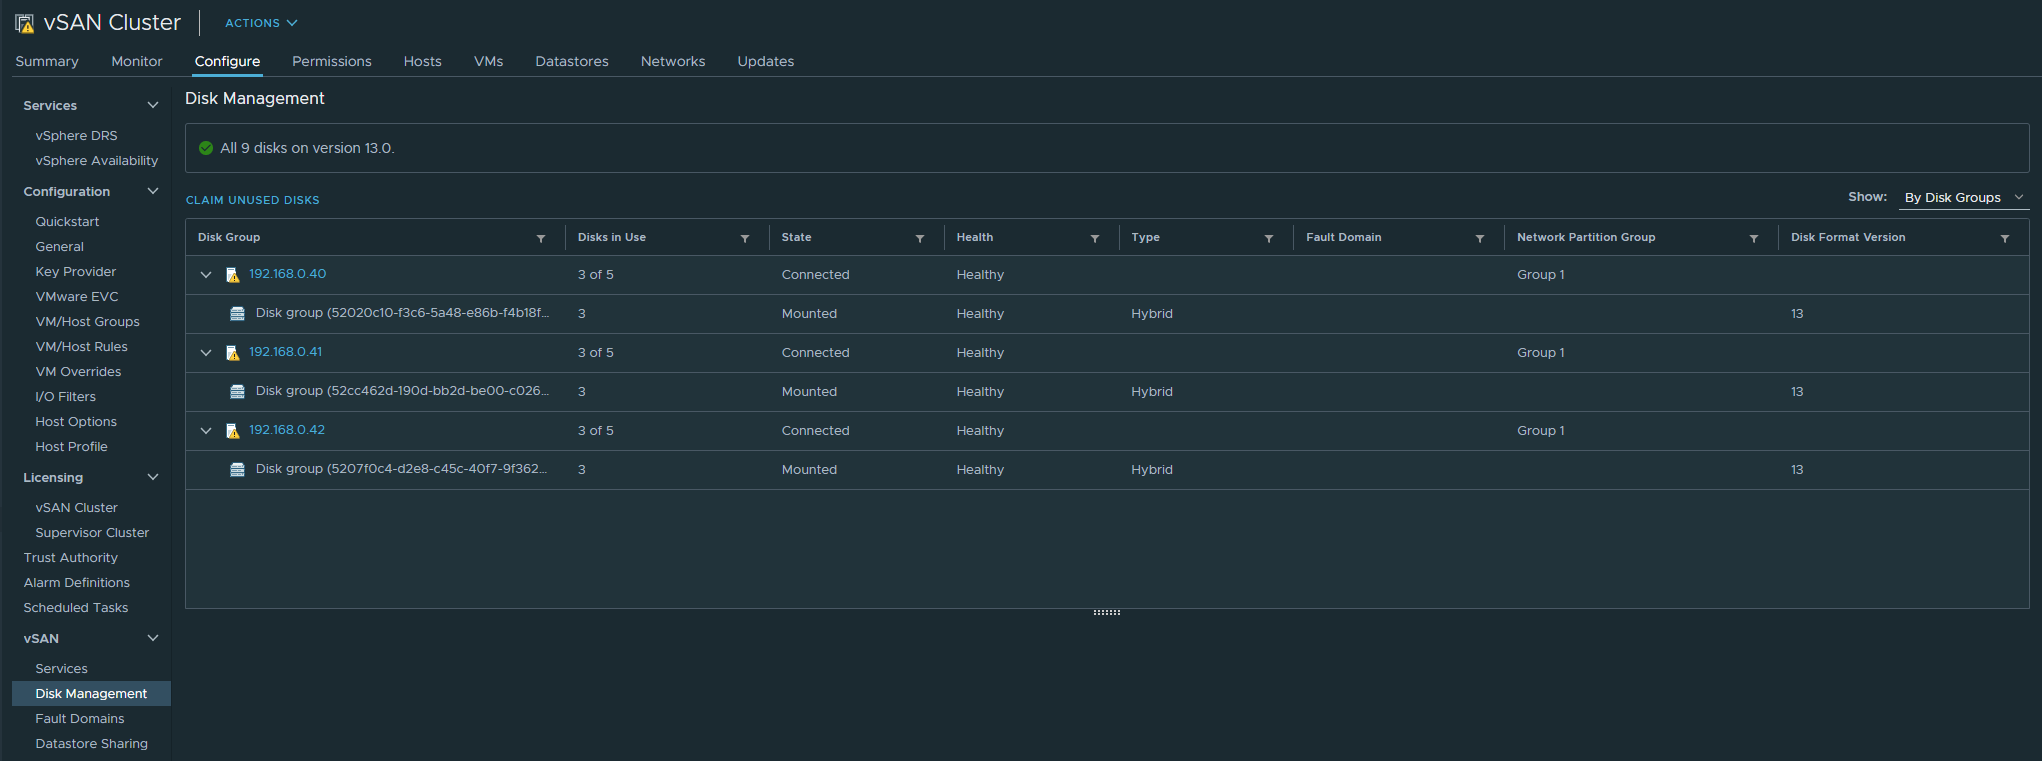
Cluster > Configure > Disk Management
Gives a nice overview of our drive groups and their health.
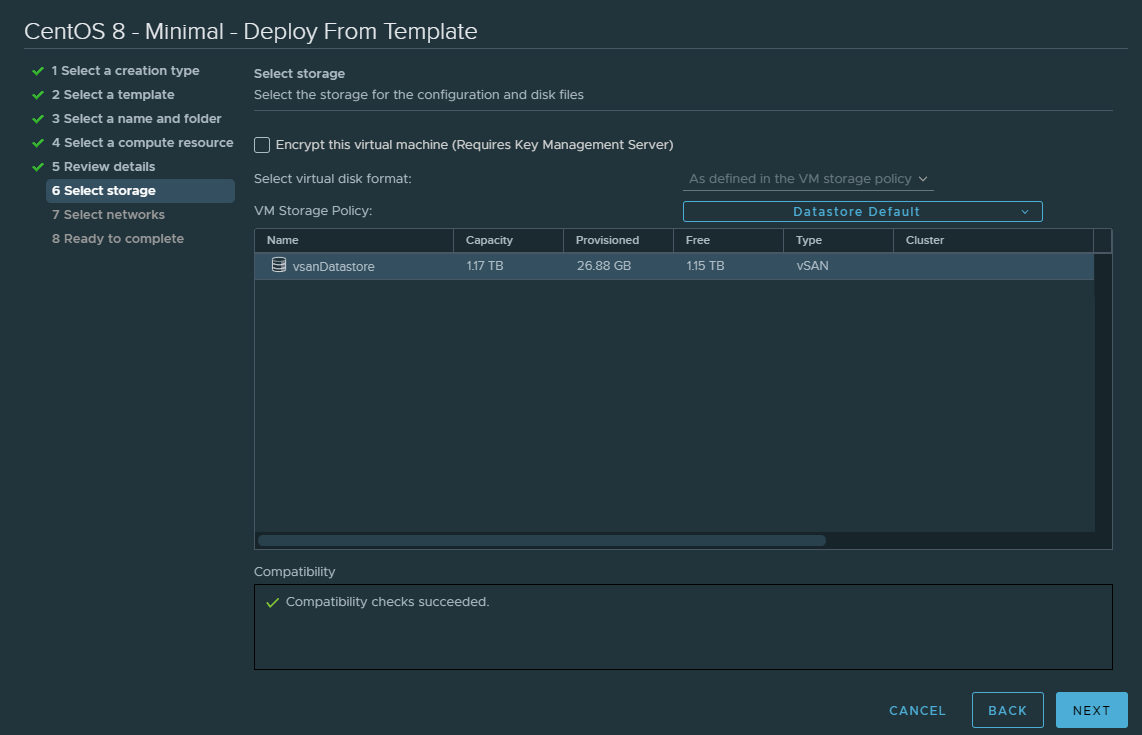
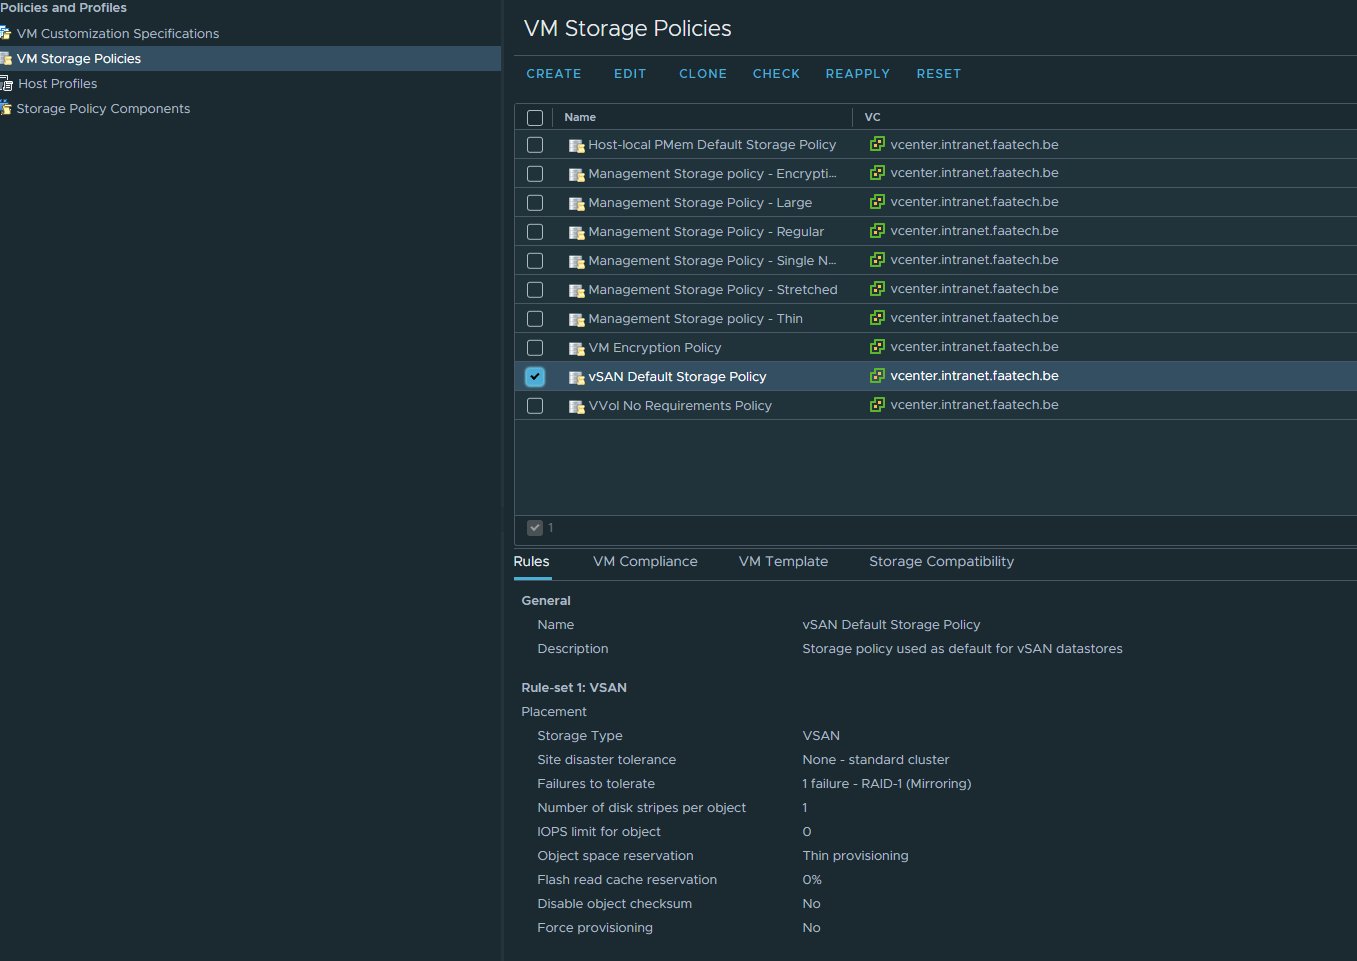
Using the vSAN Datastore and default vSAN Storage policy
Create a new VM and the newly created vSAN Datastore should appear.
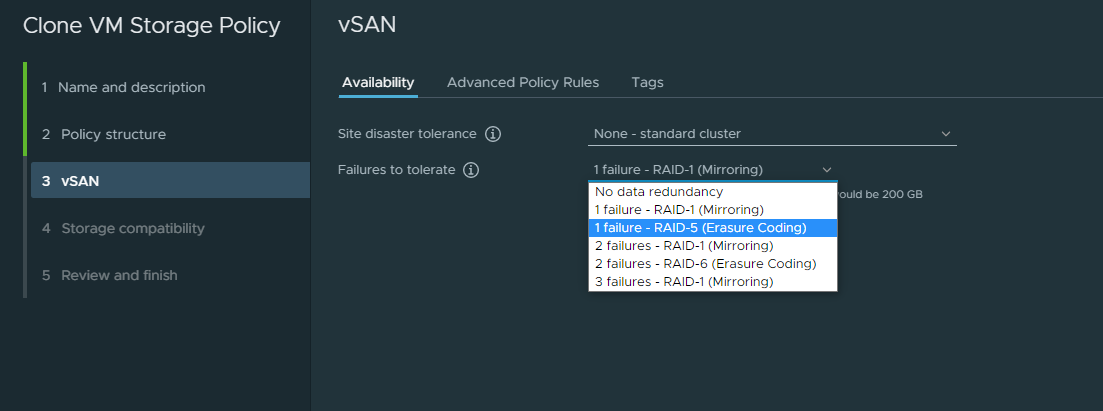
By default it’s configured as a RAID 1 (mirroring). To change this behavior we’ll have to configure a vSAN policy profile. Under Policies & Profiles

Clone the default vSAN profile and edit it to your liking.
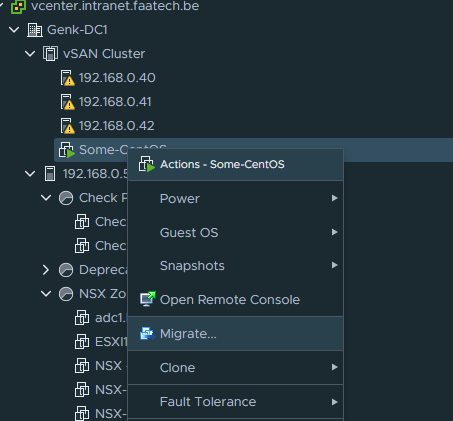
Live migration with vMotion
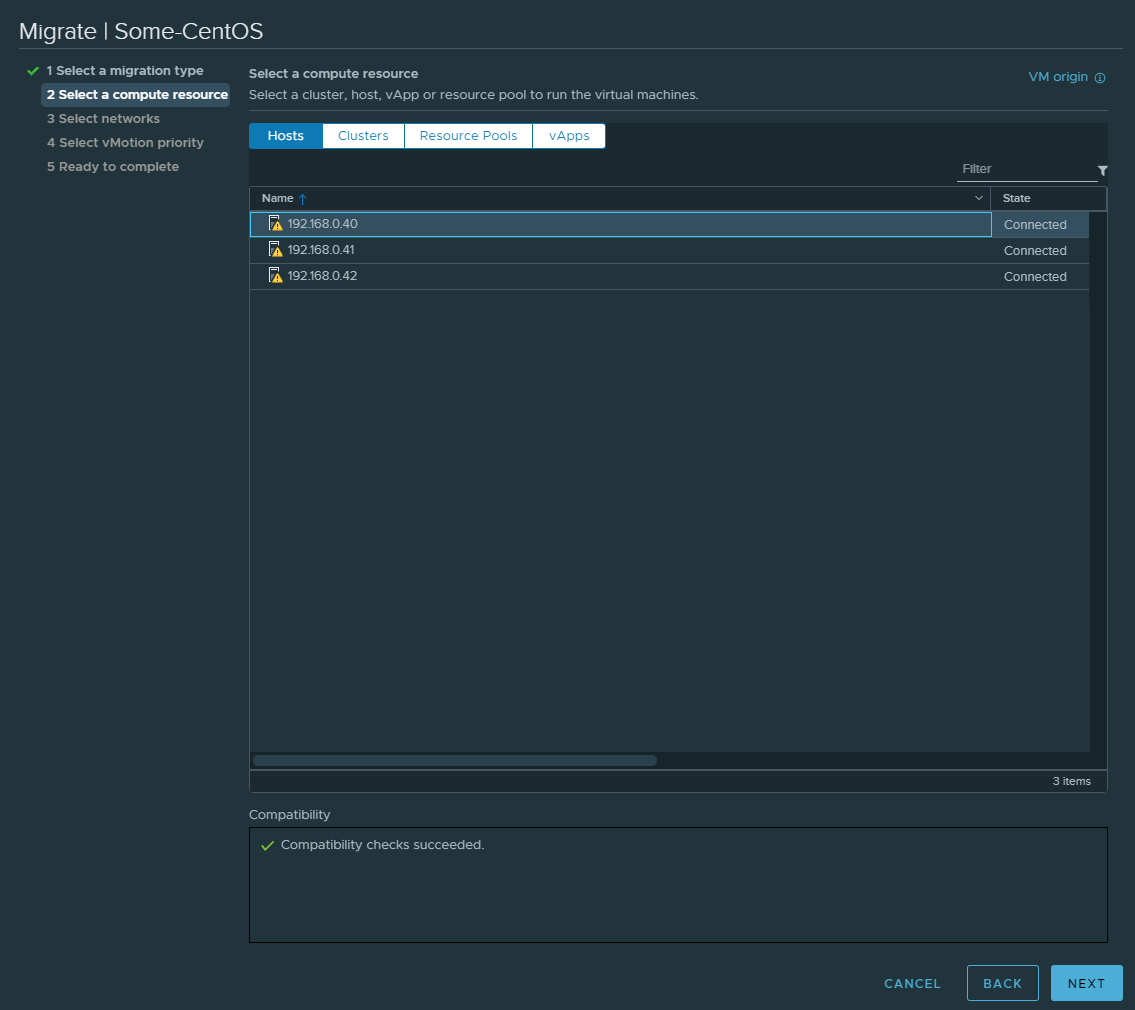
Select the VM and right click migrate.
We have 3 options here. Because we’re using a shared datastore (vSAN Datastore) the 2nd and 3rd option are quite useless. Select the first.
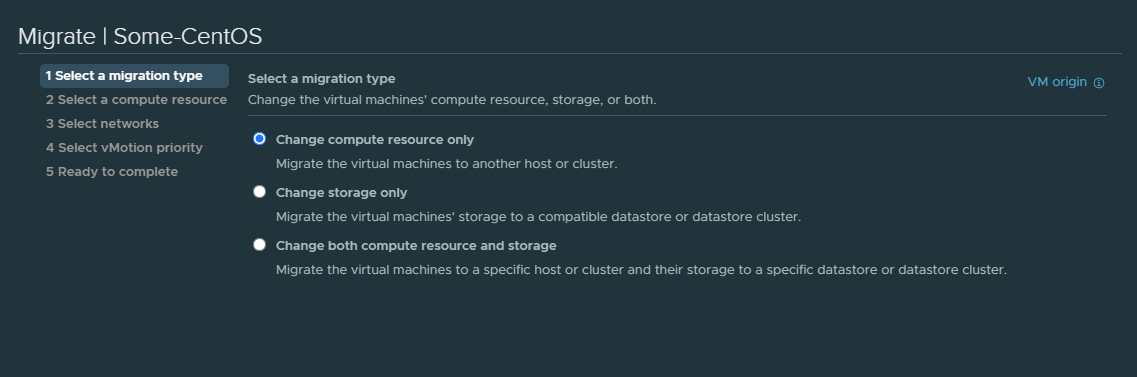
Currently it’s residing on ESXI-3 for me, so I’ll move it to ESXI-1.
Retain the networking and next.
awesome guide !