In this guide we’ll be setting up a simple IPSEC site-to-site VPN tunnel between NSX-T and another site. There are other VPN options available in NSX-T, but we’ll be sticking to just IPSEC as that’s the most commonly used VPN service in general.
Prerequisites
- NSX-T up and running
- A router/firewall of your choice that supports IPSEC
- Prior experience with IPSEC
- Able to create destination NAT policies
Topology overview
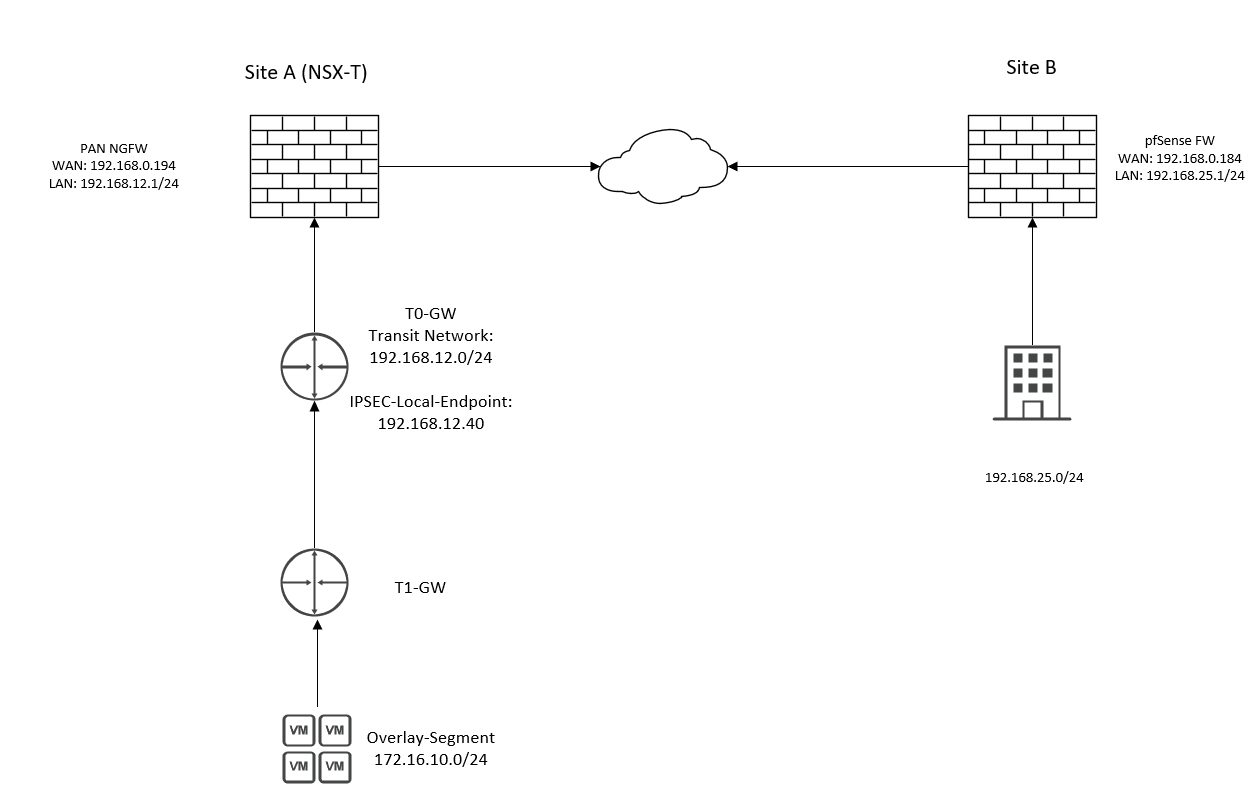
We can see that we have two networks; 172.16.10.0/24 in Site A behind NSX-T and 192.168.25.0/24 on Site B behind a pfSense firewall. Site A is behind an PAN NGFW firewall and this router/firewall does not need to support IPSEC because the tunnel isn’t initiated on this router. However, we have to create a destination NAT policy on the PAN firewall to forward UDP/500 to the IPSEC-Service address (192.168.12.40).
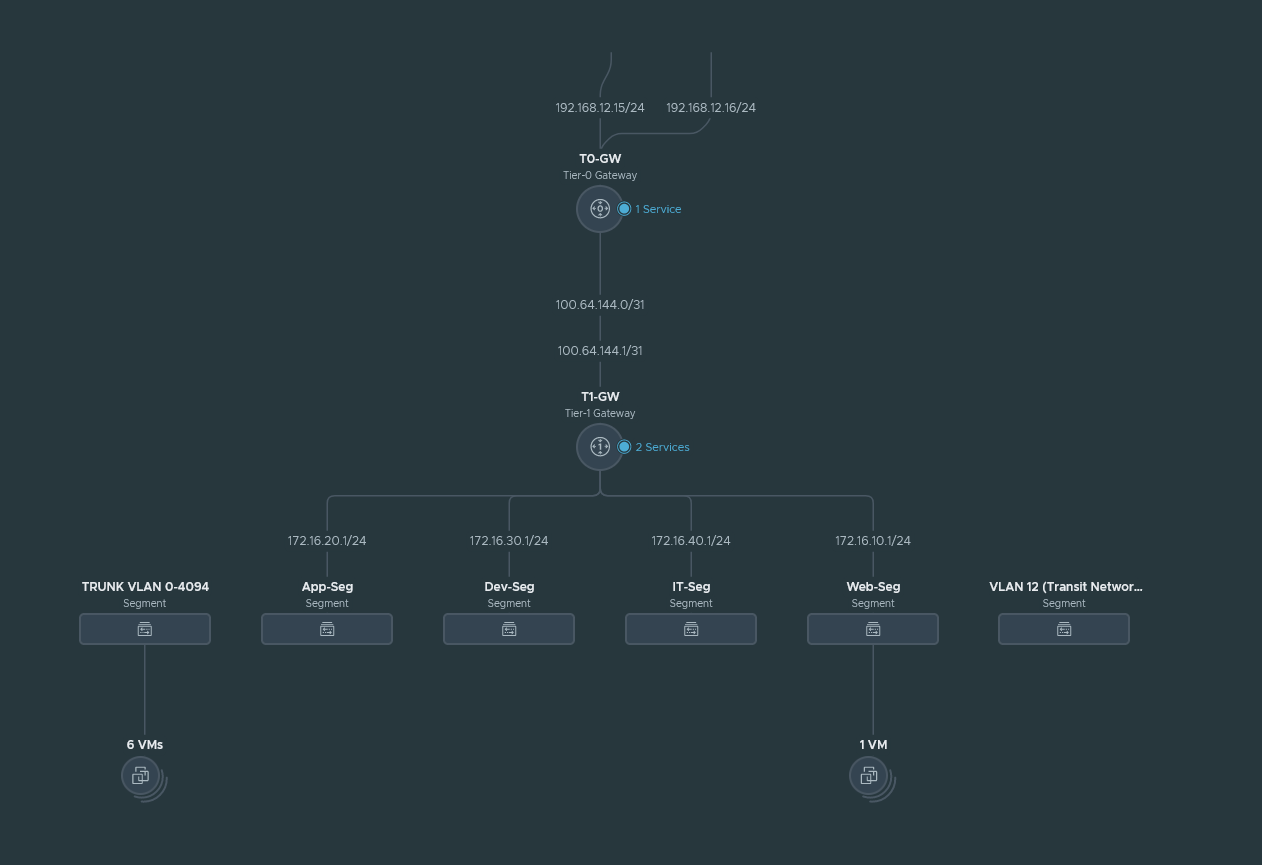
We can see that we have two edge uplink interfaces: 192.168.12.15/24 & 192.168.12.16/24 which connects to the PAN NGFW. For this demonstration we’ll use only the Web-Segment (172.16.10.0/24) to keep everything simple.
Phase 1 overview
Site A (NSX-T):
Local IP address: 192.168.12.40
Local ID: 192.168.0.194
Remote IP address: 192.168.0.184
Remote ID: 192.168.0.184
Site B:
Local IP address: 192.168.0.184
Local ID: 192.168.0.184
Remote IP address: 192.168.0.194
Remote ID: 192.168.0.184
Phase 2 overview
Site A (NSX-T):
Local network: 172.16.10.0/24
Remote network: 192.168.25.0/24
Site B:
Local network: 192.168.25.0/24
Remote network: 172.16.10.0/24
Configuring the IPSEC VPN service
We’ll start off by configuring the IPSEC service.
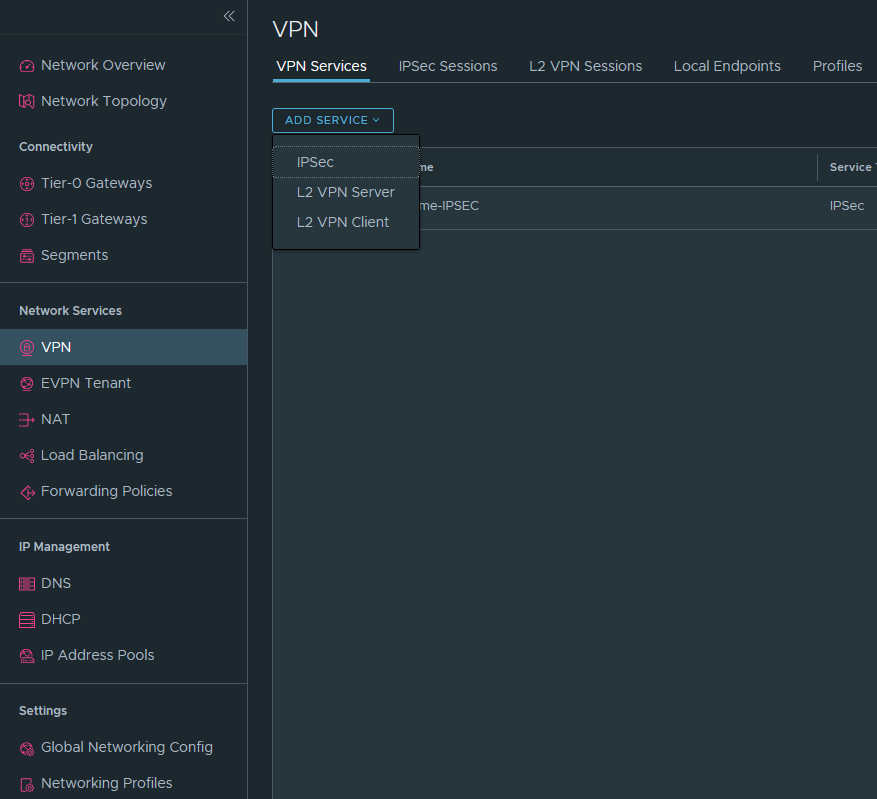
Networking > Networking services > VPN > Add service > IPSEC
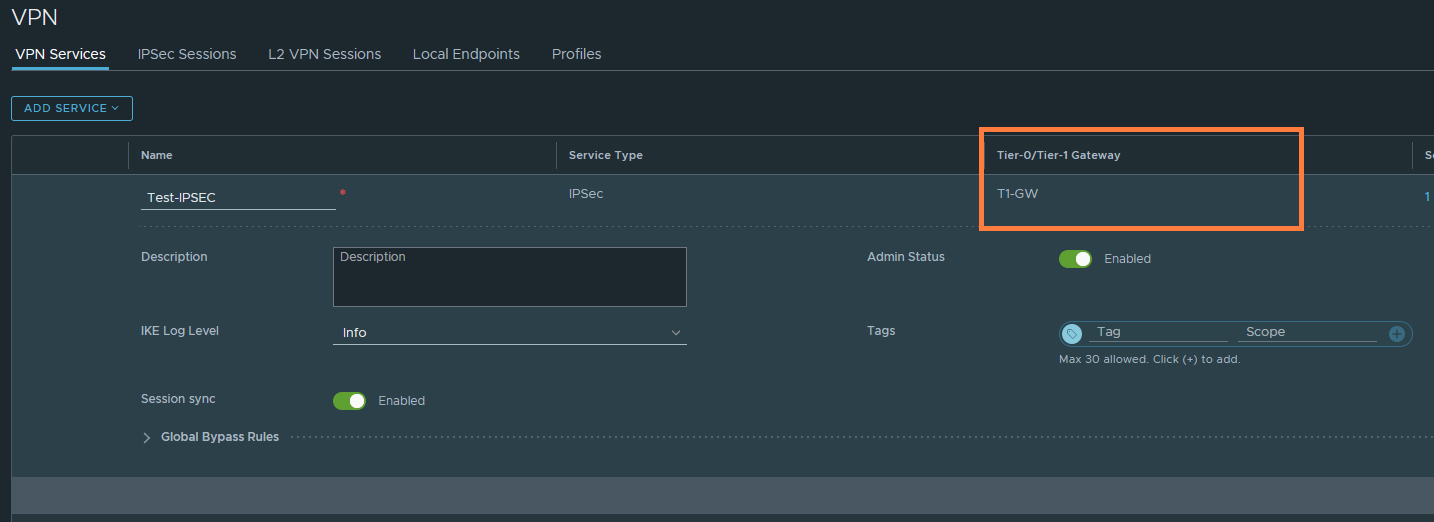
Name it and select either the T0 or T1-GW. For simplicity, we’ve gone with the T0 GW.

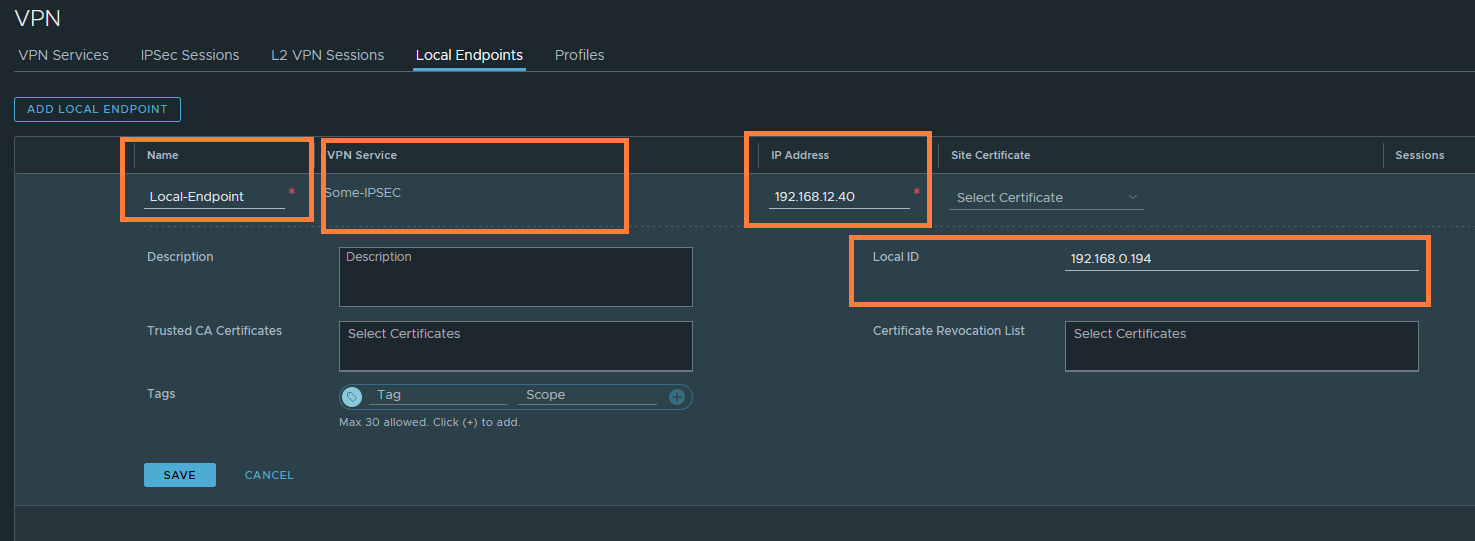
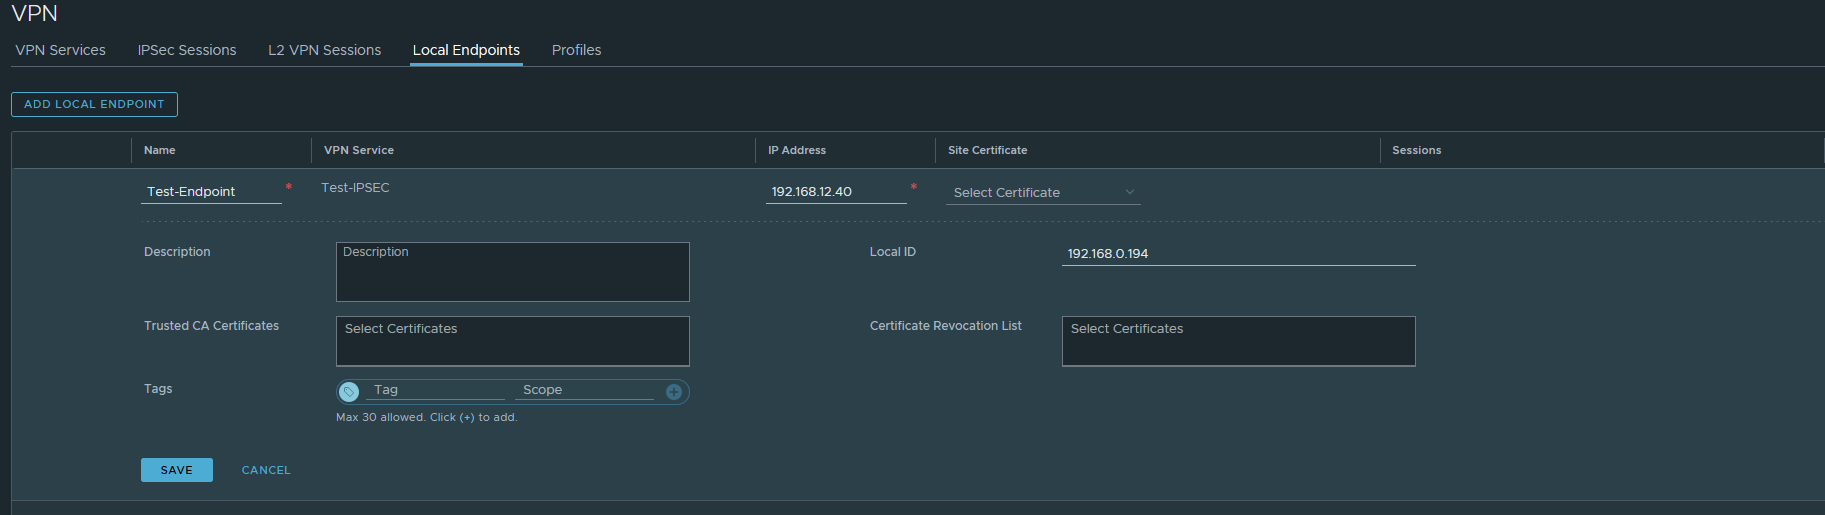
Next, head over to ‘Local Endpoints‘. This will be the address that the upstream router will port forward UDP/500 traffic to. Just see this as the IPSEC-service address.
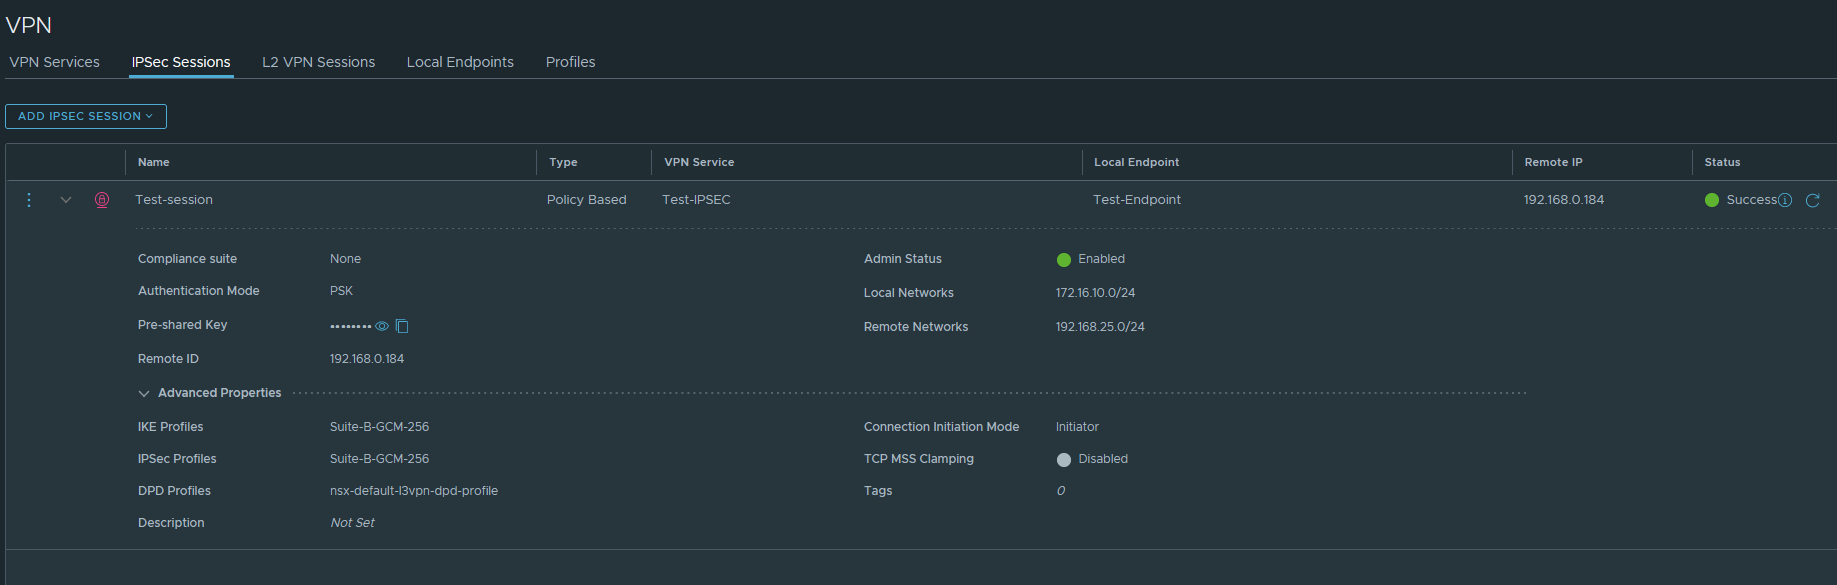
Lastly, go to IPSec Sessions and create a policy-based session. The route-based sessions requires an tunnel interface which is a lot more complicated.
Select the ‘VPN service’ and the ‘Local Endpoint’. The remote IP & ID should be the WAN interface of Site B’s router. I have decided to use a preshared key rather than a certificate. Enter the local network and the remote networks. I’ve selected the following suites for IKE (P1) and IPSEC (P2).

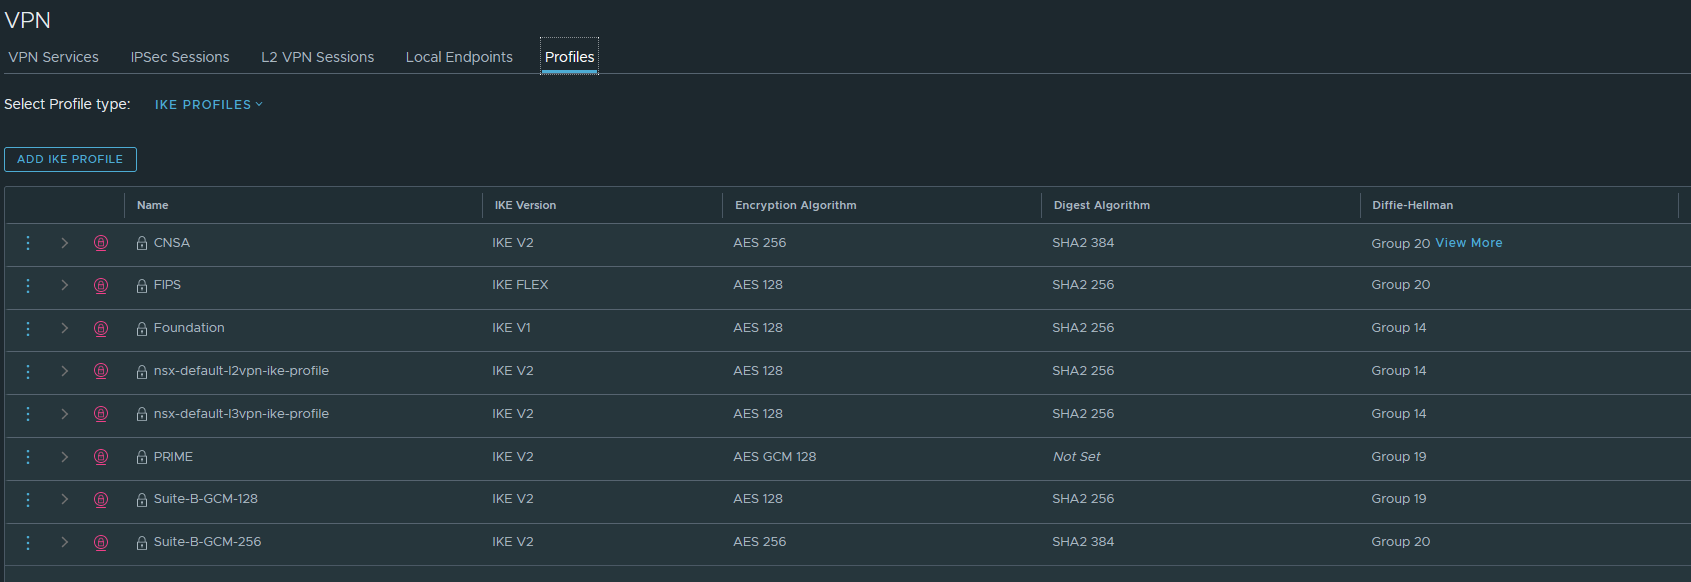
Make sure that the cipher suites actually match on both sides. Under ‘Profiles‘, you can see the cipher suites used by the profiles we just selected.
For IKE:
For IPSEC:

Port-forwarding UDP/500 on the upstream router.
This is the policy that I’ve configured on the PAN NGFW. It’s just a simple destination NAT Policy. Anything that hits the 192.168.0.194 (WAN address of the NGFW) on port 500/UDP will be translated to 192.168.12.40 which is the IP address of the ‘Local Endpoint’ IPSEC service in NSX-T.

Validating the tunnel connection
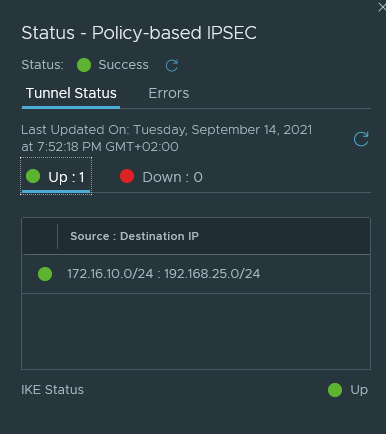
We can see status of our P2 tunnels under IPSec sessions.
We can check the status of our IPSec Sessions under the VPN Services tab as well.

(Optional) Using the T1 as the IPSEC gateway
We can also use the T1 as the IPSEC gateway if we wish to do so. This requires us to either have BGP configured or add some static routes. You have to create a new VPN service and possibly delete the existing one because we cannot use the same remote IP address for two different VPN services.
The Local Endpoints & IPSec Sessions configuration are the exact same. The IP address used here can be anything you desire. Because BGP will advertise this to the upstream router, or if you configure a static route yourself. I’ve sticked to 192.168.12.40 to keep things simple.
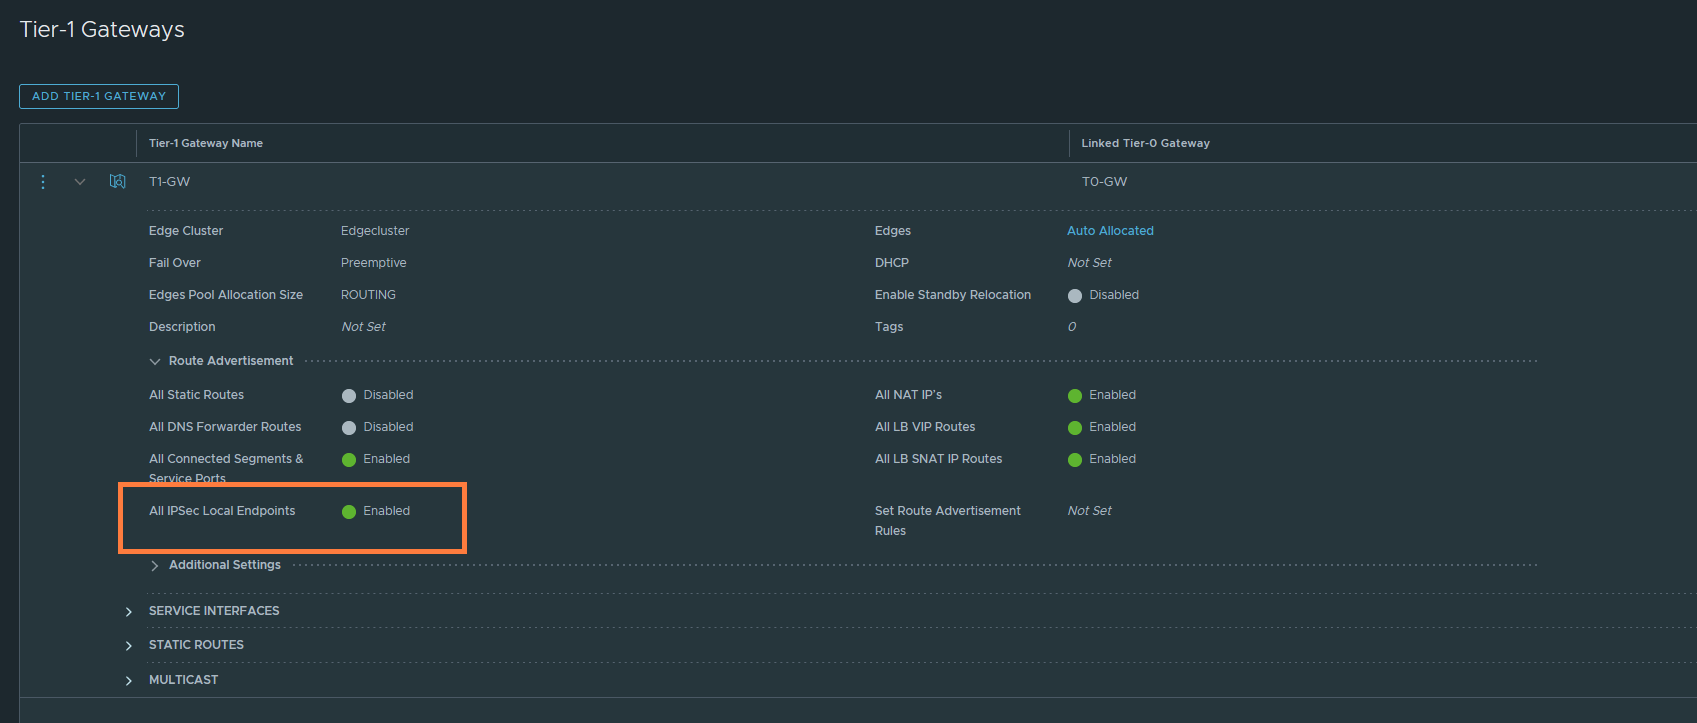
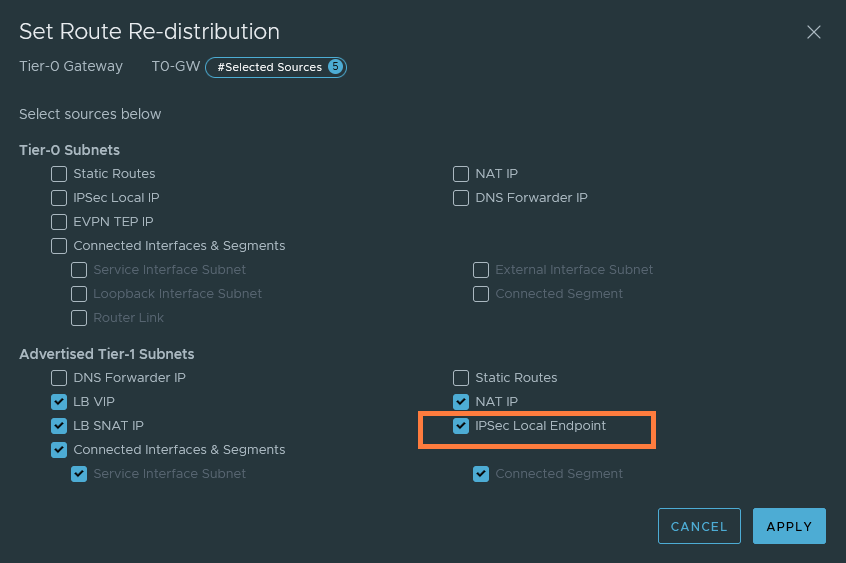
The next step is to configure the route advertisements on both the T1 and T0 GW. If you’re doing static routes and not BGP, then you do not have to configure route advertisements on the T0 gateway. But it’s required on the T1 gateway regardless.
T1 GW
T0 GW
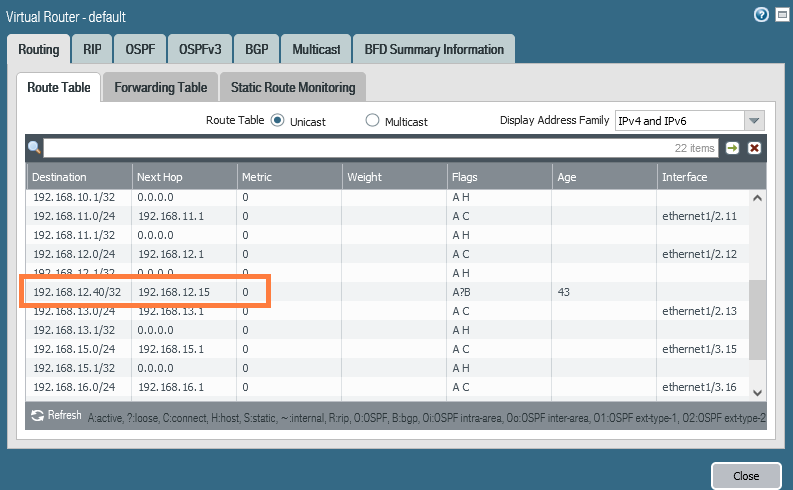
We should see that 192.168.12.40/32 is advertised to the upstream router. The next-hop should be the Edge’s uplink interface which is in my case 192.168.12.15. So if you do need to add the static route, now it’s the moment to do that.