Captive Portal will interrupt users asking for credentials before being granted with access to a network. For example, a Wi-Fi network in a hotel, hospital, bar… Usually it’s some outdated and rather unstable Captive Portal that’ll steer people away from ever being interested. And I was also a victim of that. Palo Alto’s implementation obviously goes much deeper and plays by the zero-trust’s least privilege principles like MFA (Multi-Factor Authentication) and User-ID to create user-to-IP mappings. Furthermore leveraging the full capabilities of the Next-Generation Firewall.
A use-case scenario would be when a user tries to establish an SSH connection with a server that stores sensitive data. As we all know passwords aren’t secure regardless of their complexity. Additional authentication layers should be added like MFA and restricting unwanted users to authenticate. Eg “Domain\Domain Admins” are allowed to SSH but “Domain\Domain Users” are refused regardless of IP-addressing.
Imagine a security policy configured so that only “Domain\Domain Users” are allowed to access a SMB share and employees want to use their phone to access the share. Asking them to join the domain with their phone obviously isn’t an option. Instead we can do user-to-IP mappings by utilizing the User-ID feature and the Captive Portal on the Palo Alto Firewall. The firewall will map the IP address to a given Domain User that has access to the SMB share. Another example is when people prefer to bring their laptop to work instead of using a company’s desktop. Usually the desktops they provide are members of a domain. Again, the purpose of a BYOD device isn’t to join an Active Directory domain.
SAML (Single-Sign-On)
In this guide we’ll use the SAML authentication method using Okta’s Captive Portal SAML Application. The main benefit to using SAML over LDAP authentication is Single-Sign-On. Users can securely authenticate with multiple applications and websites by logging in once with just one set of credentials (e.g. Active Directory). Okta supports a wide variety of SAML applications with GlobalProtect being one of them. SaaS applications such as Office 365 are supported as well.
It makes the life of an employee much easier rather than logging in multiple times a day. People happen to forget their login credentials and use the same (insecure) password for all of their logins without any security layers such as MFA. It’s so much more practical than the browser’s built-in password manager. Outside of enterprise related needs – not enough applications and websites we encounter daily support SAML.
SAML keeps it very unified by sticking to just one set of credentials rather than needing to remember a bunch of logins. There’s no way around it and SAML should be married to MFA.
Check this guide to use LDAP instead of SAML.
Pre-requisites
- Active Directory Domain Controller
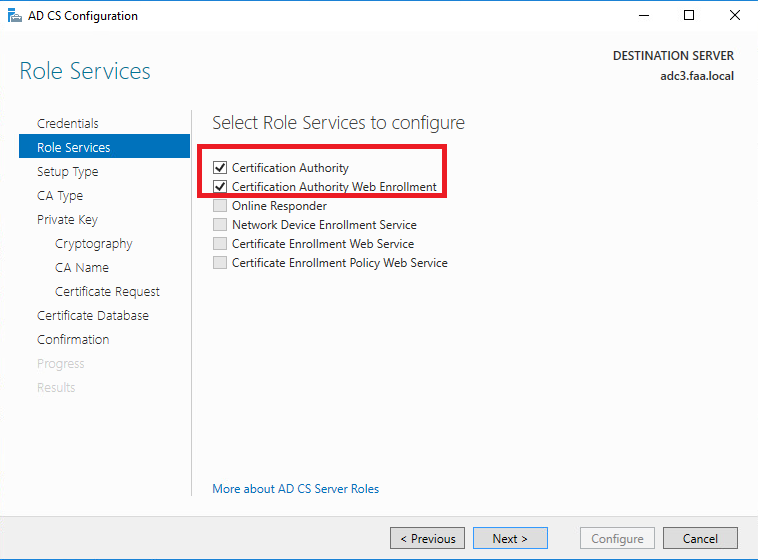
- Active Directory Domain Certificates Role for the web-page with a valid certificate
- User-ID configured on the firewall
- 30-day Trial Okta.com
- Okta Verify App on iOS/Android and enrolled user
Okta Verify App configuration
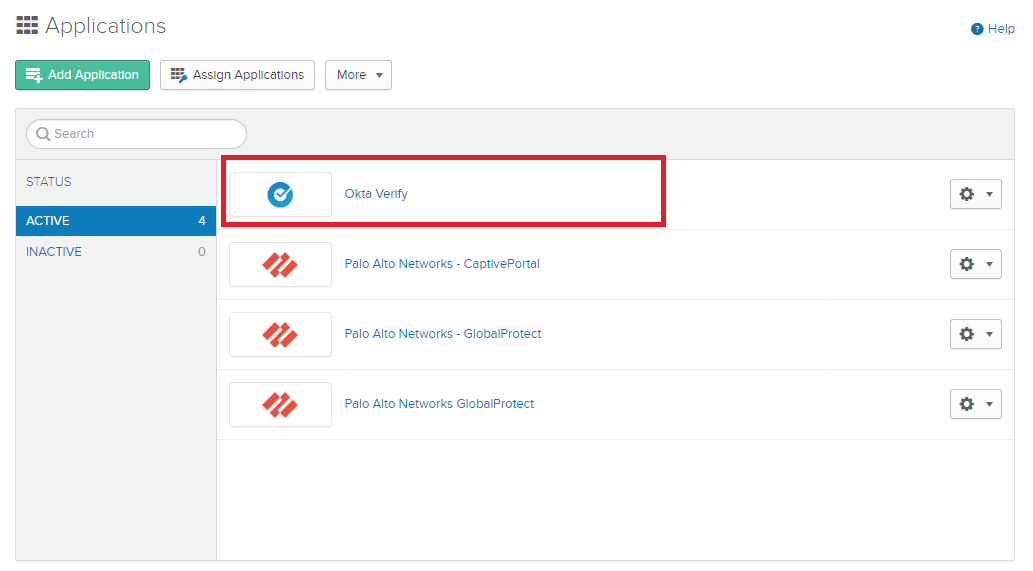
On the organization’s admin page add the “Okta Verify” application.
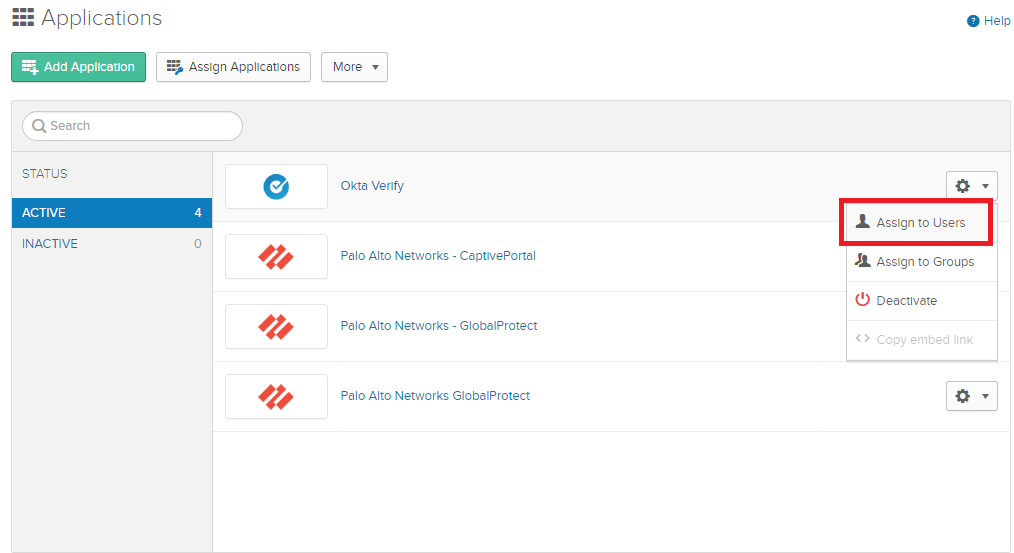
Assign users to the application.
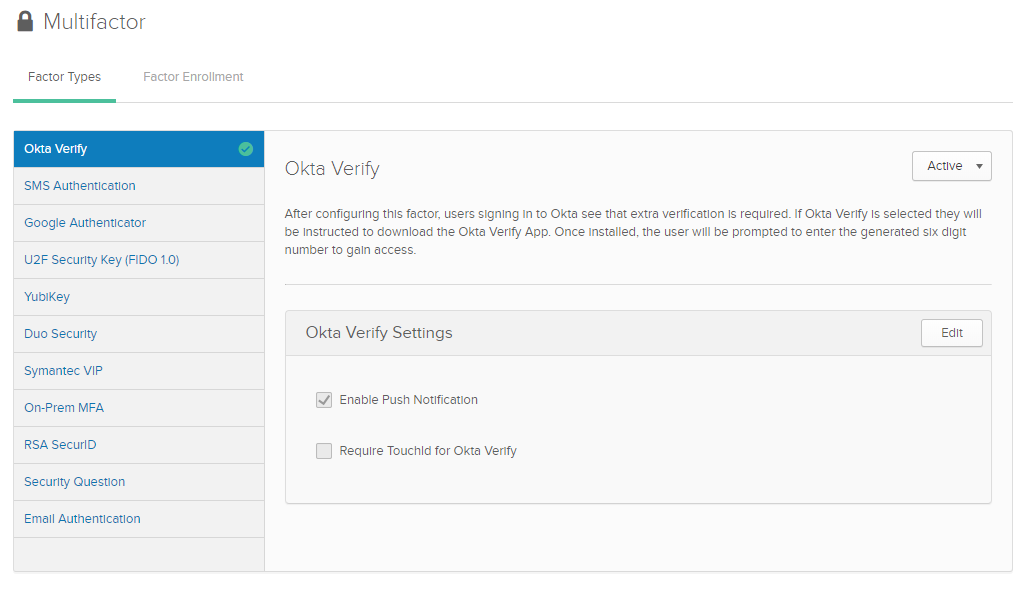
Security > Multifactor
Make sure it is active and enable push notification to make life easier because OTP’s can be tedious after a while. Although you still have the option to enter an OTP.
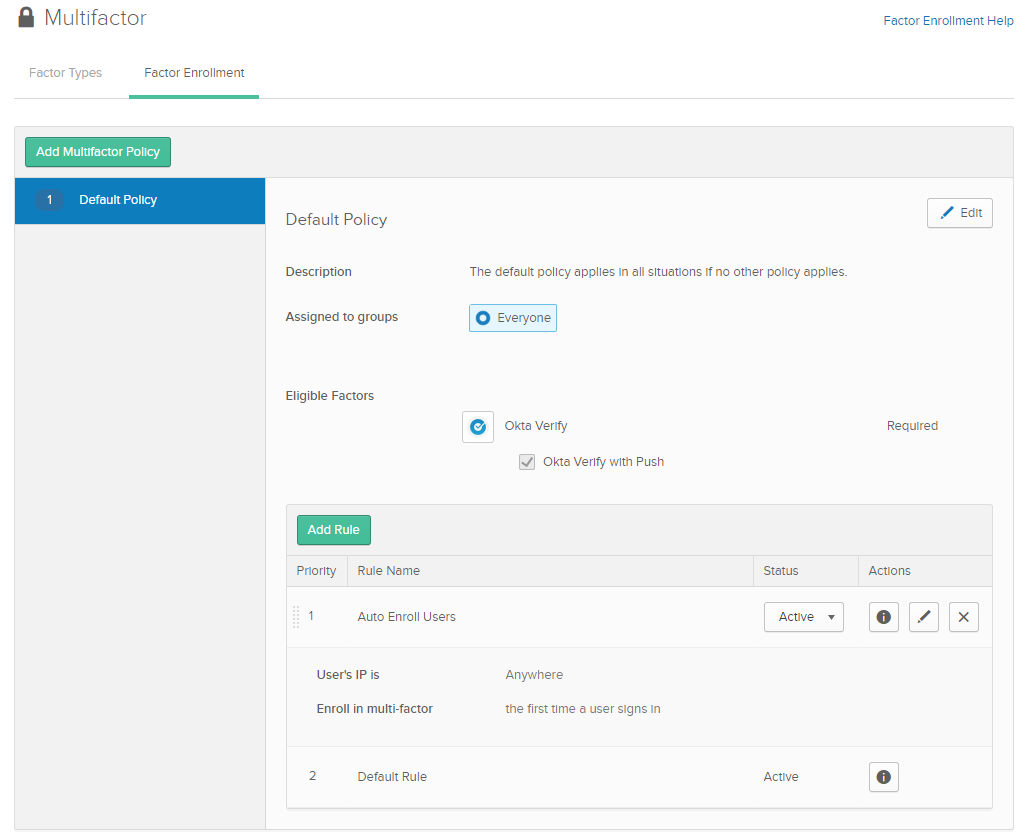
Security > Multifactor > Factor Enrollment
Add a policy so that users are automatically enrolled as they log in.
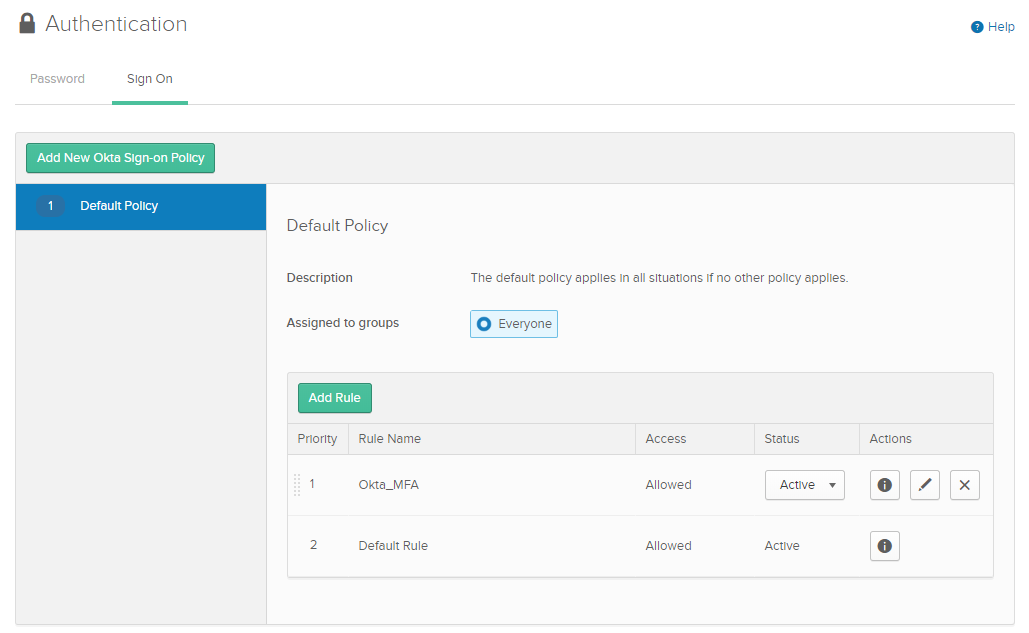
Security > Authentication > Sign On
Add a policy that will require users to use MFA every time they log in.

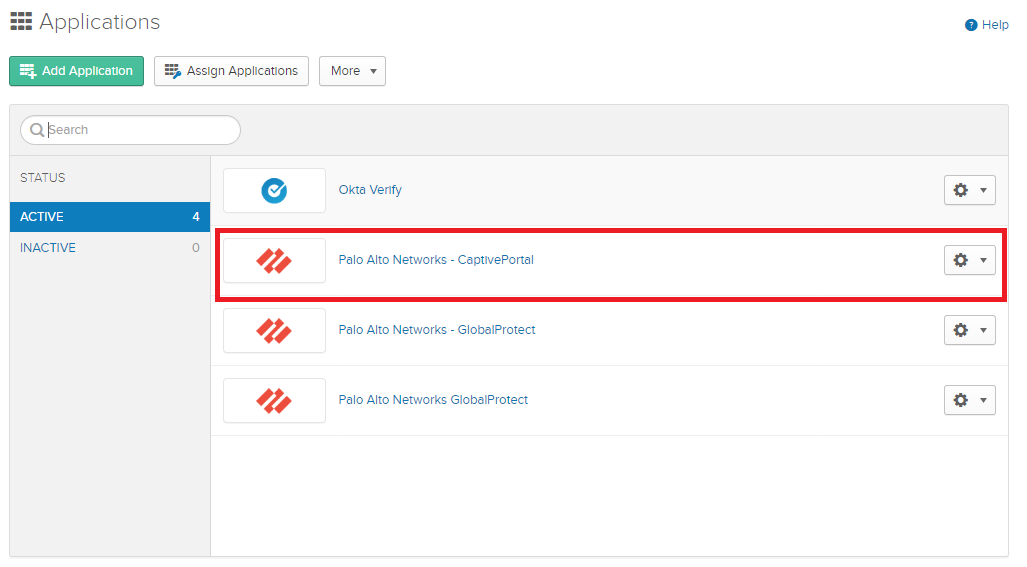
Captive Portal Application
Add the Captive Portal Application.
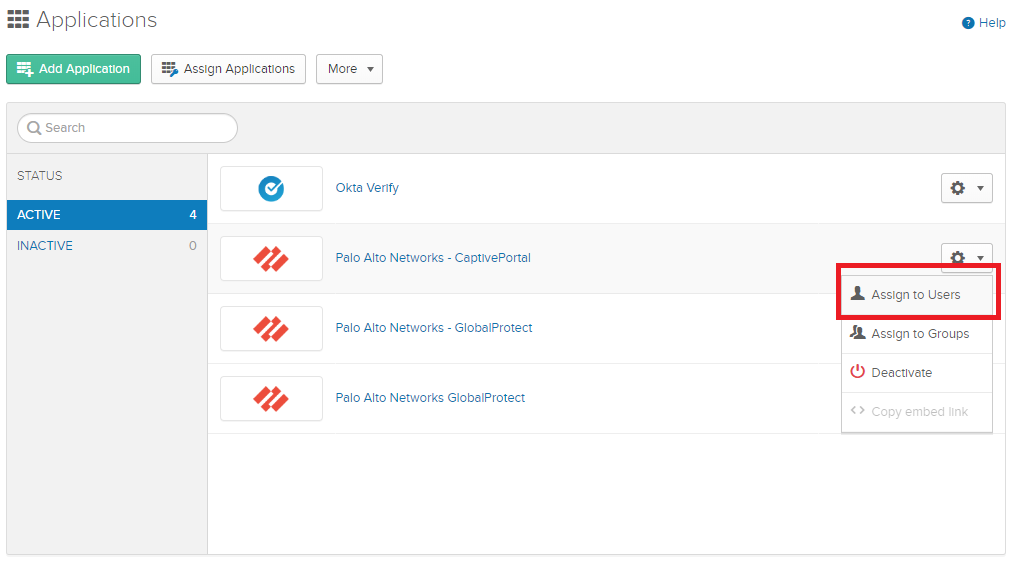
Don’t forget to assign a user.
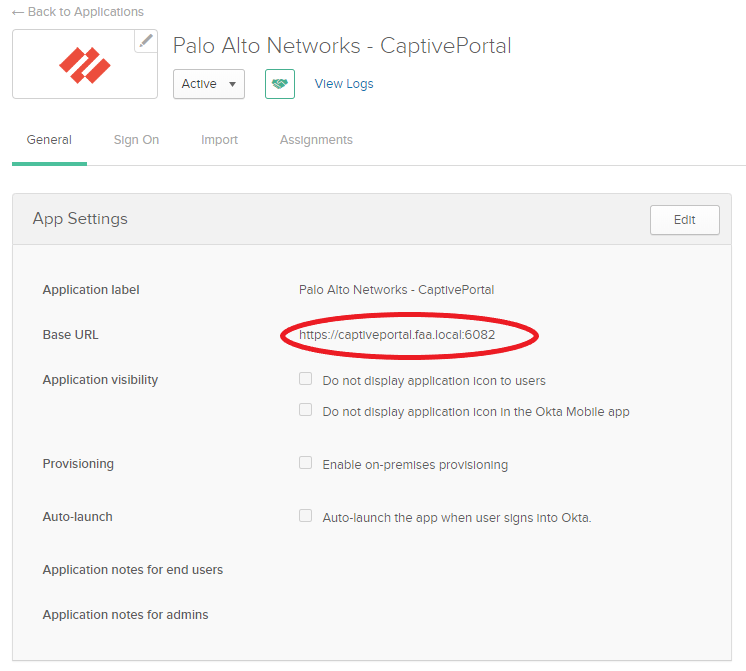
When we will configure the Captive Portal on the Palo Alto Firewall, we’ll have either the option to use a FQDN or an IP address. The IP address can be of any physical interface’s default gateway.
I’ve used captiveportal.faa.local -> 192.168.50.254 (Some Floating IP address on my High-Availability Active/Active Cluster.
Captive Portal > Sign On
Add a new policy that will prompt users to MFA every time they sign on.

Active Directory Domain Certificates Setup
This step can be skipped if you prefer to use a self-signed certificate to simplify the process. Although it’s good practice issuing the Captive Portal’s certificate by the Active Directory root CA because domain members automatically trust the root CA.

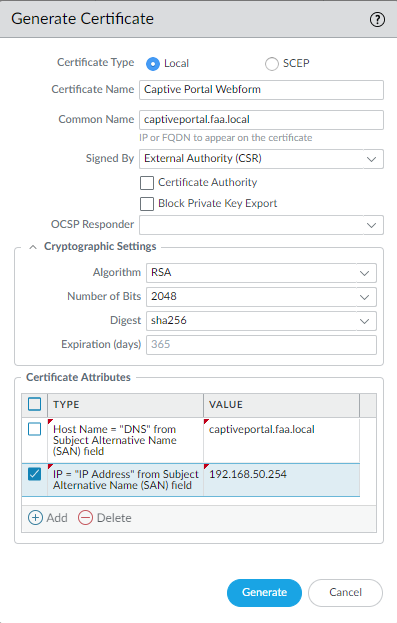
Next let’s request a CSR on the Palo Alto firewall for the Captive Portal. The Hostname/DNS Attribute should match the Common Name. So captiveportal.faa.local twice. The physical interface’s IP address of my LAN interface is 192.168.50.254 which I intend to use for the captive portal.
Don’t forget to create the A-record on the domain controller which maps the FQDN to the desired IP address so that the firewall can resolve it.
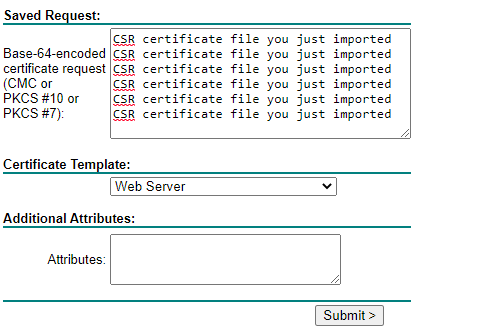
Export the certificate and copy paste the contents in http://<IP-address-DomainController/certsrv (http and not https).
Request a certificate > advanced certificate request > paste the contents of the CSR certificate and make sure to select “Web Server” as template
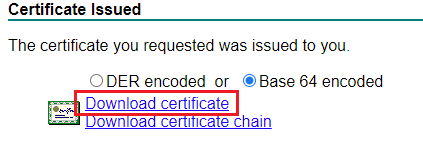
It has to be in a PEM format (Base 64) and import the downloaded certificate on the firewall.
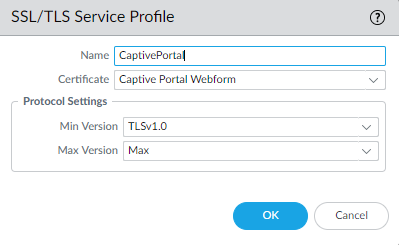
Let’s hook it up to a SSL/TLS Service Profile that’ll we’ll later use for the captive portal web-page.
SAML Server Profile & Authentication Profile
Import the metadata file from Okta’s Admin Panel. Right click > Save as
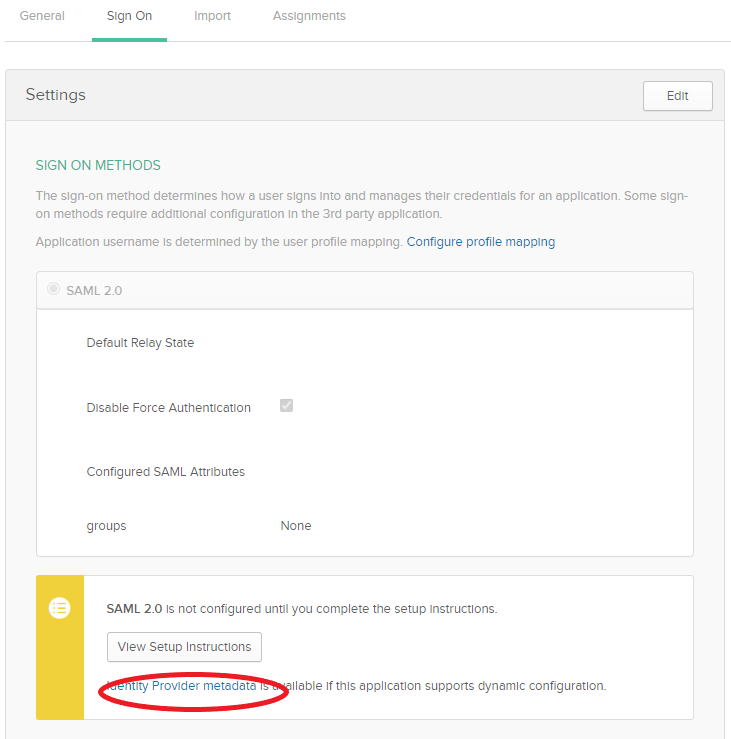
Device > Server Profile > Import
Import the metadata file and make sure that “Validate Identity Provider Certificate” is unchecked.

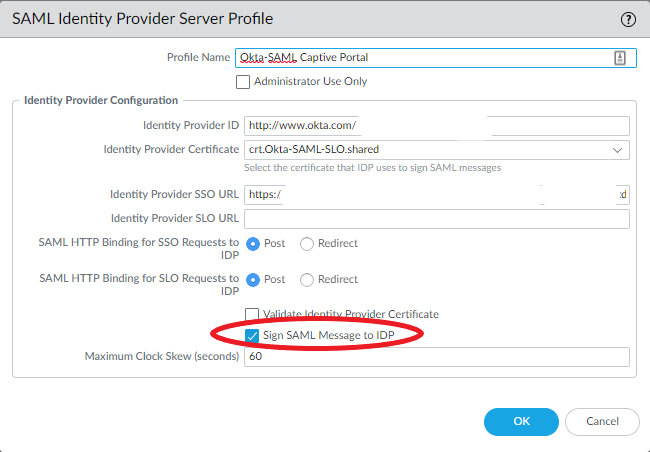
Edit the Server Profile and make sure ‘Sign SAML Message to IDP” is checked.
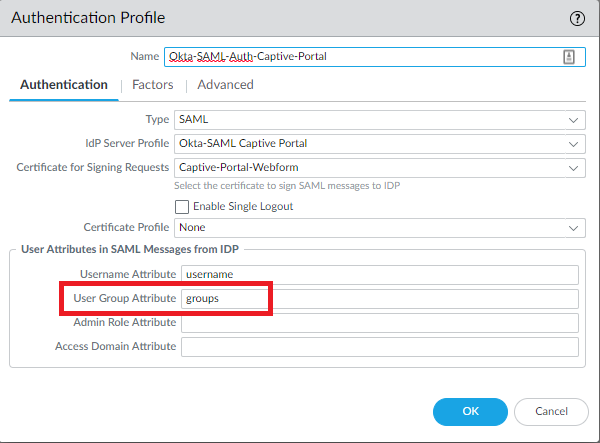
Device > Authentication Profile > Add
Add a new Authentication Profile and select the type SAML and the Server Profile we just created. Use the web-form certificate we requested from our Active Directory’s Root CA or just use a self-signed certificate. Enter the value groups for “User Group Attribute”.
Captive Portal Configuration
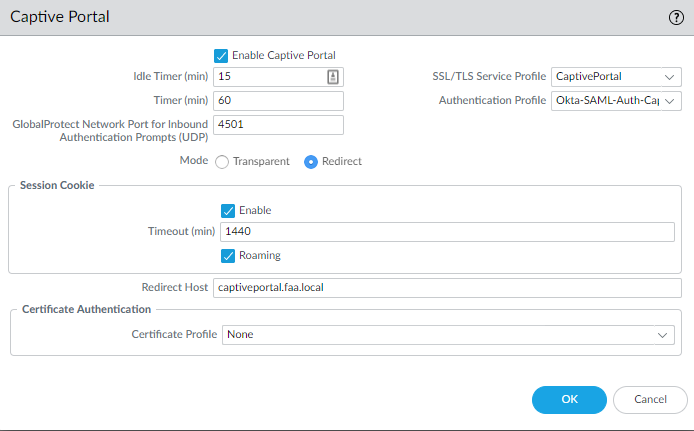
Device > User Identification > Captive Portal Settings
Select the SSL/TLS Service Profile that contains the web page’s certificate. Select the SAML Authentication profile. It has to be set to redirect mode and enter the captive portal’s FQDN.
Authentication Enforcement
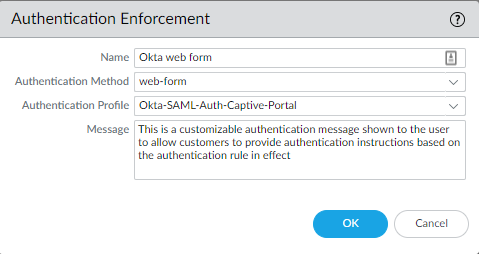
Objects > Authentication > Add
Select web-form as Authentication method and the SAML Authentication Profile. The other no-captive-portal authentication method will be explained when we get to configuring our authentication policies.
Select your desires sources, addresses, users and destination zones/addresses and the services (PA’s terminology for protocols). Select the Authentication enforcement we just made a moment ago.

So let’s say there’s some stubborn user who doesn’t want to authenticate for any reason. Create a new Authentication Enforcement with “no-captive-portal” as the method. Then just simply make a new Authentication policy, select that Authentication Enforcement and make sure this policy is set above the rule that requires authentication.
Interface Management Profile
Enable User-ID so ip-user-mapping will work and Response-pages so that the web-page will pop up.

Attach it to a physical interface.

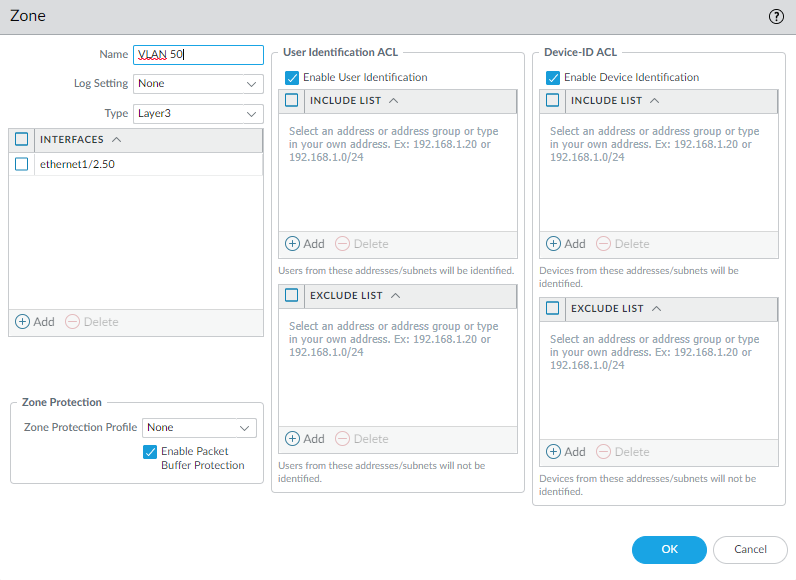
Enable User-ID for your security zones.
Conclusion
The portal should look like the regular Okta login portal. Okta also provides an external URL for who are located outside the network’s perimeter e.g. at home. It’s under Captive Portal > General > App Embed Link
To force a user to re-authenticate the only option is to clear the users session within the Admin Panel. Directory > People > Select the User and